










DIY Seed Starter Cups: Grow Your Garden from Scratch with Homemade Containers
Starting seeds indoors might just be one of the most satisfying things you can do as a gardener. Instead of spending money on seedling trays at the garden center, you can make your own seed starter cups from stuff you already have at home — and honestly, it’s easier than you’d think. Gardeners of all kinds have been doing this for years, from people growing a few herbs on an apartment balcony to homesteaders who produce most of their own food.
What makes DIY seed starter cups so appealing is how flexible they are. Newspaper, cardboard egg cartons, paper towel tubes, yogurt containers, even orange peels — all of these can become little growing vessels that would’ve otherwise ended up in the recycling bin. Each material has its own strengths, and once you figure out what works best for different types of seeds, you’ll get your seedlings off to a really solid start.
There’s also something more personal about it. When you grow a seed in a container you made yourself, you feel a little more connected to the whole process — like you’re in it from the very beginning. This guide covers everything you need to know, from picking your materials and putting the cups together to planting, caring for your seedlings, and getting them into the ground.
Why DIY Seed Starter Cups Are Worth the Effort
Store-bought seed trays and peat pots add up fast, especially if you’re starting a lot of seeds. A single season’s worth can easily cost twenty to forty dollars or more, and most of it is single-use plastic that ends up in the trash. When you make your own, the materials are either free — newspaper, toilet paper rolls, egg cartons — or basically nothing, which makes it one of the most budget-friendly habits you can pick up as a gardener.
The environmental argument is just as compelling. A lot of homemade seed starter cups are fully biodegradable, meaning you can plant them straight into the ground without ever disturbing the roots. That’s a big deal for plants like cucumbers, squash, and melons, which really don’t like having their roots messed with during transplanting. As the cup breaks down in the soil, it adds organic matter and helps improve soil structure — so it’s genuinely good for your garden, not just convenient.
There’s also a customization angle that you just can’t get with store-bought trays. Want smaller cups for herbs and flowers? Done. Bigger ones for tomatoes or peppers that need more root room? Easy. You can label them however you like, group them by planting date, and fit them into whatever tray or box works for your windowsill or grow light setup. When you’re juggling a long planting list with different germination timelines, that kind of flexibility really matters.
The Best Materials for Homemade Seed Starter Cups
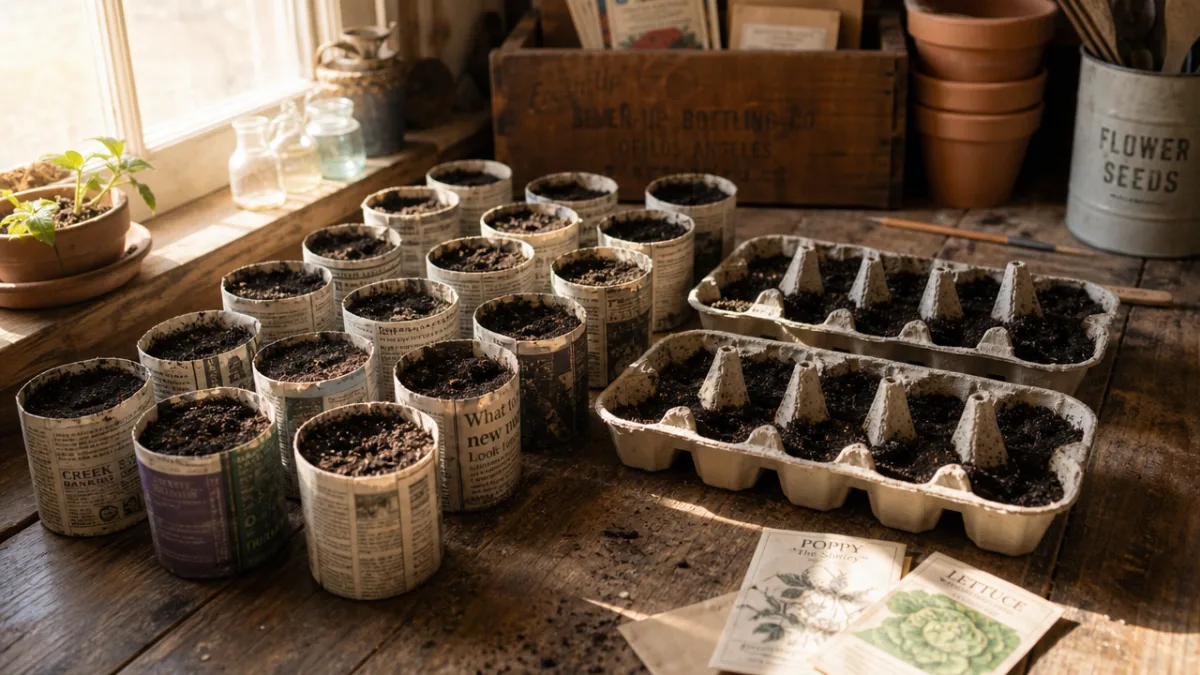
Newspaper is probably the most popular choice, and it earns that reputation. It’s free, it’s everywhere, it breaks down completely in the soil, and it holds its shape surprisingly well once it’s folded and formed. You wrap strips around a small cylinder, fold the bottom closed, and you’ve got a cup ready to fill. Most newspapers now use soy-based inks, which are totally safe for plants and break down harmlessly — so you can plant the whole cup directly in the ground without a second thought.
Toilet paper and paper towel tubes are another great option with almost zero prep work. Cut a paper towel tube into thirds, fold up the bottom of each piece, and you’re done. These work especially well for seeds that grow long taproots — things like carrots, parsnips, or sunflowers — because the tall, narrow shape gives those roots somewhere to go before you transplant. Like newspaper, the cardboard breaks down quickly in moist soil, so these can go straight into the ground too.
Egg cartons are kind of a ready-made solution — they’re already divided into individual cells and don’t need much modification at all. Cardboard ones are ideal since they can be planted directly in the soil, carton and all. Foam cartons need to be removed first, but you can reuse them for several seasons. Other materials worth trying include:
- Yogurt cups and small plastic containers with a few drainage holes punched in the bottom — these hold up well and can be reused year after year
- Citrus peel halves (orange, lemon, or grapefruit) that add nutrients to the soil as they decompose and look pretty great on a windowsill, honestly
- Paper coffee cups with the bottoms perforated for drainage — sturdy, widely available, and easy to get in bulk from any coffee shop that uses disposables
- Coconut coir pots, which are commercially made but fully biodegradable — a nice middle ground if you want something more polished without going full store-bought
Whatever you go with, the same basic rules apply: the cup needs to hold its shape until your seedlings are ready to transplant, it needs to drain well so roots aren’t sitting in soggy soil, and it needs to be the right size for what you’re planting. Getting that last part right is a small thing that makes a bigger difference than you might expect.
How to Make Newspaper Seed Starter Cups Step by Step
The newspaper cup is a classic for a reason — no tools, no glue, no special technique required. Start by cutting or tearing a full sheet of newspaper into strips about four to five inches wide and twelve inches long. Don’t stress about getting the measurements exact; gardening is pretty forgiving, and a cup that’s a little taller or wider than intended will work just fine. If your seedlings will be indoors for several weeks, try folding two strips together for a double-walled cup — it holds up much better under regular watering.
To shape the cup, wrap your strip around something small and cylindrical — a juice glass, a spice jar, a short piece of wooden dowel. Leave an inch or two of paper hanging past the bottom, then fold that bit inward to form the base. The overlapping folds hold themselves in place from the tension, and once you add moist seed-starting mix, the dampness helps the paper keep its shape. Slide the cup off the cylinder and stand it upright in a tray or shallow box next to the others.
Fill each cup to about half an inch below the rim with a good seed-starting mix — not regular potting soil, which tends to be too dense for young seedlings. Seed-starting mix is lighter, finer, and designed to hold just the right amount of moisture without suffocating delicate roots. Press a small indentation into the surface, drop in one or two seeds at the depth your seed packet recommends, cover lightly, and mist with a spray bottle. Label each cup right away with a wooden craft stick or a piece of tape — once germination kicks in and you’ve got a dozen seedlings that all look the same, it’s very easy to lose track of what’s what.
Setting Up the Ideal Environment for Germination
After your cups are planted, the conditions you create over the next few weeks will have a huge impact on how your seedlings come in. Temperature is the first thing to get right. Most vegetable seeds germinate best when the soil is somewhere between 65 and 75 degrees Fahrenheit, though heat lovers like peppers and basil prefer it even warmer — around 80 degrees. A seedling heat mat under your tray can make a noticeable difference, especially if your house runs cool in early spring.
Once seedlings emerge, light becomes the priority. A sunny south-facing windowsill can work, but in a lot of homes it’s just not quite enough to grow strong, compact seedlings. When plants don’t get sufficient light, they get “leggy” — tall, spindly, and weak as they stretch toward whatever light they can find. A simple LED or fluorescent grow light hung a few inches above your trays and left on for fourteen to sixteen hours a day makes a real difference. It’s an upfront cost, but one that pays for itself pretty quickly across multiple growing seasons.
Watering technique is also more important than most beginners realize. Overwatering is one of the most common ways to lose seedlings — it encourages fungal diseases like damping off, which can take out an entire tray overnight. The best approaches are gentle misting or bottom-watering, where you set the tray in a shallow container of water and let the cups soak it up from below. Check the mix daily and only water when the top inch feels dry. If you spot any white or gray fuzz on the soil surface, cut back on watering and improve airflow around your trays.
Caring for Seedlings as They Grow
Once your seeds have sprouted and you see the first true leaves — the second set, which actually look like the plant’s real leaves rather than the small rounded seed leaves that come first — it’s time to start feeding. Seed-starting mix has little to no nutrients in it by design, since seedlings don’t need fertilizer while germinating. But once those true leaves show up, a diluted liquid fertilizer every ten to fourteen days will keep growth steady and healthy. Half-strength is the way to go — full-strength fertilizer can burn young roots.
Thinning is something a lot of gardeners put off because it feels a bit harsh, but it really is necessary. If two seeds sprouted in the same cup, the weaker one needs to go so the stronger one has the space and resources to really take off. Rather than pulling it out — which can disturb the roots of the seedling you want to keep — just snip it off at soil level with small scissors. It takes about two seconds and makes a meaningful difference in how your plants develop by transplant time.
As you get closer to transplant day, start hardening off your seedlings — gradually getting them used to outdoor conditions before they live there full time. Going straight from a cozy indoor setup to a windy, fluctuating outdoor garden is a shock to the system, and it can set plants back significantly. Start by taking your cups outside to a sheltered spot for an hour or two on mild days, then slowly increase their time outside over seven to ten days until they can handle a full day out before you plant them for good.
Transplanting Your Seedlings with Confidence
Transplant day is when all that early work really pays off. If your cups are biodegradable — newspaper, paper towel tubes, or cardboard egg carton cells — the process couldn’t be simpler: dig a hole a little bigger than the cup, set it in, backfill with soil, and water well. The cup breaks down within a few weeks, and the roots spread out naturally without ever experiencing any transplant shock. It’s one of the nicest things about going the DIY route.
For yogurt containers, plastic cups, or other non-biodegradable options, squeeze the sides of the cup gently to loosen the root ball, then turn it upside down and let the soil block slide out into your hand. Be as gentle as you can and try not to disturb the roots any more than necessary. Plant at the same depth the seedling was growing at in the cup — with one exception: tomatoes can actually be planted a bit deeper, since they grow roots along any buried stem and end up much stronger for it.
After transplanting, water each plant thoroughly to settle the soil around the roots and close up any air pockets. A layer of mulch — straw, wood chips, or shredded leaves — around each plant goes a long way toward keeping moisture in, regulating soil temperature, and holding back weeds during those first critical weeks outside. Keep a close eye on your transplants for the first week, watering when the top inch of soil feels dry and watching for signs of stress like wilting or yellowing. Most seedlings bounce back from transplant stress pretty quickly and start putting on new growth within a week or so.
Tips for Scaling Up and Saving Money Season After Season
Once you’ve felt the satisfaction of growing your own seedlings this way, you’ll probably want to do more of it. Scaling up doesn’t take much extra effort — mostly it just requires a little organization. Set aside a drawer or bin in your home for collecting newspaper, toilet paper rolls, and egg cartons throughout the year, so that when seed-starting season rolls around in late winter, you’ve already got a good stockpile waiting. Tell your family and friends what you’re collecting — most people are happy to hand over their egg cartons and newspapers once they know they’re going to good use.
The reusable parts of your setup — grow lights, heat mats, and any durable cups — are worth spending a little on upfront because they last for years. A grow light that costs forty dollars might serve you reliably for five or more seasons, which works out to about eight dollars a year. Keep everything clean, dry, and stored properly between uses to get the most out of it. Wash reusable plastic cups in a dilute bleach solution at the end of each season to prevent disease from carrying over, rinse them thoroughly, and let them dry completely before putting them away.
Seed saving is the natural next step after you’ve gotten comfortable with DIY seed starting, and together they can bring your garden’s input costs down close to zero over time. When you save seeds from your best open-pollinated or heirloom plants each season and start them in your homemade cups the following year, you’re working with seeds that have already adapted to your specific soil and climate. They often outperform anything you’d buy commercially right from the first season. Pair that with the savings from your homemade starter cups, and gardening starts to feel less like an ongoing expense and more like a genuinely self-sufficient practice that gets better every year.








What do you think?
It is nice to know your opinion. Leave a comment.