










Crochet a Floral Mini Doily: The Perfect Beginner Project
What Is a Floral Mini Doily and Why You Should Make One
A floral mini doily is a small, decorative crocheted piece that looks just like a flower in full bloom — delicate, layered, and honestly kind of magical for something you made yourself. Most of them land somewhere between three and six inches across, and you build them up from the center outward, one round at a time, watching the petal shapes appear as you go. They’ve been around for a long time — think Victorian parlors, lacework, and the kind of needlework that used to be considered the height of domestic elegance.
Here’s the thing though — they’re way more beginner-friendly than they look. Unlike those massive tablecloth doilies that take forever and require you to track dozens of stitches at once, a mini version can be done in a single afternoon. The small scale means mistakes are easy to catch before they spiral, and the repetitive rhythm of working in rounds is actually a great way to build muscle memory before you move on to trickier projects.
And the payoff is real. There’s something genuinely satisfying about turning a spool of thread into something that looks like a blooming flower. They make lovely gifts, sweet little home décor touches, and charming handmade details for weddings, baby showers, or holiday tables. Fair warning: once you finish your first one, you’ll almost certainly want to make another.
Materials and Tools You Will Need
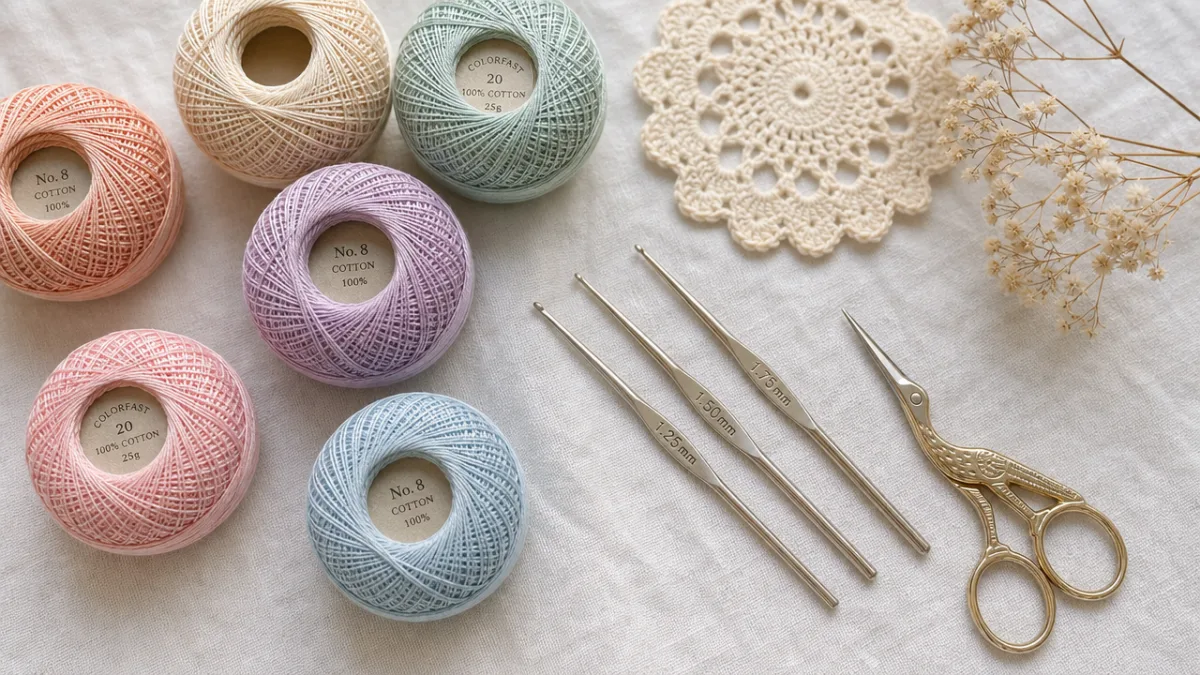
Getting your supplies together before you sit down to crochet makes the whole experience a lot more enjoyable. For a floral mini doily, the main thing you’ll need is fine cotton thread — usually what’s labeled as size 10 crochet thread. Cotton is the go-to choice for a reason: it holds its shape beautifully once starched, has a lovely subtle sheen that suits the lacey look, and comes in every color imaginable, from classic white and ivory to cheerful florals like coral, lavender, and butter yellow.
For your hook, you’ll want a steel crochet hook in the 1.5mm to 1.75mm range to match that size 10 thread. Steel hooks feel noticeably different from the aluminum or plastic ones you might be used to for yarn projects — lighter, smaller, a different grip altogether. Give yourself a few minutes to adjust before you dive in. A lot of beginners find a rubber grip sleeve makes longer sessions much more comfortable on the hands.
Beyond the thread and hook, you just need a few finishing supplies. A tapestry needle for weaving in ends, a small pair of sharp scissors, and if you want your doily to really hold its shape and look polished, blocking mats, rust-proof pins, and some liquid starch or starch spray. Having everything within reach before you start means no mid-project scrambling.
- Size 10 cotton crochet thread in your preferred color or colors
- Steel crochet hook, size 7 (1.65mm) or as specified by your pattern
- Tapestry needle for weaving in ends
- Small sharp scissors
- Blocking mats and rust-proof T-pins
- Liquid starch or starch spray for finishing
- A printed or digital copy of your chosen pattern
Understanding Basic Stitches Before You Begin
Before you jump into a pattern, it’s worth spending a few minutes reviewing the stitches you’ll actually encounter. Most beginner doily patterns pull from a surprisingly small set of basics, and once you’re comfortable with them, a whole world of designs opens up. The chain stitch is pretty much the starting point for all crochet — it forms the center of most doilies when you work it into a magic ring or a chain loop.
You’ll also use the slip stitch constantly when working in rounds, since it’s how you connect the end of each round back to the beginning. Single crochet shows up in floral centers sometimes, creating a tighter, denser texture. And double crochet is really the workhorse of doily making — it gives you that taller, airier fabric that makes lacework look so open and delicate. Chances are you’ll meet all of these within the first few rounds of your pattern.
Two more techniques worth knowing before you start are chain spaces and picots. A chain space is just a little arc of chain stitches that you skip over and then work into on the next round — that’s what creates the open, lattice-like look you see in lace. A picot is a tiny decorative loop, usually three chain stitches joined back on themselves, that adds a dainty finishing touch to petal edges and borders. Neither one is hard, but spotting them in a written pattern before you’ve seen them in action can be confusing, so a quick look beforehand saves a lot of head-scratching.
- Practice the magic ring or starting chain until you can form it confidently without referring to instructions.
- Work a small swatch of double crochets to get comfortable with your tension before starting the doily.
- Read through the entire pattern at least once before picking up your hook so the overall structure makes sense.
- Use stitch markers at the beginning of each round to keep your place and avoid miscounting.
- Count your stitches at the end of every round, especially during the first three rounds where the stitch count is small and errors compound quickly.
Step-by-Step Guide to Crocheting Your Floral Mini Doily
Start with a magic ring or foundation chain — whichever you prefer — to form the center of your flower. For the magic ring, loop the thread around your finger, insert your hook through the loop, pull up a working loop, and chain two to stand in as your first stitch. The magic ring is great because you can pull the center hole completely closed once your first round is done, giving you a neater, more polished look than a chain-loop center. That said, if the magic ring frustrates you at first, just chain six and join it into a ring — it works perfectly well and there’s no shame in it.
Your first round is usually about establishing the core of the doily — something like twelve double crochets worked evenly into the center ring, then joined with a slip stitch. Before you move on, tug gently on the yarn tail to close up the center ring. This round is your foundation for everything that comes after, so it’s worth pausing to check that your stitches are even and your tension feels consistent.
Rounds two through four are where things start to get exciting, because this is when the floral shape actually begins to show up. These middle rounds typically mix chains with clusters of double or triple crochets to form individual petal shapes, and each round adds more stitches, which is what makes the piece grow outward in a flat circle rather than curling up. If you notice the doily starting to cup or ruffle, stop and recount your stitches — that’s usually the culprit. The final rounds tend to add a decorative edging, often with picots or shell stitches, and that’s what gives the finished piece that polished, intentional look.
Once you’ve completed the last round, cut your thread with about six inches of tail, pull it through the final loop, and use your tapestry needle to weave it into the back of the work. Weave through several stitches in different directions so it stays put, then trim the excess. Now your doily is ready for blocking — and that’s the step that really makes the difference between “cute little crocheted thing” and “genuinely stunning piece of lacework.”
Blocking and Finishing Your Doily Like a Pro
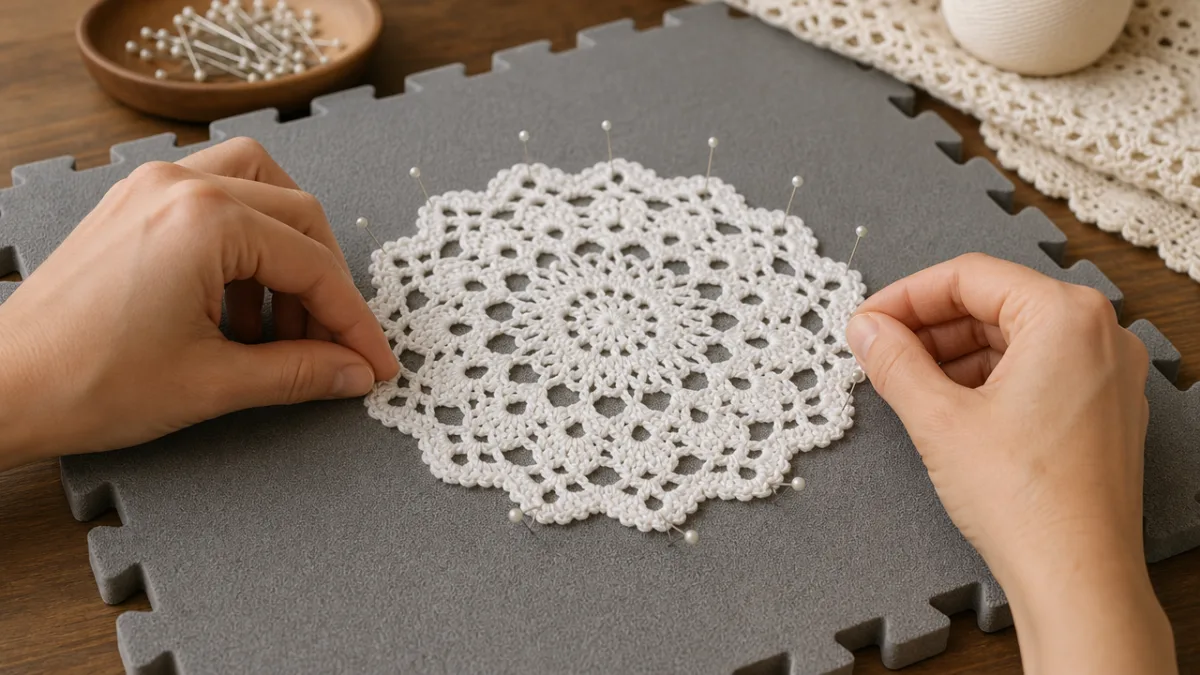
Blocking is honestly the step that makes all the difference, and it’s the one most beginners skip — which is a shame, because it’s what takes a doily from limp and crumpled to crisp and beautiful. Start by soaking it briefly in cool water until the thread is fully saturated. Gently squeeze out the excess water (no wringing or twisting — be kind to it), then roll it up in a clean towel and press to pull out more moisture. You want it damp but not dripping when it goes on the mat.
Pin it down on your blocking mat, working from the center outward and gently stretching each petal and scallop into shape as you go. The pins hold everything in position while it dries, setting the stitches into clean, crisp lines they’ll keep once dry. Take a little extra time to arrange the petals symmetrically and coax the picot points into neat, sharp tips — it really shows in the final result. Once everything is pinned, apply a generous, even coat of liquid starch or starch spray over the whole surface.
Then just let it dry completely before removing the pins — usually several hours, sometimes overnight, depending on how humid your space is. When you unpin it and hold it up to the light, the difference is striking. A well-blocked doily looks almost impossibly intricate for the work involved. From there, it’s up to you: display it on a side table, use it as a candle mat, frame it over a piece of colored paper for wall art, or tuck it into a small shadow box as a handmade gift that will actually impress someone.
Tips for Customizing Your Design and Going Further
Once you’ve held that first finished doily in your hands, you’ll probably start thinking about what you’d do differently next time — and that’s where the fun really begins. Color is the easiest place to start. A classic white or ecru doily is timeless and always beautiful, but switching thread colors at the end of each round creates a gorgeous ombre or rainbow effect. Earthy tones like terracotta, sage, and dusty rose give mini doilies a modern, bohemian feel that looks right at home on a wooden surface or next to a houseplant.
Thread weight is another variable worth playing with. A slightly heavier thread — size 3 or size 5 — gives you a softer, more relaxed drape and a larger finished piece, which works nicely as a mug rug or small coaster. Go the other direction with size 20 or size 30 thread and you’ll end up with something almost impossibly delicate, practically indistinguishable from needle lace. That finer work does require more patience and decent lighting, but the result is stunning.
As your skills grow, the floral motif itself has a lot of room to evolve. Some patterns add a raised bobble stitch in the center to mimic the look of a real flower, while others build layered petals by working into rounds behind the current stitches. You can also join multiple mini doilies together into table runners, placemats, or decorative wall hangings. All of it draws on the same skills you built on that very first little doily — which is a big part of why it’s such a great starting point with so much room to grow.
- Try changing colors at the start of each new round for a vibrant, modern look.
- Experiment with different edging styles such as shells, fans, or scallops to change the silhouette of the finished piece.
- Use a variegated thread for an effortless multicolored effect without managing multiple thread balls.
- Join finished doilies with a simple single crochet seam to build larger decorative pieces.
- Look for vintage doily pattern booklets at thrift stores or library sales for a treasure trove of inspiring floral designs.
Building a Crochet Practice Around Small Projects
One of the best pieces of advice you’ll hear from experienced crocheters is to lean into small projects, especially early on. It’s tempting to go straight for something ambitious — a blanket, a cardigan — but that path leads to a lot of half-finished objects and frustrated crafters. Small projects like mini doilies, on the other hand, give you that hit of completion regularly, and that really does matter for staying motivated and actually improving.
Making one or two mini doilies a week does a few things at once. Your hands get faster and more confident with each repetition. If you mix up your pattern choices, you’ll encounter different stitch combinations that quietly expand your skills without feeling overwhelming. And you end up with a growing collection of beautiful, finished things you can use, give away, or even sell — which creates a satisfying loop of purpose that keeps a creative practice going long-term.
There’s also something to be said for what crochet does for your mental state. The rhythmic, repetitive motion of working through stitches is genuinely calming — research has shown it can lower cortisol levels and bring you into something close to a meditative state, quieting the mental noise of a busy day. A lot of devoted crocheters will tell you it’s their main stress-relief tool. Starting that kind of practice with something accessible, rewarding, and genuinely pretty — like a floral mini doily — might just be the best on-ramp into a creative hobby that can stay with you for life. Grab your hook, pick a color that makes you happy, and make your first bloom.








What do you think?
It is nice to know your opinion. Leave a comment.