










Making Christmas Tree Cones In The Classroom: A Complete Guide for Teachers
Introduction: Why Christmas Tree Cone Crafts Belong in Your Classroom
The holiday season is a perfect time to bring together creativity, fine motor practice, and a little festive fun — all in one activity. Christmas tree cone crafts have stuck around in elementary classrooms for good reason: they’re affordable, easy to pull off, and kids genuinely love what they end up with. Whether you’ve been teaching for twenty years and want something fresh for December, or you’re brand new and hunting for a hands-on project that actually works, this one delivers more than it might look like at first glance.
And there’s real learning happening underneath all the glitter. Kids practice following multi-step directions, build patience as they layer on decorations, and work through some genuine spatial reasoning when they try to spread ornaments evenly around a cone. Every child makes different choices, so every tree looks different — which means the whole thing becomes a small act of personal expression tucked inside a shared classroom project.
Teachers who’ve done this activity before often mention how naturally the conversation flows — about family traditions, about color and design, about what makes something feel beautiful. A table covered in foam balls and ribbon scraps has a way of becoming one of the most socially rich spots in the room, almost without trying. This guide covers everything you need to make it go well from start to finish.
Gathering Your Materials: Everything You Need Before You Begin
Good prep is honestly what separates a smooth craft day from a chaotic one. When materials are organized and ready to go before kids sit down, everything runs better. The good news is that most of what you need is pretty affordable — craft stores, dollar stores, and classroom supply budgets can all cover this one. If you start your supply list a few weeks early, you also have time to send a parent donation request, and in most cases families are happy to chip in when you give them a specific list of what you actually need.
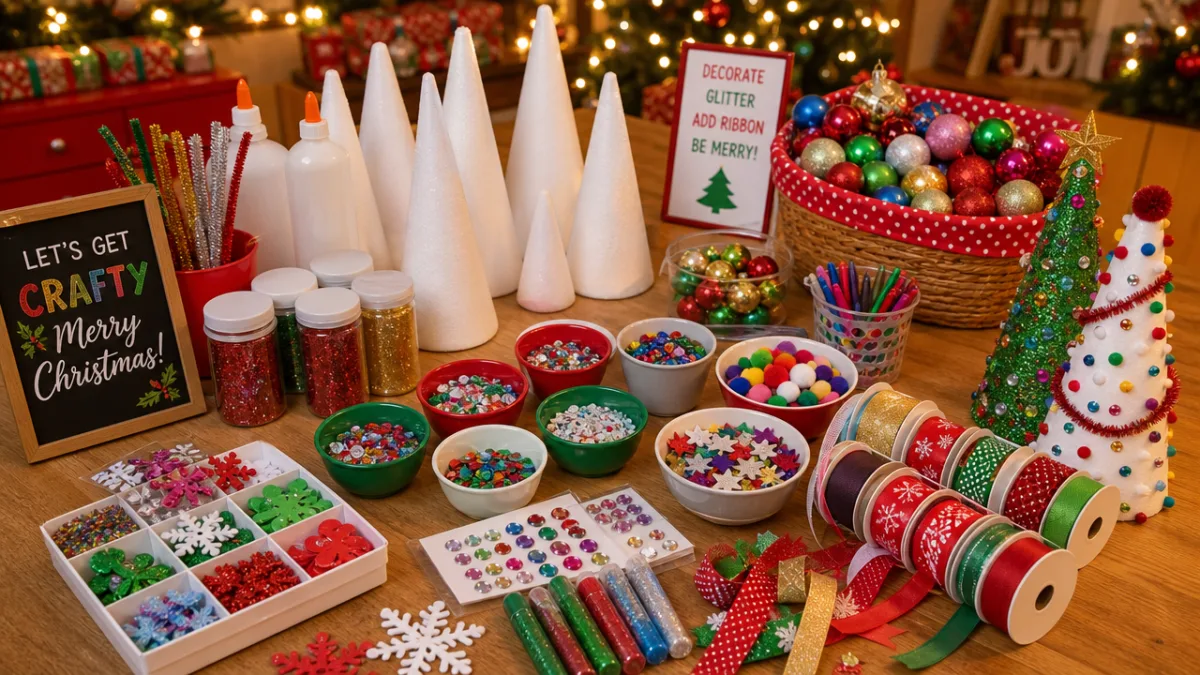
The star of the show is the cone itself. Styrofoam cones are the go-to choice because they’re lightweight, easy to stick pins and picks into, and they hold their shape no matter how enthusiastically a kid decorates them. They come in several sizes, but for classroom use a medium cone — somewhere around 9 to 12 inches tall — tends to be the sweet spot. Big enough that kids have room to work, small enough that it doesn’t get awkward for smaller hands. Green Styrofoam cones save you the step of painting, though white ones give a really pretty snowy look if you want to go that direction.
For decorations, variety is your friend. The more options kids have to choose from, the more invested they get in the project. Consider pulling together some or all of the following:
- Small foam or glass ball ornaments in assorted colors
- Glitter glue in gold, silver, red, and green
- Miniature ribbon bows and curling ribbon scraps
- Sequins, rhinestones, and flat-backed gems
- Toothpicks or floral picks for inserting ornaments
- Straight pins for securing flat decorations
- Pipe cleaners for garland effects
- Small star toppers or foam star cutouts
- White faux snow flocking spray (teacher use only)
- Craft glue and glue sticks
How you organize these supplies matters just as much as having them in the first place. Pre-portioning things into small cups or divided trays heads off the inevitable moment when every kid lunges for the same bag of gems at once. A central supply station where children take turns choosing what they need — rather than piling everything onto individual desks — keeps things orderly and actually teaches a useful real-world skill: sharing limited resources with other people. A bit of logistical thinking on your end before the session starts translates directly into a calmer, more enjoyable experience for everyone.
Step-by-Step Instructions: Walking Students Through the Process
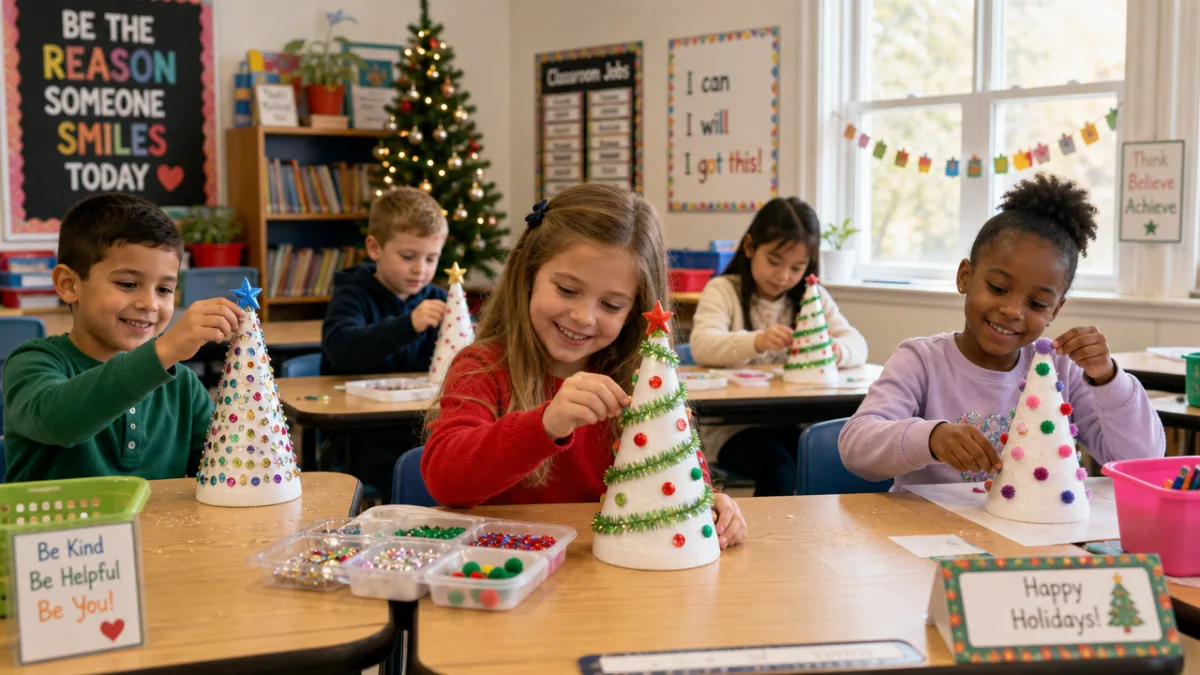
Once your space is set up and materials are ready, it’s time to actually walk kids through making the thing. With elementary-age students, a modeled, step-by-step approach works best — you show each stage, they watch, then they try it themselves. This matters especially for the trickier steps, like pushing an ornament pick into Styrofoam without cracking it, or getting a star topper to sit securely at the tip. When kids can see exactly what you mean, you field a lot fewer individual questions once everyone gets going.
Start by having students pick their cone and set it flat-end-down on a piece of cardboard or a foam tray to protect the desk. If you’re working with white cones and want a green tree look, now’s when you apply a base coat of green paint or green glitter glue, moving from the bottom up. Let that dry before moving on — or, if your schedule is tight, paint the cones the day before and have them waiting at each seat. A ready-to-decorate cone sitting there when kids arrive creates a nice little spark of excitement and skips the part where everyone’s waiting and getting restless.
For the decorating itself, the sequence that works best mirrors how you’d decorate a real tree: start at the bottom and work your way up. Have kids place their largest ornaments first, spacing them around the cone at different heights, then fill in the gaps with smaller pieces — sequins, gems, little dots of glitter glue. The star or topper goes on last, gently pressed into the very tip. Walking kids through this order not only gives them a more visually balanced finished tree, it also teaches a design principle that transfers to lots of other creative work: start big, then add detail.
Differentiation Strategies: Making the Activity Work for Every Learner
Open-ended crafts are naturally flexible, but that doesn’t mean differentiation takes care of itself. In any classroom, you’ve got kids with strong fine motor skills sitting next to kids who are still working on the basics. You’ve got kids who dive into creative choices without hesitation and kids who freeze up when faced with too many options. A well-thought-out Christmas tree cone activity plans for all of that ahead of time, so every child gets to feel genuinely successful rather than either bored or quietly struggling.
For kids who find fine motor tasks challenging, try pre-loading ornament picks into the cone at evenly spaced intervals before the session starts. Instead of fighting with pushing picks into Styrofoam — which takes real hand strength and precision — they can put their energy into choosing and placing decorations, which is the fun part anyway. Offering larger gems and ornaments to kids who have trouble with small objects lets everyone participate in the same activity without anyone feeling like they’ve been handed a different, lesser version of it.
For kids who are ahead of the curve or finish early, having extension ideas ready prevents the downtime that tends to spiral. Some teachers invite early finishers to make a gift tag or card to go with their tree — a natural writing opportunity. Others put out a simple reflection prompt like “What was your favorite part of making your tree, and why?” which gets kids thinking about their own creative process. You can also invite these students to help a peer who’s still working, which builds classroom community and gives the confident learner something genuinely valuable: the experience of explaining a process in their own words.
Classroom Management Tips: Keeping the Activity Running Smoothly
Even a beautifully planned craft can go sideways fast without some solid management in place. Glitter has a well-deserved reputation, and any activity involving small materials and excited kids needs deliberate structure to stay on track. The teachers whose craft sessions run the smoothest are almost always the ones who’ve thought through the room setup, the order of distribution, and the cleanup plan before anyone sits down.
Set clear expectations before anything gets handed out. A short, direct conversation about how to handle shared supplies, what to do if something spills, and what the cleanup signal will look like goes a long way toward setting a calm tone from the start. A lot of experienced teachers put a visual timer on the whiteboard so kids can track the time themselves rather than waiting to be told. When students can see that fifteen minutes are left, they naturally pace themselves better and transition to cleanup with a lot less pushback.
Glitter glue is strongly recommended over loose glitter for classroom use — it gives the same sparkly effect while staying where you put it instead of traveling to every surface in the room. Laying down butcher paper or plastic tablecloths before you start makes cleanup genuinely fast; you just gather the corners and funnel stray bits back into containers. Assigning a cleanup crew from each table group, and rotating who does it so everyone takes a turn, builds a sense of shared responsibility for the classroom that pays off well beyond this one activity.
Displaying and Celebrating Finished Work: Honoring Student Creativity
The moment a kid holds up their finished tree to show the class is one of those small but genuinely powerful moments in teaching. That finished cone isn’t just a decoration — it’s a record of decisions made, small challenges worked through, and something personal brought into being. How you respond in that moment, and what happens to the trees afterward, says a lot to students about whether their work is actually valued. Good display and celebration practices reinforce the idea that creative effort is worth something, and kids go home proud of what they made.
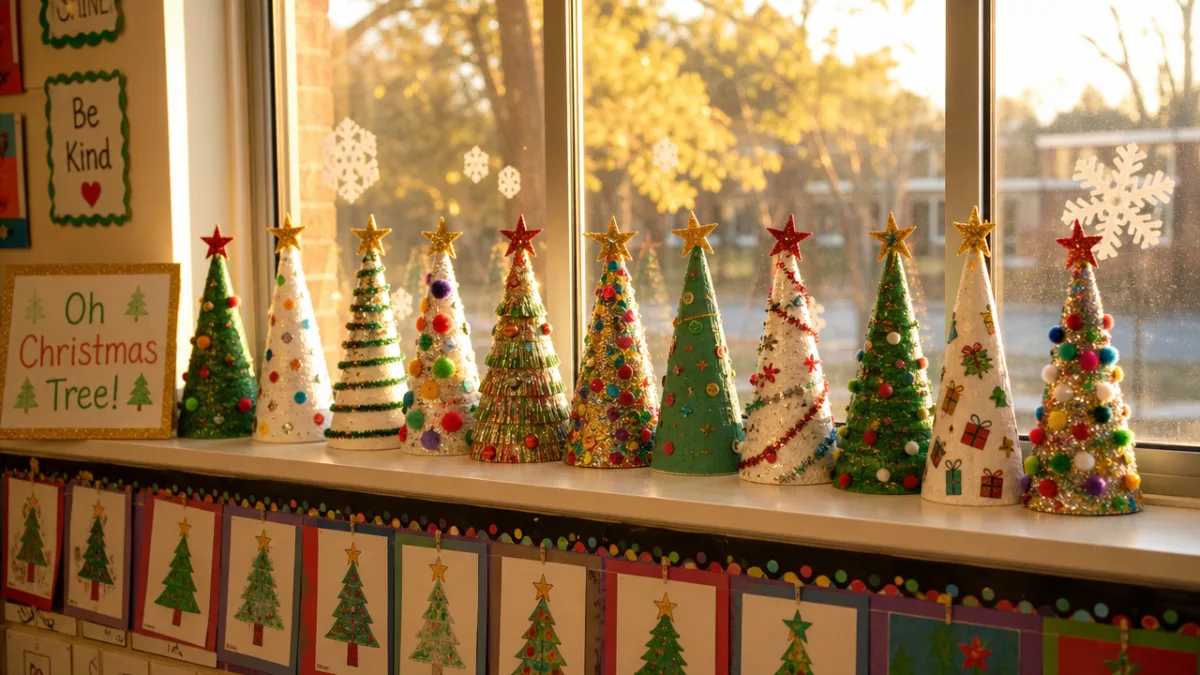
A classroom display of all the finished trees together — lined up on a windowsill, a bookshelf, or a dedicated holiday table — creates something that’s often more striking than any single tree on its own. Seeing their individual creation as part of a larger group piece gives kids a real sense of belonging. Snapping some photos of the display and sharing them through your classroom newsletter or parent communication app extends the celebration home and lets families see what their child actually did that day, not just what came home in a backpack.
A brief sharing ceremony is also worth the ten minutes it takes. Giving each child a chance to describe one choice they made while decorating and explain why they made it does several things at once: it builds oral language skills, encourages kids to articulate their own creative thinking, and creates a moment where their peers genuinely hear them. Even a short round of “I chose gold stars because…” can turn a fun craft activity into something kids and teachers both actually remember.
Connecting the Craft to Curriculum: Finding the Learning Within the Fun
One of the best arguments for hands-on holiday crafts is how much real academic learning they can carry when you frame them the right way. Christmas tree cone projects look like pure fun on the surface — and they are — but they’re also full of natural entry points for math, language arts, science, and social studies. You don’t have to choose between meaningful instruction and a good time in December. With a little intentional framing, the craft itself becomes the lesson, and the curriculum connections show up on their own.
Math is everywhere in this activity. Kids count ornaments, compare quantities, and practice one-to-one correspondence as they work. Older students can take on pattern challenges — alternating colors, repeating shapes — which puts a foundational math concept into a context that actually feels meaningful. Estimation questions like “How many gems do you think it’ll take to fill this section?” build number sense and the ability to make reasonable predictions, which the Common Core emphasizes across grade levels for good reason.
Language arts connections come just as naturally. Vocabulary grows in context as kids use words like symmetry, texture, garland, and ornament in real conversation. Writing extensions — a holiday story inspired by the finished tree, a descriptive paragraph about the decorating process, a simple how-to guide for a younger student — give kids an authentic reason to write, which is often what reluctant writers need most. And science questions pop up on their own: Why does glitter glue stay put when loose glitter doesn’t? What makes Styrofoam different from other materials? How does the cone shape hold everything up? Those questions, raised naturally in the middle of making something, open doors to real inquiry that can carry forward long after the holiday season is over.








What do you think?
It is nice to know your opinion. Leave a comment.