










Dollar Store Tin Tile Crafts: Transform Budget Finds into Stunning Home Décor
The Magic of Dollar Store Tin Tiles
Walk into any dollar store and you might overlook the humble tin ceiling tiles stacked in the home décor aisle, but seasoned crafters know these inexpensive finds are among the most versatile materials available for DIY projects. Typically sold for just one or two dollars each, these pressed metal tiles feature intricate embossed patterns that mimic the look of expensive Victorian-era architectural details. With a little creativity and some basic craft supplies, they become the foundation for beautiful wall art, trays, frames, and countless other decorative items that would cost ten times as much at a boutique home décor store.
What makes tin tiles so appealing to crafters of all skill levels is their forgiving nature. Unlike wood or fabric, tin tiles are durable and resistant to warping, and they accept paint beautifully in all its forms — spray paint, chalk paint, metallic acrylics, and even oxidizing solutions that create an aged patina finish. Because the tiles already have beautiful dimensional detail built into their surface, even a simple single-color coat of paint transforms them into something that looks handcrafted and intentional rather than store-bought. The embossed patterns catch and reflect light in ways that add texture and visual interest to any space without requiring carving or sculpting skill on your part.
The dollar store tin tile craft trend has taken off across social media platforms, with creative homemakers sharing projects that range from simple painted wall hangings to elaborate mosaic-style gallery walls featuring dozens of tiles in coordinating colors. The low cost of entry is one of the biggest draws — you can experiment freely, make mistakes, and start over without feeling like you’ve wasted significant money. This accessibility has made tin tile crafting a beloved hobby for renters looking to personalize their spaces, budget-conscious decorators staging homes for sale, and anyone who enjoys transforming everyday objects into something extraordinary.
Understanding the Material
Before diving into your first project, it helps to understand exactly what dollar store tin tiles are made of and how they behave. Despite the name, most of these tiles are actually made from lightweight steel or aluminum rather than pure tin, which makes them slightly more rigid and less prone to denting than true tin. The embossed patterns are pressed into the metal during manufacturing, creating raised geometric or floral designs that add dimension to the flat surface. The tiles are typically coated with a thin protective layer to prevent rusting, though this coating is thin enough that paint and adhesives bond to the surface with ease when you prepare it properly.
Sizing varies by retailer and region, but the most common dollar store tin tiles measure approximately twelve inches square, making them perfectly proportioned for framed art projects, trivet-style trays, and wall installation arrangements. Some stores carry rectangular versions or smaller accent tiles that work beautifully as drawer pulls, cabinet inserts, or decorative accents on furniture pieces. When shopping, run your fingers over the surface to feel the depth of the embossing — deeper patterns tend to create more dramatic visual effects once painted, especially when you use dry-brushing or antiquing techniques that highlight the raised areas differently than the recessed ones.
Essential Supplies and Tools You’ll Need
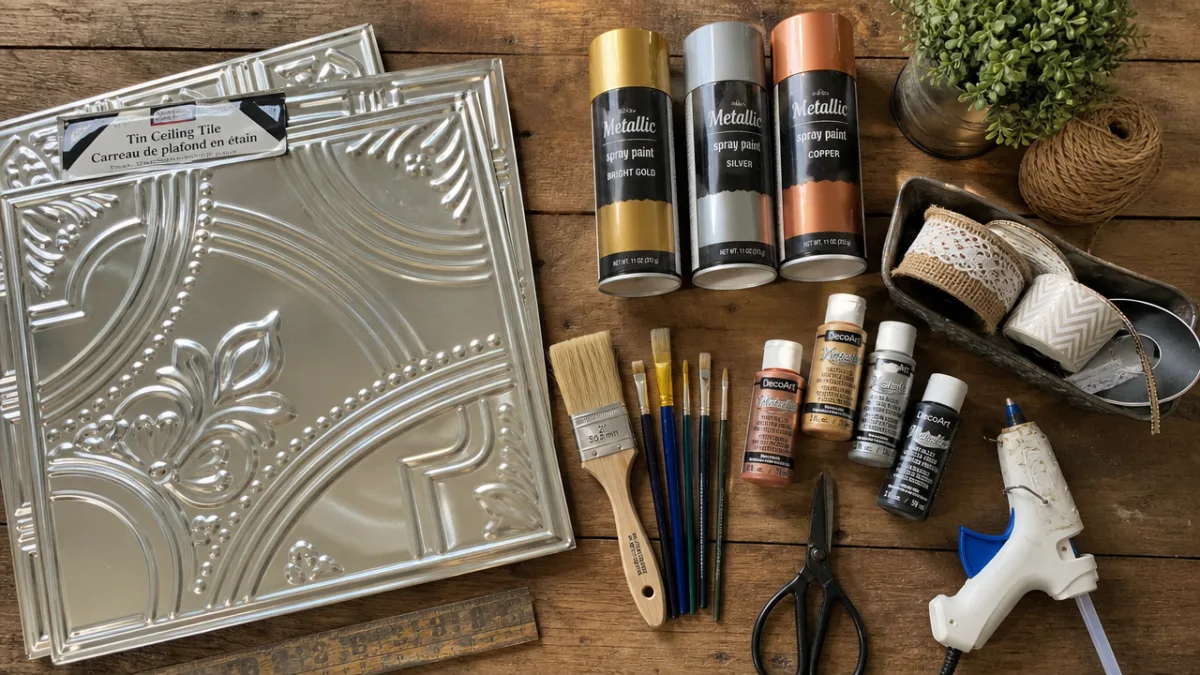
One of the greatest pleasures of tin tile crafting is that the supply list is refreshingly short and inexpensive. Beyond the tiles themselves, most projects require only a handful of items that you likely already have at home or can pick up at the dollar store in the same shopping trip. Having the right supplies on hand before you begin makes the crafting process smooth and enjoyable, and ensures you get the professional-looking results that make this hobby so rewarding and satisfying for crafters at every experience level.
Paint selection is perhaps the most important supply decision you’ll make. Chalk paint is a perennial favorite among tin tile crafters because it adheres directly to metal without priming, dries quickly to a matte finish that takes wax and antiquing mediums beautifully, and is forgiving of application imperfections. Metallic spray paint is another excellent choice for creating glamorous gold, silver, bronze, or copper finishes that highlight the embossed details magnificently. Acrylic craft paints work well too, especially when you’re layering multiple colors or using the dry-brush technique to create depth and dimension across the tile’s textured surface.
Beyond paint, gather the following supplies to set yourself up for successful tin tile projects across a variety of styles and applications. Having these items on hand opens up a world of creative possibilities and ensures you can complete projects start to finish in a single crafting session without frustrating supply runs mid-project.
- Fine-grit sandpaper (220 grit) — for lightly scuffing the tile surface to improve paint adhesion on particularly smooth tiles
- Painter’s tape — for masking off sections when creating two-tone or geometric color-blocked designs
- Foam brushes and bristle brushes — foam for smooth base coats, bristle for dry-brushing and texturing techniques
- Clear wax or Mod Podge sealer — to protect finished tiles, especially those used as functional items like trays or trivets
- Picture hanging hardware — sawtooth hangers, D-rings, or adhesive strips for mounting finished tiles to walls
- Craft glue or two-part epoxy — for attaching decorative elements like ribbon, handles, or embellishments
- Antiquing glaze or dark wax — for creating aged, vintage-looking finishes that emphasize the embossed pattern detail
Workspace Setup for Success
Setting up your workspace thoughtfully before you begin any tin tile project makes the entire crafting experience more pleasant and helps you achieve better results. Because spray paint is a popular choice for these projects, working outdoors or in a well-ventilated garage is important for your health and to prevent paint fumes from accumulating indoors. Lay down a drop cloth or old cardboard boxes to protect your work surface, and wear disposable gloves to keep paint off your hands. If you’re working indoors with brush-on paints, open windows and position a fan to circulate air throughout the space comfortably.
Step-by-Step Project Ideas for Every Skill Level
Whether you’re a complete beginner picking up a paintbrush for the first time or an experienced crafter looking for your next satisfying challenge, tin tile projects exist on a spectrum that accommodates everyone. The projects described here range from a simple twenty-minute makeover to more involved multi-day creations, and each one produces a finished piece that looks intentional, stylish, and far more expensive than its humble origin would suggest. Starting with a beginner project builds your confidence with the material before moving on to more complex techniques.
The simplest and most popular tin tile project is the painted wall medallion — a single tile coated in metallic gold or antique bronze spray paint and hung on the wall as a standalone decorative accent. This project requires only one tile, one can of spray paint, and about thirty minutes of your time, including drying. The embossed pattern on the tile does all the visual heavy lifting, creating a piece that resembles expensive wall art or architectural salvage. Hang it solo above a bed, sofa, or entryway console table for immediate impact, or create a symmetrical pair flanking a mirror or window for a balanced, formal arrangement that transforms an ordinary room into something that feels curated and intentional.
For those ready to step up their crafting game, consider creating a decorative serving tray by pairing a tin tile with handles from the dollar store hardware section. Paint the tile in a color that complements your kitchen or dining room, seal it thoroughly with a waterproof top coat, and attach sturdy metal or wooden handles using two-part epoxy. The resulting tray is not only beautiful but functional — perfect for corralling remote controls on a coffee table, organizing perfume bottles on a vanity, or serving drinks at casual gatherings. This project takes about an hour of active work plus drying time and produces a piece with significant visual impact and everyday utility.
Gallery Wall Arrangements
One of the most dramatic ways to use dollar store tin tiles is to create a statement gallery wall using multiple tiles in varying colors or finishes. Begin by selecting a cohesive color palette — perhaps three shades of the same color family, or a mix of metallic finishes like gold, silver, and bronze — and paint each tile slightly differently using different techniques or shades. Arrange them on your wall in a grid pattern, a diamond configuration, or a more organic salon-style grouping. The result is a large-scale art installation that looks like something from a designer showroom but costs a fraction of comparable purchased artwork.
When planning a gallery wall, lay all your tiles out on the floor first and experiment with arrangements until you find one that pleases you visually. Photograph the arrangement with your phone so you can reference it when transferring the layout to your actual wall. Use a level and painter’s tape to mark tile positions on the wall before committing to hardware placement, and maintain consistent spacing between tiles for a polished, intentional look. Even a slight variation in spacing can make the arrangement look accidental rather than designed, so taking the time to measure carefully pays enormous dividends in the final appearance of your finished gallery wall installation.
Painting Techniques That Elevate Your Results
The difference between a tin tile project that looks like a dollar store craft and one that looks like a designer piece often comes down entirely to paint technique. Fortunately, the most effective techniques for elevating tin tile projects are also some of the easiest to learn, requiring no formal art training and minimal practice to execute convincingly. Understanding how paint behaves on the embossed surface and using that behavior intentionally is the key insight that separates beautiful results from merely adequate ones in this type of crafting.
Dry brushing is the single most transformative technique you can apply to a painted tin tile. After applying a base coat in one color and allowing it to dry completely, load a stiff bristle brush with a small amount of a contrasting color — often a lighter shade or a metallic paint — and wipe most of the paint off the brush onto a paper towel until only a trace amount remains. Then drag this nearly-dry brush lightly across the surface of the tile, allowing the raised portions of the embossed pattern to catch the paint while the recessed areas stay the base color. The result mimics the look of genuine aged metal or hand-painted ceramic with professional depth and dimension that looks incredibly sophisticated.
Antiquing glazes and dark waxes offer another avenue for creating depth and visual interest on painted tin tiles. These products, available at craft stores and sometimes in dollar store craft sections, are applied over a fully dried paint layer and then partially wiped away, leaving darker pigment behind in the recessed areas of the embossed pattern while the raised portions return to their original painted color. The effect beautifully mimics the patina that develops naturally on aged metal objects over decades of use, giving your freshly painted tile the character and authenticity of a genuine antique find without any of the expense or hunting that real antique shopping requires.
Color Palette Inspiration
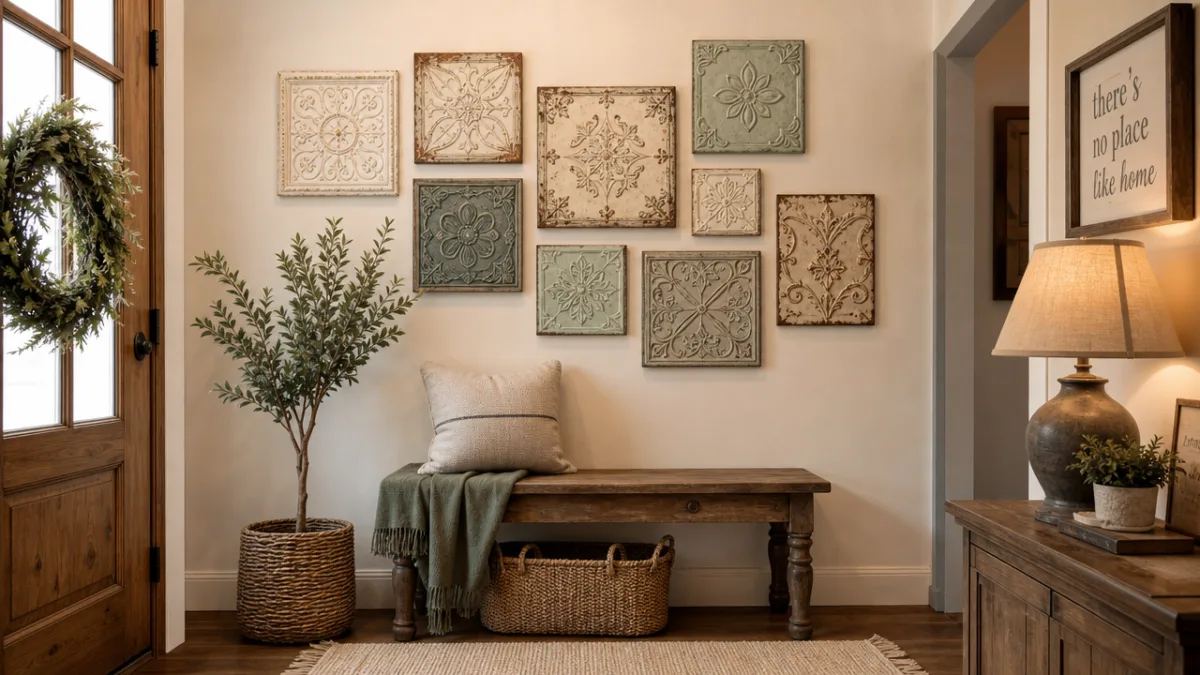
Choosing the right color palette for your tin tile projects can feel overwhelming given the infinite possibilities, but a few reliable combinations consistently produce stunning results across a range of home décor styles. For farmhouse and cottage interiors, soft whites, warm creams, and muted sage greens create a gentle, welcoming feel that pairs beautifully with natural wood tones and linen textiles. Industrial and modern loft spaces benefit from the drama of matte black tiles with silver dry-brushing, which enhances the architectural quality of the embossed patterns and gives finished pieces a bold, graphic presence that commands attention without competing with other design elements in the room.
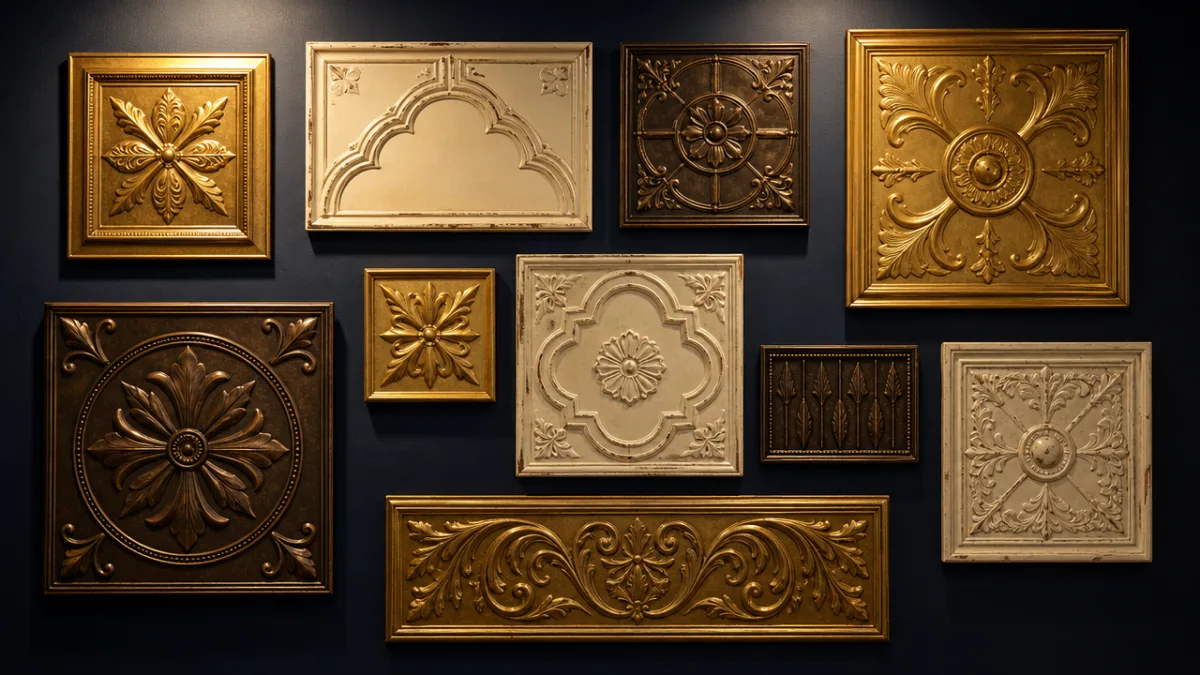
Glamorous and maximalist interiors call for full metallic treatment — deep antique gold or rich bronze spray paint applied in multiple thin coats produces tiles that look like genuine architectural salvage from a Victorian ballroom or European palace. These gold-finished tiles are particularly stunning when grouped together on a dark-painted accent wall, where the warm metallic tones glow against a deep navy, forest green, or charcoal background. For a more playful and eclectic approach, consider painting tiles in rich jewel tones — emerald, sapphire, amethyst, and ruby — and arranging them in a mosaic-inspired pattern that brings color, texture, and personality to any space in your home.
Creative Project Ideas Beyond Basic Wall Art
Once you’ve mastered the basic painted tile techniques, a world of more creative applications opens up that extends far beyond simple wall hangings. Tin tiles are remarkably adaptable to a wide range of functional and decorative projects throughout the home, and thinking creatively about how their size, shape, and surface texture can serve different purposes leads to some of the most innovative and satisfying crafting outcomes. The crafters who get the most enjoyment from this hobby are those who look at a stack of dollar store tiles and see not just wall art but a dozen different possibilities simultaneously.
Cabinet and furniture inserts represent one of the most impressive applications of dollar store tin tiles, offering a way to dramatically upgrade the look of plain flat-panel cabinet doors or drawer fronts without the expense of buying new furniture. Remove the center panel of a cabinet door, cut the tin tile to fit the opening, and secure it from behind using construction adhesive — the result is a custom cabinet with built-in textural detail that looks like expensive furniture from a high-end retailer. This technique works beautifully on plain IKEA furniture pieces, thrifted wooden cabinets, and builder-grade kitchen or bathroom cabinetry that needs visual interest and personality to make it feel less generic and mass-produced.
Tin tiles also make extraordinary picture frames and mirror surrounds when cut and arranged around a central opening. Use tin snips to cut tiles into strips of equal width, paint them in your chosen finish, and glue them around a basic mirror or photograph using construction adhesive. The embossed pattern creates a richly textured frame that rivals products sold in high-end home décor boutiques for a fraction of the cost. This is a particularly popular project for bathroom mirrors, where the metallic finish of painted tin tiles complements the reflective surfaces and fixtures already present in the space, creating a cohesive and considered design moment.
Seasonal and Holiday Decorating with Tin Tiles
The versatility of tin tiles extends beautifully into seasonal and holiday decorating, where their ability to accept almost any paint treatment makes them endlessly adaptable to changing décor themes throughout the year. During the winter holiday season, spray tiles in deep red and antique gold, then embellish them with ribbon, pine cones, or small ornament hooks to create stunning Christmas wall pieces that look like heirloom decorations. In autumn, copper and burnished orange finishes evoke the richness of fall foliage, while spring projects in soft pastels and fresh greens bring a sense of renewal and lightness to rooms transitioning out of winter’s darker palette.
Creating seasonal tile collections that swap in and out throughout the year is a budget-friendly way to keep your home décor feeling fresh and current without the expense of purchasing new decorations for every holiday and season. Because the tiles are inexpensive, you can afford to invest in multiple sets painted for different times of year and store unused tiles flat in a box between seasons. Establishing a consistent hanging system — perhaps a row of small hooks or a ledge shelf — makes seasonal swapping quick and effortless, transforming your space in minutes rather than hours whenever the mood strikes you or a new holiday approaches on the calendar.
Tips, Troubleshooting, and Getting the Best Results
Even the most straightforward craft projects come with a learning curve, and tin tile crafting is no exception. Understanding common challenges and how to address them before you encounter them saves frustration and helps ensure that your finished projects look as polished and professional as the inspiring images you see across social media and craft blogs. The good news is that tin tiles are among the more forgiving craft materials available, and most mistakes are entirely correctable with a little patience and the right approach to problem-solving throughout the creative process.
Paint adhesion is the most common challenge beginners encounter, particularly when using brush-on paints that can bead up or peel on the smooth metallic surface of unprepared tiles. The solution is straightforward: lightly scuff the tile surface with 220-grit sandpaper before painting, which creates tiny scratches that give the paint something to grip. Alternatively, apply a coat of adhesion promoter spray, available at hardware stores, which chemically bonds to metal surfaces and creates an ideal base for any paint type. Chalk paint is the exception to this rule — it contains binding agents that adhere directly to metal without any surface preparation, making it the most beginner-friendly option for tin tile painting projects of all kinds.
Achieving even spray paint coverage on embossed surfaces requires slightly different technique than painting a flat surface. Hold the spray can approximately twelve inches from the tile surface and apply multiple thin coats rather than one heavy coat, allowing each coat to dry completely before applying the next. Moving the can in smooth, consistent passes that extend slightly beyond the edges of the tile ensures even coverage without buildup in the corners. Pay special attention to the recessed areas of the embossed pattern, which can be harder to reach with spray paint — angling the can slightly to the left and then to the right during separate passes helps ensure that paint reaches all areas of the complex textured surface thoroughly and evenly.
Sealing and Protecting Your Finished Projects
A quality sealer is the final step that transforms a nice craft project into a durable finished piece that will look beautiful for years rather than months. For purely decorative wall-hanging tiles, a light coat of clear matte or satin spray sealer provides adequate protection against dust and humidity. For functional items like trays, trivets, or cabinet inserts, invest in a more durable product such as Minwax Polycrylic or a two-part epoxy top coat that can withstand the rigors of regular handling, cleaning, and occasional moisture exposure. Apply sealer in thin, even coats just as you did with the paint, and allow each coat to cure fully before adding the next layer for maximum durability and scratch resistance.
Storing and caring for finished tin tile pieces is also worth considering to extend their beauty and longevity. Avoid hanging painted tiles in areas with direct sunlight exposure over long periods, as UV radiation can fade paint colors and break down sealers more quickly than in shaded locations. For wall-hung pieces, check the hanging hardware periodically to ensure it remains secure, as the weight of metal tiles puts more stress on wall anchors than lighter canvas or paper art would. With proper installation, thoughtful placement, and minimal maintenance, your dollar store tin tile creations will remain beautiful, functional, and impressive-looking additions to your home décor for many years to come.








What do you think?
It is nice to know your opinion. Leave a comment.