










Spooky Mason Jar Halloween Decor Ideas: Transform Your Home This Haunting Season
The Magic of Mason Jar Halloween Decorations
When it comes to Halloween decorating, few materials offer the versatility, charm, and budget-friendly appeal of the humble mason jar. These glass containers, originally designed for canning and preserving food, have become one of the most beloved crafting tools in the seasonal decor world. Their transparent surfaces allow light to pass through beautifully, making them perfect vessels for creating glowing, eerie, and enchanting Halloween displays that will impress every trick-or-treater and dinner guest who crosses your threshold.
The beauty of mason jar Halloween decor lies in its accessibility. You do not need to be an experienced crafter or spend a fortune at a specialty store to create stunning seasonal displays. Most of the supplies required — paint, twine, battery-operated tea lights, craft glue, and decorative elements like fake spiders or plastic gems — can be found at your local dollar store or craft shop for just a few dollars. With a little creativity and an afternoon of crafting time, you can transform a collection of ordinary jars into something truly spectacular and spooky.
Mason jars also offer incredible flexibility in terms of style and aesthetic. Whether you prefer a classic, gothic Halloween look with black and orange color schemes, a more whimsical and playful approach with friendly ghosts and smiling pumpkins, or a sophisticated, moody farmhouse-inspired design with neutral tones and dried botanicals, there is a mason jar Halloween project that fits your vision perfectly. The projects below will guide you through a wide range of ideas that span every skill level and design preference.
Glowing Witch and Ghost Lanterns
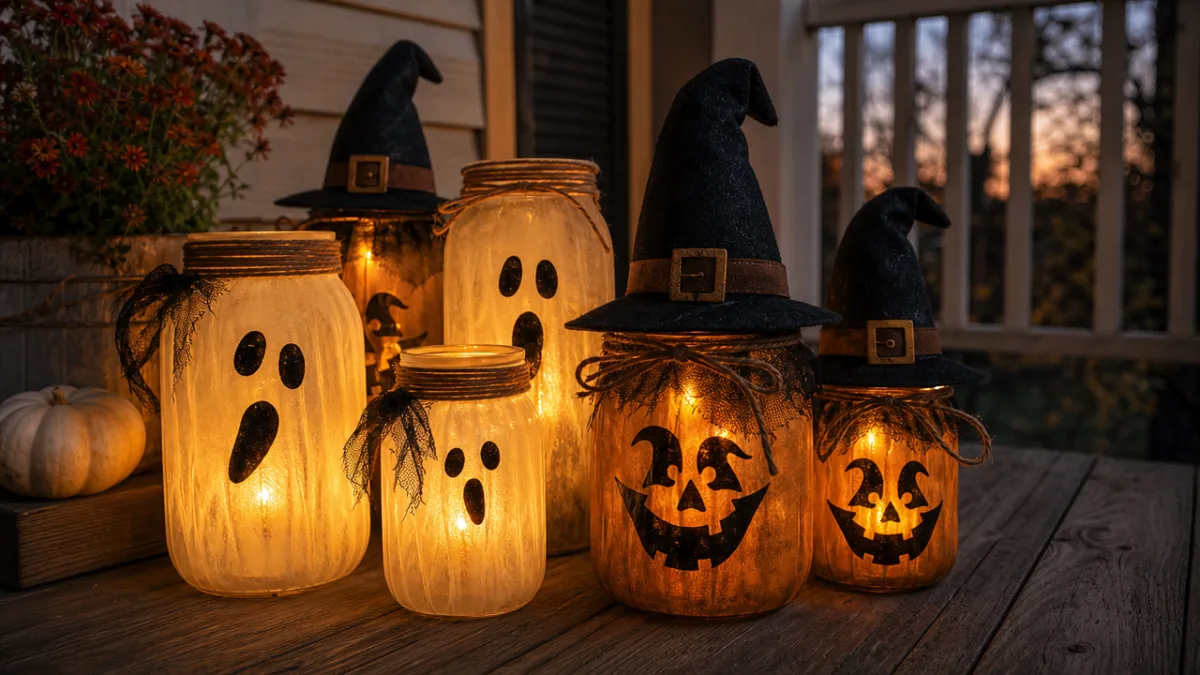
One of the most popular and visually striking mason jar Halloween projects is creating glowing witch or ghost lanterns. To make these enchanting luminaries, start by cleaning your jars thoroughly and allowing them to dry completely. For ghost jars, apply several coats of white frosted glass spray paint or white acrylic paint mixed with a small amount of Mod Podge to achieve a translucent, glowing effect when a battery-operated tea light is placed inside. Once dry, add black felt or paint details for the eyes and mouth to bring your ghost to life.
Witch-themed mason jar lanterns take the concept a step further with rich purple, deep green, or classic black color treatments. Paint the exterior of the jar in your chosen witchy hue, then wrap the neck with a strip of black ribbon or burlap twine tied into a small bow. You can add miniature witch hat toppers crafted from black foam sheets or felt, which can be glued directly to the lid of the jar. Tiny orange or purple gemstone stickers scattered across the surface add a touch of magical sparkle that catches the light beautifully in the evening hours.
For the most dramatic effect, arrange a grouping of three to five ghost or witch lanterns together on a mantle, windowsill, or outdoor porch step. Vary the jar sizes to create visual interest — use a large quart-sized jar flanked by two standard pint jars and a couple of small jelly jars. When the battery-operated tea lights flicker inside at dusk, the arrangement creates a hauntingly beautiful glow that evokes the spirit of the season without any fire hazard. These lanterns are safe for both indoor and outdoor use and can withstand light weather conditions on a covered porch.
Creepy Crawly Spider Web Jars
Spider webs and Halloween go hand in hand, and incorporating this iconic motif into your mason jar decor creates an instantly recognizable seasonal display. The simplest approach involves wrapping your jars in stretchy white cotton spider web material, which can be purchased in bulk from most Halloween or party supply stores. Drape the webbing loosely around the jar, tucking the ends under the base to secure it, then add a few plastic spiders of varying sizes crawling dramatically across the web for maximum creep factor.
For a more polished and permanent spider web effect, try painting the web directly onto the glass surface. Use a fine-tipped black paint pen or a small brush with black acrylic paint. Begin by drawing a small dot in the center of the jar’s front face, then extend six to eight lines outward like spokes on a wheel. Connect these lines with slightly curved arcs, working from the center outward to build a realistic-looking web. Allow this to dry fully before adding a small, detailed spider painted in black with tiny white highlights on its body to suggest a glossy, unsettling sheen.
Another creative variation involves filling the mason jar itself with eerie spider web-themed contents. Consider placing a small plastic skull or figurine inside the jar before filling it with water tinted black or deep purple using food coloring. Seal the lid tightly and place it on display as a macabre snow-globe-style decoration. Alternatively, fill jars with layers of black sand, tiny plastic spiders, and orange glitter for a layered, textural display that requires no additional lighting to look stunningly spooky on any flat surface or shelf.
Potion Bottle and Apothecary Jar Collections
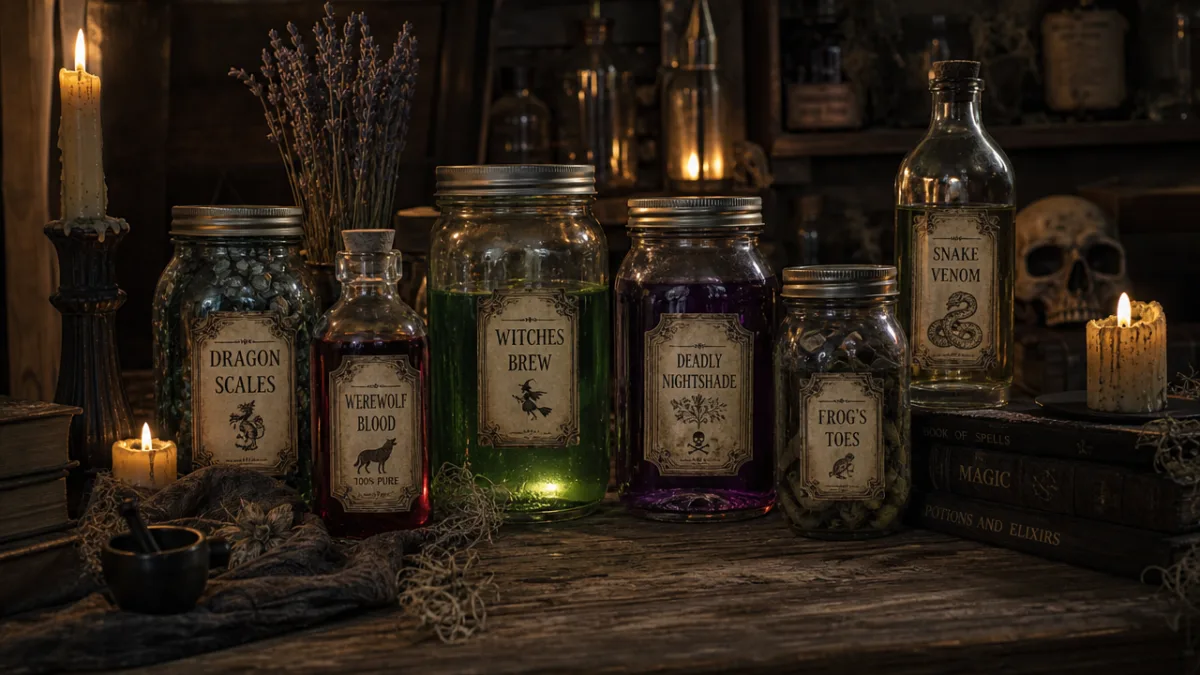
The Halloween apothecary aesthetic has surged in popularity in recent years, and mason jars are the perfect base for building an impressive collection of faux potion bottles and magical ingredient containers. This style lends itself beautifully to both Halloween parties and longer-term seasonal displays that can be kept out through the end of October. To begin, gather an assortment of jar sizes and shapes — wide-mouth quart jars work well for large apothecary-style containers, while narrow-necked jelly jars mimic the look of traditional potion bottles quite convincingly.
Labeling is the most important element of any apothecary jar collection. Create aged, handwritten labels using parchment-colored cardstock and brown ink, or print vintage-style labels from free online resources and distress the edges with a brown ink stamp pad. Label your jars with evocative Halloween ingredient names such as Witch’s Tears, Dragon’s Blood, Pickled Eyeballs, Bat Wings, Toad Venom, or Grave Dust. Tie the labels onto the jars using thin black ribbon or rough jute twine for an authentically old-world alchemical feel that adds tremendous character to the display.
The contents of your apothecary jars are just as important as the labels in selling the illusion. Consider these filling ideas to complete your potion collection:
- Black-dyed rice or sand to suggest powdered dark magic ingredients
- Dried herbs such as rosemary, lavender, or black-painted pine cones to represent botanical spell components
- Plastic eyeballs, skull beads, or novelty skeleton hands for a viscerally creepy ingredient jar
- Orange and black candy corn or small wrapped sweets for a sweet-themed apothecary display
- Water tinted with food coloring in green, purple, or blood-red for glowing liquid potion effects when lit from below with an LED puck
- Fake moss, cork pieces, and small dried flowers for a naturalistic, herbalist-inspired look
Once your collection is assembled, arrange the jars on a wooden tray, a rustic crate, or a length of aged black fabric draped across a table or shelf. Tuck in additional spooky props like mini cauldrons, black feathers, dried flower bunches, or a small plastic raven to build out the scene. Layering items at different heights using small wooden blocks or stacked books hidden beneath a cloth creates a display with depth and visual complexity that looks professionally styled and thoroughly immersive.
Jack-o’-Lantern Mason Jar Luminaries
Jack-o’-lanterns are the quintessential Halloween icon, and recreating their cheerful, carved pumpkin aesthetic on a mason jar is a project that the whole family can enjoy together. The simplest version involves painting a jar with bright orange acrylic paint, allowing it to dry completely, then adding a classic jack-o’-lantern face in black. You can use black paint with a small brush for a freehand approach, or cut a stencil from cardstock and tape it to the jar surface before applying paint with a sponge for clean, sharp-edged results that look very polished and intentional.
For a more dimensional and textural jack-o’-lantern jar, experiment with orange tissue paper and Mod Podge decoupage. Tear the tissue paper into small irregular pieces and brush them onto the outer surface of the jar with a layer of Mod Podge, overlapping the pieces slightly for full coverage. Once dry, the layered tissue creates a subtly uneven, slightly crinkled texture that actually resembles the surface of a real pumpkin. After a final sealing coat of Mod Podge, add the black face details and a small loop of green ribbon at the top to suggest a pumpkin stem.
You can also create themed variations on the classic jack-o’-lantern jar to add variety to your display. Try a sleepy-eyed pumpkin with half-closed oval eyes and a small curved smile for a more whimsical, less threatening look suitable for households with young children. Alternatively, create a menacing pumpkin with jagged triangle eyes and a wide gaping mouth filled with painted white teeth for a more traditionally scary aesthetic. Making a matched set of three or four jars with slightly different expressions creates a charming mini pumpkin patch effect that works wonderfully as a centerpiece for a Halloween dinner table.
Outdoor Halloween Pathway Lanterns
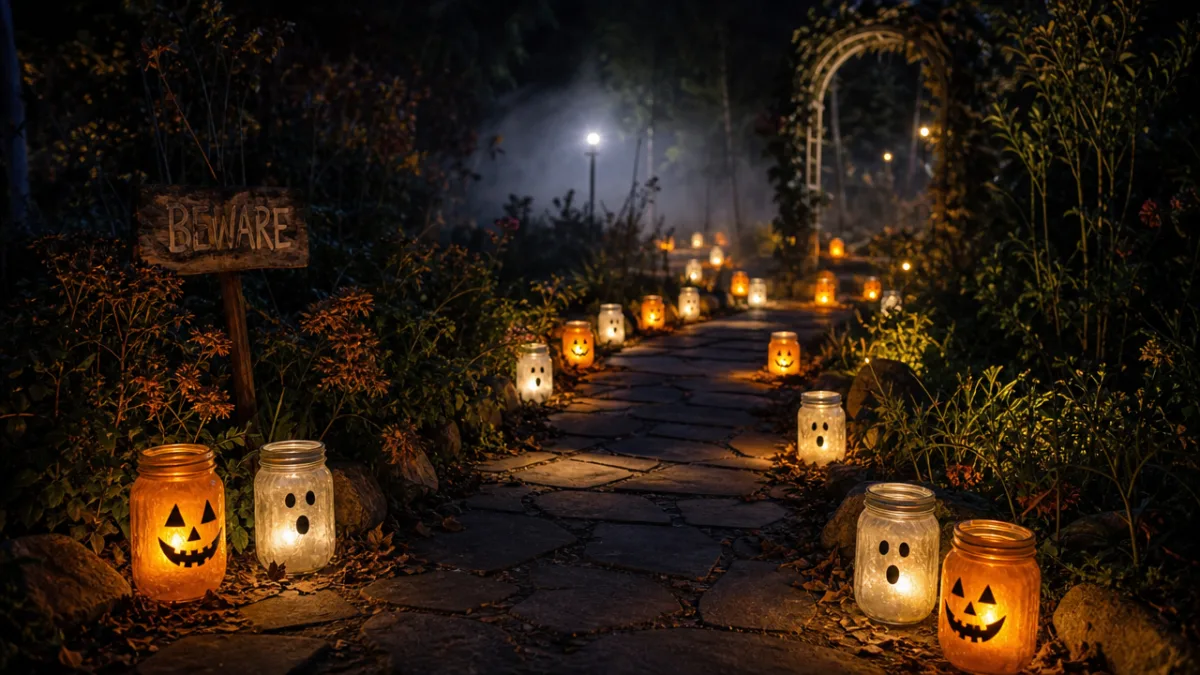
Mason jar decorations are not limited to indoor display — they can also create a dramatically spooky and beautiful effect when used outdoors to line a pathway, front porch steps, or driveway on Halloween night. For outdoor use, it is important to choose battery-operated tea lights or small LED candles rather than real flames, both for safety and practicality in any light breeze. Many battery-operated options now feature flickering modes that convincingly mimic the natural movement of a real candle flame, preserving the magical effect without the risk.
To weatherproof your outdoor mason jar lanterns, consider painting them with outdoor-rated acrylic paint or sealing indoor paint with several coats of clear outdoor Mod Podge. You can hang these lanterns from shepherd’s hooks, wooden fence posts, or tree branches using wire jar hangers — these are specifically designed for mason jars and can be found at craft stores. Hanging lanterns at varying heights along a pathway creates a floating, ethereal effect after dark that transforms an ordinary front walkway into a genuinely atmospheric Halloween experience for arriving trick-or-treaters.
Themed outdoor displays can tell a cohesive visual story when you plan them carefully. Consider these popular outdoor mason jar Halloween pathway themes to inspire your project:
- The Haunted Graveyard Path: Alternate black-painted lanterns with orange ones, adding painted RIP tombstone motifs. Place small foam gravestones between the jars in the lawn.
- The Witch’s Forest: Use deep green and purple jars decorated with moons and stars, hung from a line of tree branches to create a magical woodland passage.
- The Classic Pumpkin Parade: Line every porch step with an orange jack-o’-lantern jar of progressively larger sizes, leading guests up to your front door.
- The Ghostly Procession: A series of white frosted ghost lanterns in a winding line through the yard, each one slightly different in expression or size.
For maximum impact, plan your outdoor mason jar display in advance and test the arrangement during daylight hours before Halloween night arrives. Consider how the lights will appear from the street — the approach view from a distance is often the most dramatic angle, and positioning your lanterns to be visible from the road will encourage more trick-or-treaters to visit and reward your decorating effort. Adding a layer of fake cobwebs or dried leaf clusters around the base of each jar ties the individual lanterns together visually and integrates them into the surrounding landscape beautifully.
Tips for Crafting the Perfect Mason Jar Halloween Decor
Before you dive into your mason jar Halloween crafting session, a little preparation and planning will ensure the best possible results. Begin by cleaning all of your jars thoroughly with warm soapy water, then wipe them down with rubbing alcohol before painting. This removes any oils or residue from the glass surface that would prevent paint from adhering properly. Allowing the jars to dry completely before beginning any paint application is equally critical — even a small amount of remaining moisture can cause paint to bubble, peel, or dry unevenly, compromising the finished look of your project.
When it comes to choosing paints, not all formulas perform equally well on glass surfaces. Look for acrylic enamel paints specifically labeled for use on glass or ceramic, as these bond more effectively and resist chipping far better than standard acrylic craft paint. If you are using standard acrylic paint, sealing the finished jar with multiple coats of Mod Podge, clear acrylic sealer spray, or decoupage medium will significantly extend the durability of your decoration and protect it through the full Halloween season. For jars that will be used outdoors, always use an outdoor-rated sealant as a final protective coat.
Organization and efficiency are also key to a successful and enjoyable crafting session, especially if you are making multiple jars in an assembly-line fashion. Set up your workspace with all materials within easy reach, protect your table surface with newspaper or a silicone craft mat, and work in stages — complete all base coats across all jars first before moving on to detail work. This approach allows layers to dry while you continue working and maximizes the time you have available. Here are some final tips to keep in mind as you craft:
- Use painter’s tape to create clean, sharp lines between color sections on more complex painted designs
- A foam makeup sponge creates a beautifully even, streak-free base coat on glass surfaces
- Battery-operated tea lights with a timer function are ideal — set them to activate at dusk automatically for a hands-free evening display
- Store finished jars carefully with crumpled tissue paper inside to prevent cracking or chipping during storage
- Photograph your finished display from multiple angles to save inspiration for next year’s Halloween decorating season
Mason jar Halloween decorations represent the very best of seasonal crafting — they are accessible, affordable, endlessly customizable, and genuinely beautiful in their finished form. Whether you complete one simple ghost lantern or build an elaborate themed display encompassing every project described above, the effort you invest will reward you with decorations that draw admiration from neighbors, delight from visiting children, and a genuine sense of pride in your own creative handiwork. This Halloween, let the humble mason jar prove once again that the most magical decorations are often the ones you make entirely by hand.








What do you think?
It is nice to know your opinion. Leave a comment.