










5 Eye-Catching DIY Planters Made with Scrap Wood
Why Scrap Wood Planters Are the Ultimate Weekend Project
There is something deeply satisfying about transforming what most people would consider waste into something genuinely beautiful and functional. Scrap wood planters sit at that perfect intersection of sustainability, creativity, and practicality — giving leftover lumber a second life while adding warmth and character to your home or garden. Whether you have a stack of old fence boards in the garage or a pile of pallet wood from a recent delivery, the raw materials for a stunning planter are probably already within reach.
Unlike many DIY projects that demand expensive tools, precision cuts, and a steep learning curve, scrap wood planters are forgiving by nature. The rustic, imperfect quality of reclaimed wood is not a flaw — it is the entire aesthetic. Knots, grain variations, weathered paint, and irregular edges all contribute to a look that feels lived-in and authentic in a way that store-bought planters simply cannot replicate. This makes these projects ideal for beginners and experienced woodworkers alike.
Beyond aesthetics, there is a real environmental argument for choosing scrap wood over purchasing new materials. The lumber industry is resource-intensive, and repurposing wood that would otherwise end up in a landfill reduces demand for new production. Every planter you build from salvaged materials is a small but meaningful step toward more conscious consumption. When you combine that with the cost savings — since most of these projects require little more than screws, wood glue, and a few basic tools — it becomes very difficult to justify buying a plastic pot from a big-box store.
Getting Started: Tools, Safety, and Wood Selection
Choosing the Right Scrap Wood
Not all scrap wood is created equal when it comes to planters, and making the right selection from the outset will save you a significant amount of trouble down the line. The primary concern is moisture resistance, since planters are constantly exposed to watering, rain, and humidity. Cedar and redwood are the gold standards for outdoor wood projects because they contain natural oils that resist rot and repel insects. If you happen to have scraps of either, prioritize them for any planter that will live outdoors year-round.
Pressure-treated lumber is another common option found in scrap piles, particularly from old deck projects. While it is highly durable and rot-resistant, older pressure-treated wood may contain chromated copper arsenate (CCA), a chemical compound that has been phased out in the United States for residential use since 2004 but may still appear in older materials. For food-growing planters or anything children and pets will be close to, it is worth being cautious and lining the interior with heavy-duty plastic sheeting as a barrier. For purely decorative planters, pressure-treated scraps are perfectly fine to use.
Pine, fir, and other softer woods are the most commonly available scraps and work well for indoor planters or covered outdoor spaces. They will eventually degrade if left fully exposed to the elements, but a good coat of exterior paint or wood sealant can significantly extend their lifespan. The key is to manage your expectations based on where the planter will live, and to choose your finishing strategy accordingly. A simple coat of linseed oil or outdoor polyurethane can add years to a pine planter’s functional life.
Essential Tools and Safety Tips
Most of the five planter designs in this article can be built with a remarkably minimal toolkit. At the bare minimum, you will need a saw (a hand saw works fine, though a circular or miter saw speeds things up considerably), a drill with screwdriver bits, sandpaper in a range of grits, and clamps to hold pieces together while glue dries. A tape measure and a carpenter’s square are invaluable for keeping your cuts straight and your corners true, even when working with rustic, imprecise materials.
Safety should never be an afterthought, even for simple weekend builds. Always wear safety glasses when cutting or drilling, and use hearing protection if you are working with power tools for extended periods. A dust mask is particularly important when sanding older wood, which may carry traces of old paint or finishes. Keep your workspace clear of debris and make sure your workpiece is firmly secured before making any cuts — a shifting board is one of the most common causes of DIY injuries. Take your time, especially if you are new to working with power tools.
Planter Design 1: The Classic Stacked-Log Box
The stacked-log box is one of the most visually striking planters you can build with minimal effort, and it requires almost no precise measuring or cutting. The concept is simple: short lengths of log or thick branch are stacked in alternating directions, log-cabin style, to create a chunky, organic enclosure for your plants. The natural variation in the wood — its bark, knots, and irregular diameter — becomes the design feature rather than something to work around. This is the kind of planter that stops guests in their tracks and invites the question, “Where did you get that?”
To build one, gather logs or thick branches of roughly similar diameter, ideally between three and six inches across. Cut them into uniform lengths — somewhere between eight and fourteen inches works well for a medium-sized planter. Stack them in pairs at right angles to one another, securing each layer with long screws or construction adhesive as you go. The structure does not need to be perfectly level or precisely aligned; in fact, a slight irregularity in the stacking adds to the handmade charm. Once you reach your desired height, line the interior with landscape fabric before adding soil to prevent dirt from falling through the gaps.
This design works exceptionally well with succulents, trailing plants like pothos or ivy, or compact flowering plants such as pansies and petunias. The natural wood tones complement almost any plant palette, and because the logs are thick, they retain temperature well, giving plant roots a more stable environment. If you want to use this planter indoors, simply place a waterproof tray beneath it to catch drainage. Sealing the interior with a wood preservative or coating it with a waterproof membrane will dramatically extend the life of the planter for outdoor use.
Planter Design 2: The Rustic Pallet Trough
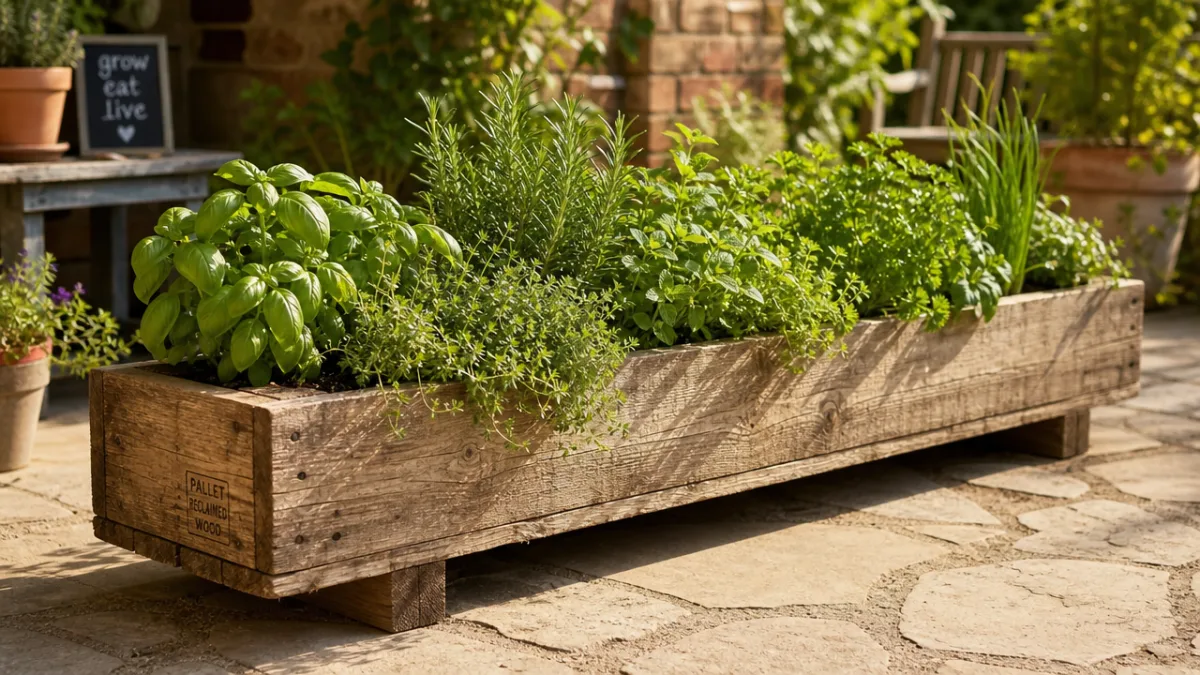
Wooden pallets may be the single most democratically available scrap wood source on the planet. They are used to ship virtually everything and are frequently given away for free outside hardware stores, garden centers, and warehouses. Repurposing a pallet into a planting trough is one of the most efficient DIY moves you can make, since the pallet’s structure — parallel boards connected by crossbeams — essentially does most of the work for you. With a few modifications, you can have a large, functional trough planter in an afternoon.
Start by selecting a pallet in good condition, free from excessive splitting or signs of chemical treatment. Look for the HT stamp on the pallet’s wood, which stands for heat-treated — meaning it was sanitized with heat rather than chemical fumigants and is safe for use around plants and edibles. Once you have your pallet, stand it upright and use scrap boards to enclose the bottom and sides, creating a box shape. You can cut the pallet to your desired length if needed, though working with the full size produces a wonderfully generous trough that can accommodate multiple plants in a single row.
The rustic pallet trough is particularly well-suited to herb gardens, since its long, narrow form allows you to plant a variety of herbs side by side — basil, rosemary, thyme, mint — creating a living kitchen garden that is both practical and beautiful. Line the interior with burlap or landscape fabric before filling with a high-quality potting mix, and consider adding a layer of gravel at the bottom for improved drainage. The weathered grey or brown tones of aged pallet wood pair beautifully with the green of fresh herbs, making this planter as photogenic as it is useful.
Planter Design 3: The Geometric Triangular Stand
If the stacked-log box and pallet trough lean toward the organic and rustic, the geometric triangular stand takes scrap wood in a more contemporary direction. This design uses straight, clean cuts to create angular, three-dimensional stands that elevate potted plants at varying heights, creating a dynamic display with significant visual impact. The contrast between the clean lines of the wooden structure and the organic softness of the plants themselves is what makes this design so compelling. It feels curated and intentional without being fussy.
Building the triangular stand requires a bit more precision than the previous designs, but it is still well within reach for a confident beginner. The basic structure consists of three legs that splay outward from a central platform, held together at the top and optionally braced with lower crosspieces for stability. Using a miter saw, cut your leg pieces at consistent angles — typically around fifteen to twenty degrees — so that when assembled, the legs splay outward gracefully without wobbling. Softwoods like pine or fir work well here since they are lightweight and easy to cut, and the finished stand can be painted or stained to match any interior decor.
One of the great advantages of the triangular stand is its versatility. Build several in different heights — a tall one, a medium, and a short — and group them together to create a plant corner that functions almost like living sculpture. They work indoors with tropical houseplants, fiddle leaf figs, or snake plants, and can hold standard nursery pots of virtually any size by adjusting the dimensions of the platform. Finish with a matte black, white, or natural wood stain for a look that feels right at home in a modern farmhouse or Scandinavian-inspired interior.
Planter Design 4: The Vertical Wall Pocket Planter
When floor space is at a premium — in a small apartment, on a narrow balcony, or in a cramped urban garden — the vertical wall pocket planter is a revelation. This design mounts directly to a wall or fence and uses individual wooden pockets or troughs arranged in a grid or staggered pattern to create a living wall effect. The visual impact is disproportionate to the amount of floor space it occupies, and it brings greenery into vertical surfaces that would otherwise be bare and uninspiring. It is also highly practical, keeping plants accessible and visible without cluttering surfaces or the floor.
To build the wall pocket planter, cut scrap boards into small box shapes — roughly six inches wide, four inches deep, and six inches tall works well for most small plants. Assemble each box with wood glue and screws, then attach a backing board with pre-drilled mounting holes. Once you have built as many pockets as your wall space allows, mount them using screws into wall studs or fence rails, arranging them in whatever configuration pleases you most. The staggered, offset arrangement tends to look the most dynamic and also allows each plant to receive good light without being shaded by the row above.
The wall pocket planter really excels with trailing plants, succulents, and small flowering annuals. Air plants (Tillandsia) are an especially elegant choice since they require no soil — simply tuck them into the wooden pockets with a handful of decorative pebbles and mist them a few times a week. For an indoor installation, use a waterproof liner inside each pocket and place a drip tray or waterproof backing behind the entire assembly. Outdoors, cedar or well-sealed pine will weather beautifully over time, the wood gradually silvering to a soft grey that makes the greenery pop even more vividly.
Planter Design 5: The Farmhouse Window Box
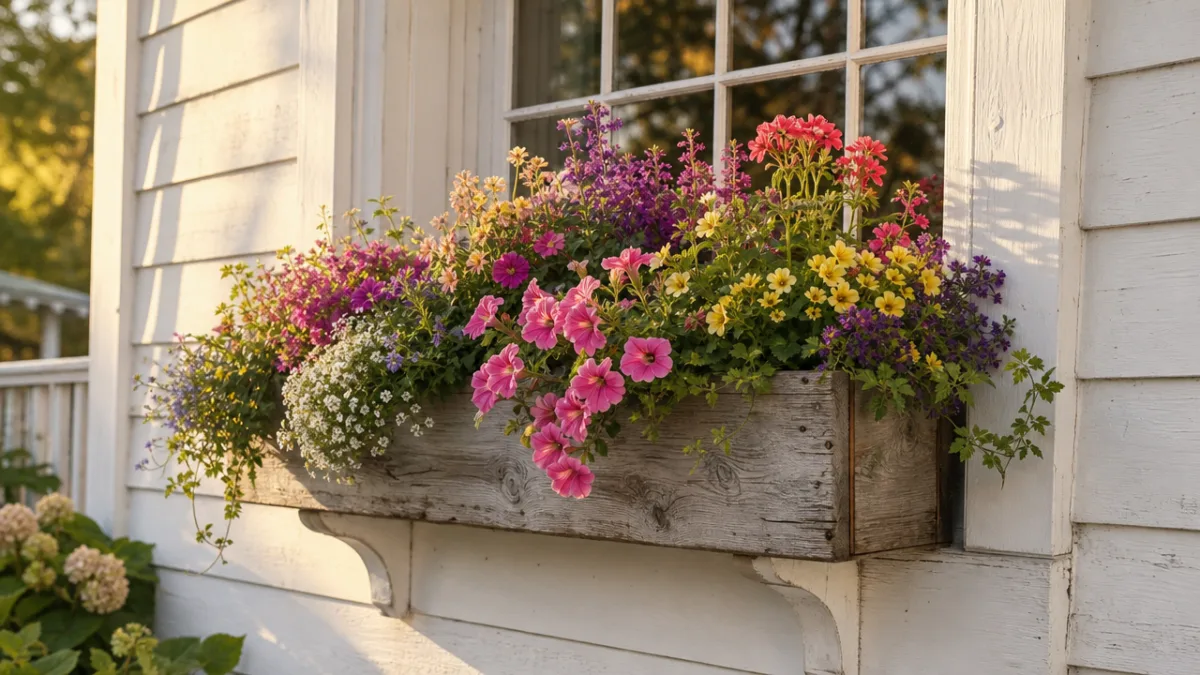
The window box is perhaps the most classic of all planter forms, and building one from scrap wood allows you to customize the dimensions, style, and finish to suit your home’s character perfectly. A farmhouse-style window box made from reclaimed wood carries a warmth and authenticity that mass-produced plastic or pressed-wood versions simply cannot match. It is also an opportunity to add real curb appeal to your home — a well-planted window box transforms the exterior of a house in a way that few other small investments can replicate.
Construction is straightforward: cut your front, back, bottom, and two end pieces to the length of your window, assemble with exterior screws and waterproof wood glue, and add drainage holes along the bottom. The farmhouse aesthetic is enhanced by choosing boards with visible grain, slight weathering, or even traces of old paint — the layered history of the wood tells a story that new lumber cannot. Finish with a coat of exterior paint in a colour that either matches or thoughtfully contrasts with your home’s trim. White, sage green, charcoal, and deep navy are all perennial favorites for farmhouse window boxes.
Mounting the window box securely is critical, particularly since a fully planted and watered box can be surprisingly heavy. Use heavy-duty brackets rated for at least double the expected weight, and ensure they are screwed into solid wood framing rather than just the siding. For the planting itself, a classic farmhouse combination might include trailing lobelia, upright geraniums or pelargoniums, and a central spike of dracaena for height — a simple thriller-filler-spiller formula that gardeners have relied on for generations. Water consistently, fertilize every two weeks during the growing season, and deadhead spent blooms regularly to keep the display looking its best throughout summer and into fall.
Finishing Touches: Sealing, Staining, and Styling Your Planters
A planter that is built well but finished poorly will not last — and more importantly, it will not look as good as it could. The finishing stage is where you get to make deliberate choices about the final personality of your planter, and it is worth taking the time to do it thoughtfully. The three most popular finishing approaches for scrap wood planters are natural sealants, paint, and stain, and each produces a distinctly different result. Your choice should be informed by where the planter will live, what plants it will hold, and how it fits into your overall decor.
Natural sealants such as tung oil, linseed oil, or exterior-grade polyurethane penetrate the wood grain and protect it from moisture without obscuring its natural character. These are the best choice when your wood has beautiful grain, interesting colour variation, or appealing imperfections you want to show off. Apply two to three coats, sanding lightly with fine-grit sandpaper between each coat for the smoothest result. For outdoor planters, a UV-resistant exterior formula will prevent the wood from greying prematurely, though many people actually love the gradual weathering process and choose to leave the wood to silver naturally.
Paint offers the most dramatic transformation and the widest range of stylistic possibilities. A coat of matte black paint turns almost any scrap wood planter into a sleek, modern statement piece, while white creates a clean, Scandi-inspired aesthetic, and bold colors like terracotta, cobalt, or mustard yellow add personality and energy. Always use a primer first, particularly on woods with high tannin content like cedar or redwood, to prevent bleed-through. Chalk paint has become popular for planter projects because it requires no priming, adheres to almost any surface, and can be distressed easily for a vintage look — seal it afterward with wax or varnish to protect against moisture.
Styling Your Planters for Maximum Impact
Building the planter is only half the project — how you style and arrange it determines whether it becomes a true focal point or just another pot on the shelf. Grouping planters of different heights, sizes, and materials creates visual rhythm and depth. A cluster of three planters — say, a tall triangular stand, a small stacked-log box, and a medium geometric planter — works far better than three identical containers lined up in a row. The odd-number rule from interior design applies here: groupings of three, five, or seven feel more dynamic and natural than even-numbered arrangements.
Consider the relationship between the planter and the plant when making your selection. A rough, heavily textured planter made from chunky stacked logs calls for an equally bold plant — a large-leafed tropical, a dramatic succulent arrangement, or a cascade of trailing ivy that spills dramatically over the edge. A sleek, geometric stand painted in matte black pairs beautifully with a single architectural plant like a snake plant or a graphic cactus. These intentional pairings elevate both the planter and the plant, creating a composition that feels designed rather than assembled by chance.
Finally, pay attention to the background against which your planters will be seen. A white wall makes any planter pop and shows off both the wood texture and the plant colours at their most vibrant. A brick or stone wall creates a more rustic, layered effect, while dark walls can make lighter-coloured wood and bright foliage feel almost luminous. Wherever you place your scrap wood planters, the effort you put into building, finishing, and styling them will be repaid many times over in the pleasure they bring — both to you and to everyone who encounters them.








What do you think?
It is nice to know your opinion. Leave a comment.