










How to Upcycle Wire Lampshade Frames into Plant Stands
There’s something genuinely satisfying about looking at something destined for the bin and thinking, “wait — I could do something with that.” Wire lampshade frames are exactly that kind of object. Most people toss them without a second glance, but once you start noticing their shape — those clean rings, those evenly spaced spokes — you start to see what they could become. This guide walks you through turning these forgotten frames into plant stands that are actually beautiful, genuinely useful, and a little bit clever.
Why Wire Lampshade Frames Make Perfect Plant Stands
When you really look at a wire lampshade frame, it’s almost suspiciously well-suited to holding plants. The rings at top and bottom give you stable resting surfaces, and the open spoke structure lets light reach your plants from every angle. That openness isn’t just nice to look at either — it means air can actually circulate around your pots, which goes a long way toward preventing the moisture buildup that causes root rot and mold.
There’s also something about the aesthetic that just works. That mix of industrial and botanical feels right at home in a lot of different interior styles — whether you’re into clean Scandinavian lines, cozy bohemian layering, or anything in between. A coat of matte black spray paint and the frame feels sharp and modern. Leave it raw or go for a rust patina effect and suddenly it reads more like something you’d find in a vintage workshop, which looks especially good alongside terracotta pots and trailing vines.
And then there’s the environmental side of things. Lampshade frames are steel, which takes a huge amount of energy to produce and essentially forever to break down in a landfill. Giving one a second life is a small act, but a real one. Plus, plant stands from home décor shops can be surprisingly pricey — so you’re saving money, reducing waste, and ending up with something more interesting than anything you’d find on a shelf. Hard to argue with that.
Gathering Your Materials and Tools
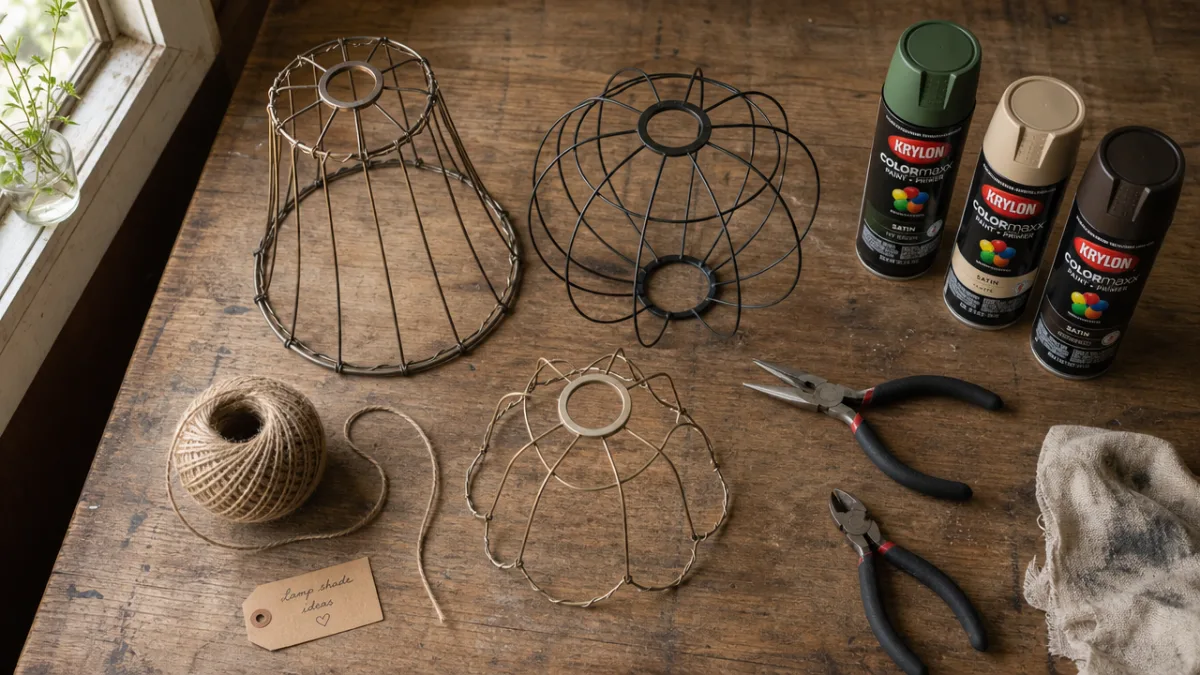
Before you dive in, it’s worth taking a bit of time to track down the right frames and get your supplies together. Once you start looking, wire lampshade frames turn up in a lot of places. Thrift stores and charity shops often have a box of them sitting somewhere, priced at almost nothing. Estate sales, garage sales, and online marketplaces like Facebook Marketplace or Craigslist are equally good bets. And if you’ve got an old lampshade at home that’s past its best, just strip off the covering and you’ve already got your starting point.
When you’re choosing frames, think about size and shape relative to the plants you want to display. Drum-shaped frames — the ones with parallel rings of the same diameter at top and bottom — are the easiest to work with because they sit flat and stable whether right-side up or flipped over. Conical frames that taper from a wide base to a narrower top are great when inverted, since they naturally form a cradle shape that holds round or globe-shaped pots really nicely. Grabbing a few different sizes lets you build a tiered display with some real height variation and visual rhythm.
Your tool and materials list will depend on how far you want to take the project. At a minimum you’ll need wire cutters, pliers, and something abrasive for surface prep — sandpaper or a wire brush both work. If you’re planning to paint the frames, you’ll want primer, spray paint, and somewhere well-ventilated to work. A few extras that are optional but genuinely useful: jute twine or macramé cord for wrapping the spokes, small S-hooks or zip ties if you want to add hanging elements, and felt or rubber pads for the base to protect your floors and stop things sliding around.
- Wire lampshade frames in assorted sizes (drum or conical shapes work best)
- Wire cutters and needle-nose pliers
- Sandpaper (medium and fine grit) or a wire brush
- Metal primer and spray paint in your chosen finish
- Jute twine, leather cord, or macramé rope for decorative wrapping
- Felt furniture pads or rubber feet for the base
- Small terracotta, ceramic, or plastic pots sized to fit your frames
- Optional: clear sealant spray for outdoor use
Preparing and Cleaning Your Wire Frames
Prep work isn’t glamorous, but skipping it will absolutely show in the finished result. Old wire frames tend to carry a fair bit of history — dust, oxidation, grease from years of handling, and usually some leftover fabric glue or staples from their original shade. If you paint over all of that without cleaning first, the finish will flake and the whole thing will look unfinished rather than intentional. A bit of patience here saves a lot of frustration later.
Start by stripping off any remaining fabric, paper, or plastic. Most of it peels away by hand, though stubborn sections might need a quick cut with scissors or a craft knife before they’ll come free. Once you’re down to bare metal, go around with wire cutters or pliers and remove any staples, tacks, or binding wire that held the shade in place. Then take your time running your fingers carefully around the whole frame, feeling for any sharp wire ends that are sticking out. Fold these flush with needle-nose pliers — you don’t want them catching on your skin or snagging plant roots down the line.
With the frame physically cleaned up, move on to the surface itself. Scuff the wire all over with medium-grit sandpaper or a wire brush to knock off any surface rust and give paint something to grip. After that, wipe everything down with a cloth dampened with rubbing alcohol or a mild degreaser and let it dry completely before you do anything else. If there’s rust that goes deeper than the surface, pick up a rust converter product — applied now, it stabilizes the metal and stops deterioration from continuing under your finish coat.
Designing and Assembling Your Plant Stand
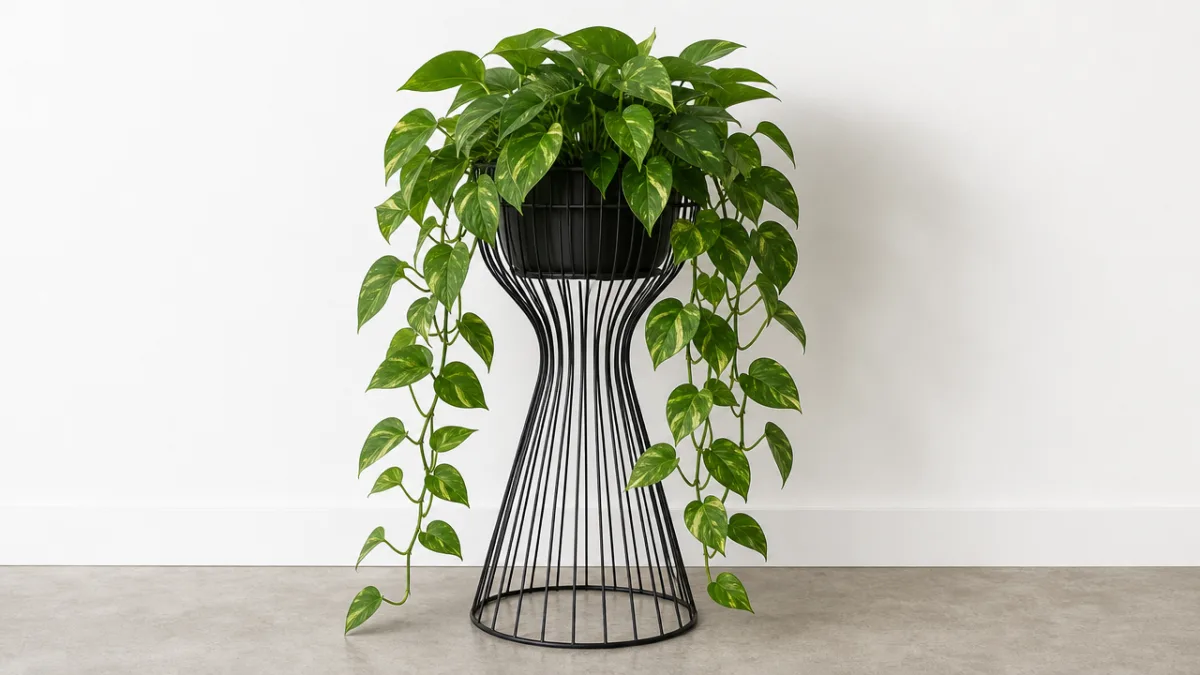
This is the fun part, and there’s a lot of room to make it your own. The simplest version: take a drum-shaped frame, flip it upside down so the lower ring becomes the base, and just set a pot on the upper ring. No structural changes needed at all. You can finish one of these in an afternoon, and the result is genuinely charming — especially once it’s painted and you’ve got something like a pothos or string of pearls trailing over the edges, playing against the geometry of the frame beneath.
If you want to go bigger, a multi-tier design connects two or three frames of different sizes vertically, bound together with wire or sturdy zip ties at the points where the rings meet. The largest frame forms the base, giving you a wide, stable footprint, with progressively smaller frames stacked up from there. Each level holds a pot, and the cascading effect you get — especially with plants of different heights and leaf textures — is really striking. Short lengths of wooden dowel or bamboo stakes threaded between the frames help keep the spacing consistent and add a nice warm contrast to all that metal.
Decorative wrapping is probably the single most effective way to take a wire frame stand from “functional object” to something that actually looks like it belongs in a carefully styled room. Wrapping the vertical spokes in jute twine, natural leather cord, or dyed macramé rope adds texture and warmth that a purely metallic finish just can’t achieve on its own. Work around each spoke methodically, keep the wrapping tight and even, and secure the ends with a dab of strong craft glue. Wrap every spoke for a cohesive, full look, or alternate to create a more open, graphic pattern that still lets the wire’s geometry come through.
- Decide on your configuration: single tier, double tier, or triple tier display.
- If combining multiple frames, test-fit them together before committing to any attachments.
- Bind frames together at contact points using sturdy wire, zip ties, or strong craft wire.
- Apply any decorative wrapping to spokes or rings before adding a finishing paint coat.
- Apply primer followed by two light coats of spray paint, allowing full drying time between coats.
- Attach felt or rubber pads to the base ring to protect flooring and add grip.
- Test the structure with weighted pots before adding your plants.
Choosing the Right Plants for Wire Frame Stands
Plant choice matters more than people often think, and getting it right from the start saves a lot of fussing around later. The most basic thing to check is whether your pot actually fits the frame — it needs to be wide enough to rest on the ring without falling through, but not so wide that it looks like it’s drowning the frame underneath it. An oversized pot creates a top-heavy, unbalanced look that works against everything the stand is trying to do visually.
Trailing and cascading plants are some of the most rewarding choices for elevated wire stands because the height really lets them do their thing. Golden pothos, heartleaf philodendron, string of pearls, burro’s tail sedum, ivy — all of these look spectacular when they’re spilling over the edges of a pot held up by a wire frame. Because the structure is open on all sides, the stems can cascade freely in every direction, and the silhouette you end up with has an almost sculptural quality to it.
For tiered displays, it’s worth thinking through the light and water needs of whatever you’re placing on each level, since the plants on top will cast some shade on the ones below. A taller, light-hungry plant like a snake plant or small fiddle-leaf fig on the upper tier pairs well with a shade-tolerant trailer like pothos or a ZZ plant lower down — you get a practical arrangement that actually keeps everyone happy. Succulents and cacti are also excellent candidates for wire stands, especially in terracotta pots, since the open frame provides exactly the kind of airflow and drainage these plants thrive on.
Displaying Your Upcycled Plant Stands Indoors and Outdoors
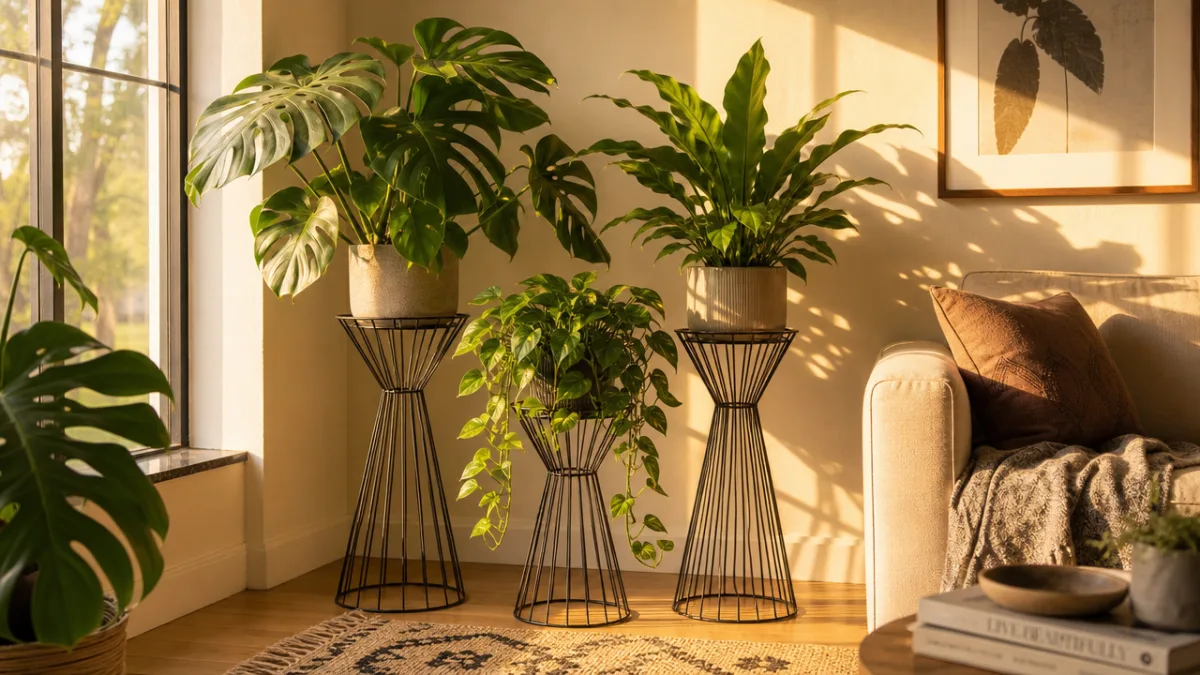
One of the nicest things about these stands is how well they adapt to different spaces. Indoors, a single stand in a bright corner can completely transform what was previously just a dead zone of the room — suddenly there’s something living and interesting there, drawing your eye. Group three stands of varying heights together and you get something that feels more like a curated display than a random collection of houseplants. That kind of intentional clustering has a much more polished, designed feeling than plants scattered around a room with no relationship to each other.
For outdoors, a few extra steps will help your stands hold up through the seasons. If you get significant rain or humidity where you live, make sure the frames are properly primed and finished with a weather-resistant topcoat — spray-on clear sealants for metal are easy to find and won’t change how your paint looks. On a windy balcony or patio, adding a small amount of decorative gravel or pebbles to the pot helps weigh things down and reduces tipping risk, while also improving drainage and giving the surface of the soil a tidy, finished appearance.
Don’t underestimate the styling around the stands themselves either. A woven rattan tray underneath catches drips and adds another layer of natural texture. A stack of art books or a ceramic piece placed nearby turns the whole thing into a composed little still-life. And lighting is worth thinking about — a warm-toned lamp or a strand of fairy lights near your plant stand display at night creates a genuinely cozy atmosphere that makes the whole arrangement feel considered and inviting well after the sun goes down.
- Group stands in odd numbers (three or five) for a more visually dynamic arrangement.
- Vary heights deliberately to create a sense of movement and layering.
- Use a consistent color palette for your pots and frames to unify a mixed display.
- Place stands near natural light sources but be mindful of intense afternoon sun on delicate plants.
- Rotate your plants a quarter turn each week to ensure even growth on all sides.
- Outdoors, bring any uncoated or lightly sealed frames inside during periods of heavy frost or prolonged rain.
The best thing about this project, honestly, is that it doesn’t really have an ending. As your plants grow, as you stumble across new frames at thrift stores and salvage yards, as your taste shifts and evolves, your collection shifts with it. That’s what makes upcycling feel like more than just a craft project — it becomes a way of looking at the world, of noticing what’s been overlooked, and of slowly making your space more personal and more alive, one small transformation at a time.








What do you think?
It is nice to know your opinion. Leave a comment.