










Build a Garden Tool Shed Yourself: Complete Plans and Guide for DIY Woodworking Success
Why Every Gardener Needs a Dedicated Tool Shed
If you’ve spent any amount of time tending a garden, you already know the frustration of hunting for misplaced trowels, tripping over rakes left leaning against the fence, or discovering that your favorite pruning shears have rusted because they were left exposed to the elements. A dedicated garden tool shed is not merely a luxury for the serious horticulturist — it is a practical investment that protects your tools, extends their lifespan, and brings genuine order to what can otherwise become a chaotic outdoor workspace. Building one yourself makes this investment even more rewarding.
The satisfaction of constructing a structure with your own hands is something that store-bought solutions simply cannot replicate. When you build a garden shed from scratch, you gain complete control over every dimension, material, and design choice. You can tailor the width of the door to accommodate your wheelbarrow, add a potting bench at exactly the right height for your back, or incorporate windows that let in the precise amount of light your seedlings need. This level of customization is the hallmark of a truly successful DIY woodworking project.
Beyond the practical benefits, a well-designed and carefully built garden shed adds tangible value to your property. Real estate experts consistently note that thoughtful outdoor structures enhance curb appeal and can meaningfully increase a home’s resale value. Whether you envision a rustic cedar retreat nestled among climbing roses or a clean, modern structure painted to match your house, the design possibilities are virtually limitless when you take on the project yourself. This guide will walk you through everything you need to bring your vision to life.
Planning Your Shed: Dimensions, Permits, and Site Selection
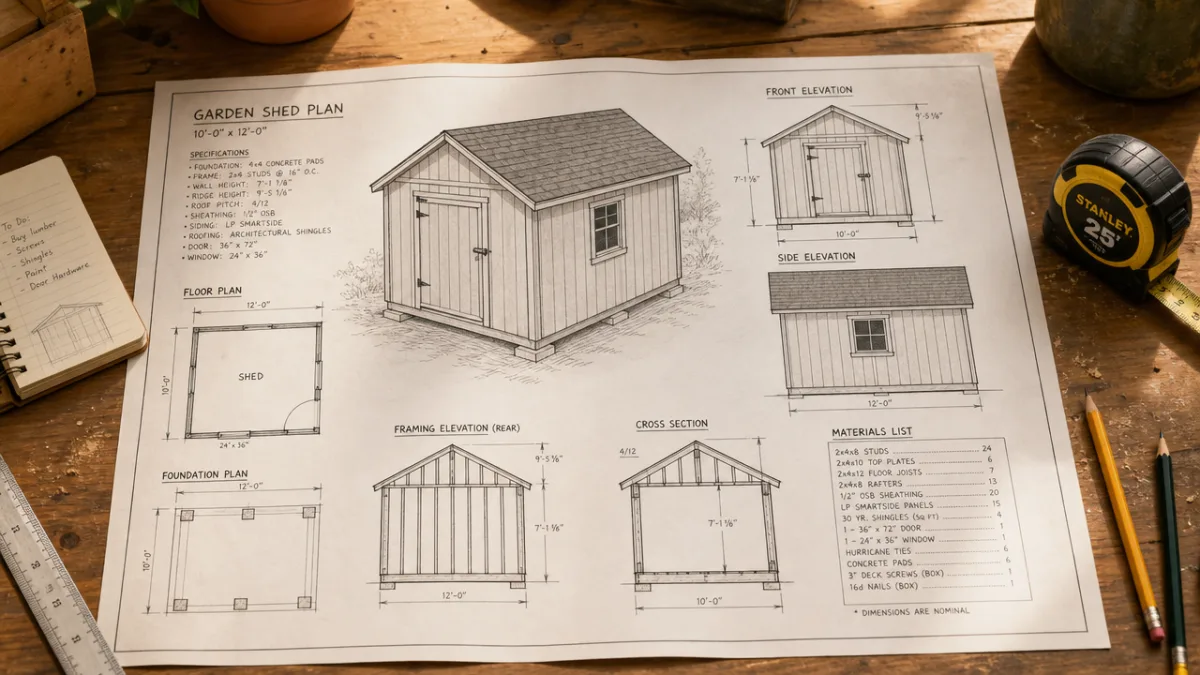
Before you purchase a single board or drive a single nail, careful planning is the most important work you will do on this entire project. Start by assessing exactly what you need to store. Lay out all your garden tools on the lawn and take a realistic inventory. Long-handled tools like spades, forks, and rakes require vertical storage space of at least six feet. Larger equipment such as lawn mowers, wheelbarrows, and garden carts demand generous floor space. Most gardeners find that a shed measuring 8 by 10 feet or 8 by 12 feet strikes an excellent balance between generous storage and a manageable building footprint.
Zoning regulations and building permits are a reality that many enthusiastic DIYers overlook until they are well into construction, which can result in costly fines or even mandatory demolition. Contact your local planning authority before breaking ground. In most jurisdictions, sheds under a certain square footage — often 100 to 120 square feet — do not require a formal building permit, but the rules vary considerably by municipality, county, and state. Homeowners in communities governed by a homeowners association also need to review their CC&Rs carefully, as restrictions on outbuilding size, color, and placement are extremely common.
Site selection is equally critical and deserves thoughtful consideration rather than simply choosing the most convenient empty corner of your yard. Ideally, your shed should sit on level ground, away from large tree roots that could heave a concrete foundation over time, and in a location that offers good drainage so water does not pool around the base. Consider the path you will walk carrying tools — proximity to the garden itself reduces unnecessary hauling. Also think about sun exposure: a south-facing window can warm a potting area beautifully in early spring, while excessive western exposure can make an unventilated shed uncomfortably hot in summer.
Choosing the Right Materials for Your Garden Tool Shed
The material choices you make at the outset will determine not only how your shed looks but how long it lasts and how much maintenance it demands over the coming decades. Pressure-treated lumber is the gold standard for any framing members that will be in contact with the ground or the concrete foundation, as it resists rot and insect damage that would quickly compromise untreated wood. For wall framing, standard construction-grade 2×4 dimensional lumber is perfectly adequate and easy to source at any home improvement center. Studs spaced 16 inches on center provide a strong, rigid wall structure that can support shelving and hanging tool organizers.
For exterior sheathing and siding, you have several excellent options depending on your aesthetic preferences and budget. Engineered wood siding such as LP SmartSide offers outstanding durability and a clean, finished appearance that takes paint beautifully. Traditional cedar or redwood is naturally rot-resistant and weathers to an attractive silver-gray if left unfinished, making it a popular choice for gardens with a naturalistic or cottage aesthetic. T1-11 plywood siding is an economical option that installs quickly and, when properly primed and painted, provides very respectable weather protection. Whichever you choose, commit to proper sealing and painting before installation to maximize longevity.
Roofing materials deserve just as much attention as the walls and floor. Asphalt shingles are the most common choice for residential sheds because they are affordable, widely available, and easy for an intermediate DIYer to install without specialized tools. They come in a wide range of colors and styles, making it simple to match your house roof. Metal roofing panels are increasingly popular for shed projects because they shed water and snow efficiently, last for decades with minimal maintenance, and add a contemporary look that many homeowners find appealing. For a smaller shed, even rolled roofing (also called mineral-surface cap sheet) can provide reliable waterproofing at a very low cost.
Step-by-Step Foundation and Framing Guide
A solid foundation is the literal and figurative cornerstone of a well-built shed, and skipping or skimping on this step is the single most common mistake first-time shed builders make. For an 8×10 or 8×12 shed, a gravel pad foundation combined with a pressure-treated skid frame is a popular, code-compliant, and relatively simple approach. Begin by excavating the site to a depth of about four inches, lay landscape fabric to suppress weeds, then fill with compacted pea gravel or crushed stone. The flat, well-drained surface this creates provides an excellent base that allows minor seasonal movement without cracking like a poured concrete slab might.
With your foundation prepared, you can begin building the floor frame from pressure-treated 2×6 or 2×8 lumber. Construct a rectangular perimeter frame, then add interior joists spaced 16 inches on center for a floor that feels solid and doesn’t flex underfoot when you roll a loaded wheelbarrow across it. Once the floor frame is assembled and squared — checking squareness by measuring diagonals, which should be equal — cover it with three-quarter-inch tongue-and-groove plywood, fastening it with construction adhesive and screws or ring-shank nails for maximum rigidity. This floor platform then becomes your work surface as you raise the walls.
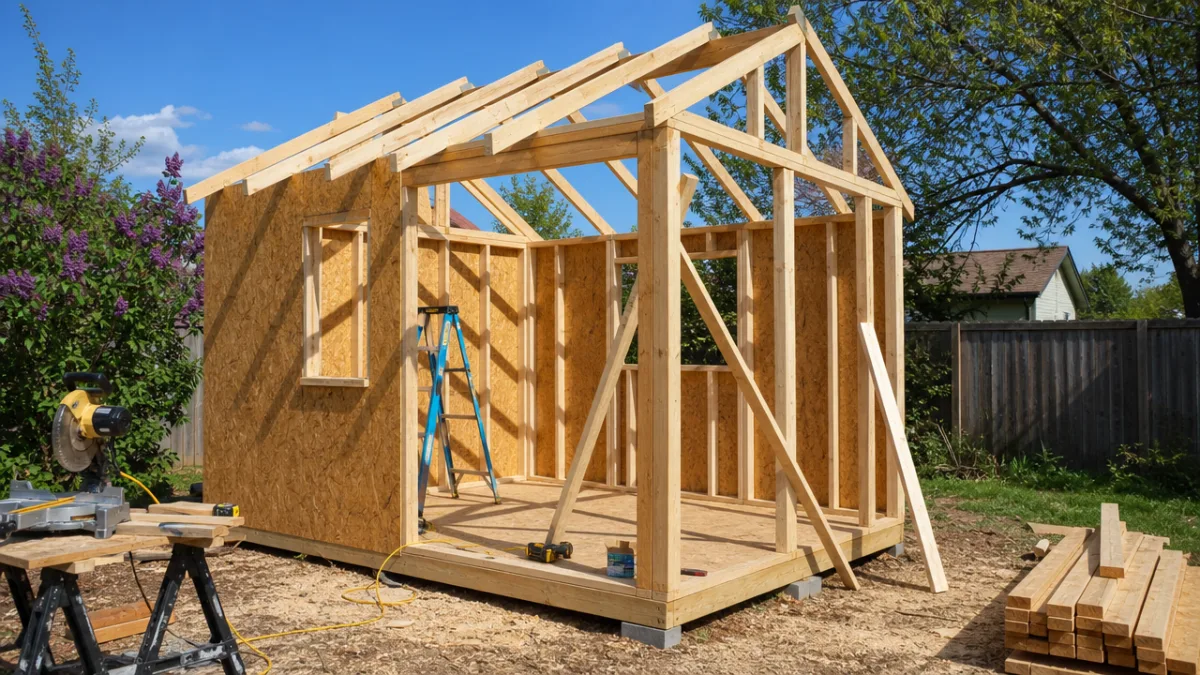
Wall framing proceeds in a logical sequence that becomes intuitive once you understand the anatomy of a stud wall. Each wall section consists of a bottom plate, a double top plate, and vertical studs at regular intervals, with additional framing — called headers and jack studs — surrounding any window or door openings to carry the load around them. Frame each wall flat on the floor platform, then tilt it up into position and brace it temporarily while you fasten it to the floor frame and neighboring walls. The rear wall and two side walls go up first; the front wall, which includes the door opening, comes last. Once all four walls are standing and connected at the corners, the structure has remarkable rigidity.
- Essential framing tools to have on hand: circular saw, framing square, speed square, chalk line, hammer or framing nailer, tape measure, and a level at least 48 inches long.
- Lumber quantities for an 8×10 shed: approximately 40 to 50 studs, 6 sheets of three-quarter-inch plywood for the floor, and 10 to 12 sheets of half-inch plywood or OSB for wall sheathing.
- Important safety reminders: always wear eye and ear protection when cutting lumber, use work gloves when handling rough framing lumber, and never work alone when tilting wall frames into position.
Roofing, Siding, and Weatherproofing Your Shed
Once your walls are standing and your top plates are doubled and fastened, attention turns to the roof, which is where many first-time builders feel the most apprehension. A simple gable roof — the classic triangular peaked shape — is both structurally sound and relatively straightforward to build, making it the ideal choice for a first shed project. Begin by cutting your common rafters to the correct angle using the roof pitch you selected in your plans. A 4-in-12 pitch (four inches of rise for every 12 inches of horizontal run) is a beginner-friendly slope that sheds water effectively while keeping the overall structure height reasonable and the rafter cuts manageable.
After setting and fastening your rafters along both sides of the ridge board, sheath the roof with half-inch plywood or OSB panels, working from the eaves upward toward the ridge. Apply 30-pound roofing felt or synthetic underlayment over the entire sheathed surface before any shingles go down — this critical layer serves as your last line of defense against water infiltration if a shingle ever blows off or a nail pops. Install drip edge metal along the eaves and rakes before and after the felt respectively, and then begin laying your shingles from the bottom up, staggering the vertical joints in each successive course as you work your way to the ridge cap.
With the roof complete and your shed no longer vulnerable to rain, you can turn to installing siding, windows, and the door. Work methodically around the exterior, nailing or screwing your siding panels according to the manufacturer’s instructions and ensuring proper overlap at all horizontal seams to prevent water wicking. Caulk every joint, corner, and penetration with a high-quality exterior paintable caulk, as gaps here are where wind-driven rain will inevitably find its way inside. Prime and paint all exterior wood surfaces with at least two coats of exterior paint, paying particular attention to end grain, which absorbs moisture most readily and is the most common starting point for rot in any wood structure.
Interior Organization: Maximizing Storage and Functionality
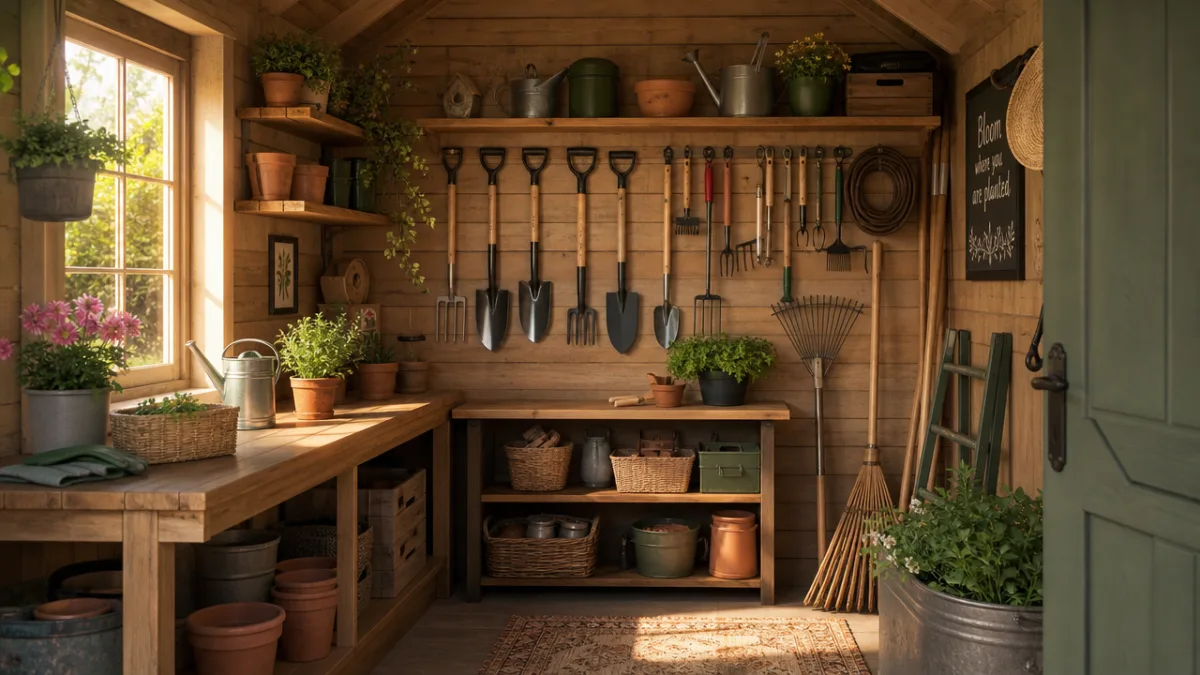
The exterior of your shed may be what neighbors and guests notice first, but the interior organization is what determines whether your new structure actually delivers the daily convenience you built it to provide. Before you move a single tool inside, take time to plan the interior layout on paper. Think in three dimensions: the floor, the wall space between knee height and the ceiling, and the overhead space that is often left entirely unused. A well-organized shed uses all three zones purposefully, giving every tool a specific home that makes both retrieval and return intuitive and quick.
A French cleat wall system is one of the most versatile and beloved storage solutions among serious woodworkers and gardeners alike, and it is remarkably simple to build. Rip a sheet of three-quarter-inch plywood into strips at a 45-degree angle, then mount the strips horizontally across an entire wall with the angled edge facing up and outward. Any bracket, shelf, bin, or hook built with a matching 45-degree notch will lock onto the cleat system and can be repositioned anywhere along the wall in seconds without any tools. This infinite adjustability means your storage system can evolve as your tool collection grows and changes over the years.
Beyond the cleat wall, consider incorporating a few specific features that will transform your shed from a simple storage box into a genuine outdoor workspace. A fold-down potting bench mounted to the wall saves valuable floor space when not in use but provides a generous work surface for repotting seedlings, filling planters, or organizing seeds at the start of each growing season. A pegboard panel beside the door puts frequently used hand tools at eye level and instantly visible. Overhead loft shelving above the door, spanning the full width of the shed, is perfect for seasonal items like holiday lighting or camping gear that you access only a few times per year.
- Install a French cleat wall system for maximum flexibility in hanging tools and accessories.
- Add a fold-down potting bench to create a functional workspace without sacrificing floor space.
- Mount pegboard panels near the entrance for frequently used hand tools and garden gloves.
- Build overhead loft shelving along one or both end walls for seasonal and infrequently needed items.
- Include at least one electrical outlet for charging battery-powered tools and a single overhead light for visibility on dark mornings and evenings.
- Install hooks, rails, and brackets specifically designed for long-handled tools to keep rakes, shovels, and hoes neatly vertical and off the floor.
Finishing Touches, Maintenance, and Long-Term Care
The difference between a shed that looks like a serious outdoor structure and one that looks like an afterthought often comes down entirely to the finishing details. Trim boards applied at all corners, around windows, and framing the door opening give your shed a polished, intentional appearance that dramatically improves its visual integration with your home and garden. Choose trim that is at least one inch thick for visual weight, and paint or stain it in a contrasting or complementary color to your main siding for a traditional, well-crafted look. Decorative hardware — strap hinges, a period-appropriate door handle, and a hasp for a padlock — adds character while also serving genuine functional purposes.
Gutters and downspouts are a finishing detail that many shed builders omit, and it is a decision they often come to regret. Without gutters, rainwater cascades directly off the roof edges and onto the foundation perimeter, gradually eroding the gravel pad and potentially undermining the structure over time. A simple aluminum gutter system with a single downspout that directs water away from the building is not expensive, not difficult to install, and represents excellent long-term protection for the foundation work you invested significant effort in creating. Connect the downspout to a rain barrel to collect water for irrigation, and the gutter system pays for itself many times over through water savings alone.
An annual maintenance routine is the key to ensuring that your hand-built shed remains a source of pride rather than a source of regret for decades to come. Each spring, walk the entire exterior perimeter and inspect carefully for any signs of paint peeling, wood softening, caulk cracking, or roofing material lifting. Touch up paint on any bare areas immediately before moisture can penetrate. Check that all door and window hardware is functioning properly and lubricate hinges, hasp, and latch mechanisms with a dry spray lubricant. Inspect the floor inside for any signs of moisture intrusion, which typically presents as staining, soft spots, or a musty odor, and address the source before any rot can establish itself.
Building a garden tool shed yourself is an undertaking that rewards patience, careful planning, and a willingness to learn as you go. Every cut made, every nail driven, and every problem solved along the way builds skills that will serve you on future projects and deepens your connection to the structure itself. Years from now, when you pull open that shed door on the first warm morning of spring and reach for your favorite spade, knowing that you built this space with your own hands will make the whole gardening season feel just a little more satisfying. The plans you choose today are simply the beginning of something that, if built and cared for properly, can stand and serve your family for a generation.








What do you think?
It is nice to know your opinion. Leave a comment.