










98+ Creative & Cheap Garden Edging Ideas and Designs (2026)
Why Garden Edging Transforms Your Outdoor Space
Garden edging is one of those deceptively simple landscaping techniques that can completely redefine the look and feel of your outdoor space without requiring a massive budget or professional help. When you add a clean, deliberate border between your lawn, flower beds, pathways, and other garden zones, you instantly create a sense of order and intentionality that elevates the entire yard. Even a modest garden with basic plantings looks dramatically more polished once proper edging is in place, and that visual payoff is hard to achieve through any other single improvement.
Beyond aesthetics, garden edging serves several practical purposes that make it a genuinely functional investment. It keeps grass from creeping into flower beds, reducing the time you spend on hands-and-knees weeding along borders. It prevents mulch from washing out onto paths during rain. It creates physical barriers that protect root systems and define growing zones for different plant varieties. For gardeners who have struggled with beds that seem to blur and merge into the lawn over time, a solid edging solution is often the missing piece that finally brings long-term structure to the space.
The beauty of modern garden edging is the sheer variety of options available, spanning nearly every budget, style preference, and skill level. You can spend an afternoon pressing bricks into the soil along a curved bed, or you can invest a weekend building a decorative stone border that becomes a permanent landscape feature. Whether your garden leans cottage-style, modern minimalist, rustic farmhouse, or formal English, there is an edging approach that will complement and enhance your vision. This guide explores more than 98 creative and affordable ideas to inspire your next project.
Natural and Organic Edging Materials
Natural materials are among the most beloved choices for garden edging precisely because they age gracefully and tend to harmonize with plant life rather than compete with it. Logs, branches, stones, and living plants have been used as borders for centuries, and their timeless appeal continues to make them relevant in contemporary garden design. Working with natural materials also tends to be more forgiving in terms of precision, since their inherent irregularity actually contributes to a relaxed, organic aesthetic that many gardeners actively seek.
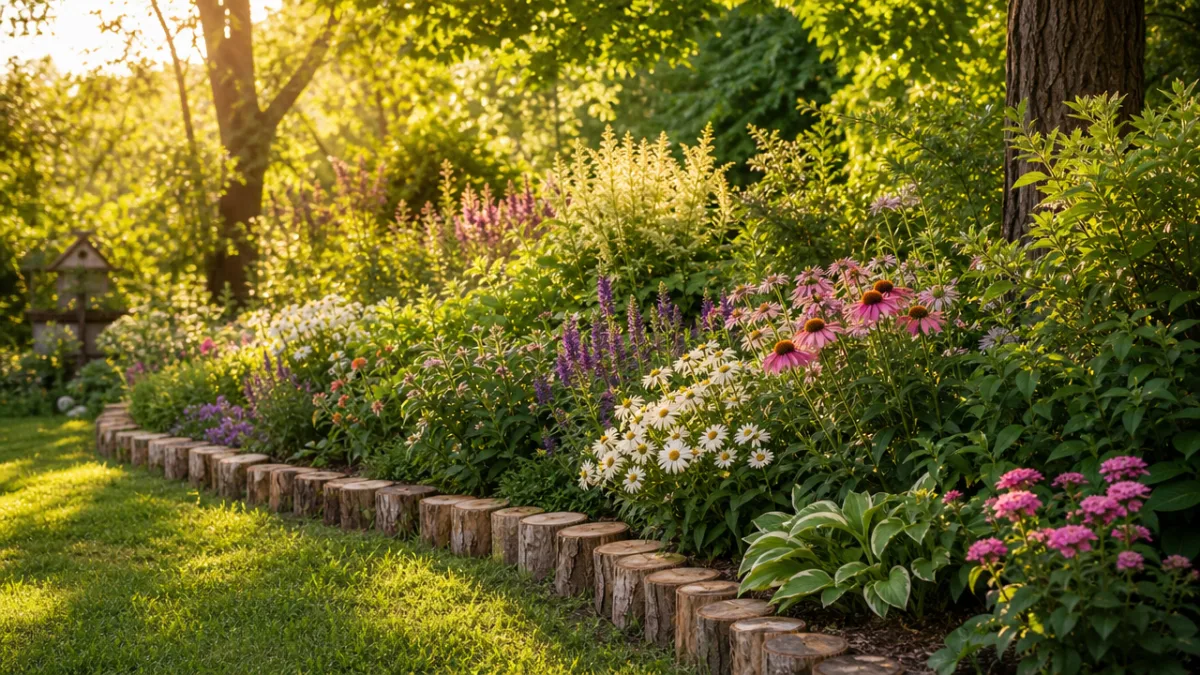
Fallen branches and logs can be arranged end-to-end along a bed border to create a charming, woodland-inspired edge that costs absolutely nothing if you have access to wooded areas or downed timber. Split log rounds, set upright in the soil with their flat faces outward, create a scalloped pattern with beautiful wood grain texture. Over time these materials weather, develop moss, and become increasingly integrated into the garden’s ecosystem. For a more refined version of this approach, you can use uniform sections of bamboo staked upright along a path, creating a tidy, contemporary natural border that is also exceptionally budget-friendly.
Living edging is another natural option that doubles as a design feature in its own right. Low-growing herbs like thyme, chamomile, and lavender can be planted densely along a bed border to create a fragrant, soft boundary that blooms seasonally. Ornamental grasses clumped at intervals provide dramatic sculptural markers along a path. Even clipped boxwood or dwarf mondo grass can serve as a living edge that grows more lush and defined with every passing season. The key with living edging is patience and consistent trimming, but the reward is a border that is alive, dynamic, and deeply integrated with the rest of your garden design.
Budget-Friendly DIY Edging Ideas
One of the most encouraging truths about garden edging is that some of the most striking results come from the most affordable materials. Repurposed and recycled items can be transformed into genuinely lovely borders with minimal effort and creativity. Old wine bottles buried neck-down in a row create a surprisingly elegant, jewel-toned edge that catches light beautifully. Reclaimed bricks sourced from demolition sites, architectural salvage yards, or even curbside finds can be laid in herringbone patterns, stacked at angles, or set flat for a variety of effects at little to no cost.
Concrete edging is another wonderfully cheap option that offers substantial durability. You can purchase inexpensive concrete edging molds and cast your own decorative borders using bagged concrete mix from any home improvement store. Shapes range from simple curved strips to elaborate Victorian rope designs, and you can tint the concrete with pigment powder to complement your garden’s color palette. Once set, concrete edging lasts for decades with virtually no maintenance, making the low upfront investment even more impressive in terms of long-term value.
Metal landscape edging has become increasingly popular as a DIY option because it is flexible, long-lasting, and available at very reasonable prices through online retailers and garden centers. Steel and aluminum edging strips can be bent into smooth curves or sharp geometric lines depending on the design you are aiming for, and they create a clean, modern boundary that professional landscapers have used for years. Corten steel edging develops a beautiful rust patina over time that many gardeners find enormously appealing, particularly in naturalistic or prairie-style plantings. For truly zero-cost edging, even stacked pinecones, arranged river rocks, or rows of terracotta pots can serve as charming temporary borders.
Here are some of the most popular budget edging materials and their approximate costs:
- Reclaimed bricks: free to $1 each from salvage yards or curbside finds
- Concrete edging (DIY cast): approximately $5 to $15 per linear foot for materials
- Flexible steel landscape edging: $10 to $30 per 20-foot roll
- Plastic landscape edging: $5 to $15 per 20-foot roll
- Bamboo stakes: $10 to $25 for a bundle of 50 stakes
- Wine bottle edging: free if you save your own bottles over time
- Corten steel edging: $20 to $50 per linear foot depending on height
Decorative and Stylish Edging Designs
For gardeners who want their edging to make a genuine design statement rather than simply define a boundary, decorative options open up a world of creative possibility. Ornate wrought iron edging panels, often sold as fencing sections, can be set along a bed to lend a formal, Victorian-era elegance to even a modest front yard garden. These panels come in an extraordinary range of styles, from simple picket tops to elaborate scrollwork and floral motifs, and their durability means they can serve as a long-term design investment that weathers seasons beautifully.
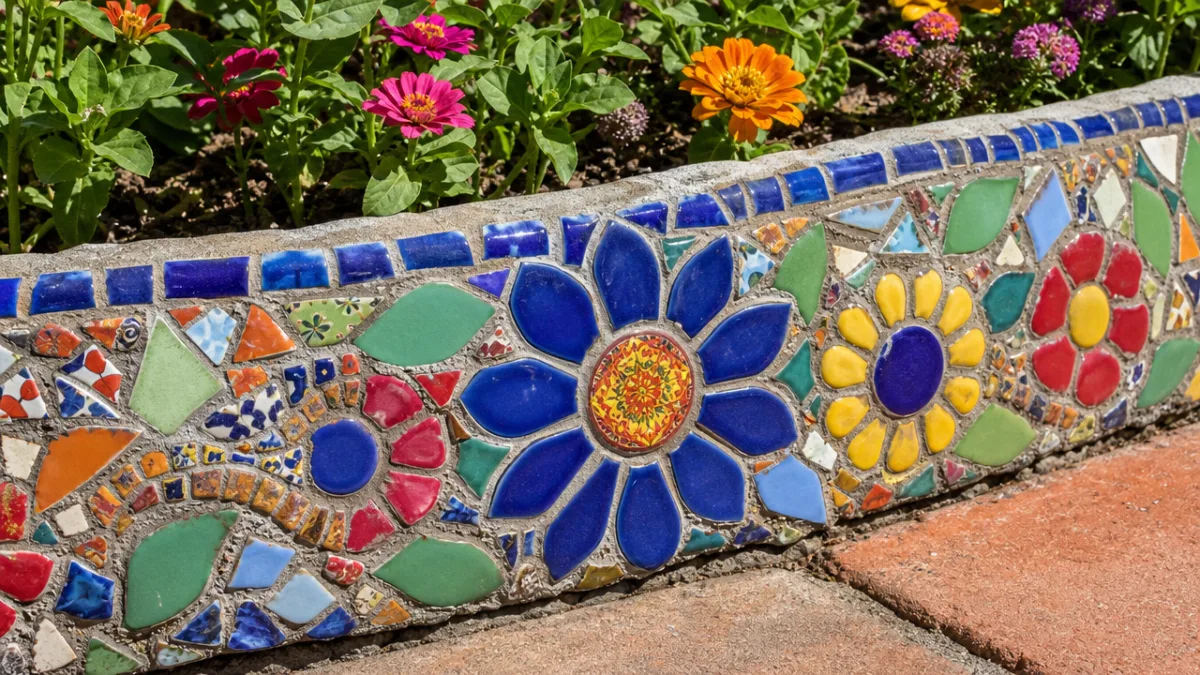
Mosaic and tile edging is a wonderful way to introduce color, pattern, and artisan craftsmanship to garden borders. Broken ceramic tiles, arranged in colorful patterns along the edges of raised beds or pathway borders, create a Gaudi-esque exuberance that brings personality and joy to the garden space. This is also an ideal way to repurpose chipped or broken dishware, turning what would otherwise be waste into genuine art. Cement board or mortar can be used to set tiles permanently, or they can simply be pressed into soft soil for a more temporary installation that can be rearranged seasonally.
Poured concrete edging with embedded stones, sea glass, or decorative aggregates offers another level of customization that elevates an ordinary border into something genuinely sculptural. Formwork is set along the edge of a bed, a wet concrete mix is poured and leveled, and then decorative elements are pressed into the surface before it cures. The result is a permanent, one-of-a-kind edging that can incorporate colors and textures specifically chosen to complement your home’s exterior or your garden’s planting palette. This technique requires slightly more skill and preparation than simpler methods but remains very accessible to dedicated DIY gardeners.
Some of the most visually striking decorative edging styles to consider include:
- Victorian rope-pattern concrete edging, which mimics the look of twisted cord along a border
- Stacked slate or flagstone edging set on edge for a vertical, layered effect
- Corrugated metal sheeting used as a contemporary raised bed edge with industrial appeal
- Reclaimed terracotta roof tiles set at angles to create a traditional scalloped Mediterranean border
- Gabion wire cages filled with colorful stones to create chunky, textural border walls
- Painted timber edging with stenciled patterns or carved designs for a folk art quality
Edging Solutions for Specific Garden Styles
Different garden aesthetics call for different edging approaches, and matching your border material and style to your overall garden theme is one of the most important decisions you will make during the design process. A cottage garden overflowing with roses, foxgloves, and hollyhocks looks most at home with soft, irregular edging made from weathered timber, wicker hurdles, or low woven willow borders that reinforce the romantic informality of the planting. Trying to impose a sharp steel edge on a cottage garden would create a jarring contradiction between the wildness of the plants and the precision of the boundary.
Formal and contemporary gardens, by contrast, benefit enormously from clean, geometric edging in materials like polished granite, smooth concrete, or crisp black steel. These gardens rely on strong lines, symmetry, and a restrained plant palette, and the edging must reinforce those qualities rather than soften them. Low box hedging clipped to precise heights and angles is the classic choice for formal gardens, creating living walls that define parterre beds and topiary displays with absolute clarity. For a more modern take, laser-cut corten steel panels with geometric patterns can serve as edging that is simultaneously boundary, artwork, and structural element.
Japanese and Zen-inspired gardens have their own edging traditions that center on stone, gravel, and bamboo. Large, flat stones placed carefully along the edge of a moss or gravel area create the contemplative, deliberate quality central to this aesthetic. Bamboo poles lashed together with black twine to form low fences are another authentically Japanese approach to garden edging that looks both humble and refined. The underlying principle in these gardens is that the edging should feel intentional and quiet, suggesting careful human thought without overwhelming the natural beauty of the materials themselves.
For vegetable and kitchen gardens, practical considerations dominate the edging choice, though beauty need not be sacrificed. Raised bed edging made from untreated cedar or redwood is both attractive and food-safe, and its warm timber tones complement the lush greens of vegetable foliage magnificently. Stone edging around herb beds is another excellent option, as the thermal mass of stone absorbs heat during the day and releases it slowly at night, creating a marginally warmer microclimate that many herbs appreciate. Galvanized metal raised bed edging has become extremely popular in recent years, offering a clean agricultural aesthetic combined with impressive longevity and resistance to rot.
Installation Tips and Maintenance for Long-Lasting Edging
Even the most beautiful edging material will fail to deliver its full potential if it is installed carelessly or without proper preparation. The first step in any edging project is defining the line you want to create, which can be done by laying a garden hose along the intended border and adjusting it until the curve or angle looks right when viewed from above and from the key vantage points around your garden. Once you are happy with the line, you can mark it with a string, spray paint, or edging spade cuts before beginning installation. This preparation step takes only a few minutes but saves enormous amounts of frustration and rework later in the process.
Depth of installation is one of the most commonly overlooked aspects of edging, and getting it right makes a significant difference in how well the edging performs over time. Most landscape edging should be buried at least two to three inches below the soil surface to provide enough resistance against the pressure of growing grass roots and soil movement. For materials like bricks or stones, setting them partly below grade also improves their stability and reduces the likelihood of them tipping or shifting after heavy rainfall. Metal edging should always be installed with a slight inward lean toward the bed, which counteracts the tendency of the material to lean outward under soil pressure over time.
Maintenance requirements vary considerably depending on the material you choose, and factoring in ongoing care time is wise before committing to a particular edging style. Natural wood edging, while beautiful, will need to be replaced or treated every few years as it weathers and decomposes. Metal edging may develop rust at connection points and require light sanding and sealing periodically. Living edging requires the most consistent attention, with regular clipping, fertilizing, and gap-filling as plants age and occasionally die back. Stone and concrete edging are the lowest maintenance options overall, though they may shift slightly over time as ground freezes and thaws through seasonal cycles, requiring occasional resetting of displaced sections.
Follow these steps for a successful garden edging installation:
- Mark your border line carefully using a hose, string, or spray paint before digging anything
- Cut along the marked line with a sharp half-moon edger or spade to create a clean channel
- Remove all grass and roots from within the channel to prevent regrowth beneath the edging
- Add a layer of sand or compacted gravel to the base of the channel if working with heavy materials like stone or brick
- Install your edging material, ensuring it sits at a consistent height throughout the border
- Backfill around the edging on both sides with soil, tamping firmly to eliminate air gaps
- Apply a top dressing of mulch or gravel on the bed side to further discourage weed growth along the edge
Finally, do not underestimate the impact that regular edge maintenance will have on keeping your garden looking its best year-round. Even perfect edging needs to be refreshed seasonally, with a sharp spade or dedicated edging tool used to recut the clean line that grass and soil inevitably try to blur over time. This task takes only twenty to thirty minutes for an average garden and the visual payoff is immediate and dramatic, instantly restoring the crisp definition that makes a well-edged garden look so professionally maintained. Think of it as one of the highest return-on-time investments in your entire gardening routine, delivering outsized aesthetic rewards for a modest commitment of effort.








What do you think?
It is nice to know your opinion. Leave a comment.