










How To Make A Garden Arch With PVC Pipe: A Complete Step-by-Step Guide
Introduction to PVC Garden Arches
A garden arch might just be one of the best things you can add to your outdoor space. Whether you want to frame a pathway, give your climbing roses somewhere to show off, or just create a bit of height and drama in the garden, a well-placed arch can completely change how the whole yard feels. And here’s what surprises a lot of people: you really don’t need to be handy, spend a lot of money, or own a single power tool to pull this off.
PVC pipe has become a go-to material for DIY garden arches, and honestly, it’s easy to see why. It’s cheap, light, and holds up well in all kinds of weather. Unlike wood, it won’t rot, warp, or give you splinters a few seasons in. You can also paint it pretty much any color you want, so matching it to your existing garden style is a lot easier than you’d think.
This guide covers everything from picking the right pipe and rounding up your supplies, to bending the arch and getting it properly anchored in the ground. By the time you’re done reading, you’ll have a clear picture of exactly what to do — and enough confidence to actually go do it.
Materials and Tools You Will Need
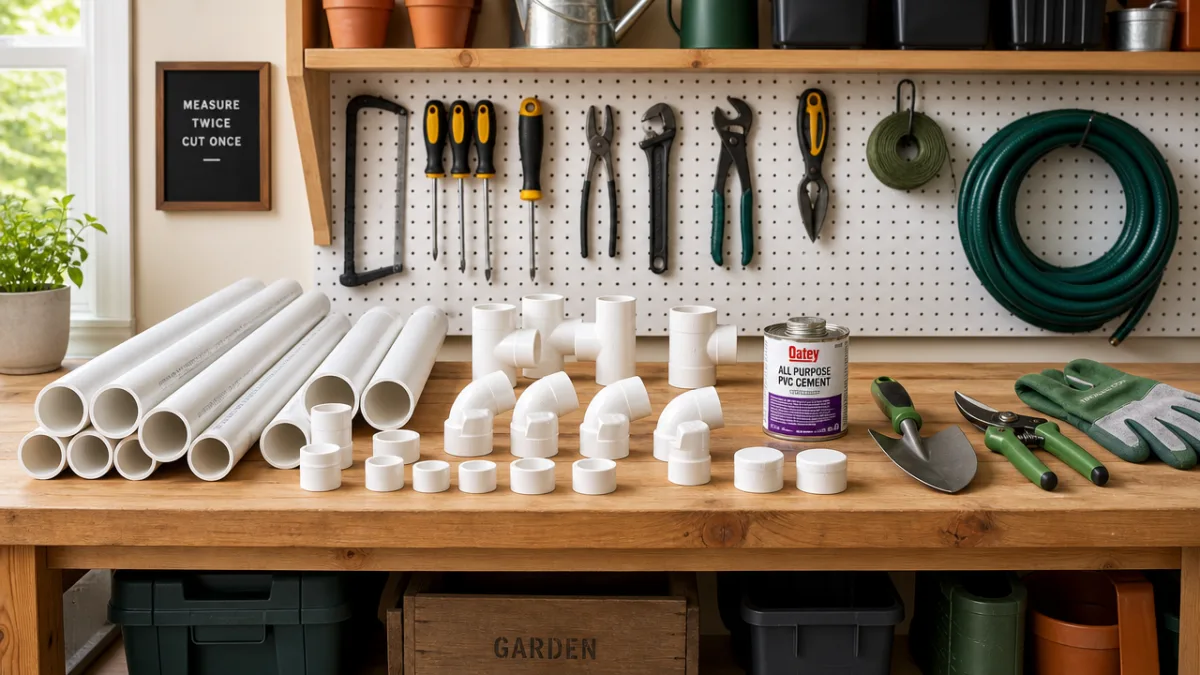
Getting everything together before you start will save you a lot of back-and-forth trips to the hardware store. For a standard arch — roughly six feet tall and three feet wide — the shopping list is pretty short and won’t cost you much. The main material is schedule 40 PVC pipe, which has the right mix of flexibility and strength for this kind of project. Three-quarter inch or one-inch diameter pipe is what most people use, and either will bend smoothly without kinking when you apply a bit of heat.
Here’s what you’ll need for a typical build. Four lengths of PVC pipe, each around eight feet long, will make up the legs and the curved top. You’ll also need four T-shaped connectors, four 90-degree elbow connectors, and PVC primer and cement to lock the joints together. Four ground stakes — metal or wood, at least eighteen inches long — will hold the whole structure in place. If you want to go a little further, decorative end caps, zip ties for training plants, and a can of exterior spray paint are worth picking up too.
- Four 8-foot lengths of 3/4-inch or 1-inch schedule 40 PVC pipe
- Four PVC T-connectors matching your chosen pipe diameter
- Four PVC elbow connectors (90-degree)
- PVC primer and solvent cement
- Metal or wooden ground stakes (at least 18 inches long)
- Measuring tape and marker
- PVC pipe cutter or hacksaw
- Heat gun or hot water source for bending (optional)
- Exterior spray paint in your preferred color
- Safety gloves and eye protection
On the tool side, a pipe cutter or fine-toothed hacksaw will handle your cuts cleanly. A measuring tape and a permanent marker are essential. If you want a gently curved arch top rather than a more angular shape, a heat gun will let you soften the pipe and coax it into shape. A rubber mallet and a level will come in handy when it’s time to drive the ground stakes in straight. Chances are you’ve already got most of this stuff in your garage.
Planning and Measuring Your Garden Arch
A few minutes of planning upfront will save you a lot of headaches once you’re mid-build. Before you cut anything, go out to the spot where the arch will live and take some real measurements. How wide is the path or bed entrance it needs to span? How tall do you want it to feel? Most garden arches land somewhere between six and eight feet tall and two and a half to four feet wide, but your garden might call for something a little different.
Sketching a quick diagram — even a rough one on a scrap of paper — is genuinely useful, and it’s something a lot of first-timers skip. Draw the front and side views, write in the pipe lengths, and you’ll have a reference to work from instead of trying to hold it all in your head. If the arch is going over a path, measure the path carefully and then add at least six inches on each side so the stakes can go into the soil beside the walkable surface rather than in it.
It’s also worth thinking about what the arch is actually going to do before you settle on your design. If you’re planning to grow something heavy like wisteria or climbing roses, go with one-inch pipe and think about adding some cross-bracing between the legs for extra stability. For lighter annual vines like morning glory or sweet peas, three-quarter inch pipe is plenty. And if you have a preference for the arch shape — a gentle curve, a flat top, or a pointed Gothic style — nail that down now, since each option involves slightly different cutting and bending steps.
Step-by-Step Construction Process
With everything measured and your materials at the ready, it’s time to actually build the thing. Start by cutting all your pipe sections to length. Whether you’re using a pipe cutter or a hacksaw, try to keep your cuts straight and clean — uneven ends can leave small gaps in your joints that weaken the structure over time. Once everything is cut, run the ends over some fine sandpaper or use a deburring tool to knock off any rough edges, which will also help your fittings seat properly.
The build itself follows a pretty logical order once you see it laid out. Start by assembling the two vertical leg sections, fitting the upright pipes into the T-connectors that will hold your horizontal bracing later. If you’re going for a curved top, this is when you’ll bend your arch pipes. Work slowly with the heat gun, applying even heat along the section you want to curve and rotating the pipe so it heats uniformly. When it starts to feel pliable, bend it over something round — a large bucket or barrel works great — and hold it there until it cools and keeps its shape.
- Cut all PVC pipe sections to your planned measurements and deburr the ends.
- Dry-fit all pieces together without glue to check alignment and dimensions.
- Bend the arch top sections using a heat gun if a curved profile is desired.
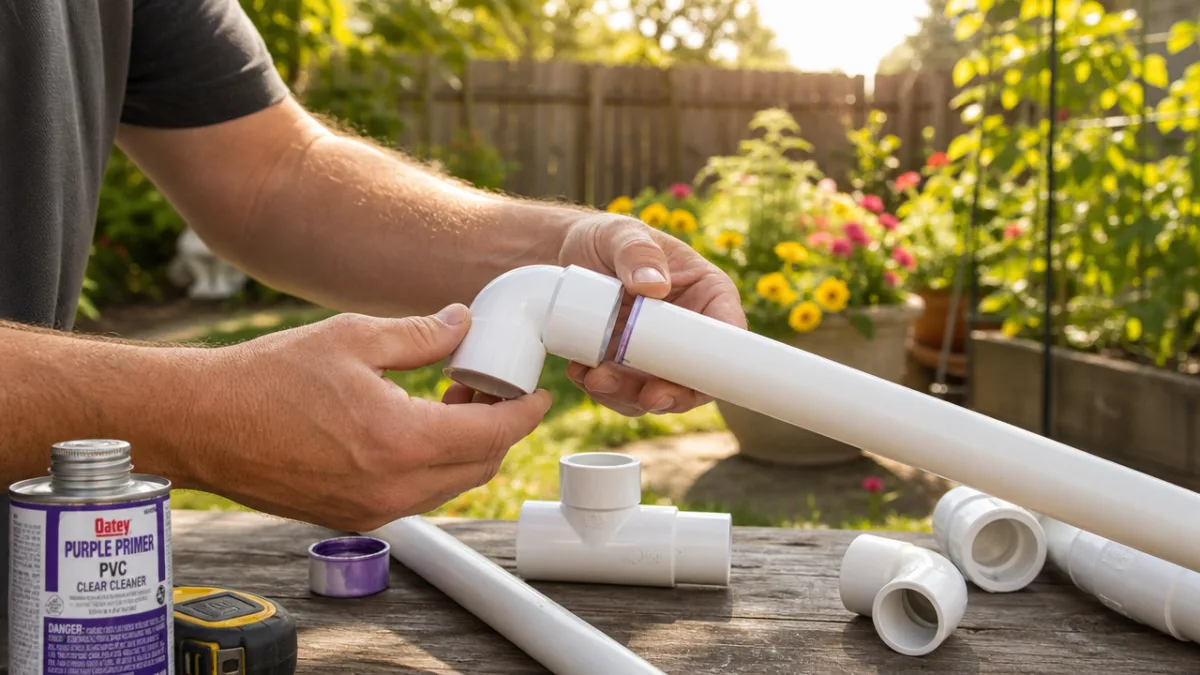
- Apply PVC primer to all pipe ends and connector sockets before gluing.
- Apply solvent cement to primed surfaces and push connectors firmly onto pipe ends, holding for 30 seconds.
- Allow all cemented joints to cure for at least one hour before handling.
- Attach decorative caps or paint the completed arch as desired.
- Drive ground stakes into the soil at marked positions and slide arch legs over them.
Once everything is glued and the joints have had an hour to cure, you’re structurally done. Now’s a great time to paint it if you want to move away from plain white PVC. Two or three light coats of exterior spray paint give a smooth, even finish that looks much more intentional. Matte black is popular for a modern feel, forest green blends right into the garden, classic white suits a cottage aesthetic, and a verdigris copper finish can look surprisingly elegant. Let everything dry fully before you take the arch outside.
Installing the Arch in Your Garden
Getting the installation right matters just as much as the build itself. A beautifully made arch that wobbles in a light breeze or leans to one side is still a disappointment. Before you drive a single stake, mark out the position of each one using a garden cane or a spot of spray paint on the soil. Double-check that both sides are parallel and that the spacing matches the width of your arch base exactly. It takes an extra few minutes, but it saves a lot of frustration once the stakes are already in the ground.
Drive each stake in with a rubber mallet or post driver, aiming for at least twelve to eighteen inches of depth. If your soil is on the loose or sandy side, go deeper or use longer stakes. Keep a spirit level handy and check the alignment of each stake as you go — it’s much easier to correct a slight lean before the stake is fully in than after. Once both pairs of stakes are set, slide the arch down over them and push the legs firmly until the base of the arch sits flat on the ground.
For areas with strong winds or particularly soft soil, it’s worth adding a small pour of ready-mix concrete around the base of each stake for a more permanent anchor. Alternatively, if you’d rather not go that far, filling the hollow PVC legs with dry sand adds noticeable weight and cuts down on the tendency of lighter arches to sway or lift in a gust. Whatever method you go with, take a step back and look at the arch from a few different angles before you call it done — it’s the easiest time to make small adjustments.
Decorating and Planting Your Garden Arch
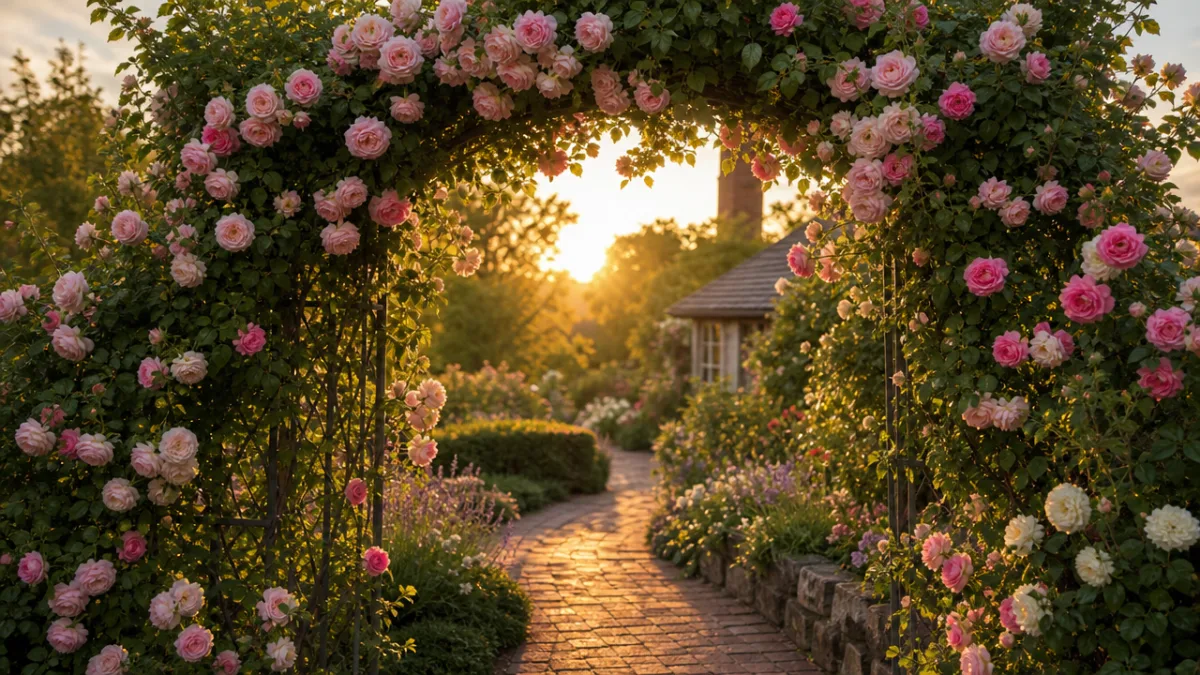
This is where the project gets really fun. With the arch securely in place, you can start turning it into the living garden feature you had in mind. Climbing plants are the obvious choice, and there are great options for every situation. Perennial climbers like roses, clematis, honeysuckle, and jasmine will come back each year and fill out more thickly as time goes on. Annual climbers like morning glory, sweet peas, nasturtium, and black-eyed Susan vine grow fast and put on a colorful show through the warmer months.
To give your plants something to grab onto, string some garden twine, jute netting, or flexible plastic mesh horizontally between the arch legs at roughly six to eight inch intervals. This gives tendrils and stems a proper grid to weave through. As new growth appears, gently guide it toward the arch and secure it loosely with soft garden ties or strips of stretchy fabric. Steer clear of wire ties directly against young stems — as the plant grows, those can cut in and cause real damage.
That said, you don’t have to rely on plants alone. Fairy lights or solar LED strings woven through the arch look wonderful in the evening and are easy to attach with small cable ties. Hanging lanterns, wind chimes, or a small birdhouse from the top adds a lot of personality. For seasonal decorating, wreaths, garlands, or bunting can be draped over the arch and swapped out throughout the year. The nice thing about PVC is that it handles all of this without complaint — it really is a flexible canvas for whatever you want to do with it.
Maintenance Tips and Long-Term Care
One of the best things about PVC is how low-maintenance it is compared to wood or metal. That said, a little attention now and then will keep your arch looking good and standing strong for years. The most important thing to check periodically is the joints, especially after rough weather. Properly cemented PVC connections are very tough, but a stray falling branch or a knock from a wheelbarrow can sometimes crack or loosen one — and catching it early makes the repair much simpler.
Over time, if the pipe is left unpainted, direct sunlight can make the surface go slightly chalky, yellowed, or grey. This is just UV degradation and it doesn’t actually weaken the pipe, but it can look a bit tired. A fresh coat of exterior spray paint every two or three years will take care of it completely and give the arch a new lease on life. If you’d rather skip the painting, a PVC UV-protectant spray from any plumbing or hardware store will slow the discoloration down considerably.
At the end of each growing season, spend a few minutes on the plants — cut back dead stems and train any new growth into a balanced shape across the arch. Check that the ground stakes are still sitting firm and that the legs haven’t shifted or tilted over the summer. If you’ve got battery-powered lights on the arch, bring them inside for winter to extend their life. That’s really all there is to it. With just these simple annual check-ins, your PVC garden arch will keep looking great and doing its job through many seasons to come.








What do you think?
It is nice to know your opinion. Leave a comment.