










DIY Luxury Fountain from Plastic Pots: A Complete Step-by-Step Guide to Building a Stunning Garden Water Feature
Introduction: Transforming Your Garden with a Homemade Water Fountain
There is something undeniably magical about the sound of flowing water in a garden. A well-placed fountain can transform even the most ordinary outdoor space into a serene retreat that feels like a luxury spa or an elegant estate garden. The gentle trickle of water creates a calming ambient soundscape that masks urban noise, attracts wildlife, and brings an unmistakable sense of sophistication to your yard, patio, or balcony. The best part? You do not need to spend thousands of dollars on a professionally installed water feature to achieve this effect.
This comprehensive guide will walk you through the entire process of building a beautiful, fully functional fountain using plastic pots — materials that are affordable, lightweight, and widely available at any garden center or home improvement store. With some creativity, a small submersible pump, and a weekend afternoon, you can create a tiered water feature that looks every bit as impressive as the expensive stone fountains sold at garden boutiques. Plastic pots, when properly treated and arranged, can mimic the appearance of terracotta, stone, or ceramic, giving your finished project a truly luxurious aesthetic.
Whether you are an experienced DIY enthusiast or a complete beginner with no prior crafting background, this project is approachable, rewarding, and endlessly customizable. You can scale it up or down depending on your available space, adjust the color scheme to complement your existing garden décor, and even add lighting elements to make your fountain glow beautifully after dark. By the time you finish reading this guide, you will have everything you need to get started and create a garden centerpiece that impresses every visitor who steps into your outdoor space.
Why Choose Plastic Pots for Your Fountain?
Plastic pots offer a number of practical advantages that make them ideal for DIY fountain construction. Unlike heavy concrete or ceramic vessels, plastic pots are lightweight and easy to move, reposition, and store during winter months. They are also highly resistant to cracking and weathering, meaning your fountain will remain structurally sound through years of seasonal temperature changes, rain, and UV exposure. For beginners especially, the forgiving nature of plastic makes it much easier to drill, cut, and modify without the risk of shattering expensive materials.
From an aesthetic standpoint, modern plastic pots come in a remarkable variety of finishes, textures, and colors that can convincingly replicate the look of natural materials. Stone-effect, terracotta-finish, and aged-concrete-style pots are all readily available, and a coat of appropriate outdoor paint can further enhance any desired effect. Many gardeners are surprised to discover that their finished plastic pot fountain is virtually indistinguishable from much more expensive alternatives when viewed from a normal garden viewing distance.
Cost is another compelling reason to choose plastic. A complete tiered fountain using plastic pots can typically be assembled for between twenty and sixty dollars, depending on the size and number of pots you choose. This represents a fraction of the cost of ready-made garden fountains, which can easily run into hundreds or even thousands of dollars for a comparable visual impact. The money you save can be reinvested into beautiful surrounding plantings, decorative stones, or lighting that elevates the overall effect of your finished water feature.
Materials and Tools You Will Need
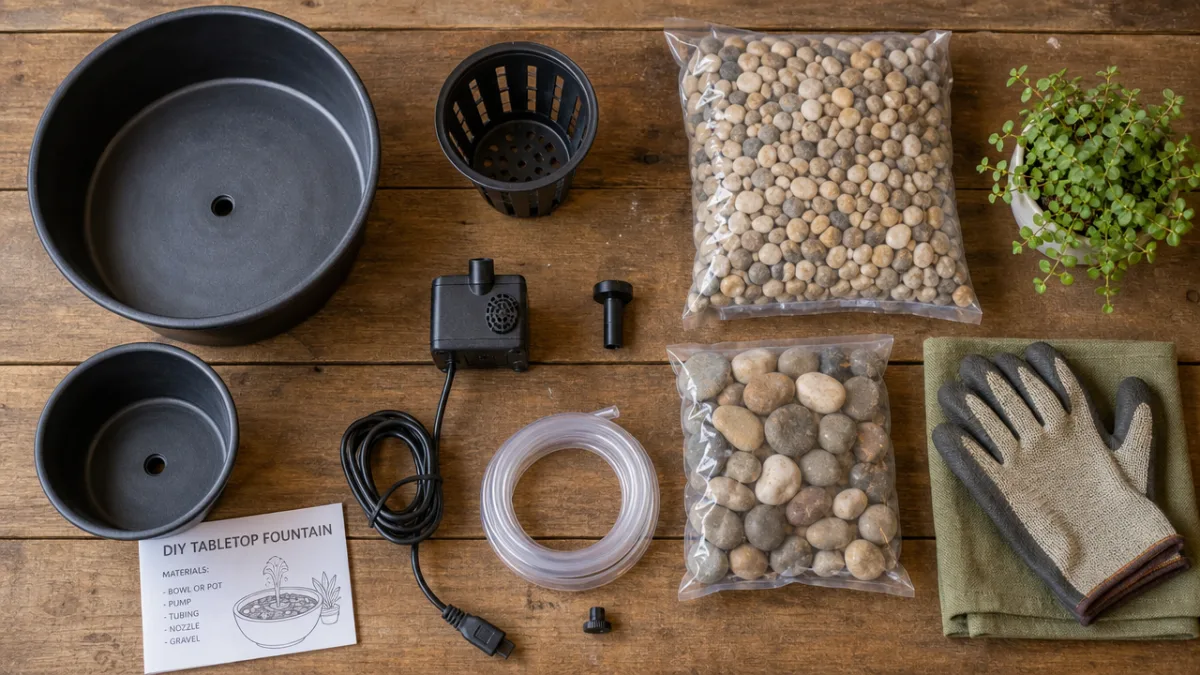
Before diving into construction, it is important to gather all your materials in advance. Having everything on hand before you begin will make the build process smooth and uninterrupted, allowing you to focus on the creative and enjoyable aspects of the project. The core materials for this fountain are simple and available at virtually any garden center, hardware store, or online retailer. You do not need any specialized skills or tools beyond what most households already possess.
The heart of any fountain is the pump, and choosing the right one is critical to your project’s success. For a small to medium tiered pot fountain, a submersible pump rated between 80 and 200 gallons per hour (GPH) is generally ideal. A pump that is too weak will produce an unsatisfying trickle, while one that is too powerful may cause excessive splashing and rapid water loss. Most submersible pumps designed for fountains or small ponds come with adjustable flow controls, which give you the flexibility to fine-tune the water flow to your personal preference once the fountain is assembled and running.
Here is a full list of materials you will need to complete this project:
- Three plastic pots of graduating sizes (for example, 6-inch, 10-inch, and 14-inch diameter) with a stable, flat base
- One large plastic basin, storage tub, or extra-large pot to serve as the reservoir at the bottom
- One submersible fountain pump (80–200 GPH with adjustable flow)
- Clear flexible vinyl tubing to fit the pump outlet (typically 1/2-inch inner diameter)
- Waterproof sealant or silicone caulk rated for aquatic use
- Outdoor spray paint or stone-effect paint in your desired finish
- A drill with hole saw attachment or standard drill bits in multiple sizes
- Decorative gravel, river stones, or glass pebbles for the reservoir
- Waterproof mesh or filter foam to protect the pump intake
- Optional: waterproof LED lights designed for fountains or garden use
In terms of tools, you will need a power drill, sandpaper or a sanding block, painter’s tape, and a measuring tape or ruler. Safety goggles and work gloves are strongly recommended when drilling into plastic, as small shards can become airborne. A level will help ensure your stacked pots are balanced and that water flows evenly around the rim of each tier rather than pouring off to one side.
Step-by-Step Construction Process
With your materials assembled, it is time to begin building. The construction process involves five main phases: preparing the pots, running the tubing, sealing and painting, assembling the tiers, and filling and testing the fountain. Working through each phase methodically will give you the best results and help you avoid the most common pitfalls that frustrate first-time fountain builders. Set aside at least one full day for the build, keeping in mind that paint and sealant will need adequate drying time before water is introduced.
Begin by drilling a hole in the bottom center of each of your three graduated pots. The hole should be just large enough to feed your vinyl tubing through with a snug fit — typically around half an inch in diameter. Use a drill bit slightly smaller than your tubing diameter and gradually enlarge the hole if needed, as it is always easier to make a hole larger than to fix one that is too big. For the smallest pot at the top, you may want to drill a slightly off-center hole to direct the water flow toward the middle of the tier below it, creating a more pleasing cascade effect.
Once all holes are drilled, thread your vinyl tubing through each pot from bottom to top, starting with the largest pot and working your way up to the smallest. Leave several inches of tubing extending above the rim of the top pot — this will be trimmed later once you know exactly how much extension creates the ideal water arc. Apply a generous bead of waterproof silicone sealant around each hole where the tubing meets the pot, both on the inside and outside surfaces. Allow this sealant to cure completely according to the manufacturer’s instructions, which typically takes between twelve and twenty-four hours.
Painting and Finishing Your Pots
Once the sealant has fully cured, it is time to apply your chosen paint finish. If you are going for a stone or concrete aesthetic, stone-effect spray paints available at most craft and hardware stores do a remarkable job of creating realistic texture. Apply paint in light, even coats rather than one heavy layer, which can lead to dripping and uneven coverage. Two to three thin coats will produce a far more professional-looking result. Allow each coat to dry fully before applying the next, and lightly sand between coats for the smoothest final surface.
For a more organic, natural look, consider dry-brushing a lighter shade over a darker base coat once the paint has dried. This technique, borrowed from model painting and theatrical set design, creates the illusion of depth and weathering that makes plastic look convincingly like aged stone or weathered terracotta. Use a stiff-bristled brush with very little paint on it, dragging it quickly across the textured surface of the pot to catch only the raised areas and leave the recesses in shadow.
Do not forget to paint the large reservoir basin as well, as it will be visible at the base of your completed fountain. A coordinating color or finish will tie the whole composition together and prevent the reservoir from looking like an afterthought. If you have chosen to incorporate LED lighting, now is also the time to drill any necessary holes for lighting cables, seal them, and consider how the illumination will interact with your chosen paint colors — warm amber lights pair beautifully with terracotta tones, while cool blue or white lights enhance a stone or concrete effect.
Assembling and Positioning Your Fountain
With painting complete and all surfaces fully dry, you are ready for the exciting phase of final assembly. Choose the location for your fountain carefully before beginning — once filled with water, the reservoir will be quite heavy and difficult to move. The ideal spot is level ground with access to an outdoor electrical outlet for the pump. Consider also the viewing angle: position the fountain where it will be visible from your main outdoor seating area or from inside the house through a window, so that you can enjoy both the sight and sound of flowing water throughout the day.
Place your reservoir basin in its final position and connect the pump to the bottom end of the vinyl tubing. Lower the pump into the reservoir, positioning it as centrally as possible so that it draws water evenly. If your pump came with suction cup feet, attach these to the inside bottom of the reservoir — they will prevent the pump from shifting once water is added. Cover the pump with a layer of decorative gravel or river stones, which will weigh it down, hide it from view, and also serve as a pre-filter to prevent large debris from entering the pump intake.
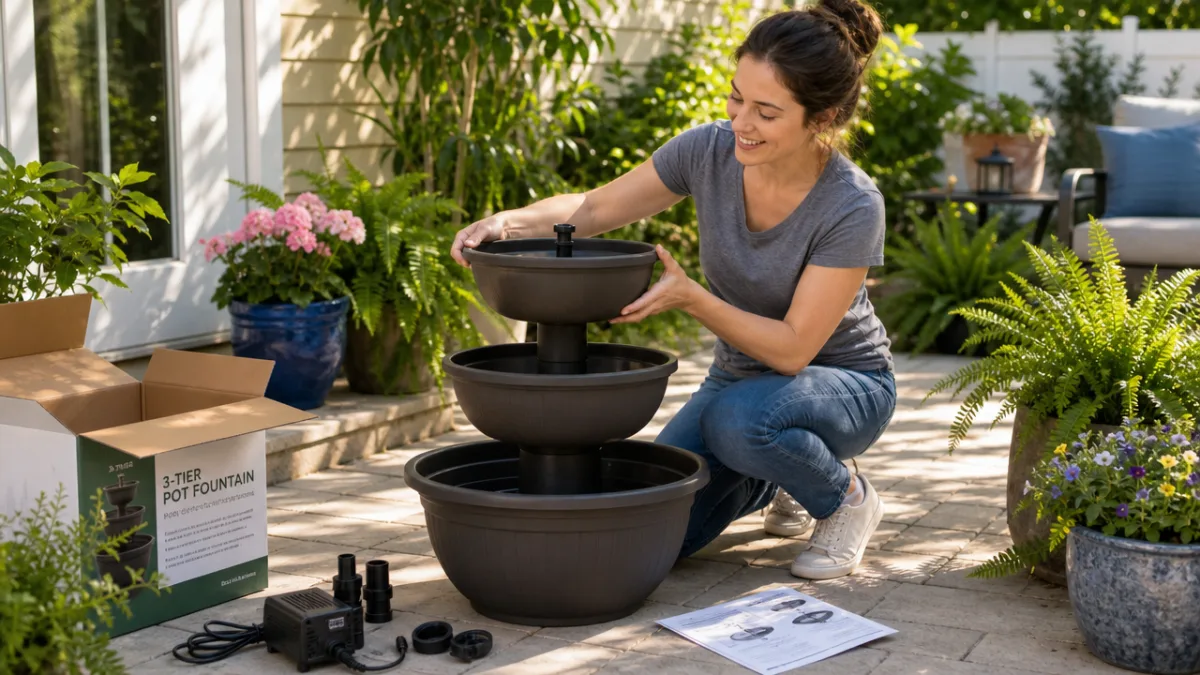
Now stack your pots in graduating order, threading the tubing through each one as you go. Use small wedges of rubber or folded landscape fabric to level each pot and ensure it sits evenly on the one below it. This leveling step is crucial: even a slight tilt will cause water to flow faster on one side, potentially leading to spillage and uneven water distribution. Once all three pots are stacked and level, trim the tubing at the top so that approximately two inches extend above the rim of the smallest pot, and place a decorative cap or small ornament over the opening if desired to complete the finished look.
Filling, Testing, and Fine-Tuning
Before connecting the pump to power, fill the reservoir with water until it is approximately three-quarters full. This pre-fill ensures that the pump will be submerged immediately when activated, which is critical — running a submersible pump dry, even for a few seconds, can damage the motor and shorten its lifespan significantly. Once the reservoir is filled, plug in your pump and observe the initial water flow. It may take a moment for water to travel through the entire length of tubing and begin cascading over the pot rims, so be patient during those first few seconds.
Once flowing, assess the water behavior at each tier. Ideally, water should overflow evenly around the full circumference of each pot’s rim, cascading in a consistent sheet or gentle trickle to the pot below. If water is rushing too forcefully and causing excessive splashing, reduce the pump’s flow rate using its built-in adjustment dial. If the flow seems weak or uneven, check that the tubing is not kinked anywhere along its length and that all sealant joints are watertight. Minor adjustments at this stage will have a significant impact on the final aesthetic and sound quality of your fountain.
Check all sealed joints carefully for any leaks during the first thirty minutes of operation. Even the best silicone application can occasionally miss a spot, and catching leaks early — before the fountain is surrounded by plants or integrated into a permanent display — makes repairs straightforward. If you do find a small leak, drain the fountain, allow everything to dry thoroughly, and apply additional sealant to the affected area. Once you are satisfied that everything is watertight and flowing beautifully, top off the reservoir to its full level and your fountain is ready to enjoy.
Maintenance, Seasonal Care, and Creative Enhancements
A DIY fountain requires only modest maintenance to keep it running cleanly and beautifully throughout the year. The most important ongoing task is monitoring the water level in the reservoir and topping it up regularly. Water will evaporate naturally, especially during hot summer weather, and if the reservoir level drops too low, the pump will run dry and risk damage. In peak summer, you may need to add water every two to three days; in cooler seasons, once a week is typically sufficient. Some fountain builders connect a slow-drip hose to their reservoir to automate this process.
Algae growth is the most common maintenance challenge for outdoor water features. Exposure to sunlight and the presence of airborne nutrients can cause green algae to coat the interior of your pots and cloud the reservoir water within a few weeks of installation. To manage this, use a fountain algaecide product specifically formulated for decorative water features — these are safe for birds and beneficial insects when used as directed. Alternatively, placing a few small pieces of barley straw in the reservoir is a natural, effective method of inhibiting algae growth that many organic gardeners prefer.
Clean your pump filter and intake every two to four weeks during the active season. Simply unplug the pump, remove it from the reservoir, and rinse the filter foam under running water until it runs clear. If mineral deposits from hard water have built up on the pot surfaces or around the tubing, a solution of equal parts water and white vinegar applied with a soft brush will dissolve them effectively without damaging your paint finish. An annual deep clean at the start of each season, which involves fully emptying and scrubbing the reservoir and pots, will keep your fountain looking pristine for many years.
Winterizing Your Fountain
In climates where temperatures regularly drop below freezing, it is important to winterize your fountain before the first hard frost arrives. Water trapped inside pots or tubing that freezes and expands can cause cracking and damage even to robust plastic. Begin the winterization process by unplugging and removing the pump, rinsing it thoroughly, and storing it in a frost-free location such as a garage or garden shed. Drain all water from the reservoir and each pot tier, tipping them to ensure no standing water remains in any corners or low points.
If possible, store your pots indoors or under a covered area during winter months. Alternatively, covering the entire assembled fountain with a breathable garden furniture cover will provide reasonable protection in mild climates. Remove any decorative stones or gravel from the reservoir and store them in a bag or bucket — this makes the spring reassembly much easier and prevents debris from accumulating in the reservoir over winter. With proper winterization, your plastic pot fountain should remain in excellent condition for five or more years of active use.
Creative Enhancements and Personalization Ideas
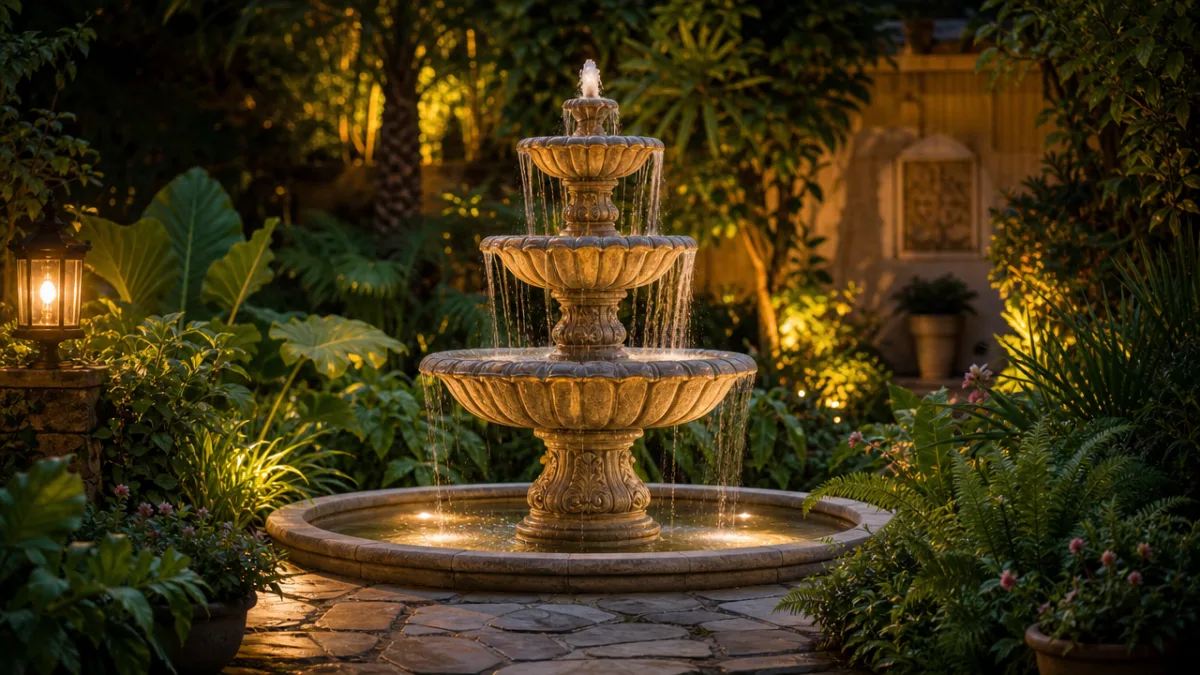
Once you have mastered the basic tiered fountain, a world of creative enhancements awaits. Adding waterproof solar-powered LED lights to your fountain transforms it into a breathtaking nighttime feature that glows gently in the dark, extending your enjoyment well beyond daylight hours. Submersible LED spotlights placed at the base of the reservoir illuminate the cascading water from below, creating shimmering light patterns that dance across nearby walls and plants. Color-changing LED options allow you to shift the mood from warm and intimate to cool and contemporary with the press of a button.
Consider surrounding your fountain with complementary plantings to integrate it naturally into your garden landscape. Moisture-loving plants such as hostas, ferns, and creeping Jenny thrive in the humid microclimate created by a nearby water feature and will soften the edges of your reservoir beautifully. Placing smooth river stones or decorative glass mulch around the base of the fountain adds texture and visual interest at ground level while helping to contain any splash water. A few weather-resistant candles or solar lanterns positioned nearby will complete the luxurious outdoor sanctuary atmosphere you are working to create.
You might also experiment with adding a small bamboo spout emerging from a top-mounted ornament, transforming your tiered fountain into a Japanese-inspired tsukubai feature. Alternatively, incorporating a large central urn as the uppermost tier — drilled to allow water to well up over its rim in a classic overflow style — creates a more formal, symmetrical aesthetic suited to traditional or cottage garden styles. The fundamental technique you have learned in this guide is fully adaptable to whatever creative vision you bring to it, making this one of the most satisfying and versatile DIY projects any garden enthusiast can undertake.
Final Thoughts: The Joy and Value of a Handcrafted Garden Fountain
Building your own garden fountain from plastic pots is one of those rare DIY projects that delivers results far beyond what the modest materials and modest investment might suggest. The finished product — a tiered, cascading water feature that fills your outdoor space with the soothing sound of flowing water — has a transformative effect on the atmosphere of any garden, large or small. Visitors who learn the fountain was handmade rather than purchased invariably express admiration, and the personal satisfaction of having created something both beautiful and functional is genuinely difficult to overstate.
Beyond the aesthetic rewards, a garden water feature delivers real, measurable benefits to the surrounding environment. The constant gentle movement of water attracts birds, beneficial insects, and pollinators to your garden, supporting local biodiversity in a meaningful way. The white noise generated by flowing water creates a natural sound buffer that reduces the intrusion of traffic and neighborhood sounds, making your outdoor space feel more private and peaceful. In warmer climates, the evaporative cooling effect of a fountain can noticeably lower the ambient temperature of a shaded patio area during summer afternoons.
Perhaps most importantly, this project demonstrates that luxury and elegance in the garden are not the exclusive domain of large budgets and professional landscapers. With thoughtful design, a willingness to experiment, and the confidence to try something new, any gardener can create outdoor spaces that feel genuinely special. The skills you develop building your first plastic pot fountain — drilling, sealing, painting, and pump installation — will serve you well in countless future garden projects. Start with this simple design, master the fundamentals, and let your imagination take you further with each successive iteration.
Sharing Your Creation and Finding Inspiration
Once your fountain is complete and flowing beautifully, consider documenting the process and finished result with photographs to share with fellow garden enthusiasts online. Platforms dedicated to DIY and gardening content are filled with communities of makers who would appreciate your work and whose own projects might inspire your next creation. Detailed documentation of your build process — including any modifications you made to the basic design — is genuinely valuable to other beginners who are looking for guidance and encouragement to start their own projects.
The DIY garden community is generous with knowledge, creative in its problem-solving, and endlessly enthusiastic about the results that can be achieved with modest materials and genuine effort. Whether you choose to share your work on social media, in a community gardening group, or simply by inviting friends and neighbors to experience your transformed outdoor space in person, the act of creating something beautiful with your own hands and sharing it with others is its own deeply satisfying reward. Your plastic pot fountain is not just a water feature — it is an expression of creativity, resourcefulness, and love for the natural world.








What do you think?
It is nice to know your opinion. Leave a comment.