










Designing a Durable Wooden Fence For Our Beautiful Backyard Garden
Why a Wooden Fence Is the Perfect Choice for Your Backyard Garden
When you’re trying to figure out how to define the edges of a backyard garden, it’s hard to beat wood. There’s just something about a well-built wooden fence that feels right at home next to flowers and greenery — it has a warmth and natural character that metal or vinyl simply can’t replicate. Whether your garden leans formal or has more of a loose, cottagey feel, wood tends to blend in beautifully rather than fight for attention.
But a wooden fence isn’t just a pretty face. It does real work in the garden — breaking up wind that might otherwise snap stems or dry out your soil way too fast, and creating a little sheltered microclimate that lets you grow plants that would normally struggle in your area. When you think about it that way, a quality wooden fence starts to look less like a home improvement expense and more like an investment in a healthier, more productive garden for years to come.
There’s also the simple pleasure of having your own enclosed space. A backyard surrounded by a beautiful wooden fence just feels different — more like a sanctuary and less like an open yard. You can garden without an audience, let the kids or the dog roam freely, and have people over without that slightly exposed feeling. It genuinely transforms how you use and enjoy your outdoor space.
Choosing the Right Wood Species for Long-Term Durability
If there’s one decision in this whole project that’s worth taking your time on, it’s choosing the right type of wood. Your choice will shape how long the fence lasts, how often you’ll need to maintain it, and how it looks as it ages. For a garden fence in particular, you need something that can handle being outside in all kinds of weather — wet winters, dry summers, and everything in between — without falling apart at the ground line.
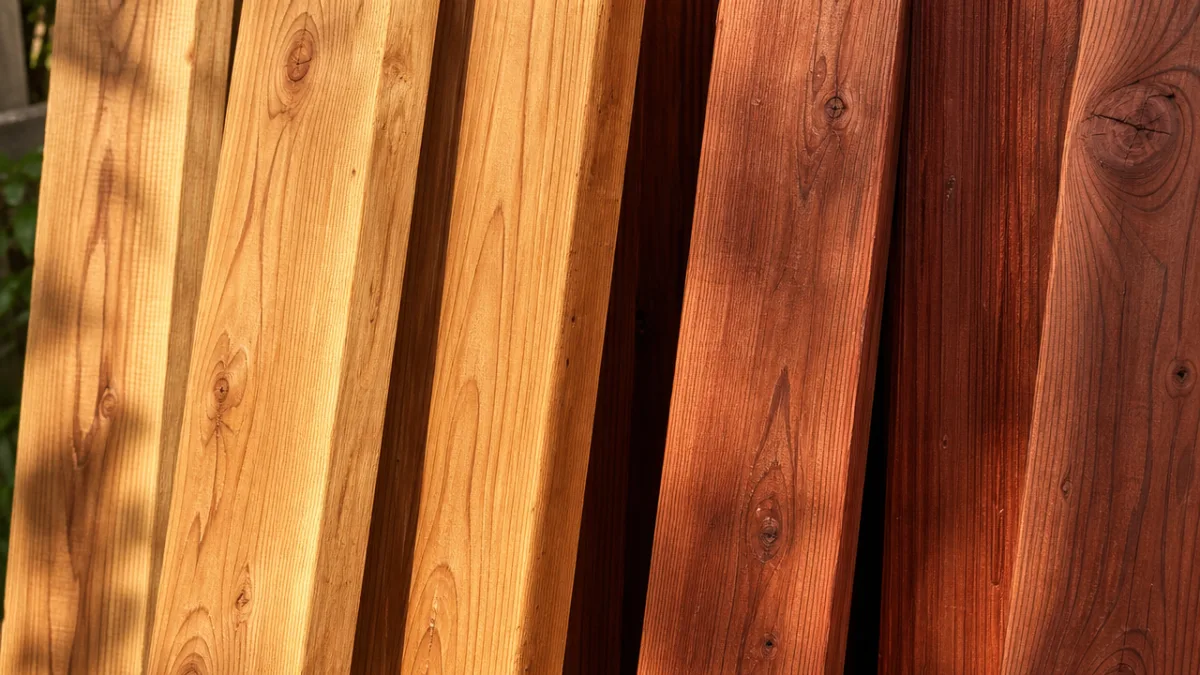
Cedar is the go-to for a reason. Western red cedar has natural oils built right into the wood that fend off rot, decay, and insects without any chemical help. It’s also lighter than a lot of alternatives, which makes working with it a lot easier. Stains soak in nicely, and if you leave it untreated it weathers to a really lovely silver-grey. If you’d rather keep that warm reddish-brown color, a stain will hold it there with some periodic reapplication.
Redwood is another great option — it shares a lot of cedar’s natural durability but has a deeper, richer color that a lot of people actually prefer. Pressure-treated pine is the budget-friendly pick, though you’ll want to be careful handling it during installation because of the chemical preservatives involved. And then there are tropical hardwoods like ipe or teak, which are essentially bulletproof — we’re talking 40-plus years with minimal upkeep — but they come at a steep price and it’s worth doing your homework on where they’re sourced before you buy.
- Western Red Cedar: Naturally rot-resistant, lightweight, accepts stains well, weathers gracefully to silver-grey.
- Redwood: Rich deep color, excellent natural durability, premium appearance with long lifespan.
- Pressure-Treated Pine: Budget-friendly, widely available, requires chemical treatment for moisture resistance.
- Ipe / Tropical Hardwood: Exceptional 40+ year lifespan, extremely dense, requires sustainably sourced purchasing.
- Douglas Fir: Strong and affordable, but requires thorough sealing and more frequent maintenance than cedar.
Essential Design Styles and Layout Planning for Garden Fences
Once you’ve landed on your wood, the next fun part is deciding what the fence will actually look like. The style you go with should match both the feel of your home and garden and what you’re actually hoping the fence will do. A fence built mainly for privacy is going to look very different from one that’s mostly there to define a border or give climbing plants something to grow up.
The board-on-board style — where boards alternate on either side of the rail — is one of the most popular options for backyard gardens, and it’s easy to see why. You get solid privacy, but the overlapping gaps still let air move through, which matters more in a garden than you might think. A fence that acts like a solid wall can actually create turbulent wind eddies on the other side, which isn’t great for plants. As a bonus, a board-on-board fence (sometimes called a shadowbox fence) looks just as nice from the neighbor’s side as it does from yours.
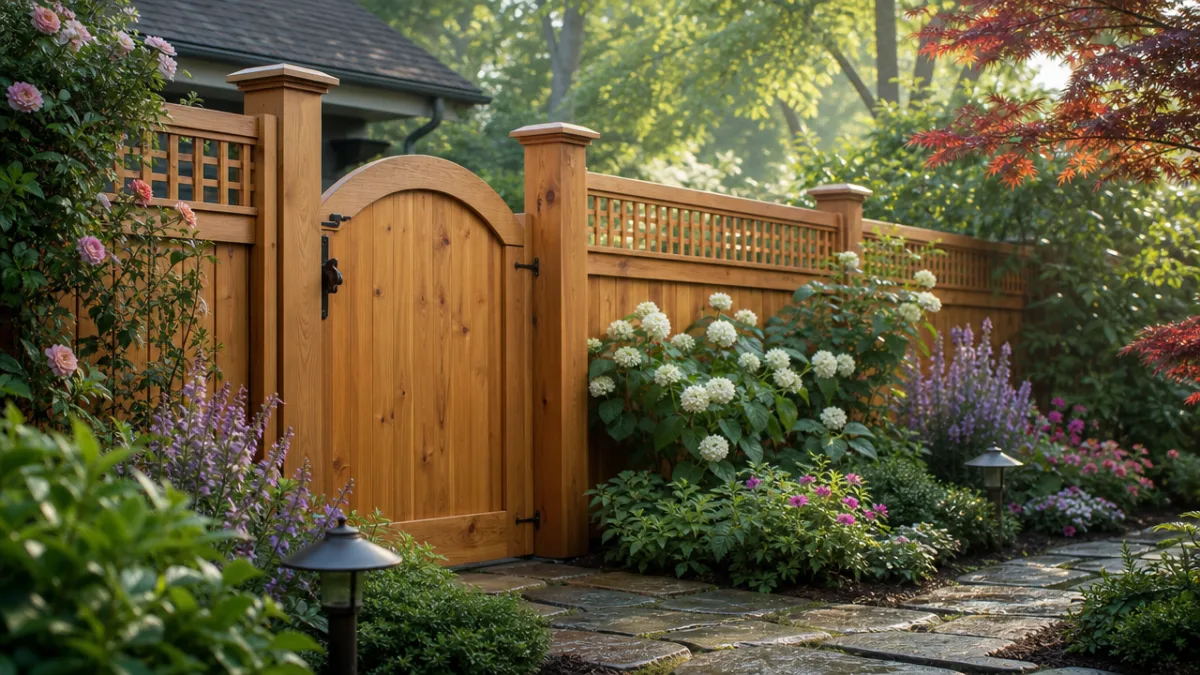
Picket fences have a totally different feel — more open and charming, perfect for a cottage garden or a kitchen garden where you want light to reach plants along the fence line and still feel connected to the wider landscape. If you want to go a step further, a lattice-top design gives climbing roses, clematis, or jasmine something to grab onto, and watching a plain fence become a living, flowering wall over a season or two is honestly one of the most rewarding things about this kind of project.
Before you buy a single board, though, sketch out a layout plan. Walk the fence line and measure carefully, noting any spots where the ground changes level and where you want gates. Think about how post placement will work around existing garden beds, mature trees, and any underground utilities. Even a rough hand-drawn plan with real measurements will save you a headache — and probably some money — once you’re actually out there building.
Post Installation: The Foundation of a Fence That Lasts Decades
If there’s one stage where you absolutely cannot afford to cut corners, it’s setting the posts. Posts are the skeleton of the whole structure, and if they’re wrong, everything attached to them is eventually going to be wrong too. The most common reason wooden fences fail early isn’t rotting boards — it’s posts that were set too shallow, without good drainage, or just not quite plumb, leading to heaving, leaning, or rot right at the ground line within a few years.
The rule of thumb is to bury about one-third of the total post length underground. For a six-foot fence, that means nine-foot posts with three feet in the ground. In colder climates, you’ll want to go below the frost line to avoid heaving during freeze-thaw cycles — sometimes that means going four feet deep or more. Rent a power auger rather than trying to hand-dig the holes. It’s much easier to get consistent depth and diameter that way, and your back will thank you.
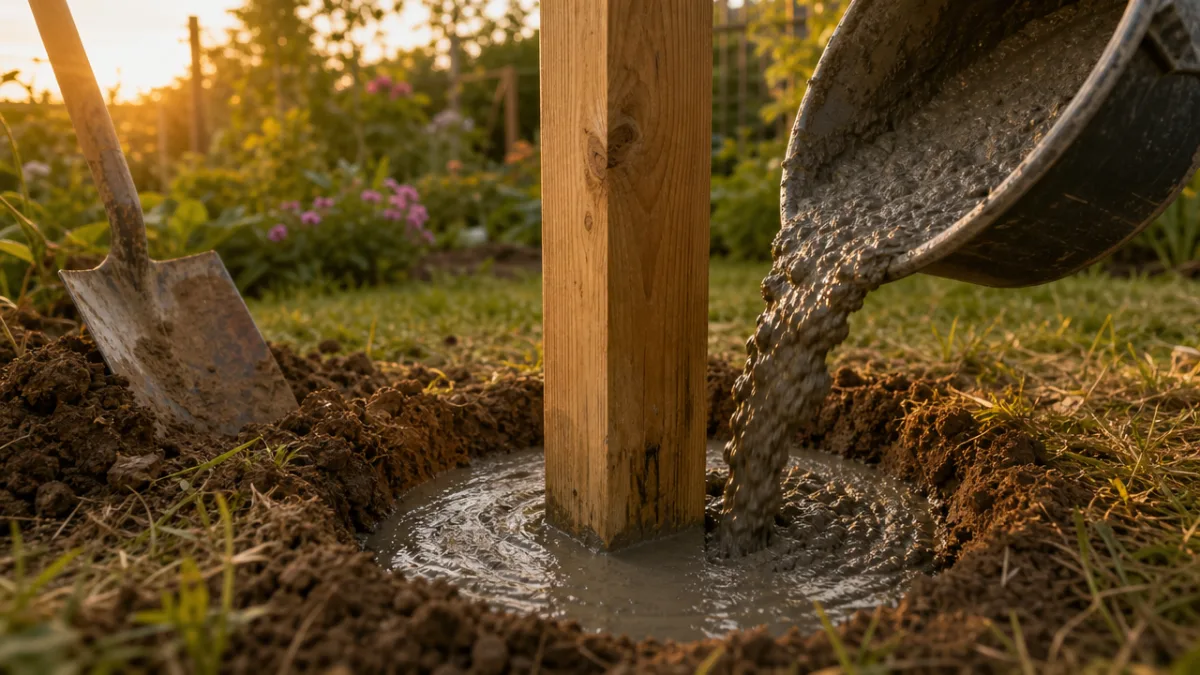
Concrete is the most reliable way to lock posts in place, but technique matters as much as the material. Experienced builders often recommend mounding the concrete slightly above grade and sloping it away from the post on all sides so water drains away from the wood instead of pooling around it. You’ll also want to cut the top of each post at an angle or add a post cap — the end grain on a post is incredibly vulnerable to moisture, and protecting it is one of the simplest things you can do to add years to the fence’s life.
- Mark post locations along the fence line using stakes and string to ensure a perfectly straight alignment.
- Dig post holes to the appropriate depth using a power auger for consistent diameter and clean sides.
- Set each post plumb (perfectly vertical) using a level before the concrete cures.
- Pour concrete around the post, crowning and sloping the surface away from the wood for drainage.
- Allow concrete to cure fully — at least 24 to 48 hours — before attaching rails or panels.
- Install post caps on every post top to protect end grain from direct water exposure.
Assembling Rails, Boards, and Hardware for Structural Integrity
With the posts solid in the ground, you can start attaching rails and boards — and this is the part where your plan finally starts looking like an actual fence. Rails are the horizontal pieces that run between posts and give the fence boards something to fasten to. For most fences up to six feet tall, two rails are plenty, but if you’re going taller or you live somewhere particularly windy, three rails will keep things from racking and flexing over time.
One thing that’s worth saying clearly: use galvanized or stainless steel hardware for everything — nails, screws, brackets, hangers, all of it. Standard steel fasteners will rust within a season or two, leaving orange streaks down your fence boards and slowly weakening every connection in the structure. Hot-dipped galvanized fasteners hold up much better, and stainless steel screws are the premium option that will genuinely outlast the wood without ever showing a spot of rust. It’s a small extra cost that makes a real difference.
When you’re attaching boards, leave a small gap — around a quarter inch — between each one. Wood swells when it gets wet, and boards installed tight with no room to expand will buckle and warp as the seasons change. A wavy, uneven fence is really hard to fix after the fact. The easiest way to keep spacing consistent is to use a small offcut of wood as a spacer and just drag it along as you work your way down the line.
Also pay attention to how close the bottom of your boards sit to the ground. Boards touching soil or mulch will wick moisture continuously and rot much faster than the rest of the fence. Try to keep at least two inches of clearance between the bottom of the boards and whatever’s below them, even if it means adjusting part of a garden bed. And if you’re planning climbing plants or groundcovers near the fence, train them to grow close but not actually touching the wood — constant damp contact from dense foliage accelerates deterioration faster than you’d expect.
Finishing, Sealing, and Ongoing Maintenance to Protect Your Investment
A brand-new wooden fence looks fantastic, but raw wood left to face the weather on its own won’t stay that way for long. A good protective finish isn’t just about looks — it slows down the constant cycle of moisture absorption and release that causes wood to expand, contract, crack, and eventually decay. Getting the finish right from the start is one of the most cost-effective things you can do, and it can genuinely add years or even decades to the life of your fence.
For cedar and redwood, most experienced builders lean toward a penetrating oil-based sealer or a semi-transparent stain. Unlike paint or a solid stain, a penetrating sealer soaks into the wood fibers and protects from within, so there’s no surface coating that can peel, chip, or trap moisture underneath it. Semi-transparent stains add color and UV protection while still letting the natural grain show through — the result looks polished but still feels organic, which is exactly what you want in a garden setting.
When you apply your finish, don’t skip the hidden surfaces. End cuts, areas tucked against rails, any spot that’s a little hard to reach — these are actually some of the most vulnerable places on the fence, and they often get overlooked. A pump sprayer is great for covering large sections quickly, followed by back-brushing to really work the finish into the grain. Let the first coat dry completely before adding a second — two proper coats will protect noticeably better than one thick one.
After that, a little routine maintenance is what makes the difference between a fence that holds up for five years and one that’s still looking great after twenty or thirty. Each spring, take a walk along the fence and look for loose boards, any hardware that’s starting to fail, posts that might have shifted, or spots where the finish has worn thin. Clean the surface with a mild wood cleaner to knock off any algae or mildew before it works into the grain. Reapply sealer or stain every two to three years — or whenever you notice water is no longer beading on the surface — and the fence will just keep rewarding you, season after season.








What do you think?
It is nice to know your opinion. Leave a comment.