










DIY Strawberry Wind Chime: A Charming Recycled Bottle Craft for Your Garden
Introduction: Turning Trash into Garden Treasure
There’s something genuinely satisfying about taking something you’d normally toss in the recycling bin and turning it into something you actually want to look at. That’s exactly what this project is — a strawberry wind chime made from old plastic bottles that ends up looking cheerful, whimsical, and totally at home hanging in your garden. Whether it ends up on your porch, along a fence, or dangling from a tree branch, it’s the kind of thing that makes people stop and smile.
Upcycled bottle crafts have really taken off over the last decade, and it’s easy to see why — people want creative outlets that don’t feel wasteful. Bottles that would otherwise sit in a landfill for centuries become the starting point for something entirely new. With this project, a water bottle or old soda bottle transforms into a little painted strawberry that sways and chimes in the breeze. It’s a surprisingly fun twist on what could have been just another piece of trash.
What’s great is that you don’t need to be a craft expert to pull this off. The materials are mostly things you already have or can pick up cheaply, the skills involved are pretty forgiving, and the whole thing comes together in an afternoon. It’s a relaxed weekend project for anyone who enjoys making things, and with a bit of supervision, older kids can get involved too — it’s a nice way to talk about creativity and where our stuff actually goes when we’re done with it. By the time you’re finished, you’ll have something genuinely one-of-a-kind hanging in your garden.
Materials You Will Need
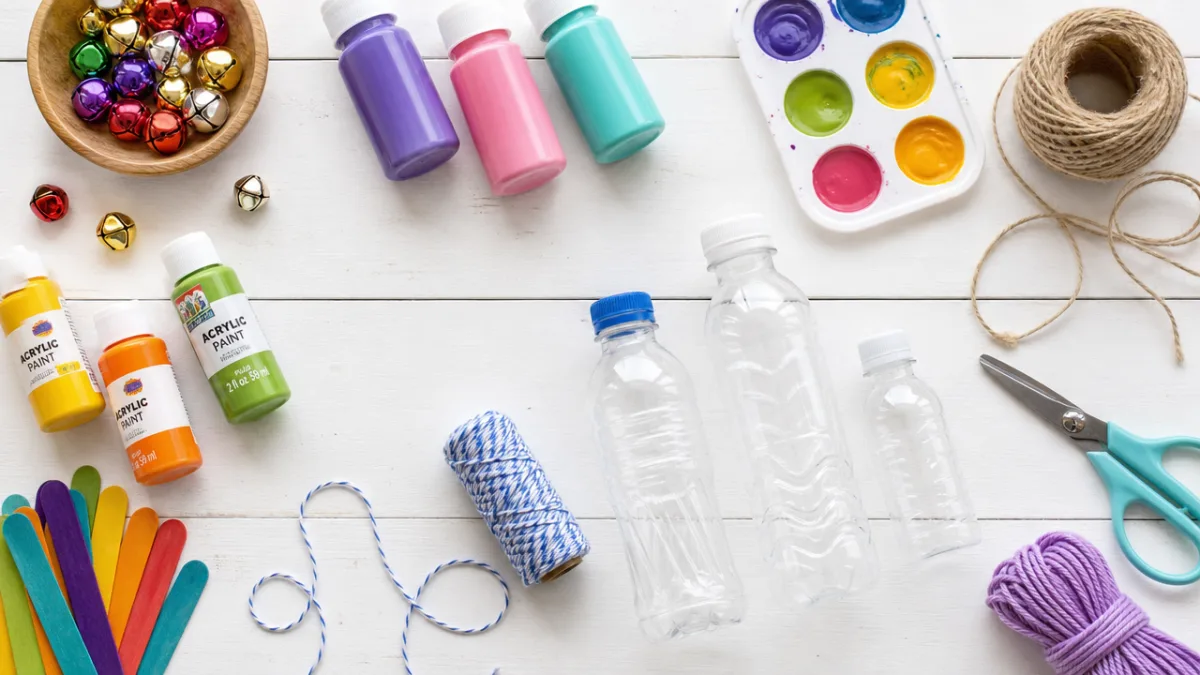
Before you jump in, it helps to get everything laid out in front of you first. Half the frustration in any craft project comes from having to stop mid-step to hunt something down, so a few minutes of prep goes a long way. The good news is that most of what you need is probably already at home — think of your recycling bin and junk drawer as your first shopping stop before you head to the craft store for anything else.
The main things you’ll need are clean, empty plastic bottles in a few different sizes, red and green acrylic paint, a fine-tipped permanent marker for adding details, clear sealant spray to protect everything from the elements, fishing line or thin nylon cord, small bells or beads for that satisfying chiming sound, a wooden dowel or a nice sturdy branch for the top bar, a hot glue gun, scissors, and a hole punch or heated skewer for making clean holes in the plastic. You’ll also want some green craft foam or felt to cut out the little leaf tops that make each bottle actually look like a strawberry.
A few extras worth grabbing: gold or red glitter if you want that sparkle-in-the-sun effect, a ruler and pencil for keeping your hole placements consistent, and a small piece of sandpaper to scuff up the bottle surfaces before painting so the paint actually sticks. If this chime is going to live outside year-round, it’s worth spending a little more on outdoor-grade paint and UV-resistant sealant — it makes a real difference in how long the colors stay looking fresh.
- Clean plastic bottles (5–8 of various sizes, such as 500ml water bottles or small soda bottles)
- Red and green acrylic paint (outdoor-grade recommended)
- Fine-tipped black permanent marker
- Clear UV-resistant sealant spray
- Fishing line or thin nylon cord (at least 3 meters)
- Small bells, beads, or metal washers for chiming
- Wooden dowel or decorative branch (30–40 cm long)
- Hot glue gun and glue sticks
- Green craft foam or felt
- Scissors, hole punch, and ruler
Preparing the Bottles: Shaping Your Strawberries
Turning a plain plastic bottle into something that actually looks like a strawberry is honestly one of the most fun parts of this whole project — and it takes a bit more thought than you might expect. Start by washing each bottle thoroughly, peeling off the labels, and wiping away any sticky adhesive residue with rubbing alcohol or a dab of cooking oil. A clean surface really matters here, both for how things look and for making sure your paint doesn’t just peel right off. Once they’re clean, give the outside of each bottle a light sand with fine-grit sandpaper using small circular motions.
The strawberry shape mostly comes from the lower half of the bottle, which already narrows toward the base in a way that’s surprisingly close to the shape of a real strawberry. For smaller bottles, you can use the whole thing. Grab your permanent marker and draw a gently scalloped line around the upper part of the bottle where you plan to cut — this slightly uneven edge will eventually be covered by the green leaf cap, but a more organic cut line makes the whole shape feel more natural and less stiff.
Cut along that line with a steady hand, rotating the bottle slowly as you go. If the plastic feels thick or tough, craft scissors or small tin snips will give you much better control than regular scissors. Once you’ve made the cut, run the sandpaper along the edge to smooth out any rough or sharp bits — both so it’s safe to handle and so the finished piece looks clean. At this point you’ll have a little cup-shaped bottle bottom that’s already starting to look like a strawberry. Do this with all your bottles and aim for a range of sizes so the final wind chime has some natural variation to it.
Painting and Decorating Your Strawberry Pieces
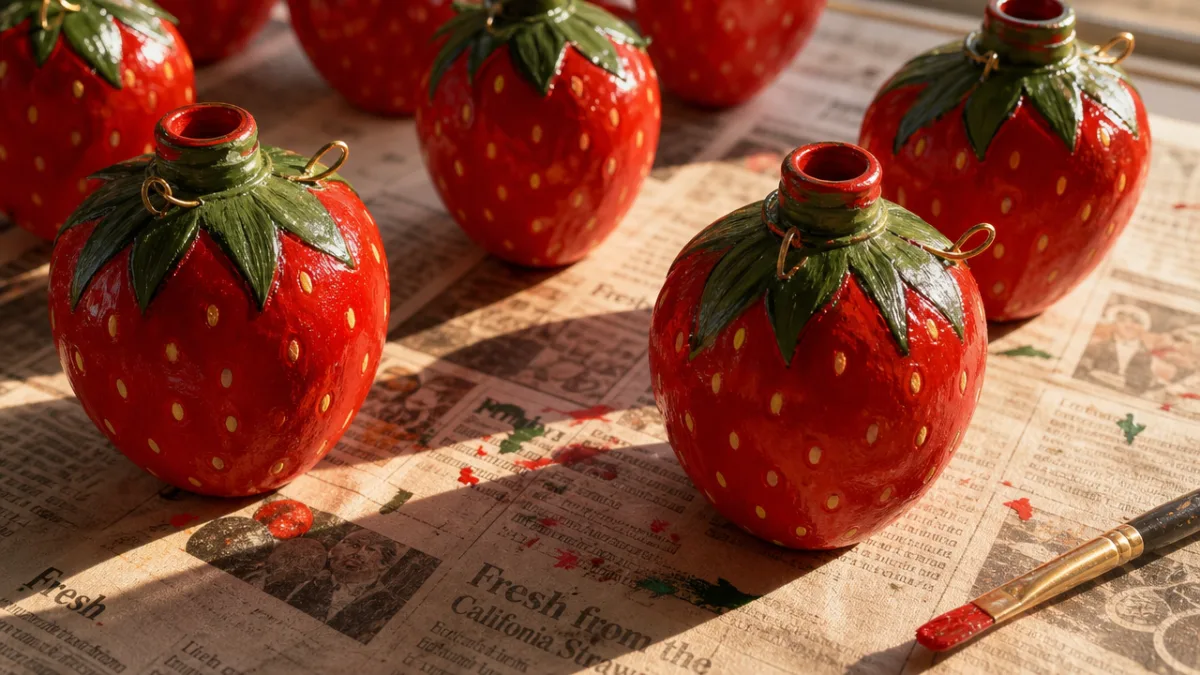
This is where things really start to look like something. Painting is your chance to put real personality into each piece, so take your time and enjoy it. Start with a solid base coat of bright red acrylic paint, working in smooth strokes from top to bottom. Plastic isn’t the most cooperative surface for paint absorption, so plan on doing two or three coats to get that rich, opaque red you’re after. Let each coat dry completely before adding the next — skipping this step leads to streaking and bubbling, and the finish never quite recovers.
Once your red coats are dry and even, it’s time for the seeds. Using a fine-tipped permanent marker or a thin brush with dark or yellowish paint, dot small teardrop or oval shapes across the surface of each bottle piece. Real strawberry seeds sit in tiny indentations, so pressing each dot slightly into the paint as you make it adds a nice subtle texture. Try to follow the natural curve of the bottle with your rows of seeds — it makes the whole thing look a lot more convincing than randomly scattered dots.
For the green leaf caps, trace and cut calyx shapes from your craft foam or felt — these are those little star-shaped leaf clusters that sit at the top of a real strawberry. Aim for five to seven pointed lobes coming out from a small central circle. Cut a tiny hole in the middle of each one so you can thread the fishing line through later. When everything is painted and sealed, use the hot glue gun to press each calyx firmly onto the top opening of its bottle piece, holding it in place for about thirty seconds while the glue sets. If you’re going the glitter route, brush a thin layer of craft glue over the red surface just before it fully dries and dust your glitter on immediately.
- Apply two to three base coats of red paint, allowing full drying time between each coat.
- Add seed details using a fine-tipped marker or thin brush with dark paint.
- Cut calyx leaf shapes from green foam or felt.
- Optionally apply glitter for added sparkle and visual interest.
- Seal all painted surfaces with UV-resistant clear spray sealant.
- Hot glue the calyx pieces to the top of each bottle strawberry.
Assembling the Wind Chime Structure
Now that your strawberries are painted, sealed, and looking great, it’s time to put the whole thing together. Start with your dowel or branch — this is the horizontal bar everything hangs from. If you’re using a plain wooden dowel, painting it green or wrapping it in twine gives it a much nicer finished look. For a natural branch, just sand down any rough spots and wipe it clean. Mark five to seven evenly spaced points along it where your hanging strands will attach.
Cut lengths of fishing line or cord ranging from about 20 to 40 centimeters, varying them a bit so your strawberries end up hanging at different heights — that cascading effect makes it look so much more interesting than everything hanging at the same level. Thread one end of each line through the hole in a strawberry’s calyx and knot it tightly two or three times. Before you tie on the strawberry, slide a small bell or a few beads onto the line first — these will sit just below the strawberry and give you that soft chiming sound when the wind moves through. Make sure they hang loosely enough to actually swing and knock around.
Tie the top of each strand securely to its spot on the dowel, finishing each one with a small drop of hot glue for peace of mind. As you arrange the strawberries, put the smallest ones toward the outside and the largest one in the center — it naturally mimics how fruit grows in a cluster. To hang the whole thing, cut three equal lengths of cord and tie them to the dowel at the left, center, and right, then gather all three ends and knot them together up top to make your hanging loop. Hold the chime up by that knot and adjust the strand positions until it hangs level and swings freely on its own.
Hanging, Displaying, and Caring for Your Creation
Where you hang this thing actually matters quite a bit — it affects both how it looks and whether it’ll actually chime. You want somewhere with a regular gentle breeze: a covered porch, a pergola, under a tree, or near a window that gets good airflow. Steer clear of spots that get hit with strong, gusty wind, which can tangle the strands or knock the pieces around hard enough to eventually break them. Somewhere with a bit of sunlight is ideal, since the light plays off the painted surfaces and any glitter you added in a really pretty way throughout the day.
Use a sturdy hook screwed into solid wood, or a purpose-made outdoor hanging hook that can handle the weight. The finished chime is quite light, but a reliable, weather-resistant hook means you won’t have to worry about it coming down unexpectedly. If you’re somewhere with cold winters, it’s worth bringing it inside during the harshest months — freeze-thaw cycles are hard on plastic and can cause the paint to crack even through the sealant. Storing it somewhere cool and dry over winter and putting it back out in spring will add years to its life.
Day-to-day, this doesn’t need much attention at all. Every few months, take a quick look at the knots and cord and replace anything that looks frayed or worn before it snaps. A damp cloth works fine for wiping down the bottle pieces if dust or debris builds up, and a fresh light coat of clear sealant once a year keeps the colors looking bright. If a bell drops off or a leaf cap comes loose, a dab of outdoor adhesive or hot glue sorts it out in minutes. A little seasonal attention is all it takes to keep your wind chime looking lovely for years.
The Bigger Picture: Crafting with Environmental Intention
This project is more than just a fun way to spend a Saturday afternoon. Every bottle that becomes a strawberry wind chime is one less bottle heading to a landfill or washing into the ocean. When you start seeing potential in the things you’d usually throw away, something shifts — you start noticing it in other areas too, in what you buy, what you keep, and what you talk to the people around you about. That kind of thinking is worth cultivating, and a craft project is as good a place as any to start.
Making this with kids is especially worthwhile. When a child paints a strawberry bright red and then hears it chiming in the wind outside — knowing they made it from something that almost got thrown away — the lesson sticks in a way that a lecture about recycling never quite does. They get to experience firsthand what it feels like to transform something ordinary into something beautiful, and that sense of creative problem-solving is genuinely useful well beyond any craft table. Make it a family project and let the conversation about where things come from and where they end up happen naturally while everyone’s painting.
There’s also something quietly meaningful about making things yourself, especially from materials that were heading for the bin. A mass-produced garden ornament gets replaced without a second thought, but a wind chime you made with your own hands from old water bottles? That one has a story. It cost you time and attention rather than just money, and that makes it worth something different. Hanging in your garden and catching the breeze, it’s a small reminder that beauty doesn’t always have to come from a store — sometimes it’s already there, waiting in the most ordinary places.








What do you think?
It is nice to know your opinion. Leave a comment.