










Crochet Flower Potholder: Free Pattern and Complete Guide
Introduction to Crochet Flower Potholders
Crochet flower potholders are one of the most charming and practical projects a crafter can take on, whether you are a seasoned expert or just beginning your journey with yarn and hook. These delightful kitchen accessories combine the timeless beauty of floral design with the everyday utility of heat protection, making them a perfect gift for friends, family, or yourself. The satisfaction of creating something both beautiful and functional is one of the reasons this pattern has remained popular across generations of crochet enthusiasts around the world.
What makes the flower potholder pattern so appealing is its versatility. You can adapt the colors to match any kitchen décor, experiment with different yarn weights to achieve varying thicknesses and textures, and even change the size of the finished piece by adjusting the number of rounds you complete. Whether you prefer a bold sunflower aesthetic with bright yellow petals and a rich brown center, or a softer romantic rose design in blush and cream, this pattern can be customized endlessly to suit your personal style and the preferences of anyone you might be gifting it to.
Beyond aesthetics, crochet potholders made with the right materials offer genuine protection from heat. When made with cotton yarn, which is the recommended fiber for kitchen accessories, these potholders provide a reliable barrier between hot cookware and your hands or surfaces. Cotton does not melt or transfer heat the way synthetic fibers can, making it the safest and most practical choice for this type of project. Learning to create your own kitchen accessories gives you complete control over the quality and composition of the items you use every day.
Materials and Tools You Will Need
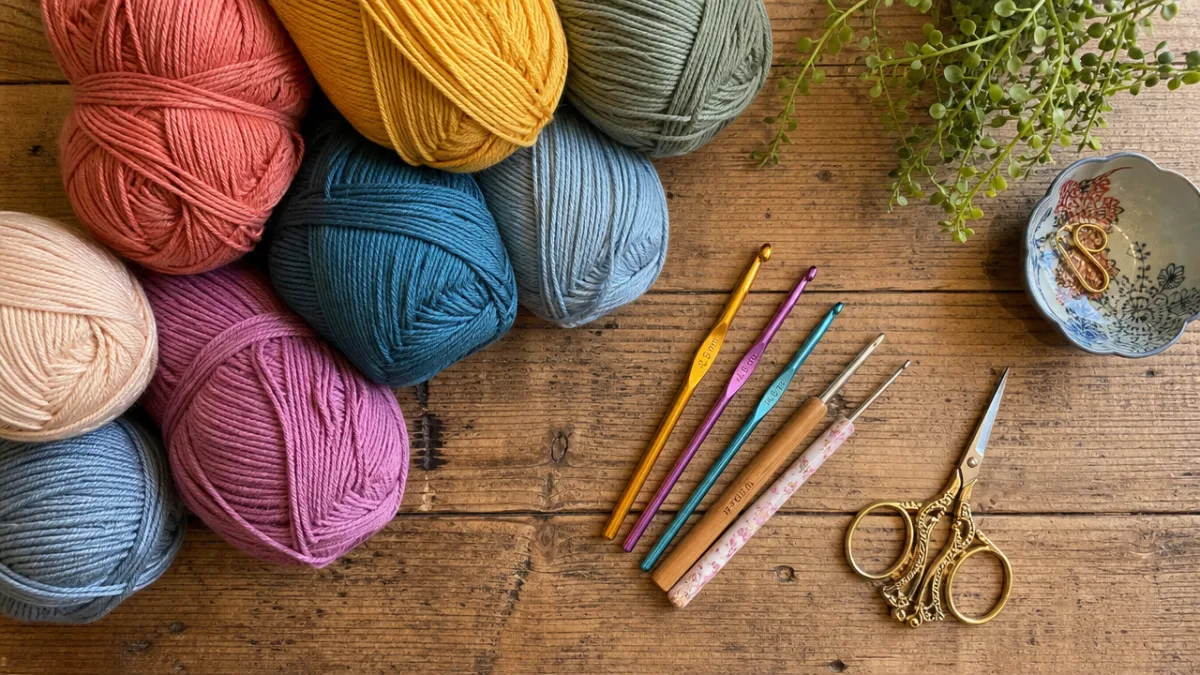
Before you begin crocheting your flower potholder, gathering the right materials will set you up for success and ensure the finished product is both beautiful and functional. The most important supply is your yarn, and for this project, 100% cotton yarn in a worsted weight is strongly recommended. Cotton yarn is heat-resistant, washable, and available in an enormous range of colors at most craft stores and online retailers. You will typically need about 50 to 75 yards each of two to three colors depending on your design: one for the center, one for the petals, and optionally one for a border or backing.
In addition to your yarn, you will need a few essential tools to complete the project smoothly. A crochet hook in size 5mm (H/8) works well with worsted weight cotton, though you should always check your yarn label and adjust if necessary. Scissors for cutting yarn, a yarn needle for weaving in ends, and stitch markers to keep track of your rounds are all helpful additions to your toolkit. Some crafters also find it useful to have a row counter app on their phone or a physical tally counter, especially when working on more complex petal arrangements that require careful attention to stitch counts.
Here is a quick checklist of materials to gather before you begin:
- 100% cotton worsted weight yarn in two to three colors (approximately 50–75 yards per color)
- Size 5mm (H/8) crochet hook
- Yarn needle for weaving in ends
- Scissors
- Stitch markers
- Row or round counter (optional but helpful)
- Blocking mat and pins (optional, for finishing)
One additional consideration when selecting your yarn is the weight and density of the finished potholder. A single layer of crocheted fabric, even in cotton, may not provide adequate protection against very hot pots and pans. Many experienced crafters choose to make two identical flower pieces and seam them together, creating a double-layered potholder that is significantly more heat-resistant. Alternatively, you can hold two strands of yarn together as you crochet, which naturally creates a thicker fabric without requiring any additional assembly steps at the end of the project.
Understanding the Basic Stitches and Pattern Structure
The crochet flower potholder pattern primarily relies on a handful of fundamental stitches that even beginners can learn with a little practice. The magic ring or adjustable loop is typically used to start the center of the flower, creating a tightly closed center point from which all subsequent rounds radiate outward. If you are not yet comfortable with the magic ring technique, you can substitute a chain-four slip-stitch ring, though the magic ring does produce a neater, more professional-looking center with no visible hole.
From the center ring, you will work rounds of single crochet, half double crochet, and double crochet stitches to build up the body of the flower. The center circle is usually completed in two to three rounds using single crochet stitches worked in the round, increasing at regular intervals to keep the work flat and circular. Once the center reaches the desired diameter, typically around two inches, you will switch to your petal color and begin working the distinctive flower petal pattern that gives this potholder its charming floral appearance.
The petals are created using a shell stitch or a series of double crochet clusters that arch upward and outward from the base round, forming the rounded shape characteristic of flower petals. Each petal is usually worked as a group of five to seven double crochet stitches all anchored into the same stitch or chain space at the base, then separated from the next petal by one or two slip stitches or chain stitches. Understanding the structure of a shell stitch before you begin will make the petal rounds much easier to execute, and swatching a few practice petals on a separate piece of yarn is a great way to build confidence before working on your actual potholder.
Step-by-Step Pattern Instructions
Begin your flower potholder by creating a magic ring with your center color yarn. Into the magic ring, work six single crochet stitches, then slip stitch to join the round and pull the tail to close the center hole completely. This first round forms the very heart of your flower. In round two, work two single crochet stitches into each stitch around for a total of twelve stitches, then join with a slip stitch. Round three involves alternating between one single crochet in the first stitch and two single crochet in the next, increasing to eighteen stitches total and completing your center circle.
For round four, you will switch to your petal color and begin forming the petals. Work one single crochet in the first stitch of the round, then in the next stitch work five double crochet stitches to form your first petal shell, followed by one single crochet in the stitch after the shell. Repeat this sequence around the entire circle, working a total of six petals evenly spaced around the flower. After completing all six petals, join with a slip stitch to the first single crochet and fasten off, leaving a tail for weaving. Your basic flower motif is now complete and should lay flat and symmetrical.
The instructions broken down by round are as follows:
- Round 1: Magic ring, 6 single crochet into ring, slip stitch to join. (6 stitches)
- Round 2: 2 single crochet in each stitch around, slip stitch to join. (12 stitches)
- Round 3: *1 single crochet, 2 single crochet in next stitch* repeat around, slip stitch to join. (18 stitches)
- Round 4: *1 single crochet, 5 double crochet in next stitch (petal), 1 single crochet* repeat 6 times, slip stitch to join.
- Round 5 (optional border): Join border color, single crochet evenly around entire outer edge of petals, slip stitch to join.
Once your flower motif is finished, you have a couple of options for completing the potholder. If you are working a single-layer version, simply weave in all ends securely and block the piece lightly by dampening it and pinning it into shape while it dries. For a double-layer potholder, work a second identical flower motif and then hold both pieces together with wrong sides facing. Work a round of single crochet through both layers simultaneously around the outer edge of the petals, joining them firmly together. This creates a neat finished border while also securing the two layers into a durable, heat-protective kitchen tool.
Color Combinations and Design Variations
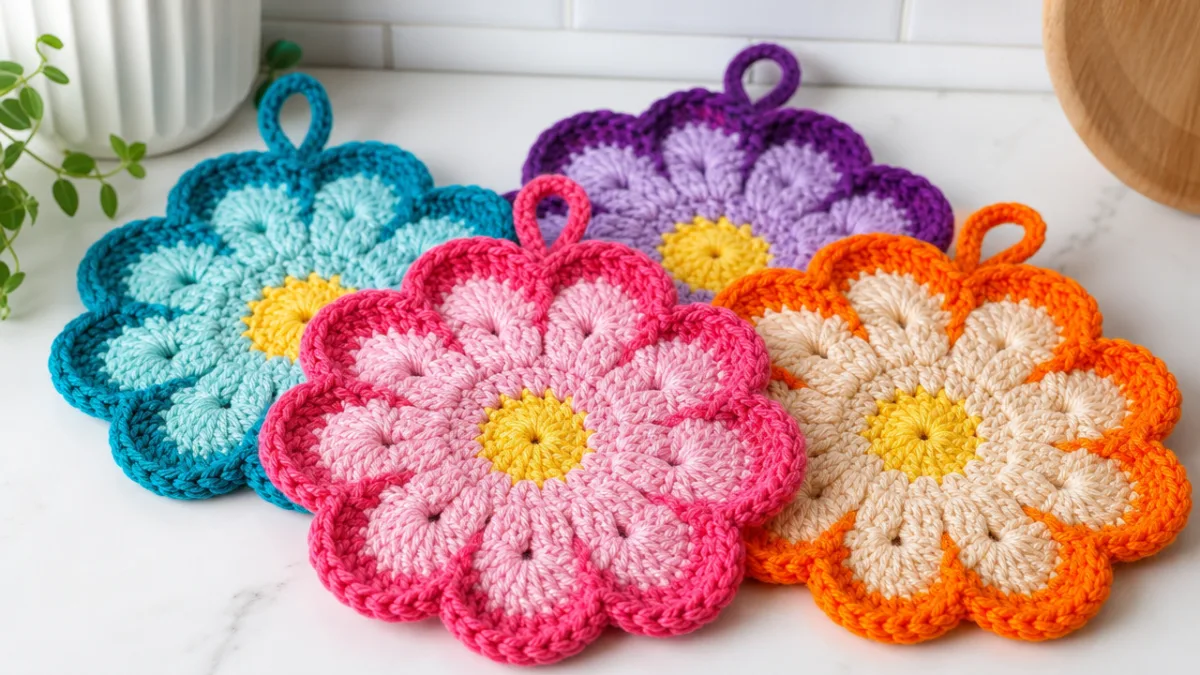
One of the most exciting aspects of making crochet flower potholders is the endless opportunity for creative color expression. Classic combinations like sunny yellow petals with a burnt orange center evoke the cheerful energy of a summer garden, while soft lavender petals paired with a pale green center create a more delicate, vintage-inspired aesthetic. For a bold and contemporary kitchen, high-contrast combinations like black petals with a bright white center, or deep teal petals with a coral center, make a striking visual statement while remaining completely functional as a kitchen accessory.
Beyond simple two-color designs, you can introduce gradient effects by using self-striping or ombre yarn for the petals, which creates a multi-toned petal effect without requiring any color changes mid-round. Another popular variation is to use a variegated yarn for the center and a solid coordinating color for the petals, allowing the natural color shifts in the variegated yarn to create visual interest in the heart of the flower. You can also explore making a multicolored center by working each of the first three rounds in a different color, building a rainbow-inspired core that radiates outward into uniform petals.
There are also several structural variations you can explore once you have mastered the basic pattern. Adding an extra round of petals creates a double-flower effect that looks impressively complex but is relatively straightforward to execute. You can also vary the size of the petals by using taller stitches such as treble crochet instead of double crochet for the shell, producing longer, more dramatic petals reminiscent of a dahlia or chrysanthemum. Another option is to add a round of chain loops between the flower and a final border round, creating a lacy, open-work effect around the edges of the potholder that adds elegance without compromising the heat-protection of the central layers.
Finishing Techniques and Care Instructions
Proper finishing is what separates a homemade-looking project from a truly polished, professional-quality handcraft. After completing your potholder, take the time to weave in all yarn ends thoroughly using your yarn needle. Thread each tail through the needle and weave it in and out of the surrounding stitches for at least two to three inches, then reverse direction and weave back the other way to lock it in place. This double-weaving technique prevents ends from working loose over time, even after repeated washing and use in a kitchen environment where the potholder will be handled frequently.
Blocking your finished potholder will dramatically improve its appearance and ensure the flower lies flat and even. To block a cotton potholder, simply soak it briefly in cool water, gently squeeze out the excess without wringing or twisting, then lay it flat on a clean towel or blocking mat. Use your hands to smooth it into a symmetrical shape, making sure each petal is evenly spaced and the center circle is as round as possible. Allow it to dry completely before using or gifting. If you have blocking pins and a foam mat, you can pin each petal tip into place while drying for an especially crisp, defined shape.
Caring for your crochet flower potholder properly will extend its life and keep it looking beautiful for years to come. Because it is made from cotton yarn, it can generally be machine washed on a gentle cycle in cool or warm water, making it highly practical for everyday kitchen use. Avoid using high heat in the dryer, as this can cause cotton to shrink slightly; instead, reshape and air dry the potholder after washing. Over time and with heavy use, the potholder may flatten somewhat, but a quick wash and reshape will usually restore its original form and loft. Replace the potholder if it shows signs of significant wear, thinning, or scorching, as a compromised potholder no longer offers reliable heat protection.
Tips for Beginners and Troubleshooting Common Issues
If you are new to crochet or working in the round for the first time, the flower potholder is an excellent project to build your fundamental skills on because it is small, quick to complete, and immediately rewarding. One of the most common challenges beginners face when working in the round is accidentally twisting stitches or losing track of where each round begins and ends. Using a stitch marker placed in the first stitch of each round and moving it up as you go will solve this problem entirely, giving you a clear visual reference point throughout the project.
Another frequent issue is a finished piece that cups or bowls rather than lying flat. This usually happens when there are not enough increases being worked in each round, causing the fabric to pull inward. If your potholder is cupping, try going up one hook size to create more slack in your stitches, or add a few extra increase stitches in your next round to encourage the fabric to spread outward. Conversely, if your potholder is ruffling or waving at the edges, you have too many stitches and need to reduce the number of increases or drop down a hook size. Consistent tension is the key to a beautifully flat, even finished piece.
Here are some additional tips to help you succeed with this pattern:
- Always check your stitch count at the end of each round before proceeding to the next, especially on the increase rounds.
- When changing colors, make the color switch on the last pull-through of the stitch before the new color begins for the cleanest join.
- If your magic ring refuses to stay closed, try working an extra slip stitch into the base of the first stitch of round two before pulling the tail tight.
- Work your stitches over the starting tail of each color change to save time on weaving in ends later.
- Take photos as you complete each round so you have a reference to return to if you need to frog (unravel) and restart a section.
Even experienced crocheters sometimes find that their petals come out uneven in size or spacing, particularly on their first attempt at a new petal pattern. If your petals look lopsided or inconsistently sized, check that you are working the same number of double crochet stitches into each shell and that your single crochet anchor stitches between petals are being worked into the correct stitches in the previous round. Sometimes taking a photo of your work and comparing it to a finished example can help you identify where a stitch was missed or added erroneously. With patience and practice, the petal round will quickly become second nature, and you will be able to work it smoothly without needing to count every stitch individually.
Gifting and Creative Uses Beyond the Kitchen
Crochet flower potholders make exceptional handmade gifts for a wide range of occasions. A set of two or three potholders in coordinating colors makes a thoughtful and practical housewarming gift that any home cook will appreciate. Pair them with a nice spatula, a jar of homemade jam, or a small cookbook for a beautifully curated gift basket that combines personal craftsmanship with complementary practical items. Because they are quick to make, you can easily produce several in a weekend crafting session, making them ideal last-minute gifts during the holiday season.
Beyond their primary function as kitchen potholders, these crocheted flower motifs have a variety of creative applications throughout the home. Use them as trivets for protecting table surfaces during meals, as decorative mats under potted plants, or as charming coasters for mugs and glasses. Some crafters choose to make smaller versions of the flower motif and attach them to hair clips, brooches, or bag embellishments, extending the pattern’s usefulness well beyond the kitchen. The flower shape also works beautifully as an appliqué that can be sewn onto dishcloths, kitchen towels, or tote bags to add a personalized decorative touch to plain household linens.
The crochet flower potholder pattern also lends itself beautifully to charitable crafting initiatives. Many community organizations, hospitals, shelters, and schools welcome handmade donations, and a cheerful set of flower potholders can brighten a community kitchen, a shelter common room, or a school teacher’s desk. Organizing a group crafting session with fellow crochet enthusiasts to make potholders in bulk for donation is a wonderful way to combine social connection with meaningful community contribution. The relatively low cost of materials and the modest time investment required to complete each potholder makes this one of the most accessible and impactful charitable crafting projects available to anyone who crochets.








What do you think?
It is nice to know your opinion. Leave a comment.