










How to Organize the Kitchen Pantry: Simple Made Pretty in 2026
A well-organized kitchen pantry is one of those home improvements that genuinely transforms your daily life. When everything has a place and you can actually find what you need without digging through cluttered shelves, cooking becomes less of a chore and more of a pleasure. Whether you are working with a spacious walk-in pantry or a modest cabinet tucked into a corner of your kitchen, the principles of smart organization remain the same: simplicity, visibility, and a touch of beauty that makes the whole space feel intentional and inviting.
In 2026, pantry organization has evolved far beyond simply shoving cans onto shelves and hoping for the best. Homeowners and design enthusiasts alike have embraced the idea that functional spaces can also be genuinely beautiful. The rise of open shelving, coordinated storage containers, and thoughtful labeling systems has turned the humble pantry into one of the most talked-about spaces in the modern home. This guide will walk you through every step of creating a pantry that works as hard as you do while looking like it belongs in a magazine spread.
Step One: Empty Everything Out and Start Fresh
Before you can build the pantry of your dreams, you need to confront the reality of what you actually have. Pull every single item out of your pantry and place it on your kitchen counter or dining table. This step feels overwhelming, but it is absolutely essential. You cannot create an organized system around clutter, expired food, and items you have not touched in three years. Think of this as a clean slate moment — the foundation upon which your beautifully organized pantry will be built.
As you empty your pantry, sort everything into categories: canned goods, grains and pasta, baking supplies, snacks, condiments and sauces, breakfast items, and so on. This sorting process will give you a clear picture of exactly how much you have in each category and what organizational systems will serve you best. You may be surprised to discover just how many duplicates you own, or how many items have slipped past their expiration dates unnoticed in the depths of a crowded shelf. Set expired and unwanted items aside to discard or donate immediately.
Once everything is sorted, take a moment to wipe down your pantry shelves thoroughly. Clean away crumbs, dust, and any sticky residue from spills. If your shelves are adjustable, this is the perfect time to reconfigure their heights to better suit the items you plan to store. Tall shelves can accommodate cereal boxes and large pasta boxes, while shorter shelf spacings work beautifully for canned goods, jars, and spice containers. A clean, properly configured pantry structure sets the stage for everything that follows, and you will feel the satisfying difference immediately.
Tools and Supplies You Will Need
Gathering the right organizational tools before you begin placing items back into your pantry will save you enormous time and frustration. Having everything on hand means you can complete the project in one focused session rather than making repeated trips to the store and losing momentum along the way. Consider your pantry’s dimensions carefully and measure shelf depths and widths before purchasing any containers or bins.
- Clear airtight containers in multiple sizes for dry goods like flour, sugar, rice, oats, and pasta
- Matching bins or baskets for grouping smaller items within a category
- Turntables or lazy Susans for deep shelves and corner spaces
- Shelf risers to create tiered visibility within a single shelf
- A label maker or chalkboard labels for clear identification
- Over-the-door organizers for spices, foil, and wrap products
- Drawer organizers or small bins for loose packets and seasoning envelopes
Step Two: Create a Logical Zoning System
The secret to a pantry that stays organized over time is a zoning system — a deliberate arrangement that assigns specific areas of your pantry to specific categories of food. When every family member knows exactly where the snacks live and where to return the cereal after breakfast, maintaining order becomes nearly effortless. Zoning works with your natural habits rather than against them, making the pantry intuitive to use on even the busiest mornings when nobody has time to think too hard about where things belong.
Start by thinking about frequency of use. Items your family reaches for every single day — breakfast foods, snacks, bread, frequently used condiments — should live at eye level and at the front of shelves, where they are easiest to grab without bending or stretching. Reserve the higher shelves for items used occasionally, such as specialty baking supplies, holiday ingredients, and backup pantry staples you buy in bulk. Lower shelves work well for heavier items like large oil bottles, bulk bags of rice or beans, and small appliances you may store in the pantry.
Keep related items together in a way that mirrors how you actually cook and eat. A baking zone might include flour, sugar, baking powder, baking soda, vanilla extract, chocolate chips, and sprinkles all grouped in one area so that baking day requires a single trip to one shelf rather than hunting across the entire pantry. Similarly, a pasta and grains zone keeps all your dinner staples in one place. A dedicated snack zone — especially one placed at a child-friendly height — empowers kids to help themselves independently while keeping everything tidy and accounted for.
Zone Ideas for Different Pantry Layouts
Whether you have a large walk-in pantry or a single reach-in cabinet, you can adapt the zoning concept to fit your space. The key is consistency — once your zones are established, commit to them so that restocking groceries and finding ingredients always feels completely automatic and stress-free.
- Breakfast Zone: Cereals, oatmeal, granola, pancake mix, syrups, nut butters, and jam
- Baking Zone: Flours, sugars, leavening agents, extracts, chocolate, and decorating supplies
- Pasta and Grains Zone: Dried pasta, rice, quinoa, couscous, lentils, and dried beans
- Canned Goods Zone: Soups, tomatoes, beans, vegetables, and fruits organized by type
- Snack Zone: Chips, crackers, popcorn, granola bars, dried fruit, and nuts
- Condiments and Sauces Zone: Oils, vinegars, hot sauces, soy sauce, and cooking wines
- Spice and Seasoning Zone: Individual spices, spice blends, seasoning packets, and salt
Step Three: Invest in the Right Storage Containers
Nothing transforms the look and functionality of a pantry quite like a cohesive set of storage containers. Transferring dry goods from their original packaging into clear, airtight containers does three important things simultaneously: it keeps food fresher for longer by protecting against moisture and pests, it allows you to see exactly how much of each ingredient you have at a glance, and it creates a visually harmonious aesthetic that makes your pantry feel calm and intentional rather than chaotic and mismatched. This single investment, more than almost anything else, is what gives a pantry that beautiful, curated appearance.
When selecting containers, prioritize airtight seals for anything that can go stale — flour, sugar, pasta, rice, oats, nuts, and coffee beans all benefit enormously from airtight storage. Look for containers that stack efficiently to maximize your vertical shelf space. Square and rectangular containers use shelf space far more efficiently than round ones, allowing you to fit more into the same footprint without wasted gaps. Clear containers are almost always preferable to opaque ones because they allow you to monitor your inventory levels without opening anything, which saves both time and mental energy during meal planning and grocery shopping.
You do not need to replace every container in your pantry all at once to feel the benefits. Start with the categories you use most frequently — your everyday baking supplies and breakfast grains, for example — and add more containers gradually as your budget allows. Many organizers recommend choosing a single brand or style and sticking with it throughout your pantry, as this visual consistency is largely responsible for the polished, magazine-worthy look that makes well-organized pantries so satisfying to behold. Popular choices in 2026 include glass jars with bamboo lids, BPA-free plastic canisters with locking seals, and modular acrylic containers designed to tessellate perfectly on a shelf.
Labeling: The Step That Makes Organization Last
A container without a label is a mystery waiting to create confusion, especially when multiple family members are reaching into the pantry at different times of day. Labels are the glue that holds your entire system together, turning a pretty arrangement into a truly functional one that anyone in the household can maintain without asking questions. There is also something deeply satisfying about a pantry where every single container, bin, and basket is clearly identified in a consistent font or handwriting style.
Labeling options range from the practical to the decorative. A simple label maker produces clean, professional-looking adhesive labels in seconds and is by far the most low-effort approach. Chalkboard labels offer a charming, changeable option that suits kitchens with a farmhouse or casual aesthetic. Pre-printed label sets designed specifically for pantry containers are widely available in 2026 and come in dozens of typographic styles to match any design sensibility. Whatever method you choose, aim to label not just the container name but also the shelf or bin so that even guests and children know exactly where to return items after use.
Step Four: Make It Beautiful as Well as Functional
Organization and beauty are not mutually exclusive — in fact, the most enduringly organized spaces tend to be the ones their owners genuinely enjoy looking at and spending time in. When your pantry is attractive, you are intrinsically motivated to keep it that way. You take a little extra care when restocking groceries. You straighten a tilted label or rearrange a bin that has shifted. The aesthetic investment you make in your pantry pays dividends in sustained tidiness that a purely utilitarian approach simply cannot match over the long term.
Consider lining your pantry shelves with removable wallpaper or shelf liner in a pattern or color that complements your kitchen’s overall palette. This small detail adds an enormous amount of warmth and personality to what might otherwise feel like a sterile space. Woven baskets and fabric-lined bins add texture and visual interest while also corralling smaller items that would otherwise look chaotic on an open shelf. Coordinating the colors of your baskets, containers, and labels creates a cohesive look that feels intentional and thoughtfully curated rather than accidentally assembled over years of mismatched purchases.
Good lighting is one of the most underrated elements of a beautiful and functional pantry. If your pantry lacks built-in lighting, battery-operated LED strip lights or puck lights are an inexpensive and renter-friendly solution that can be added in minutes. Adequate lighting means you can actually see everything on every shelf without squinting into dark corners, which both improves usability and makes the space feel more welcoming. In 2026, many homeowners are also incorporating small decorative elements into their pantries — a small succulent on a shelf, a printed quote, or a coordinating cutting board leaned casually against the wall — to make the space feel like a natural, joyful extension of the kitchen rather than merely a storage utility.
Finishing Touches That Elevate the Space
The difference between a well-organized pantry and a truly beautiful one often comes down to a handful of finishing details that require very little time or money but make an outsized visual impact. These small touches signal that the space was arranged with care and intention, and they are what transform functional organization into something that genuinely delights you every time you open the pantry door.
- Decant cooking oils and vinegars into matching glass bottles with pour spouts for a streamlined look on the shelf
- Use matching hooks on the inside of the pantry door for aprons, reusable bags, or a small chalkboard for grocery lists
- Group items with a color story in mind — a row of warm-toned spice jars, for instance, creates a naturally pleasing visual rhythm
- Add a small framed print or hand-lettered sign to give the pantry a personal, homey character
- Keep a small step stool tucked inside the pantry for easy access to high shelves, choosing one in a color that complements your palette
Step Five: Maintain Your Organized Pantry Long-Term
The most common mistake people make after completing a pantry organization project is treating it as a one-time event rather than an ongoing practice. A beautifully organized pantry will naturally drift toward disorder over time unless you build small maintenance habits into your routine. The good news is that maintaining an organized system takes dramatically less effort than creating it from scratch, especially when the system is well-designed, logical, and genuinely intuitive to use. A few minutes of attention each week is all it takes to keep your pantry looking and functioning at its best.
One of the most effective maintenance habits is the first-in, first-out approach to pantry restocking. When you bring home groceries, place new items behind older ones of the same type rather than simply stacking them in front. This ensures that older items get used before newer ones, significantly reducing food waste and the likelihood of discovering long-expired items lurking at the back of a shelf. It takes only a few extra seconds each time you put groceries away, but the cumulative impact on your pantry’s order and your household’s food waste is genuinely substantial.
Schedule a brief pantry reset once a month — just ten to fifteen minutes of pulling things forward, straightening bins, restocking containers from bulk bags, and wiping down any dusty shelves. This monthly habit prevents the gradual entropy that causes pantries to slide back into chaos over the course of a year. Many organized home enthusiasts find it helpful to combine this pantry reset with their monthly grocery planning session, checking inventory levels at the same time they write their shopping lists to avoid both overbuying and running out of staples. When your pantry is organized and your inventory is visible, meal planning becomes faster, grocery shopping becomes more efficient, and food waste drops measurably.
Teaching the Whole Family to Maintain the System
An organized pantry that only one person in the household knows how to use is a system on borrowed time. For lasting organization, every family member who accesses the pantry needs to understand where things belong and why the system is set up the way it is. This does not require a formal training session — a simple walkthrough of the zones and labels is usually enough to get everyone on the same page, especially when the system is clearly labeled and visually intuitive.
For households with children, involving kids in the organization process from the beginning dramatically increases buy-in and cooperation. When children help decide where the snack zone will be or choose the labels for their favorite items, they develop a sense of ownership over the space that makes them far more likely to put things back correctly and far less likely to rummage destructively through carefully organized shelves. Even very young children can understand simple systems when they are labeled with pictures alongside words, turning pantry maintenance into an early lesson in responsibility and order that extends well beyond the kitchen itself.
Finally, remember that flexibility is a feature, not a weakness, in any organizational system. As your family’s eating habits evolve, as seasons change, and as your household grows or shrinks, your pantry system should adapt with you. Do not be afraid to reorganize a zone that is not working, try a different container size, or relocate a category to a more convenient shelf position. The goal was never to achieve a single perfect arrangement frozen in time — it was always to create a living, breathing system that genuinely supports the way your family eats, cooks, and lives together every day.
Bringing It All Together: Your Simply Pretty Pantry
Organizing your kitchen pantry is one of the highest-return home improvement projects you can undertake in terms of the ratio of time invested to daily quality-of-life improvement. Unlike a renovation project that takes weeks and costs thousands of dollars, a pantry transformation can be completed over a single weekend and maintained beautifully with just minutes of attention each week. The ripple effects extend throughout your entire kitchen routine — meals get planned more efficiently, grocery shopping becomes more focused and less expensive, cooking feels less stressful, and the simple act of opening your pantry door brings a small but genuine moment of pleasure each and every time.
The philosophy behind the simple made pretty approach to pantry organization is that function and beauty are not competing priorities but complementary ones. A system that is beautiful but not functional will be abandoned quickly when real life intervenes. A system that is functional but ugly or joyless will never inspire the small daily habits that keep it working over time. When you design a pantry that is both deeply practical and genuinely pleasing to look at, you create something that motivates its own maintenance and brings a quiet, satisfying order to one of the most used spaces in your home.
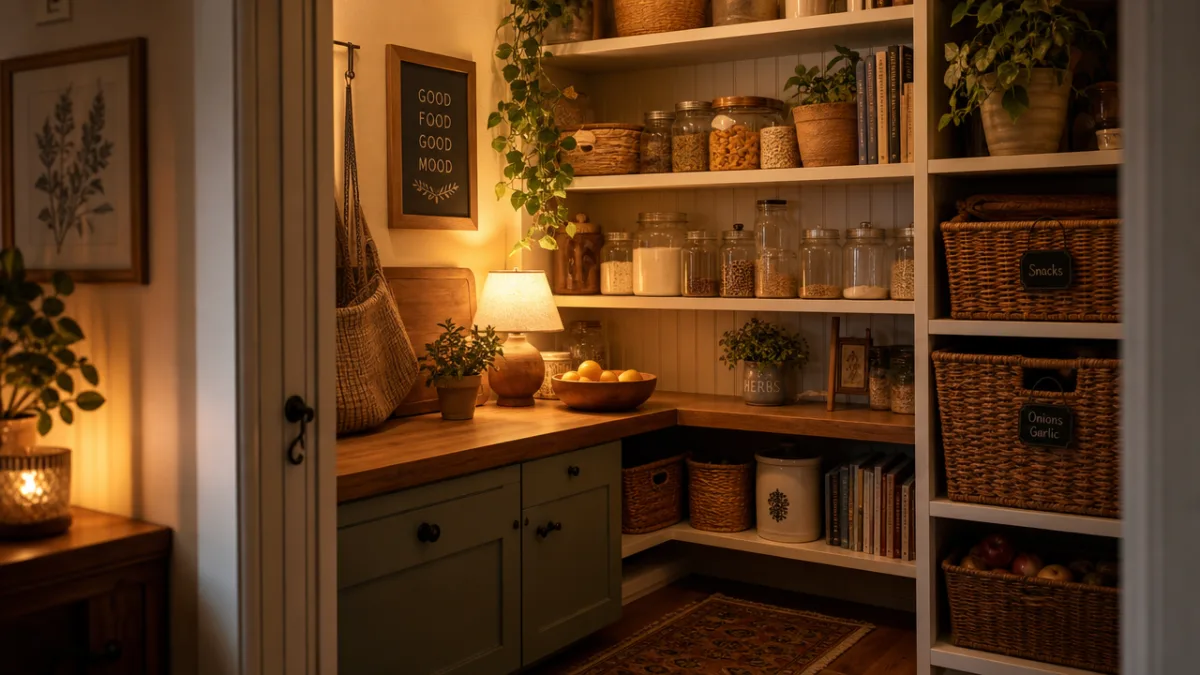
As you look at your newly organized pantry — the matching containers lined up with their clear labels, the baskets corralling your snacks in their designated zone, the shelves clean and wiped and lit with warm light — take a moment to appreciate not just how it looks but how it will change your mornings, your meal prep, and your overall relationship with your kitchen. This is the real payoff of the work you have done: not just a pretty space to photograph, but a genuinely better way of living in and enjoying your home every single day. Simple, beautiful, and entirely, wonderfully yours.
Quick Reference: The Complete Pantry Organization Checklist
Use this checklist to guide your pantry organization project from beginning to end, and refer back to it during your monthly maintenance sessions to ensure your system stays in excellent working order throughout the year.
- Empty the pantry completely and sort all items by category
- Discard expired items and donate duplicates or unwanted foods
- Clean all shelves thoroughly and reconfigure shelf heights as needed
- Measure shelf dimensions and purchase appropriate containers, bins, and organizers
- Establish your zone system based on frequency of use and category logic
- Transfer dry goods into clear, airtight containers
- Add shelf liners, lighting, and decorative touches as desired
- Label every container, bin, and shelf zone clearly and consistently
- Restock your pantry using the first-in, first-out method
- Walk household members through the system and assign shared responsibility
- Schedule a monthly ten-minute reset to maintain order going forward








What do you think?
It is nice to know your opinion. Leave a comment.