










Tapestry Crochet: A Beginner’s Guide
What Is Tapestry Crochet?
Tapestry crochet is a really fun technique where you can work colorful, geometric patterns right into your fabric — and the way it works is pretty clever. Instead of cutting your yarn every time you change colors, you carry the unused strands along the back of your work and crochet right over them as you go. The result is a thick, sturdy fabric with a beautiful design on the front and a surprisingly neat, almost woven look on the back.
Tapestry crochet actually has a really rich history — it goes back centuries, rooted in Central and South American textile traditions. Indigenous communities in Guatemala, Peru, and Mexico were using techniques like this to make bags, baskets, and clothing covered in bold, meaningful motifs long before it ever entered the modern crafting world. Researcher and author Carol Ventura is largely credited with bringing it to wider attention, documenting those global traditions and helping contemporary makers discover and fall in love with the technique.
What’s great about tapestry crochet for beginners is that the whole thing is built on a single stitch — the humble single crochet. Yes, juggling multiple colors can feel like a lot at first, but the actual stitch mechanics couldn’t be simpler. Once you get the hang of carrying your yarn and reading a basic chart, it starts to click pretty fast, and the payoff is huge. Your finished work looks way more impressive than the skill level it actually requires.
Essential Materials and Tools
Getting your materials right from the start makes a real difference with tapestry crochet. Since you’re keeping multiple strands of yarn going at the same time, the weight and texture of what you choose matters more than it does for a lot of other crochet projects. For beginners, smooth, tightly plied yarn in a worsted or DK weight is the way to go — it shows off your stitches clearly, lets the carried yarn sit neatly behind your work, and gives geometric or pictorial designs the clean, crisp look they need to pop.
Cotton yarn is pretty much the gold standard for tapestry crochet, especially if you’re making bags, pouches, or anything for the home. Because cotton has almost no stretch, your stitches stay even and your pattern won’t warp or distort over time. It also comes in a huge range of colors, which makes matching a chart a lot easier. Some names you’ll see tapestry crocheters recommend again and again are Lion Brand 24/7 Cotton, Paintbox Simply DK, and Scheepjes Catona — all solid choices for getting started.
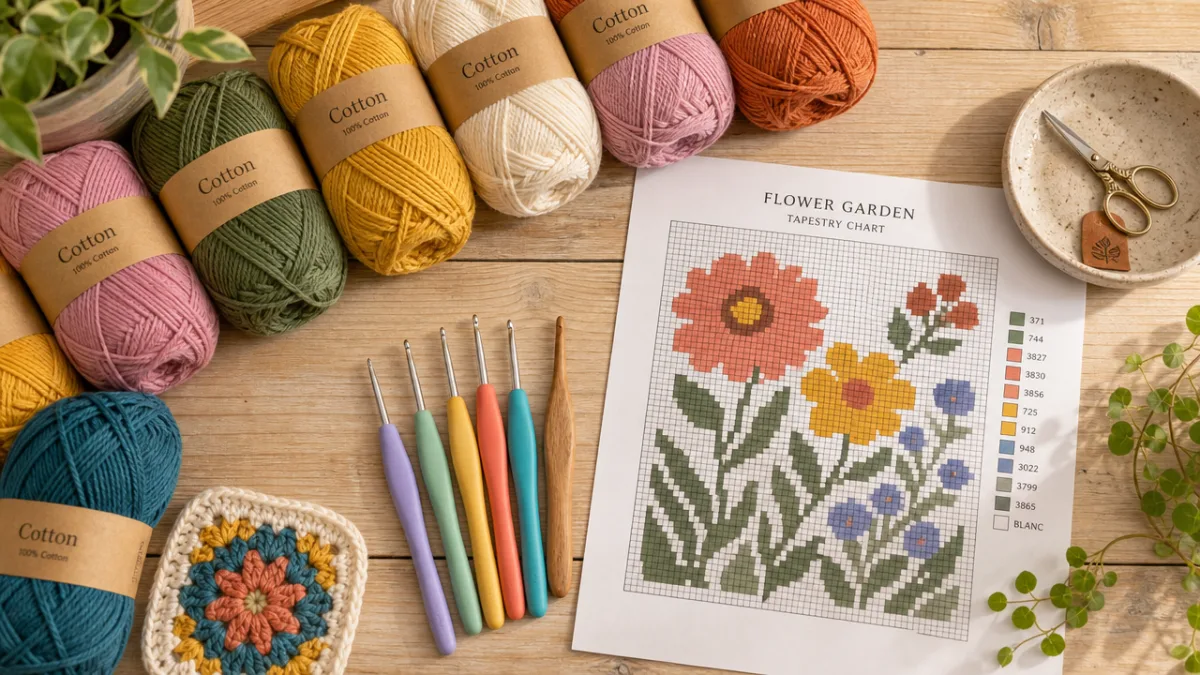
On the tools side, you’ll want a hook that’s one size smaller than what your yarn label suggests. That’s not a mistake — tapestry crochet actually needs a tighter gauge so the carried yarn stays hidden behind your work rather than peeking through to the front. Beyond that, the essentials are pretty simple: a yarn needle for weaving in ends, a pair of scissors, stitch markers to keep track of your rounds, and a color chart (printed out or pulled up on your phone or tablet) that you can reference as you work.
- Smooth, tightly plied cotton yarn in worsted or DK weight for clean stitch definition and a stable, non-stretchy fabric that holds its shape.
- A crochet hook one size smaller than the yarn label recommends, so your gauge is tight enough to keep the carried yarn from showing on the front of your work.
- A yarn needle, scissors, and stitch markers to keep things organized as your project grows and the rounds start stacking up.
- A color chart — printed or on a screen — kept somewhere easy to glance at so you can reference it constantly without losing your place.
Understanding Color Charts and Pattern Reading
Color charts are basically the language tapestry crochet is written in. Instead of spelling out every stitch in words, tapestry patterns use a grid where each tiny square stands for one single crochet stitch and each color in the grid matches a yarn color you’ll be working with. It sounds a little intimidating at first, but learning to read charts is genuinely one of the best investments you can make as a beginner — once it clicks, an enormous range of designs suddenly becomes available to you.
When you’re working in the round, which is by far the most common approach in tapestry crochet, you read the chart from bottom to top and right to left, following the same direction your hook naturally travels. Each row of the grid equals one round of stitches. A lot of beginners find it really helpful to print the chart and use a ruler or a strip of tape to cover the rows they’ve already finished, so they can stay focused on just the current round. If you prefer working from a screen, there are digital chart apps that let you highlight completed rows, which does the same thing.
The most common tapestry crochet motifs are geometric — diamonds, chevrons, stripes, zigzags — though plenty of patterns also feature animals, flowers, and folk art-inspired designs. When you’re just starting out, look for charts that use only two colors and repeat a simple pattern across each round. This lets you focus on getting the color-carrying technique solid before you tackle anything with three or more strands going at once. Ravelry, Pinterest, and a lot of crochet blogs have plenty of free beginner-friendly charts to explore.
The Core Technique: Carrying and Switching Colors
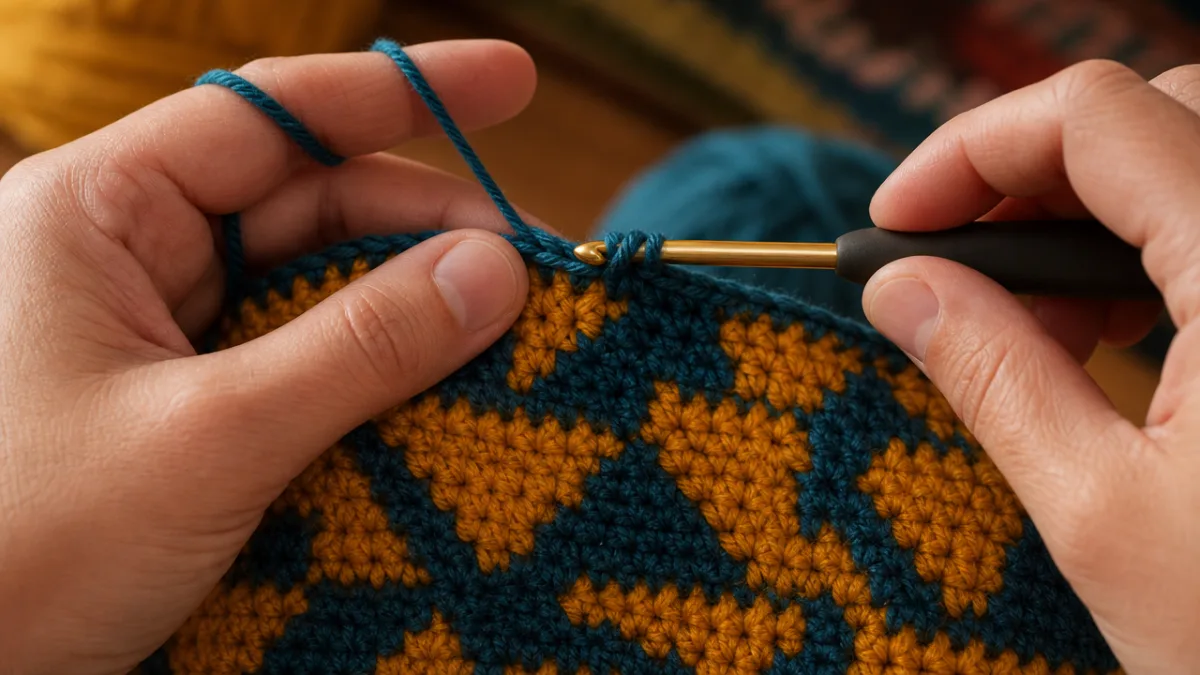
The heart of tapestry crochet — the thing that makes it what it is — is carrying the yarn you’re not currently using along the inside of your stitches so it’s always right there when you need it. The way you do this is by laying the inactive yarn flat across the top of the previous row and then crocheting over it with every single crochet you make. This wraps the carried yarn neatly inside the fabric, keeps the back of your work tidy, and means there are no loose loops or snags lurking inside a finished bag or accessory.
Switching colors is actually much easier than most beginners expect. When your chart says it’s time to change, you work your last single crochet in the old color all the way up to that final yarn-over-and-pull-through, then you finish the stitch by pulling through with the new color instead. That final pull-through is what determines the color you see on the front of the stitch — that’s the useful thing to remember. The color you just finished with then becomes the carried yarn for the next stretch, and you carry right on without breaking the rhythm. Practicing this on a small swatch before you start your actual project is really worth the extra few minutes.
Tension is where most beginners run into trouble with this technique. When you’re crocheting over a carried strand, it’s very easy to pull it too tight without realizing it, and that causes the fabric to pucker and pull. To avoid it, make a conscious habit of keeping the carried yarn relaxed and a little loose before every stitch. Some people find it helps to spread their stitches along the hook first, which gives the carried yarn a bit more room to breathe. It feels awkward at first, but with a bit of practice it becomes automatic and your fabric starts lying beautifully flat.
- Before each stitch, lay the non-working yarn flat against the top of the previous row so it’s in position to be carried.
- Insert your hook, yarn over, and pull up a loop — making sure you’re crocheting over the carried strand with every single crochet you work.
- When the chart calls for a color change, work the last stitch of the current color right up to the final yarn-over, then complete it by pulling through with the new color.
- Let the just-finished color relax loosely across the top of the row, where it’ll sit as the carried yarn until the chart calls for it again.
- At the end of each round or row, give the fabric a gentle tug in each direction to even out your tension before moving on.
Your First Tapestry Crochet Project
If you’re wondering where to start, a small flat coaster or a simple coin purse worked in the round is pretty much the perfect first tapestry crochet project. These are big enough to give you real practice with carrying colors but small enough that if something goes a bit sideways, you haven’t lost a ton of work. A two-color geometric coaster using a basic diamond or checkerboard chart can often be finished in an afternoon, which means you walk away with an actual finished object — and that feeling of accomplishment goes a long way toward keeping you motivated.
When you’re getting set up, start by crocheting a flat circle or working into a magic ring if your pattern calls for working in the round. Go ahead and join your second color right at the start, even if the first round is all one color — that way the carried yarn is already in place and you won’t have to add it in the middle of a round later. Work your first few rounds slowly and deliberately, stopping to check your chart every few stitches until reading and crocheting at the same time starts to feel natural rather than like rubbing your head and patting your stomach.
As the project grows, keep an eye on your tension around the color changes — that’s where beginners tend to pull too tight, leaving little dimples or puckers in the fabric. If you notice it happening, try loosening your grip on the working yarn a little and letting the hook sit a bit further back in the stitch before pulling through. And don’t skip blocking when you’re done. Wetting your finished piece and pinning it flat to dry smooths out a lot of minor tension wobbles and gives everything a clean, polished finish that genuinely makes the work look its best.
Tips for Growing Your Tapestry Crochet Skills
Once you’ve finished your first project and feel good about working with two colors, the natural next step is trying a three-color design. The principles are exactly the same — you’re just carrying two inactive strands at once instead of one. Most crafters find it feels surprisingly manageable at this point, because the core habit of crocheting over carried yarn is already pretty well wired in and it’s mostly just a matter of extending it to include one more strand.
Getting involved in online tapestry crochet communities is genuinely one of the best things you can do for your growth. Groups on Facebook, Reddit, and Ravelry are full of makers at every level sharing their projects, recommending patterns, troubleshooting tension issues, and cheering each other on. Seeing what more experienced tapestry crocheters are making — from tiny statement earrings and keychains to large wall hangings, market bags, and whole garments — is seriously inspiring and gives you a real sense of what this technique can grow into.
Playing with different yarns and color combinations is one of the most enjoyable parts of getting more confident with tapestry crochet. Once cotton feels comfortable, try a project in wool or acrylic and notice how the different fiber properties change the drape and density of the finished fabric. Experiment with color pairings — complementary colors for bold, graphic contrast, or analogous shades for something subtler and more sophisticated. It’s worth keeping a little notebook or digital folder where you jot down color combinations and design ideas as they come to you, so you always have somewhere to draw from when you’re ready to cast on something new.
Common Mistakes and How to Avoid Them
One of the most common slip-ups in tapestry crochet is accidentally catching only part of the carried yarn instead of crocheting cleanly over it — or missing it entirely and leaving it dangling loose. Both will show up in your finished work. Catching just one strand creates a small raised bump on the surface; missing it altogether leaves a loop on the inside. The fix is to get into a consistent hand position that keeps the carried yarn pressed firmly against the work right below your hook before every single stitch, so it’s always exactly where it needs to be.
Miscounting stitches is another one that catches a lot of beginners off guard, especially when working in the round with no obvious seam to act as a reference point. Because tapestry crochet charts tend to be very symmetrical, even one extra or missing stitch can throw the whole pattern out of alignment within just a few rounds — and suddenly you’re ripping back a lot of work. The simple fix is to use a stitch marker in the first stitch of every round and count your stitches at the end of each round before moving on. It only takes a few seconds and it saves an enormous amount of frustration.
Finally, a lot of beginners skip gauge swatching because it feels like an unnecessary detour — but with tapestry crochet, it really isn’t optional. The technique depends on a specific stitch density to both keep the carried yarn invisible and make your pattern come out with the right proportions. Working to gauge isn’t just a suggestion here the way it sometimes is in more forgiving crochet projects. Take the time to make a small swatch with your chosen hook and yarn, measure it, and adjust your hook size if needed before you dive into the main project. It’s a small investment upfront that consistently pays off in a better finished result and a much more enjoyable process from start to finish.








What do you think?
It is nice to know your opinion. Leave a comment.