










How To Crochet in The Spiral: A Complete Beginner’s Guide
Crocheting in the spiral is one of the most satisfying and useful techniques any crocheter can master. Unlike working in joined rounds — where you slip stitch at the end of each round and chain up — working in a continuous spiral means you never stop, never join, and never create that telltale jog or seam in your fabric. The result is seamless, smooth, and beautifully even, making it the preferred method for everything from amigurumi toys to hats, baskets, and bags. If you have ever noticed an awkward diagonal line running up the side of a crocheted hat or wondered why your granny squares look slightly off, spiral crocheting is likely the answer you have been searching for.
Many beginners assume that spiral crocheting is more complicated than working in joined rounds, but the truth is quite the opposite. Once you understand the basic concept and pick up a few simple habits — like using a stitch marker and keeping an eye on your count — spiral crocheting actually simplifies your work considerably. You spend less time managing slip stitches and turning chains, and more time enjoying the rhythm of your hook moving through yarn. The continuous motion becomes almost meditative, and many crocheters find that they work faster and more consistently once they make the switch to spirals.
This comprehensive tutorial will walk you through everything you need to know about crocheting in the spiral. We will cover the foundational concepts, how to start your work, how to maintain your spiral correctly, and how to avoid the most common mistakes that trip up newer crafters. By the end, you will have a thorough understanding of this technique and the confidence to apply it across a wide range of your crochet projects. Whether you are a complete beginner picking up a hook for the first time or an intermediate crocheter looking to refine your skills, this guide has something valuable for you.
Understanding the Difference Between Spiral and Joined Rounds
Before diving into the how-to, it helps to clearly understand what sets spiral crocheting apart from its alternative. In joined rounds, each round is treated almost like a flat row — you work to the end, slip stitch into the first stitch to close the circle, then chain up to create the height for the next round before continuing. This method is excellent for colorwork, certain stitch patterns, and any design where you need a defined, clearly delineated round. However, the joining process creates a subtle but visible seam, and the chain-up can sometimes leave a small hole or a loose loop that disrupts the fabric’s texture.
Spiral crocheting, by contrast, is truly continuous. When you reach the end of what would conventionally be considered a round, you simply keep going. There is no slip stitch, no chain, no pause. Your work winds upward like the thread on a bobbin or the grooves of a screw, which is precisely why it is called a spiral. Your stitch marker — an absolute necessity in this technique — marks where each round begins so you can keep your count accurate. Without this marker, you would quickly lose track of where you are, which is one reason beginners sometimes find the technique confusing at first.
The visual result of spiral crocheting is strikingly clean. Because there is no join, there is no jog — that visible diagonal step you sometimes see in striped hats or color-blocked amigurumi worked in joined rounds. Stitches flow into one another organically, and the fabric has a natural, consistent height throughout. This is why virtually every professional amigurumi pattern and most seamless hat patterns are written for spiral construction. Understanding this distinction is the first and most important step toward mastering the technique and choosing the right method for each project you undertake.
Tools and Materials You Will Need
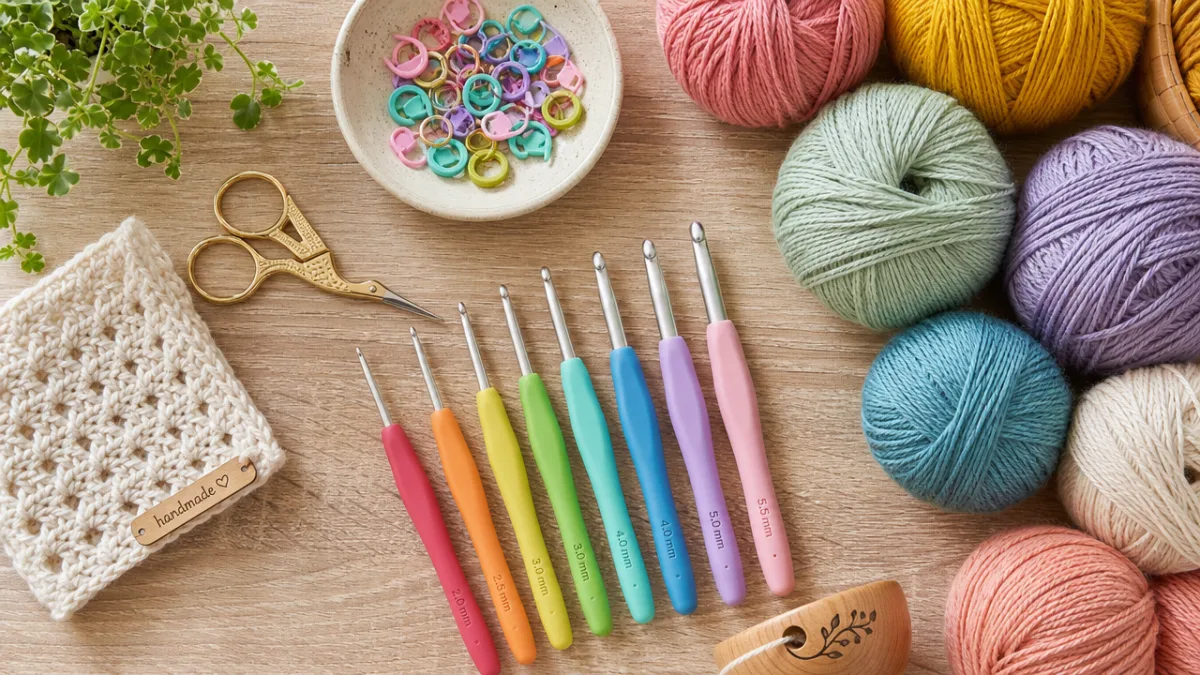
One of the best things about spiral crocheting is that it requires no special equipment beyond what you likely already own. Your standard crochet hook, yarn, and scissors are all you need to get started. However, there is one non-negotiable tool that elevates this technique from confusing to completely manageable: the stitch marker. A stitch marker is a small clip, ring, or loop that you place in a specific stitch to mark your position. In spiral crocheting, you place it at the beginning of each round so you always know when you have completed a full revolution and when to move the marker up.
Stitch markers come in many forms. You can purchase purpose-made plastic or metal locking markers, which clip onto a stitch like a safety pin. You can also use a small piece of contrasting yarn looped through a stitch, a bobby pin, or even a paperclip in a pinch. What matters most is that the marker is easy to see, easy to move, and does not damage your yarn. If you plan to crochet in spirals regularly — which you likely will once you get the hang of it — investing in a small pack of quality locking stitch markers is well worth it. Keep several on hand so you can mark multiple points in complex patterns.
Your choice of yarn also plays a role in how enjoyable your spiral crocheting experience will be. Smooth, plied yarns in solid colors are the most forgiving for beginners because every stitch is clearly visible, making it easy to identify where to insert your hook. Textured yarns, thick-and-thin singles, or very dark colors can make it harder to see individual stitches, which can lead to accidentally skipping or adding stitches — errors that compound quickly in the spiral. For your first spiral project, choose a light to medium-toned, smooth worsted weight yarn and a correspondingly sized hook. Once you are comfortable with the technique, you can experiment with any fiber or weight you like.
How To Start Your Spiral: The Magic Ring and Initial Rounds
Most spiral crochet projects begin at the center and work outward or upward, which means your starting point is crucial. The most common and recommended starting technique is the magic ring, also called the magic circle or adjustable ring. The magic ring creates a tight, adjustable center with no hole, which is ideal for amigurumi and any project where a clean center is important. To make a magic ring, wrap your yarn around two fingers, insert your hook through the loop, draw up a loop of the working yarn, and chain one to secure it. You then work your initial stitches into the ring before pulling the tail to close it tightly.
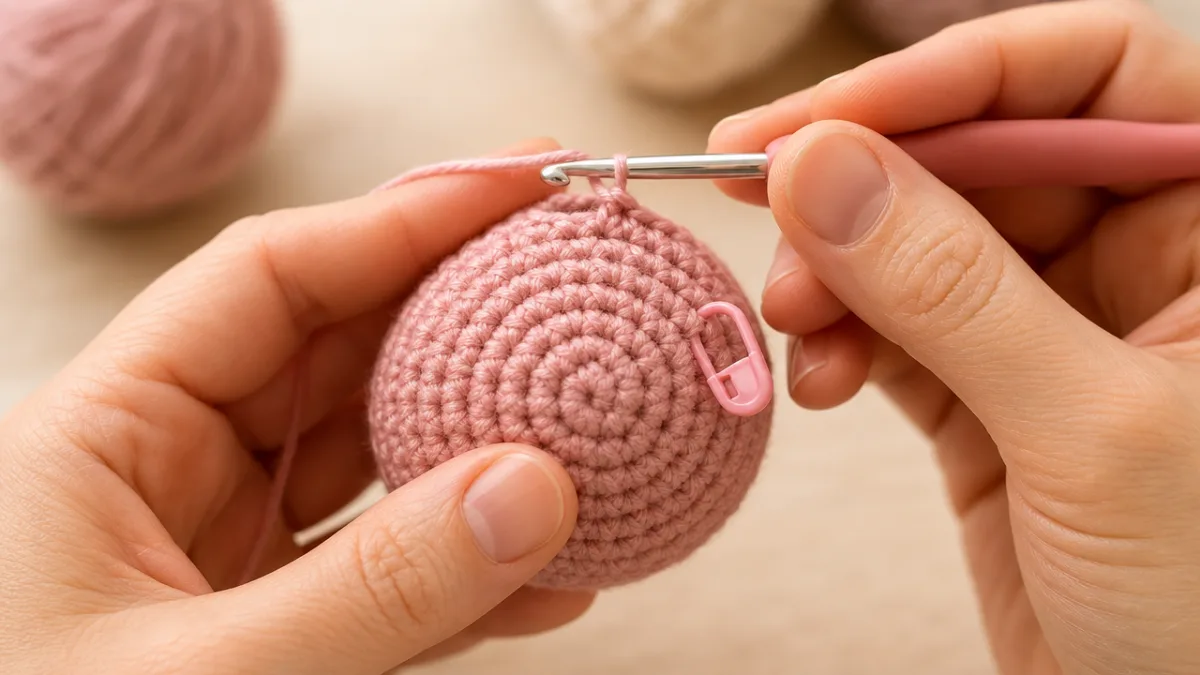
Once your magic ring is complete, you will work your first round of stitches directly into it. For most beginner spiral projects — such as a simple circle or the beginning of a sphere — this first round consists of six single crochet stitches worked into the ring. After completing your sixth stitch, do not slip stitch or chain. Instead, place your stitch marker into the first stitch of the next round, which is the very next stitch you are about to work. This marks the beginning of round two. You then simply continue crocheting, following your pattern’s increase instructions, moving your marker up at the end of each subsequent round.
It is worth noting that some patterns call for a chain-two start rather than a magic ring — particularly older or simpler patterns written for beginners. You chain two, then work your stitches into the second chain from the hook. This method is slightly easier to learn but leaves a small hole at the center, which is noticeable in projects like amigurumi where aesthetics matter. For most applications, the magic ring is superior and, once practiced a handful of times, becomes just as quick and natural as any other starting technique. Spend a few minutes practicing it on scrap yarn before beginning your actual project to build the muscle memory you need.
Maintaining Your Spiral: Stitch Counts, Increases, and Flat Circles
The key to beautiful spiral crochet is consistency, and consistency starts with accurate stitch counting. At the end of every round — when you move your stitch marker — count the stitches in the round you just completed. This habit takes only a few seconds and can save you from ripping back many rounds of work later. An off count is much easier to fix when you catch it immediately. In the spiral, because there is no natural break or join, it is remarkably easy to accidentally add or miss a stitch without noticing, especially when you are watching television or distracted. Diligent counting is your best defense.
If your project is a flat circle — like the base of a basket or a decorative coaster — you will need to increase consistently throughout each round to keep the work lying flat. The standard formula for a flat single crochet circle is to add six stitches per round: round one has six stitches, round two has twelve, round three has eighteen, and so on. The increases are distributed evenly around the circle, and in each successive round, you add one plain stitch between each increase point. Deviating from this formula — increasing too little or too much — causes the circle to either cup upward like a bowl or ruffle and ripple at the edges. Both are useful effects in certain projects, but neither is desirable in a flat circle.
When you are ready to transition from a flat base to building the vertical walls of a project — as you would when making a basket, a hat, or the body of an amigurumi animal — you simply stop increasing and work one stitch into every stitch of the round. This causes the sides to rise naturally, following the spiral upward without any visible seam or interruption. The transition is smooth and nearly invisible, which is one of the most elegant aspects of this technique. Understanding the relationship between increases, decreases, and plain rounds gives you full creative control over the shape you are building, and it is this fundamental principle that underpins nearly every three-dimensional crochet design you will ever make.
Common Mistakes and How To Avoid Them
Even experienced crocheters make mistakes when working in the spiral, but the same errors tend to come up again and again, particularly for those newer to the technique. The single most common mistake is forgetting to move the stitch marker. If you consistently move your marker at the end of each round — placing it into the first stitch of the new round — you will always know exactly where you are. Neglect this habit and you will quickly find yourself unsure whether you have completed a round or are halfway through one, leading to miscounts and misshapen fabric. Make it a non-negotiable rule: move the marker every single time without exception.
Another frequent issue is misidentifying stitches, particularly when working with chunky yarn or in poor lighting. In single crochet spiral work, each stitch has two loops on top — a front loop and a back loop — and your hook should pass under both unless the pattern specifies otherwise. Working into only one loop changes the texture of the fabric and the structure of the piece. Additionally, beginners sometimes confuse the top of a stitch with the space between two stitches, inserting their hook incorrectly and creating a loose, uneven fabric. Practicing in a well-lit space with smooth, light-colored yarn dramatically reduces this type of error and helps you train your eye to recognize correct stitch anatomy.
A third common pitfall is tension inconsistency. Because spiral crocheting is continuous without natural stopping points, it is easy to gradually tighten or loosen your grip over a long session without realizing it. Inconsistent tension shows up as wavy, uneven fabric or as rounds that look noticeably different from their neighbors. Taking regular breaks, consciously relaxing your hands, and practicing consistent yarn tension from the very beginning of your crochet journey will pay dividends across all of your work, not just in spiral projects. Many crocheters find that a yarn guide or tension ring worn on the index finger helps maintain evenness, particularly during marathon crafting sessions.
Creative Applications of the Spiral Technique
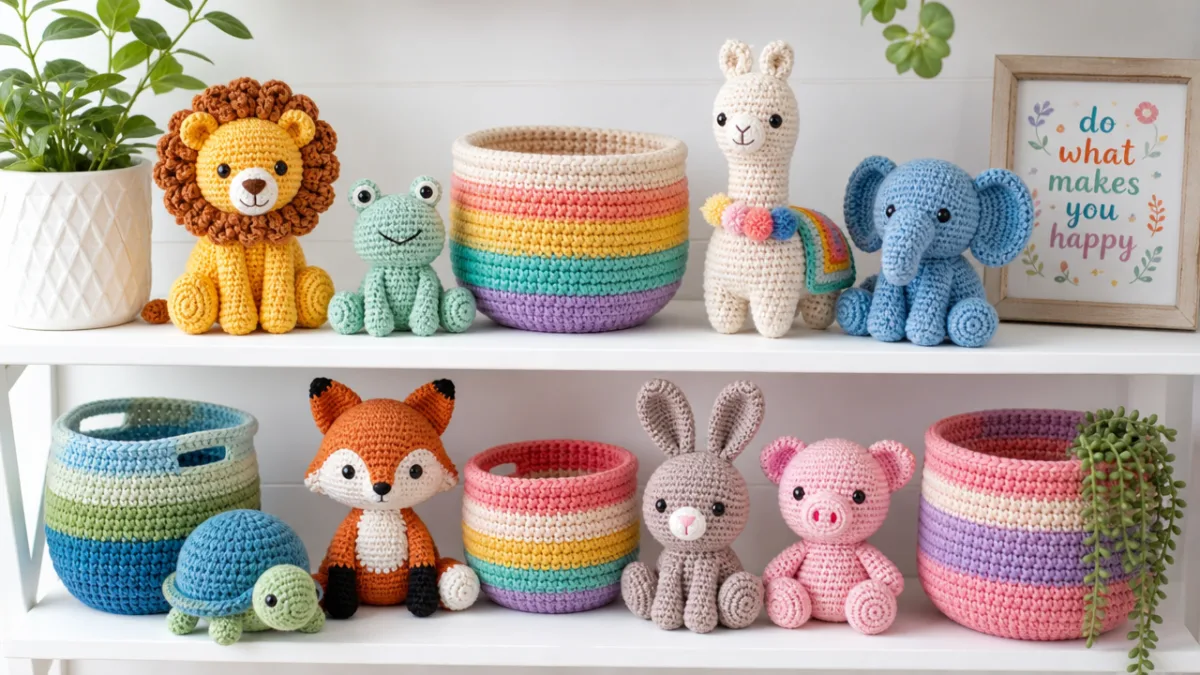
Once you are comfortable with spiral crocheting, you will quickly discover that it opens a vast world of project possibilities. Amigurumi — the Japanese art of crocheting small stuffed toys and animals — is almost entirely worked in the spiral, and for very good reason. The seamless construction creates smooth, rounded surfaces that are perfect for stuffed figures, and the technique allows you to sculpt complex three-dimensional shapes with remarkable precision. A single crochet spiral is the foundation of every amigurumi body part, from a tiny sphere of a head to a tapered arm or leg. Learning to crochet in the spiral is, in many ways, a prerequisite for amigurumi work.
Beyond amigurumi, the spiral technique is ideal for crocheted hats, particularly seamless beanies and fitted caps worked from the crown down. Starting with a magic ring and a flat circle for the crown, then transitioning to straight vertical rounds for the body of the hat, produces a professional result that rivals machine-knit headwear in its smoothness and symmetry. Baskets and bags worked in the spiral benefit from the same seamless quality, and the technique is especially popular for market bags, tote bags, and decorative storage baskets worked in cotton or jute yarn. The absence of a seam means there is no structural weak point and no unsightly join line to hide or minimize.
The spiral technique also lends itself beautifully to colorwork, though with a slightly different approach than joined rounds require. Because the spiral is continuous, color changes create a diagonal line rather than a perfectly horizontal stripe — a characteristic that can be either a design feature or a challenge depending on your goal. Many designers lean into this diagonal quality, creating swirling, striped designs that are uniquely possible in the spiral and impossible to replicate in joined rounds. Others use a technique called jogless color changes to minimize the diagonal effect. Either way, the spiral gives you a rich creative palette to work with, and experimenting with color in this format is one of the great joys of the technique.
Tips for Taking Your Spiral Crochet to the Next Level
Once you have mastered the basics of spiral crocheting, there are several habits and practices that will help you grow as a crafter and produce increasingly polished results. First and foremost, keep a project journal or notes app where you record your stitch counts, round numbers, and any modifications you make to patterns. Because the spiral has no built-in checkpoints like joined rounds do, your own notes become your roadmap. Knowing exactly which round you are on — especially in a long project like a large basket or a hat for an adult — prevents errors and saves significant frogging time if you need to put the project down and return to it later.
Blocking is another skill worth developing as you advance in spiral crochet. Blocking — the process of wetting or steaming your finished piece and pinning it to dry in the desired shape — can transform an uneven or slightly misshapen spiral project into a polished, professional item. Cotton and plant-based fibers respond especially well to wet blocking, while wool and animal fibers benefit from steam or wet blocking depending on their preparation. Even a simple flat circle that has curled or ruffled slightly during crocheting can be smoothed perfectly flat with proper blocking. Many crocheters skip this step, but incorporating it into your finishing routine makes a measurable difference in the quality of your work.
Finally, challenge yourself to read and even write your own patterns. Understanding the mathematical logic behind spiral increases and decreases — the relationship between stitch counts, the geometry of spheres and cylinders and cones — transforms you from a pattern follower into a true designer. There are excellent resources available online and in print that cover the mathematics of crochet geometry in accessible, visual terms. As you internalize these principles, you will find yourself able to design custom amigurumi, hats sized precisely to a specific head circumference, and baskets tailored to hold exactly the items you have in mind. The spiral is not just a technique; it is a foundation for limitless creative expression in yarn and fiber.








What do you think?
It is nice to know your opinion. Leave a comment.