










Beautiful Nature-Inspired Wall Decor DIY: Transform Your Space with the Beauty of the Outdoors
There is something deeply calming and restorative about bringing elements of the natural world into our living spaces. Nature-inspired wall decor has surged in popularity over the past several years, and for good reason — it connects us to the organic textures, colors, and forms that our senses instinctively respond to. Whether you live in a bustling city apartment or a quiet suburban home, crafting your own nature-inspired wall art allows you to infuse your environment with a sense of serenity, authenticity, and personal creativity that no store-bought piece can quite replicate.
DIY wall decor projects are particularly rewarding because they place the creative power entirely in your hands. You choose the materials, the color palette, the scale, and the mood. You can tailor each piece to match your existing interior design or use it as a bold starting point for an entirely new aesthetic direction. Best of all, many of the most beautiful nature-inspired projects rely on materials that are either foraged from your backyard, purchased inexpensively at a craft store, or repurposed from items you already own.
This comprehensive guide will walk you through everything you need to know about creating stunning nature-inspired wall decor from scratch. From gathering and pressing botanicals to building intricate macramé wall hangings and crafting dried flower wreaths, you will find detailed guidance, practical tips, and creative inspiration to help you transform any blank wall into a living, breathing testament to the natural world. Let’s dig in — quite literally.
Understanding the Nature-Inspired Aesthetic
Before picking up a hot glue gun or purchasing supplies, it helps to understand what the nature-inspired aesthetic actually means in the context of interior design. At its core, this style draws from the visual and tactile language of the outdoors — think soft greens and earthy browns, the irregular geometry of leaves and branches, the delicate translucency of pressed petals, and the rough warmth of natural wood and stone. The goal is not to recreate nature exactly but to evoke its essence in a way that feels intentional, curated, and deeply personal.
The biophilic design movement, which emphasizes the human need to connect with nature in built environments, provides the philosophical backbone for this aesthetic. Research has consistently shown that exposure to natural elements — even representations of them — can reduce stress, lower blood pressure, and improve overall mood and cognitive function. When you hang a piece of botanical art on your wall or install a driftwood display above your fireplace, you are not just decorating; you are actively contributing to your own well-being and creating a more nurturing environment for everyone who enters the space.
Color is one of the most powerful tools when working within this aesthetic. The palette of nature is remarkably versatile — from the dusty sage and muted terracotta of a desert landscape to the vivid emerald and cobalt of a tropical rainforest. Most nature-inspired wall decor projects lean toward softer, more muted tones that feel grounding rather than energizing, though there is absolutely room for bold, vivid botanical prints or brightly dyed woven wall hangings. The key is to choose a palette that resonates with the specific natural environment you want to evoke and stay consistent within a given piece or gallery wall arrangement.
Texture plays an equally important role. Nature is rarely smooth or uniform, and the most compelling nature-inspired decor embraces this truth. Combining rough and smooth, matte and glossy, soft and rigid creates a tactile richness that two-dimensional printed art simply cannot achieve. This is why handmade, three-dimensional wall decor pieces — dried botanicals, woven hangings, bark and moss arrangements — tend to feel so much more alive and engaging than even the most beautifully printed botanical poster.
Essential Tools and Materials for Nature-Inspired DIY Projects
One of the most appealing aspects of nature-inspired wall decor is that it does not require a professional studio or an expensive toolkit. Most projects can be completed with a modest collection of basic craft supplies combined with natural materials you gather yourself. That said, having the right tools on hand before you begin will save you time, frustration, and wasted materials. A well-stocked craft workspace will allow you to move fluidly from one project to the next without interruption.
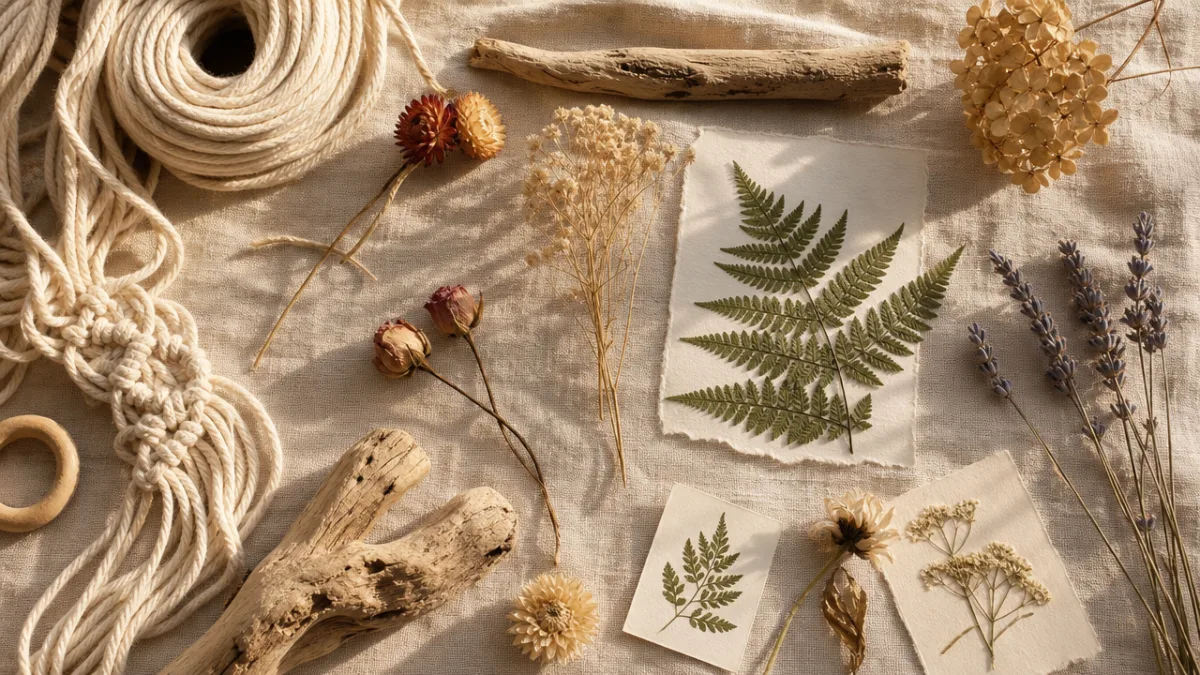
For pressed botanical projects, you will need a flower press or a stack of heavy books, absorbent paper such as blotting paper or newspaper, and a period of patience — most botanicals require one to three weeks to press fully. Once pressed, you will need archival-quality glue or double-sided tape, high-quality frames or matting materials, and optionally a UV-protective spray to preserve the colors of your pressed specimens over time. A pair of fine-tipped tweezers is invaluable for arranging delicate petals and leaves without damaging them.
For macramé and fiber wall hangings, the core materials include natural cotton or jute rope in your chosen thickness, a wooden dowel or driftwood branch for mounting, and a basic set of scissors. Different knot styles require different rope thicknesses — thicker ropes create bold, chunky textures while thinner cords allow for intricate, detailed patterns. You may also want wooden beads, feathers, dried flowers, or shells to incorporate as decorative accents within the weave. A macramé board or foam mat can be helpful for pinning and holding your work in progress, though it is not strictly necessary.
- Basic toolkit: Sharp scissors, hot glue gun and glue sticks, wire cutters, floral wire, and a sturdy cutting mat
- Natural materials: Dried flowers and grasses, pressed leaves and ferns, driftwood, bark, pine cones, and moss
- Fiber and textile supplies: Cotton macramé cord, jute twine, wooden beads, leather cord, and natural dyes
- Adhesives and finishes: Mod Podge, archival PVA glue, UV-protective spray, and beeswax polish for wood elements
- Framing and mounting materials: Wooden frames, canvas panels, shadow boxes, picture hanging strips, and sawtooth hangers
Gathering natural materials is itself a joyful and meditative part of the DIY process. Take walks in your local park, nature reserve, or even your own backyard with a basket or paper bag in hand. Look for interesting fallen leaves, seed pods, feathers, interesting-shaped twigs, and wildflowers. Always gather responsibly — take only what has naturally fallen, avoid protected species, and never strip living plants. Dried materials from florists and craft stores are also excellent and offer more consistency in color and form when you need uniformity across a larger project.
Pressed Botanical Art: A Step-by-Step Guide
Pressed botanical art is perhaps the most accessible entry point into nature-inspired wall decor, and it is also one of the most enduringly beautiful. The tradition of pressing and preserving plant specimens dates back centuries to the work of botanists and naturalists who used pressing as a method of scientific documentation. Today, the same technique is used to create exquisite framed artwork that captures the intricate detail, subtle color, and delicate structure of flowers, leaves, ferns, and grasses in a permanent, displayable form.
Begin by selecting your botanicals carefully. Flowers with relatively flat faces — pansies, violas, cosmos, daisies, and Queen Anne’s lace — are ideal for beginners because they press evenly without creating lumpy or uneven results. Ferns, individual leaves, and grasses are also excellent choices and add wonderful textural variety to a composition. Avoid overly thick or fleshy specimens like succulents or roses in their full-bloom form, as these contain too much moisture to press well without browning or developing mold.
To press your botanicals, place them between two sheets of absorbent paper, ensuring that leaves and petals are fully flattened and arranged in their most aesthetically pleasing position — this is how they will look forever, so take a moment to arrange each specimen thoughtfully. Place the prepared sheets between the pages of a heavy book or inside a flower press, then stack additional weight on top. Check your specimens after one week and replace the absorbent paper if it feels damp. Most flowers will be fully pressed and dry within two to three weeks, while thicker specimens may require up to a month.
Once pressed, the real creative work begins — arranging your specimens into a composition. Work on a clean, flat surface and lay out your pressed botanicals without gluing anything down first, experimenting with different arrangements until you find one that pleases you. Consider principles of visual balance, repetition, and contrast: mix delicate small flowers with bold leaf shapes, vary the orientation of stems and petals, and leave some negative space to give the composition room to breathe. When you are happy with your arrangement, carefully transfer each piece to your chosen background — watercolor paper, linen fabric, or a simple white card — using archival glue applied with a fine brush or toothpick.
Macramé Wall Hangings: Weaving Nature into Fiber Art
Macramé wall hangings have enjoyed a remarkable resurgence in recent years, transitioning from a craft associated with 1970s kitsch to a genuinely sophisticated and widely admired form of textile art. The appeal is easy to understand: the combination of natural fiber, rhythmic knotwork, and organic forms creates pieces that feel simultaneously ancient and contemporary, earthy and refined. A well-executed macramé wall hanging can serve as the focal point of an entire room, drawing the eye with its intricate texture and sculptural dimensionality.
The most fundamental macramé knots you will need to master for a basic wall hanging are the square knot, the half hitch, and the lark’s head knot. The lark’s head knot is used to mount your cords onto the dowel or branch at the beginning of the project. The square knot forms the dense, woven body of most hangings and can be arranged in alternating patterns to create beautiful diamond and chevron shapes. The half hitch is used for more delicate diagonal lines and can be chained together to create flowing, organic patterns that evoke the look of woven grass or trailing vines.
To incorporate nature directly into your macramé piece, consider weaving in dried botanicals as you knot. Bundles of dried lavender, small eucalyptus sprigs, dried pampas grass plumes, or individual dried flowers can be tucked into the weave at intervals, creating a living, aromatic quality that sets handmade pieces apart from anything commercially produced. You can also thread wooden or seed beads onto individual cords before knotting them, or incorporate small shells, feathers, or even small crystals as accent elements throughout the design.
Finishing your macramé piece correctly is just as important as the knotting itself. Brush out the bottom fringe with a stiff-bristled brush to separate the individual cord fibers into a soft, feathery texture — this is one of the most satisfying steps in the entire process and dramatically elevates the finished look of the piece. Trim the fringe to your desired length and shape, whether straight across, angled, or following a gentle curve. To hang the finished piece, attach a length of twine or leather cord to the ends of the dowel or branch, ensuring it is level before mounting it on your wall.
Dried Flower Wreaths and Botanical Wall Installations
A dried flower wreath is one of the most versatile and visually impactful forms of nature-inspired wall decor. Unlike fresh flower wreaths, which last only a few days, dried flower wreaths can maintain their beauty for months or even years with proper care, making them a genuinely worthwhile investment of your time and materials. The range of flowers, grasses, and seedheads available in dried form — from wispy pampas grass and feathery bunny tail grass to bold globe amaranth and elegant dried roses — allows for extraordinary creative variety.
The foundation of any wreath is its base, and the choice of base will influence both the structural integrity and the overall aesthetic of the finished piece. Wire wreath frames are sturdy and easy to work with, providing a reliable armature for heavier botanical arrangements. Grapevine wreaths offer a rustic, organic base with irregular texture that works beautifully with wildflower-style arrangements. For a more minimalist look, a simple bent willow or eucalyptus hoop creates an open, modern frame that allows your botanical elements to stand out against the negative space of the wall behind.
Building your wreath is a process of layering and balancing. Begin with your largest, most structural elements — long stems of dried grasses, large seedheads, or bundles of eucalyptus — and wire or glue these in place around the base, working in one direction to create a sense of flow and movement. Next, add your focal flowers — dried roses, proteas, or globe amaranth — spacing them evenly to create visual anchors throughout the arrangement. Finally, fill in gaps with smaller, more delicate filler elements such as dried statice, baby’s breath, or small sprigs of dried herbs, using hot glue to secure everything firmly in place.
Beyond wreaths, consider creating more expansive botanical wall installations that transform an entire wall section into a lush, gallery-worthy display. A collection of individually framed pressed botanical specimens arranged in a grid creates a clean, botanical-illustration feel that works beautifully in kitchens, studies, and bathrooms. Alternatively, a large-scale installation of driftwood pieces arranged horizontally across a wall creates a dramatic, sculptural effect reminiscent of a beach or forest floor. You might also explore creating a living moss wall panel using preserved sheet moss adhered to a painted wooden panel — these require no watering or maintenance and bring a genuinely lush, verdant quality to any interior space.
Styling and Displaying Your Nature-Inspired Wall Decor
Creating beautiful individual pieces is only half the work — knowing how to style and display them effectively is what transforms a collection of handmade objects into a cohesive, intentional interior design statement. The placement of wall decor affects the entire feel of a room, influencing how the eye moves through the space, how large or small the room feels, and how the decor relates to the furniture and other design elements below and around it. Taking the time to plan your display thoughtfully will make a significant difference in the overall impact of your work.
Gallery walls are one of the most popular and effective ways to display a collection of nature-inspired pieces, and they work particularly well when the pieces share a consistent material language — natural frames, earthy tones, organic forms — even if they vary in size and subject matter. Before hammering a single nail, lay your pieces out on the floor in the arrangement you plan to use on the wall, adjusting spacing and composition until you are satisfied. Trace each piece onto craft paper and cut out the silhouettes to use as templates on the wall, allowing you to plan the arrangement precisely without leaving unnecessary holes.
Height and scale are critical considerations when hanging wall decor. As a general rule, the center of a piece or grouping should sit at approximately eye level — roughly 57 to 60 inches from the floor — unless the piece is being hung in direct relationship to a piece of furniture, in which case it should sit 8 to 10 inches above the furniture’s top edge. Oversized pieces, such as a large macramé hanging or an expansive driftwood installation, can be hung higher to emphasize their scale and create a dramatic vertical presence that draws the eye upward and makes the ceiling feel higher.
- Plan before you hang: Use paper templates and painter’s tape to map out your arrangement on the wall before committing to any holes or nails.
- Vary scale and texture: Mix large statement pieces with smaller accents and flat framed art with three-dimensional botanical elements for visual richness.
- Consider lighting: Position a small spotlight or picture light above significant pieces to highlight their texture and depth, especially for macramé and botanical installations.
- Rotate seasonally: Swap out certain pieces — a spring wreath for an autumn one, fresh pressed summer flowers for winter botanicals — to keep your display feeling current and alive throughout the year.
- Protect your work: Keep dried botanical pieces away from direct sunlight, which fades colors, and high-humidity environments, which can cause mold or brittleness.
The relationship between your wall decor and the natural elements in the rest of the room matters enormously. Nature-inspired wall art looks most cohesive and intentional when it echoes or complements the other natural elements in the space — potted plants on a shelf below a botanical gallery wall, a wooden coffee table beneath a driftwood installation, a linen throw echoing the tone of a natural fiber macramé hanging. This layering of natural references throughout the room creates an environment that feels genuinely and holistically connected to the natural world rather than simply decorated with its imagery.
Ultimately, the most important thing about creating nature-inspired wall decor is to allow yourself the freedom to experiment, play, and follow your instincts. The natural world itself is endlessly varied, asymmetrical, and surprising — and the most beautiful handmade pieces carry that same quality of organic, unself-conscious creativity. Whether your first project is a single pressed fern in a simple frame or an ambitious woven wall hanging incorporating dried pampas grass and eucalyptus, the process of making it will connect you more deeply to the materials, the natural world they came from, and the space you are lovingly creating. Start with what calls to you, gather your materials with intention, and let the beauty of nature guide your hands.








What do you think?
It is nice to know your opinion. Leave a comment.