










How to Make Beeswax Sheet Candle Votives: A Complete Guide
Introduction to Beeswax Sheet Candles
If you’ve ever wanted to try candle making but felt intimidated by the whole process, beeswax sheet candles are the perfect place to start. Forget the double boiler and the careful pouring — with this method, you’re simply rolling pre-made sheets of beeswax around a wick. That’s really it. No melting, no molds, no mess. It’s approachable enough for kids to do alongside a parent, and satisfying enough that experienced crafters keep coming back to it.
Part of what makes beeswax so special is where it comes from. It’s a natural byproduct of honey production — bees make it to build the honeycomb cells inside their hives — and it carries that warm, faintly sweet honey scent all on its own. No added fragrance needed. There’s also a practical bonus: burning beeswax releases negative ions that can help neutralize airborne pollutants, making it a genuinely cleaner choice compared to paraffin. If you care about eco-friendly crafting, beeswax is hard to beat.
Votives themselves are those short, wide candles meant to sit inside a holder or glass, casting a soft, contained glow. They’re perfect for a dinner table, a bathroom shelf, or a cozy seasonal display. Rolled beeswax votives bring together all the natural charm of beeswax with how easy they are to make. By the time you’ve worked through this guide, you’ll have everything you need — materials, steps, decorating ideas, and care tips — to make beautiful votives you’ll actually be proud of.
Materials You Will Need
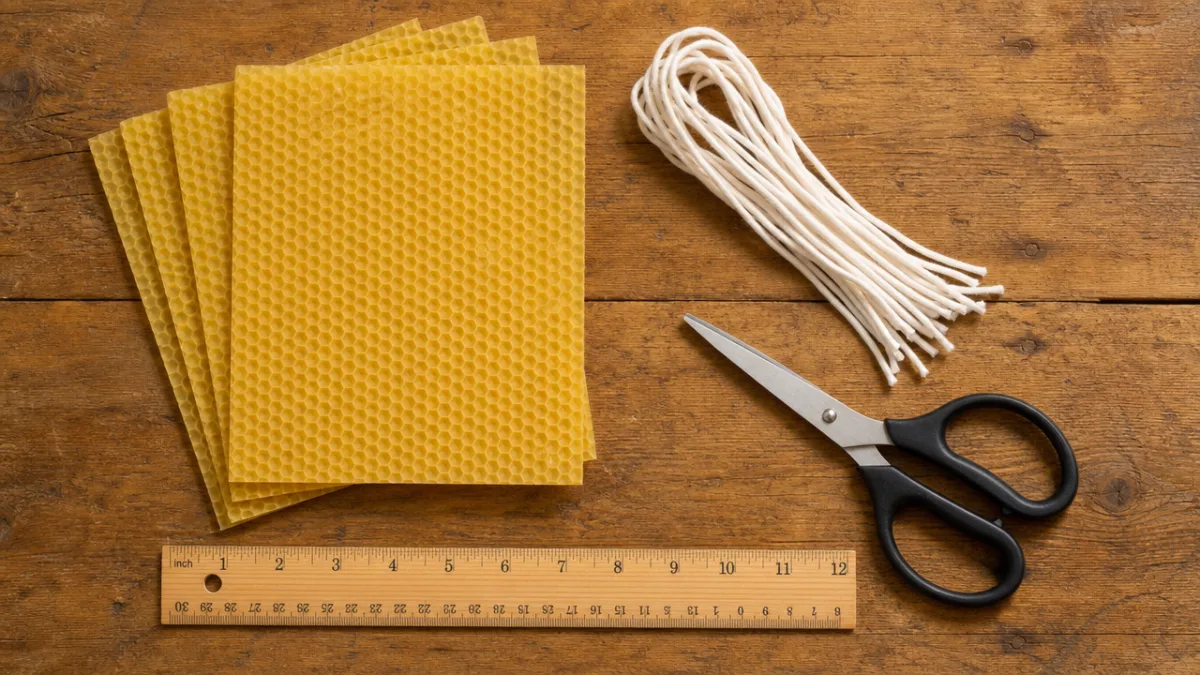
Before you dive in, take a few minutes to gather your supplies. One of the genuinely great things about this craft is how short that supply list is. There’s no specialized equipment here, no thermometers or pouring pitchers — just a handful of simple tools and, of course, the beeswax itself. Having everything within reach before you start means you can actually enjoy the process instead of stopping every five minutes to hunt something down.
The beeswax sheets are obviously the star of the show. You can find them at craft stores, beekeeping suppliers, and plenty of online shops. They come with that gorgeous honeycomb texture and in a wide range of colors — natural golden yellow, deep red, sage green, ivory, and more. For votive-sized candles, you’ll typically be working with sheets around 8 by 16 inches, though you’ll trim them down depending on how tall or wide you want your finished candle. One thing worth noting: avoid very thin sheets if you can, since they tend to crack during rolling, especially if your workspace is on the cooler side.
Beyond the sheets, here’s what you’ll need:
- Cotton wicking: Pick a wick sized for your votive’s diameter — square-braided cotton works especially well with beeswax. Most candle supply retailers offer wick sizing charts, and they’re worth a quick look before you buy.
- A sharp craft knife or scissors: You’ll use these to cut your sheets to size and trim the wick once you’re done rolling.
- A ruler or straight edge: Makes a real difference when you want clean, accurate cuts.
- A hairdryer or heat gun (optional): A gentle pass of warm air makes the wax more pliable and helps prevent cracking, which is especially useful in cold weather.
- Votive holders or glass cups: Not essential for the rolling process itself, but handy to have nearby so you can check sizing as you go.
- A cutting mat: Protects your table and gives you a stable surface to work on.
You might also want to have some optional extras on hand for decorating — dried flowers, pressed herbs, strips of contrasting colored beeswax, or ribbon can all be pressed onto the finished candle to make each one feel unique. Getting everything together upfront keeps the whole process smooth and fun.
Preparing Your Beeswax Sheets
Preparation is the step a lot of beginners skip over, and it really does make a difference. The first thing to sort out is temperature. If your sheets have been sitting somewhere cool, or your workspace is on the chilly side, the wax will be stiff and prone to cracking when you try to roll it. A quick pass with a hairdryer on low heat — held about six inches away and kept moving — is all you need to warm things up. You’re aiming for slightly flexible, not warm enough to get sticky or start melting.
Next, cut your sheets to the right size for a votive. A standard votive is roughly two inches in diameter and about two and a half inches tall, so you’ll want to cut your sheet into a rectangle that’s around two and a half inches in height. The width determines your final diameter — a longer strip means a thicker candle. For a proper votive, a strip about nine to ten inches wide gives you enough layers to feel sturdy and look full. Use your ruler and craft knife together to get clean, straight edges.
Don’t forget your wick. Cut it about an inch taller than the finished candle will be — that gives you enough to light easily, and you can always trim it down to a quarter inch once you’re done rolling. Lay the wick along one of the short edges of your cut sheet, with roughly a half inch sticking up above the top edge. Press it gently into the wax; beeswax is naturally a little tacky at room temperature, so it’ll hold the wick in place as you start to roll. Getting this right from the start is what sets your candle up to burn evenly all the way through.
Rolling Your Beeswax Votive Candles
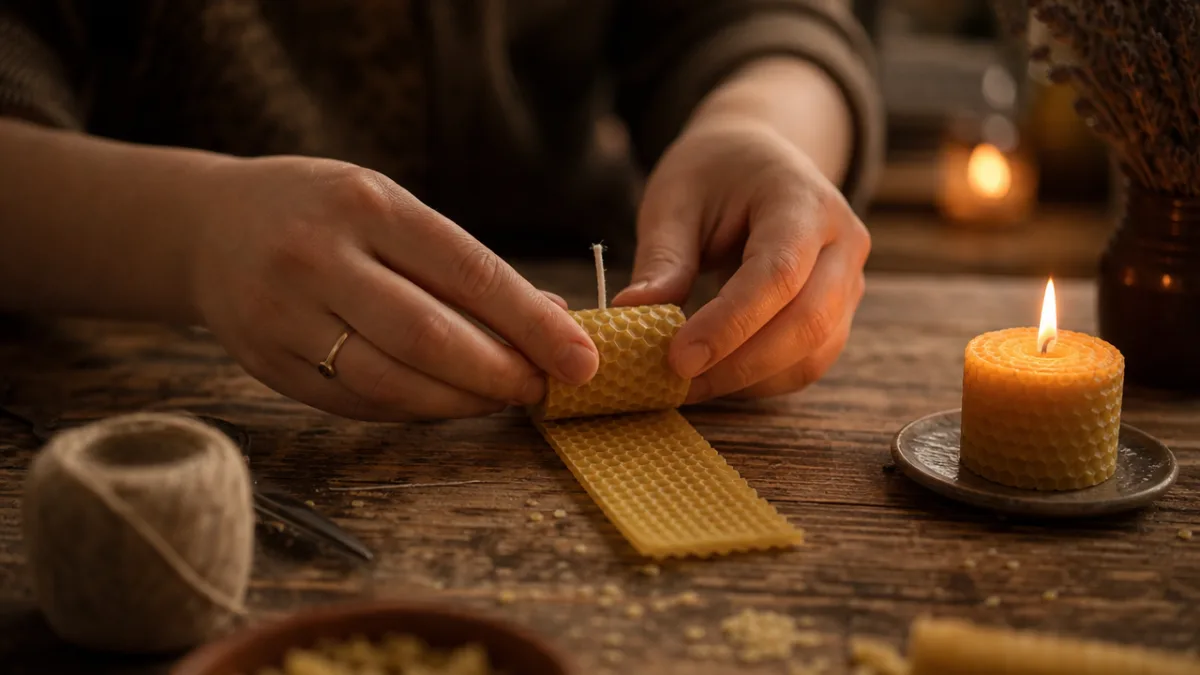
This is where it all comes together, and honestly, it’s the most satisfying part. Start by folding the edge of the sheet tightly over the wick and pressing down firmly so the wick is completely encased in that first fold of wax. This step really matters — if the wick isn’t fully secured right from the beginning, it can shift or lean as you roll, and you’ll end up with a candle that burns unevenly. Take your time here and press along the entire length of the wick to make sure it’s snug all the way down.
Once the wick is locked in, start rolling slowly and steadily. Use your fingertips and the heels of your palms to apply gentle, even pressure, keeping the roll as tight and uniform as you can. What you’re trying to avoid is air gaps between the layers — those can cause the candle to cave in or burn strangely. As you roll, keep an eye on your top and bottom edges to make sure they’re staying level. If the sheet starts drifting up or down, correct it gradually rather than forcing it all at once.
When you reach the end of the sheet, press the final edge firmly against the candle. The warmth from your hands combined with the natural tackiness of the wax is usually enough to seal it without any glue. If the edge keeps lifting, a quick breath of warm air from the hairdryer on the lowest setting will do the trick. Stand the finished votive upright and check that it’s level and looks even all the way around, then trim the wick to about a quarter inch above the top. Once you’ve made a couple of these, the whole rolling process takes maybe five minutes per candle.
Decorating and Personalizing Your Votives
Here’s where things get really fun. Because beeswax is naturally pliable and a little sticky, you can press decorative elements directly onto the surface of your finished candle without any glue or special tools. Thin strips of contrasting colored beeswax are great for creating stripes, simple geometric patterns, or small shapes like stars, hearts, or leaves. Just cut them with a sharp craft knife and press them on firmly — they’ll stick right to the candle surface.
Dried botanicals are another beautiful option. Small pressed flowers, sprigs of lavender or rosemary, fern fronds, or other delicate plant material can be pressed directly into the wax where they’ll hold naturally. When the candle is lit, the light glows through the thin wax around the botanicals in a way that looks genuinely stunning. You can take a seasonal approach too — pressed autumn leaves in fall, tiny holly sprigs in winter, wildflowers in summer. Every candle ends up feeling like its own little piece of nature-inspired art.
If you want to get more adventurous, try layering strips of different colored sheets as you roll to create a two-tone effect. Start with one color for the inner layers and switch to a contrasting one partway through, and you’ll see both colors when you look at the finished candle. A diagonal cut along the bottom edge of the sheet before you start rolling creates a candle with a striking spiral pattern where the layers peek through. For gift-giving, pressing initials or a short message into the surface with contrasting wax is a really personal touch — especially for weddings, baby showers, or the holidays.
Burning Tips and Candle Care
A little care goes a long way when it comes to getting the most out of your handmade votives. The single most important habit to get into is trimming your wick to about a quarter inch before every burn. A wick that’s too long produces a big, flickering flame that creates excess soot, burns through the wax unevenly, and can run too hot inside a glass holder. It sounds like a small thing, but consistent wick trimming genuinely extends your candle’s life and keeps it burning cleanly.
The first burn is also worth doing right. Let the candle burn long enough that the entire top surface becomes liquid — what candle makers call a full melt pool. For a standard-sized beeswax votive, that usually takes between one and two hours. If you blow it out too soon, the wax will tunnel straight down the center, leaving thick walls of unmelted wax on the sides and cutting your burn time way short. Letting it burn fully that first time sets the “memory” of the wax and means it’ll burn evenly from that point on.
Where and how you store your votives matters more than most people expect. Keep them away from direct sunlight, which can fade that warm honey-golden color over time and may soften the wax during warmer months. A cool, dry spot — a drawer or a box — works well and also keeps the honeycomb-textured surface from collecting dust. When you burn them, always use a heat-resistant surface and place them inside an appropriate glass holder, both for safety and to catch any pooling wax toward the end of the candle’s life. Follow these basics and your votives will burn beautifully from the first light all the way to the last.
Gifting, Storing, and Sharing Your Creations
Handmade beeswax votives make genuinely thoughtful gifts for just about any occasion. The whole process from start to finish takes well under an hour per batch, which means you can realistically turn out a dozen or more in an afternoon. That makes them a fantastic option for holiday gifts, wedding favors, housewarming presents, or teacher appreciation gifts. And even without any decoration, there’s something about beeswax — that honeycomb texture, the warm golden color — that looks intentional and beautiful right out of hand.
Packaging them well makes the gift feel even more special. A simple ribbon tied around the candle, a small handwritten card with burning instructions and a note about the natural honey scent, and a cellophane bag or kraft paper box is genuinely all you need to create something that looks boutique. Pairing a votive with a small holder and a book of matches (maybe with a personalized label) turns it into a complete, ready-to-use gift set. Adding a line or two about beeswax — its air-purifying qualities, its renewable source, its clean burn — gives the gift a thoughtful, educational dimension that most people really appreciate.
If you find yourself hooked on the craft, there’s plenty of room to explore. The same basic rolling technique works for tapers, pillar candles, and even more sculptural shapes. You might look into sourcing wax directly from local beekeepers, which supports your regional agricultural community and gets you access to incredibly fresh, fragrant wax. Sharing your work on social media, at a local craft market, or within a candle-making community opens up a whole world of inspiration and connection. For something so simple at its core, beeswax sheet candle making has a way of pulling you in — and the deeper you go, the more you appreciate the natural materials and the quiet, ancient work of bees that makes it all possible.








What do you think?
It is nice to know your opinion. Leave a comment.