










How to Tint Bottles and Jars: A Complete Guide to Beautiful DIY Glass Coloring
Introduction to Glass Tinting: Why It’s Worth Trying
Tinting bottles and jars is one of those wonderfully satisfying DIY projects that transforms ordinary, overlooked objects into stunning decorative pieces. Whether you’ve been saving old wine bottles, pasta sauce jars, or vintage apothecary containers, a little tinting can give them an entirely new life. The process is accessible to beginners, requires minimal materials, and produces results that look genuinely professional when done with care and patience.
The appeal of tinted glass lies in how it interacts with light. When sunlight or candlelight passes through a tinted bottle, it casts rich, jewel-toned shadows and glows that can transform any shelf, windowsill, or table centerpiece. Sea glass greens, cobalt blues, amber tones, and blush pinks are all achievable at home, allowing you to match any interior palette or seasonal theme you have in mind. The versatility alone makes this one of the most rewarding craft techniques to add to your repertoire.
Beyond aesthetics, glass tinting is also a wonderful way to practice sustainability. Instead of purchasing new decorative vases or buying expensive tinted glassware, you repurpose containers that would otherwise end up in recycling or landfill. Many crafters find that once they start, they begin seeing potential in every jar and bottle they encounter — a mindset shift that makes the craft both economical and environmentally thoughtful. The hobby scales beautifully, from a single statement piece to an entire coordinated collection.
Materials and Tools You Will Need
Getting started with glass tinting requires gathering a handful of readily available supplies, most of which you may already own. The primary materials are clean glass containers, a tinting medium of your choice, and basic painting or application tools. Before you begin any project, it helps enormously to lay everything out on a covered work surface so that you can move efficiently through each step without stopping to search for something you’ve misplaced. Preparation is genuinely half the battle with craft projects like this one.
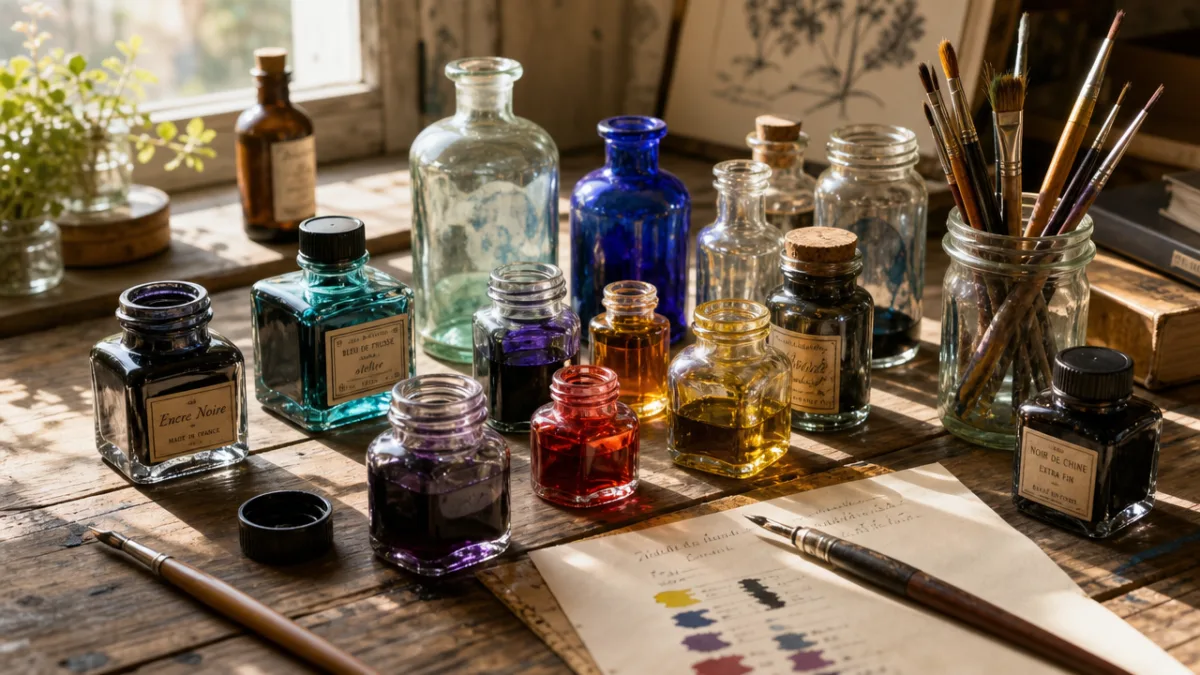
There are several methods for tinting glass, and each requires slightly different materials. The Mod Podge and food coloring method is the most beginner-friendly and uses supplies you can find at any craft store or even in your kitchen pantry. The Elmer’s glue method produces a slightly more opaque, frosted effect and is similarly easy to source. Resin-based tinting and specialized glass paints offer a more durable, professional finish and are better suited for pieces that will be handled frequently or used to hold water and fresh flowers. Understanding these differences upfront will help you choose the right approach for your specific project.
Here is a general list of materials you should have on hand regardless of which method you choose:
- Clean, dry glass bottles or jars (labels fully removed, no residue)
- Rubbing alcohol or white vinegar for cleaning and degreasing
- Mod Podge, Elmer’s glue, or a dedicated glass painting medium
- Gel food coloring or alcohol ink in your chosen colors
- Foam brushes or soft-bristle paintbrushes
- A covered or protected work surface
- A drying rack or elevated surface to allow all sides to dry evenly
- Optional: spray sealant for added durability
One detail that many beginners overlook is the importance of thoroughly degreasing the glass before applying any tinting medium. Even a clean-looking jar can carry invisible oils from handling, manufacturing residue, or dishwasher detergent film. Wiping each container down with rubbing alcohol and allowing it to dry completely ensures that your tinting medium adheres evenly and doesn’t develop streaks, bubbles, or peeling edges down the line. This five-minute step saves significant frustration later in the process.
Method One: Mod Podge and Food Coloring Technique
The Mod Podge and food coloring method is widely considered the gold standard for beginner glass tinting because it produces beautiful, translucent results without requiring any specialized materials or techniques. The basic premise is simple: you mix Mod Podge with a small amount of gel food coloring, apply it to the inside of your clean glass container, swirl it to coat evenly, drain any excess, and allow it to dry thoroughly. What emerges is a stunning stained-glass effect that lets light pass through in a warm, glowing way.
To begin, squeeze roughly two to three tablespoons of Mod Podge into your jar or bottle. Add three to five drops of gel food coloring — gel works far better than liquid food coloring because it produces richer, more saturated color without making the mixture too watery. Stir or swirl the container gently until the color is evenly distributed throughout the Mod Podge. At this point you can adjust the intensity by adding more food coloring for deeper tones or more Mod Podge to lighten the effect. Testing on a small inconspicuous area before committing to the full coat is always a good practice.
Once your mixture is ready, tilt and rotate the jar slowly to allow the tinted Mod Podge to coat the entire interior surface. Work methodically, ensuring no clear patches remain. Then invert the jar over a paper towel or wire rack and allow the excess to drip out for at least twenty minutes. The remaining thin film on the glass is what creates the tinted effect. Leave the container upside down or right-side up on a rack to dry for a minimum of six to eight hours, or overnight if possible. Once dry, the interior will appear softly tinted without any visible texture or brush marks on the outside surface, giving the piece a factory-finished look.
For a deeper or more opaque color, you can apply a second coat once the first is completely dry. Simply repeat the swirling and draining process, using the same color or experimenting with a complementary shade layered on top. Layering amber over pink, for example, creates a gorgeous coral tone. Layering blue over green produces a rich teal. This experimental quality is one of the most enjoyable aspects of the technique, and keeping notes on your color combinations allows you to replicate successful results in future projects.
Method Two: Exterior Painting with Glass Paints
While the interior swirl method produces that beautiful translucent glow, painting the exterior of your glass containers opens up a completely different set of creative possibilities. Using acrylic glass paints, chalk paints, or specialty glass enamels, you can create opaque colors, textured finishes, gradient effects, and even decorative patterns. This method is particularly popular for pieces meant to be used as centerpieces, vase arrangements, or decorative clusters on shelving where the visual effect matters more than the light-passing translucency.
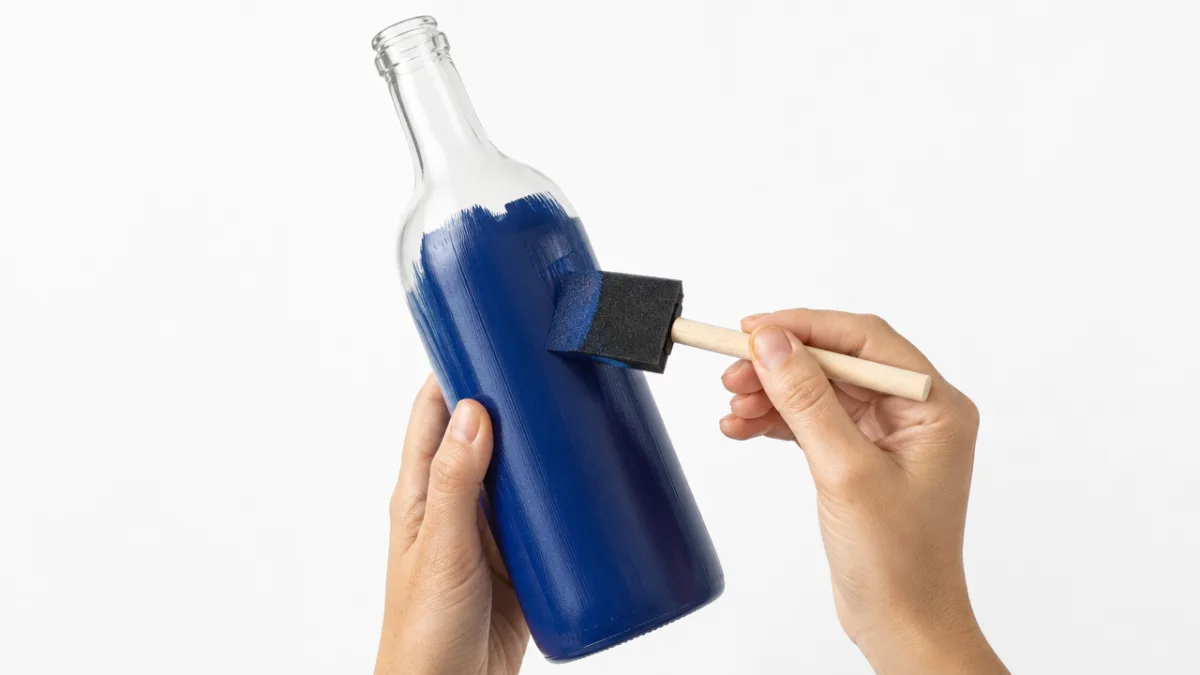
Begin by applying a thin base coat using a foam brush for smooth coverage or a bristle brush if you prefer visible texture and brushstrokes as part of the aesthetic. Foam brushes minimize streaking and are ideal for achieving a clean, even finish on smooth glass surfaces. Allow the base coat to dry for at least an hour before applying a second layer. Two to three thin coats will always produce better results than a single thick coat, which is prone to dripping, uneven drying, and peeling. Patience during this stage is what separates a polished result from an amateur one.
One of the most popular exterior techniques right now involves creating an ombre or dip-dye effect, where the color transitions gradually from deep and saturated at the base to lighter or transparent toward the top. To achieve this, apply your darkest shade at the bottom third of the container, then quickly blend it upward with a dry brush before it sets, gradually lightening by picking up less paint on the brush as you move higher. You can also use a makeup sponge to stipple the transition zone, which softens the gradient beautifully and gives the piece a professional, gallery-worthy appearance.
Sealing your exterior-painted glass is essential if the piece will be handled regularly. A clear spray varnish in matte, satin, or gloss finish protects the paint layer from chipping and scratching. Apply it in two light coats from about twelve inches away, allowing full drying time between applications. For pieces that will hold water or be cleaned occasionally, look for a waterproof sealant specifically formulated for glass or ceramics. While no home-painted piece should be submerged for long periods, a proper sealant will give you far more durability than untreated paint alone.
Creative Color Combinations and Design Ideas
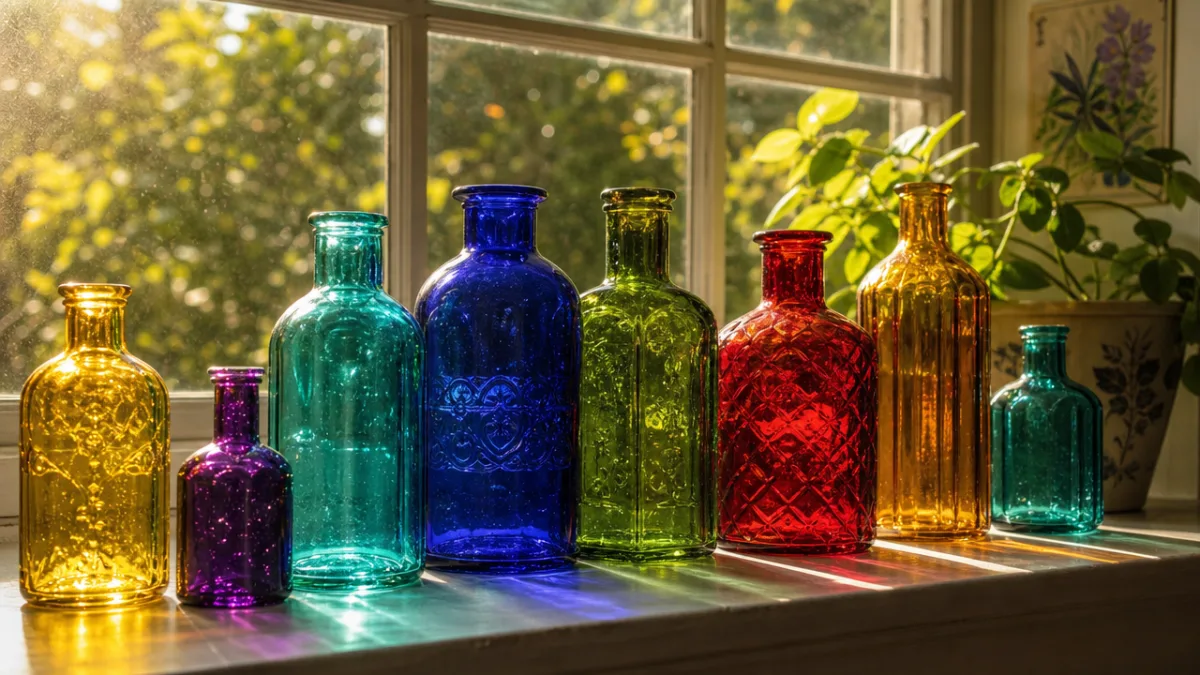
One of the most exciting aspects of tinting bottles and jars is the sheer range of creative directions you can take the technique. A cluster of bottles tinted in varying shades of the same hue — from pale lavender to deep violet — creates a cohesive, sophisticated arrangement that feels intentional and curated rather than crafty. Conversely, a bold collection mixing cobalt, emerald, amber, and ruby tones evokes the richness of antique apothecary collections or stained-glass windows and works beautifully in eclectic or bohemian interiors.
Seasonal themes lend themselves wonderfully to glass tinting projects. For autumn, warm ambers, burnt oranges, and deep cranberry tones complement harvest decorations and Thanksgiving tablescapes. Winter calls for icy blues, silver-tinted whites, and deep forest greens that echo evergreen boughs and frosty windowpanes. Spring collections might feature soft blush, mint, and butter yellow, while summer arrangements often lean into vibrant turquoise, coral, and sunshine gold. Planning your color palette around the season ensures your tinted pieces always feel fresh and connected to the world outside your window.
Here are some particularly popular and proven color combinations to consider for your first projects:
- Sea Glass Collection: Soft seafoam green, translucent aqua, and frosted white for a coastal, beachy feel
- Jewel Tones: Sapphire blue, amethyst purple, and emerald green for dramatic, luxurious arrangements
- Earthy Neutrals: Amber, warm brown, and moss green for rustic or farmhouse-style interiors
- Pastel Suite: Blush pink, lavender, and pale yellow for romantic or vintage-inspired settings
- Monochromatic Blue: Navy, cobalt, periwinkle, and sky blue in varying vessel sizes for a gallery-style shelf display
Beyond color, texture adds another dimension to tinted glass projects. Applying a light coat of tinting medium over crinkled aluminum foil pressed briefly against the wet surface creates a subtle crackled effect. Salt sprinkled onto wet glass paint and then brushed away once dry leaves a mottled, organic texture reminiscent of sea glass or weathered stone. These techniques work particularly well on the exterior-painted style and add a handmade quality that elevates the piece beyond what machine-manufactured glassware can offer.
Troubleshooting Common Problems
Even with careful preparation, tinting glass can occasionally produce results that fall short of your vision. The most common issue for beginners is streaking, which typically occurs when the tinting mixture is applied too thickly or unevenly, or when the glass surface wasn’t properly degreased beforehand. If you notice streaks developing during application, don’t try to fix them while the medium is still wet — this usually makes things worse. Instead, allow the coat to dry completely and assess whether a second even coat smooths out the imperfection or whether you need to start over.
Bubbling is another issue that frustrates new crafters, and it almost always traces back to one of two causes: either the tinting mixture was stirred too vigorously (introducing air), or it was applied over a surface that wasn’t fully dry from a previous coat. To prevent bubbling, stir your Mod Podge and food coloring mixture gently rather than beating it, and always wait the full recommended drying time between coats. If bubbles appear in a dried coat, you can sometimes sand them very lightly with ultra-fine grit sandpaper and apply a fresh layer over the top.
Peeling or flaking of dried tinting medium is a sign that adhesion failed, usually because of surface contamination or because an incompatible sealant was applied before the tinting layer had cured properly. If this happens after the piece is finished, your best option is to carefully peel away all the affected medium, re-clean the glass thoroughly with rubbing alcohol, and begin the tinting process again from scratch. It’s disappointing, but the glass itself is unharmed, and your second attempt will benefit enormously from what you learned the first time around.
Finally, color fading over time is a concern for pieces displayed in direct sunlight. The Mod Podge and food coloring method in particular is not UV-resistant, and colors can shift or fade with prolonged sun exposure. If you want to display your tinted pieces in a bright, sunny window, consider using alcohol inks mixed into the medium instead of food coloring, as these tend to hold their color better under UV light. Alternatively, applying a UV-protective spray varnish over the finished piece adds a meaningful layer of longevity to your work.
Displaying and Caring for Your Tinted Glass Creations
Once your tinted bottles and jars are finished and fully cured, the fun of styling and displaying them begins. A windowsill arrangement is the classic choice for good reason — light passing through tinted glass creates moving pools of color on walls and surfaces that change throughout the day as the sun shifts. Grouping bottles in odd numbers (three, five, or seven) tends to feel more visually dynamic than even-numbered arrangements, and mixing heights and shapes adds the kind of layered visual interest that makes a display feel thoughtfully composed rather than randomly assembled.
On shelves or mantels, tinted bottles work beautifully alongside natural materials like dried botanicals, driftwood, candles, and linen textiles. The glass introduces color and light while the organic textures ground the arrangement and prevent it from feeling overly precious. Consider using some bottles as actual vases for dried grasses, eucalyptus branches, or simple wildflowers — the tinted glass becomes part of the floral composition rather than merely a backdrop. Clusters of small tinted jars holding tealight candles create a particularly magical effect for dinner parties or evening gatherings.
Caring for your finished pieces is straightforward but does require some attention. Dust them regularly with a soft, dry cloth rather than spraying them with cleaning products, which can compromise the sealant over time. If the interior of a Mod Podge-tinted bottle collects dust, a gentle puff of air from a can of compressed air clears it without any risk to the tinted surface. Avoid submerging these pieces in water or running them through a dishwasher — hand-washing exterior-painted pieces briefly under cool water is acceptable for pieces finished with waterproof sealant, but interior-tinted bottles should be kept dry as a general rule.
Tinting bottles and jars is ultimately a craft that rewards curiosity and experimentation. Every bottle is slightly different, every color mixture behaves in its own way, and every piece you make teaches you something that improves the next one. Whether you create a single statement piece for your kitchen windowsill or build an entire collection to give as handmade gifts, the process itself is as enjoyable as the result. With the techniques and tips in this guide, you have everything you need to begin transforming ordinary glass into something genuinely beautiful.








What do you think?
It is nice to know your opinion. Leave a comment.