










DIY Floral Mason Jar Lights: Aesthetic Room Decor Ideas & Upcycled Glass Jar Crafts
The Magic of Upcycled Craft: Why Mason Jar Lights Are Having a Moment
There is something quietly revolutionary about transforming an ordinary glass jar into a glowing centerpiece that fills a room with warmth and personality. DIY floral mason jar lights sit at the intersection of sustainability, creativity, and interior design — three forces that are shaping how a new generation thinks about decorating their spaces. Rather than reaching for mass-produced decor items that look identical in a thousand different bedrooms, crafters are turning to their recycling bins and craft drawers to build something genuinely their own.
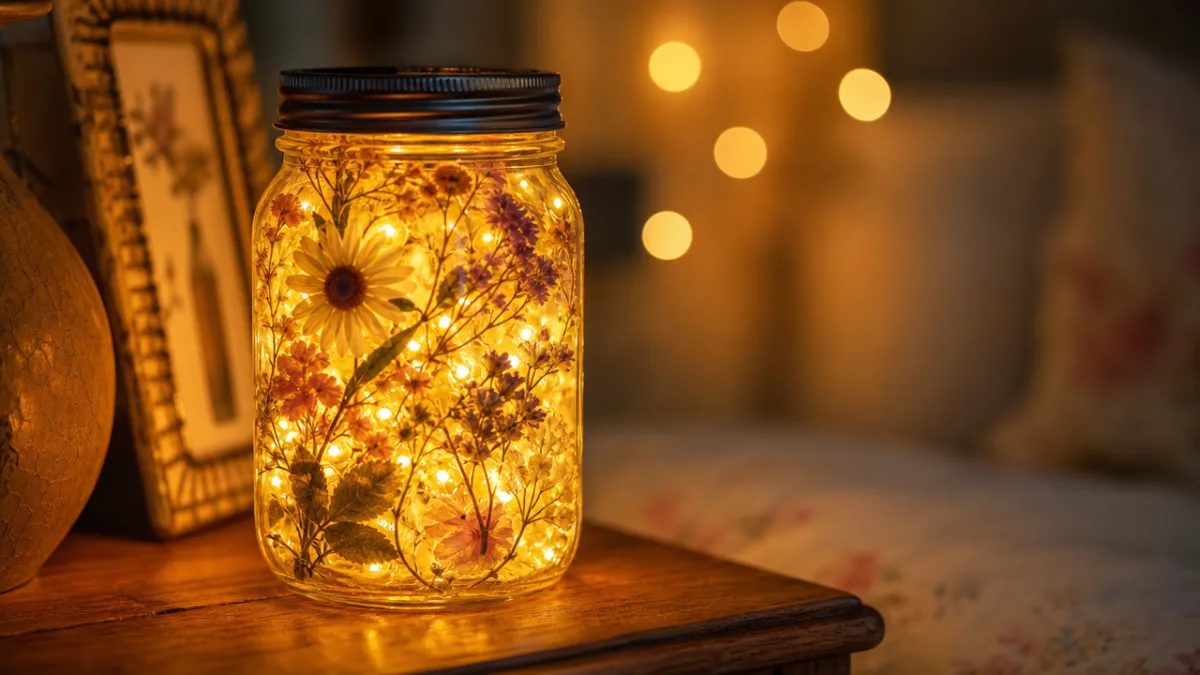
The aesthetic appeal of mason jar lights comes from a beautiful tension between the rustic and the delicate. The heavy, utilitarian glass of a canning jar contrasts perfectly with the soft glow of a string of fairy lights or a single flickering LED candle inside. When you add dried or faux flowers pressed against the glass — whether cascading wisteria, soft lavender sprigs, or bold sunflower petals — the light filters through organic shapes and casts the most extraordinary shadows on walls and ceilings. The effect is cinematic, dreamy, and completely unique to your own handmade creation.
Beyond aesthetics, there is a deeply satisfying psychological reward in making something beautiful from materials that might otherwise be discarded. Upcycling culture has grown enormously in recent years as people look for ways to reduce waste without sacrificing style. A mason jar that once held pasta sauce or pickles becomes art. That narrative — the humble origin, the creative transformation, the glowing result — is exactly the kind of story that resonates in living spaces and on social media alike. It is decor with a backstory, and that makes it infinitely more interesting.
Materials You Will Need: Building Your Supply List
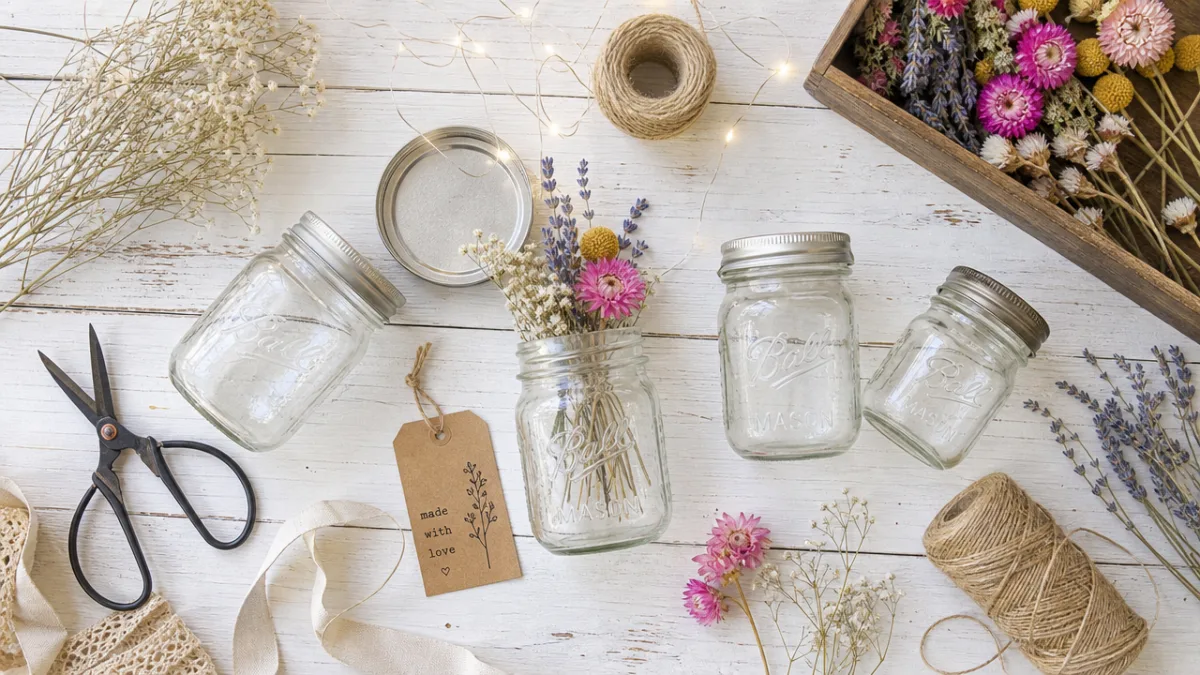
Before you begin crafting, gathering the right materials makes the entire process smoother and more enjoyable. The great news is that most of what you need is either already in your home, available inexpensively at craft stores, or easily sourced online. The foundation of every mason jar light project is, naturally, the jar itself. Wide-mouth mason jars in the classic Ball or Kerr style work beautifully, but any clean glass jar with a stable base will do the job. Pasta sauce jars, pickle jars, and even large jam jars all lend themselves wonderfully to this craft.
For the floral element, you have a few excellent options depending on your preferences and the look you want to achieve. Dried real flowers offer the most authentic texture and subtle natural fragrance, though they are more delicate and may fade over time. Pressed flowers, which you can prepare at home using heavy books and a few weeks of patience, create a flat, almost stained-glass effect when adhered to the inside of the jar. High-quality faux florals — particularly silk blooms — give you the most control over color and longevity, and they hold up beautifully even in humid rooms. Many crafters mix all three for a layered, maximalist look.
The lighting component is where the magic truly happens. Micro LED fairy lights on a thin copper wire are the most popular choice because the wire is nearly invisible and the tiny bulbs produce a warm, golden glow that mimics candlelight without any fire risk. Battery-operated versions offer the most placement flexibility since you need no outlet nearby. Flameless LED tea lights are another excellent option for a more contained, lantern-like effect. Whichever you choose, opt for warm white rather than cool white — the warmer tone is far more flattering alongside floral elements and gives the finished piece that soft, cottagecore aesthetic so many crafters are after.
- Clean glass mason jars or repurposed glass jars in various sizes
- Micro LED fairy lights on copper wire, battery-operated preferred
- Dried flowers, pressed flowers, or high-quality silk faux florals
- Mod Podge or clear-drying craft glue
- Thin floral wire and small pliers for arranging stems
- Twine, ribbon, or lace for decorating the jar’s neck
- A foam brush or wide paintbrush for applying adhesive
- Optional: glass paint, frosted spray, or tissue paper for a diffused glow effect
Step-by-Step Instructions: Crafting Your Floral Mason Jar Lights
Begin by thoroughly cleaning and drying your jars. Any residue from their former contents — particularly oils or strong-smelling foods — can affect how adhesives bond and may even attract insects if you are using real dried botanicals. A good wash with hot soapy water followed by a rinse with white vinegar will neutralize odors and leave the glass sparkling clean. Allow the jars to dry completely, ideally overnight, before you begin decorating. This step is easy to rush, but taking the time here ensures everything that follows adheres properly and looks its best.
Once your jars are clean and dry, begin arranging your floral elements. If you are pressing flowers against the outside of the glass for a decoupage effect, use a foam brush to apply a thin, even layer of Mod Podge to a small section of the jar’s exterior. Press your chosen petals or blooms gently against the wet adhesive, smoothing out any air bubbles with your fingertip. Work in small sections rather than coating the entire jar at once, as the adhesive can dry before you position your flowers. Build up your arrangement gradually, allowing each layer to dry slightly before adding more. Once you are satisfied, seal everything with two or three coats of Mod Podge over the entire decorated surface.
For an interior floral arrangement — which creates a more three-dimensional, lantern-like effect — use thin floral wire to create small bouquet clusters that can be fed through the mouth of the jar. Bend the wire ends to hook over the jar’s lip and keep the arrangement suspended at the level you want. This technique works particularly well with faux florals that have flexible stems. Once your floral arrangement is in place inside the jar, carefully feed your fairy light string in around and through the flowers, distributing the bulbs so they are visible from multiple angles when the jar is viewed from outside. Tuck the battery pack behind the jar’s neck, where it can be hidden by a ribbon or piece of twine.
- Clean and dry your jar thoroughly and allow it to rest overnight.
- Plan your floral arrangement before applying any adhesive.
- Apply Mod Podge in small sections and position flowers carefully.
- Build up layers, allowing each to dry before adding the next.
- Seal the finished exterior with two to three final coats of Mod Podge.
- Arrange interior florals using floral wire if using the lantern-style method.
- Feed fairy lights carefully around and through the floral arrangement.
- Decorate the jar’s neck with twine, ribbon, or lace to finish the look.
The finishing touches are what elevate a simple craft project into something that looks intentional and polished. Wrapping the neck of the jar with a few rounds of natural jute twine gives the piece a rustic, farmhouse quality. A satin ribbon in a complementary floral color shifts the aesthetic toward something more romantic and feminine. A strip of burlap lace lands somewhere delightfully in between. You might also consider attaching a small handwritten tag with a meaningful quote, or even a dried sprig of lavender or eucalyptus for fragrance. These small details signal to anyone who sees your creation that it was made with genuine care and attention.
Design Variations: Customizing Your Jars for Any Aesthetic
One of the greatest strengths of this craft is how completely adaptable it is to different design sensibilities. The cottagecore enthusiast might fill their jar with pressed wildflowers — daisies, clover, Queen Anne’s lace — and wrap it in cream linen ribbon for a look straight out of a sun-drenched meadow. The maximalist might cluster six or seven jars of different heights together on a tray, each packed with bold silk peonies, ranunculus, and garden roses in jewel tones of burgundy, violet, and burnt orange. The minimalist could frost a single large jar with spray diffuser, place just three dried pampas grass stems inside, and let the warm glow speak for itself.
Seasonal variations are another deeply satisfying avenue to explore. Autumn calls for dried maple leaves in amber and rust pressed against the exterior, paired with small preserved pinecones wired inside and the warmth of amber-tinted fairy lights. For winter and the holiday season, sprigs of preserved holly, small silver pinecones, and a dusting of faux snow inside the jar create something that looks like a snow globe brought to life. Spring and summer naturally lend themselves to the lightest, most romantic florals — cherry blossom branches, sprigs of baby’s breath, lavender, or small rose buds in the softest pinks and creams.
Color theory can guide your design choices in really meaningful ways. Analogous color schemes — using flowers and ribbons in shades that sit next to each other on the color wheel, like blush pink, peach, and warm coral — create arrangements that feel harmonious and soothing. Complementary pairings, like deep purple lavender against golden yellow sunflower petals, create visual drama and energy. Monochromatic arrangements, all in a single color family with variation in tone and texture, feel sophisticated and deliberate. Thinking intentionally about color before you begin gathering materials will result in a finished piece that looks like it belongs in a design studio rather than a first attempt at a Pinterest craft.
Styling and Placement: Incorporating Your Jars Into Your Room Decor
A single mason jar light is a lovely accent, but a thoughtfully grouped collection becomes a genuine focal point in a room. Clustering three jars of different heights together on a bedside table — perhaps a tall wide-mouth jar, a medium standard jar, and a small jelly jar — creates visual hierarchy and depth. Placing them on a small wooden tray or a slice of raw wood unifies the grouping and makes it easier to move as a single unit when you clean or rearrange. The asymmetry of different jar heights is more dynamic and interesting than a perfectly uniform row, and it mimics the way professional stylists compose vignettes on shelves and tables.
For those with shelf or window ledge space, mason jar lights interact beautifully with both books and natural light. Tucked between a stack of well-loved paperbacks and a small trailing plant like a pothos or a string of pearls, a glowing floral jar becomes part of a larger, layered composition. On a window ledge, the outdoor light during the day illuminates the pressed flowers from behind, creating a stained-glass effect that shifts through the day as the sun moves. At night, the fairy lights inside take over, transforming the same spot into something entirely different — a small, glowing garden that seems to float in the dark glass of the window.
String multiple jars along a length of twine or a wooden dowel to create a hanging installation that transforms an empty wall or the space above a bed into a statement piece. Thread the twine through holes in the jar lids and secure the fairy light battery packs behind each jar, then mount the whole arrangement with small hooks or nails at the desired height. This approach works particularly well in bedrooms, reading nooks, and small home offices where you want to bring warmth and character to an otherwise bare wall. The gentle movement of the jars — even the slight sway of jars hung near a window — adds a quiet, living quality to the decoration that no framed print can replicate.

Sustainability and the Upcycling Philosophy Behind This Craft
At its heart, the mason jar light craft is an argument for a different relationship with objects and materials. In a culture that generates enormous amounts of packaging waste — billions of glass jars discarded every year — choosing to see that waste as raw material is a genuinely radical act. Glass is one of the most beautiful materials available to a crafter: it is smooth, clear, dimensionally stable, and it interacts with light in ways that almost no other material can match. The fact that it arrives pre-formed in a perfectly useful shape, and often at zero additional cost, makes it extraordinary when you stop to think about it.
Pairing upcycled glass with natural or naturally derived florals deepens the sustainability story. Flowers gathered from your own garden or a neighbor’s overflowing yard, pressed and preserved at home, carry no packaging and no shipping footprint. Dried botanicals purchased from small, local growers or foraged ethically in season are similarly low-impact. Even when choosing silk or other synthetic florals — which do have a manufacturing footprint — buying once and keeping indefinitely rather than purchasing disposable plastic decor repeatedly is the more sustainable long-term choice. This craft rewards a thoughtful approach to sourcing, and that mindfulness tends to make the finished object feel even more meaningful.
The DIY ethos that drives projects like these is also deeply connected to skill-building and self-sufficiency, values that have real long-term benefits. When you learn to see materials differently — when an empty jar becomes a potential lantern, a dried flower becomes a design element, a piece of twine becomes a decorative detail — you develop a creative problem-solving habit that extends far beyond any single craft project. You begin to notice texture, color, and light in new ways. You become more observant of the materials in your environment. You waste less, make more, and find more satisfaction in your immediate surroundings. That is a meaningful return on an afternoon spent with glue, flowers, and a glass jar.
Sharing Your Creation: Building Community Around Handmade Decor
The handmade decor community online is one of the warmest and most generous spaces on the internet, and sharing your finished mason jar lights — whether on Pinterest, Instagram, or a crafting forum — connects you to that community in a genuinely rewarding way. Photographing your creation well matters here: natural side lighting, a simple background, and a moment of patience to wait for the gentle golden glow of the fairy lights to register on camera will produce images that do justice to your work. Many crafters find that the process of photographing their finished pieces teaches them to look at what they have made more carefully, noticing details they might otherwise overlook.
When you share your process — not just the finished result but the in-progress moments, the materials laid out, the imperfect first attempt, the small discoveries along the way — you offer something genuinely useful to other people who want to try the same project. Step-by-step documentation, honest notes about what worked and what you would do differently, and specific details about materials and sources are the kinds of contributions that make crafting communities thrive. The more specific and honest your sharing, the more useful it is to someone sitting at their own kitchen table, jar in hand, trying to figure out how to make something beautiful.
Gift-giving is another dimension of this craft worth celebrating. A handmade floral mason jar light, wrapped in tissue paper and given with genuine care, carries a meaning that a store-bought item simply cannot. The recipient knows that time — your time — went into making it. They know that the design choices were made with them in mind: their favorite colors, the flowers they mentioned once in passing that you remembered. That specificity is the language of real attention, and it is extraordinarily rare in a world of easy, click-to-ship gifts. Making something by hand and giving it away is one of the most generous things a person can do, and it costs far less in money than it returns in meaning.








What do you think?
It is nice to know your opinion. Leave a comment.