










Cute Beanbag Frogs: Your Complete Guide to Easy DIY Stuffed Animal Patterns
Introduction to Beanbag Frog Crafting
Beanbag frogs are one of the most delightful and rewarding sewing projects you can take on, whether you are a seasoned crafter or just picking up a needle and thread for the first time. These charming little stuffed animals combine the satisfying weight and tactile appeal of a beanbag toy with the irresistible cuteness of a frog character. The result is a handmade treasure that appeals to children and adults alike, making them perfect for gifts, nursery decorations, or simply a fun afternoon creative project that leaves you with something truly special.
What makes beanbag frogs particularly approachable for beginner sewists is the simplicity of their basic form. Unlike complex stuffed animals that require precise darts, intricate armatures, or advanced embroidery techniques, a beanbag frog typically consists of just a handful of fabric pieces that come together quickly and forgivingly. The rounded, squatty shape of a frog naturally lends itself to the beanbag format, meaning the filled body sits low and stable with a satisfying heft that children love to squeeze, toss gently, and carry around as a companion throughout the day.
Throughout this guide, you will discover everything you need to know to create your own adorable beanbag frogs from scratch. From selecting the right materials and understanding the basic pattern pieces to mastering the assembly process and adding personality through embellishments, each step has been broken down to make your crafting experience as smooth and enjoyable as possible. Whether you plan to make one special frog or a whole lily pad full of them for a craft fair or school fundraiser, this comprehensive tutorial will set you up for success every time you sit down to sew.
Materials and Tools You Will Need
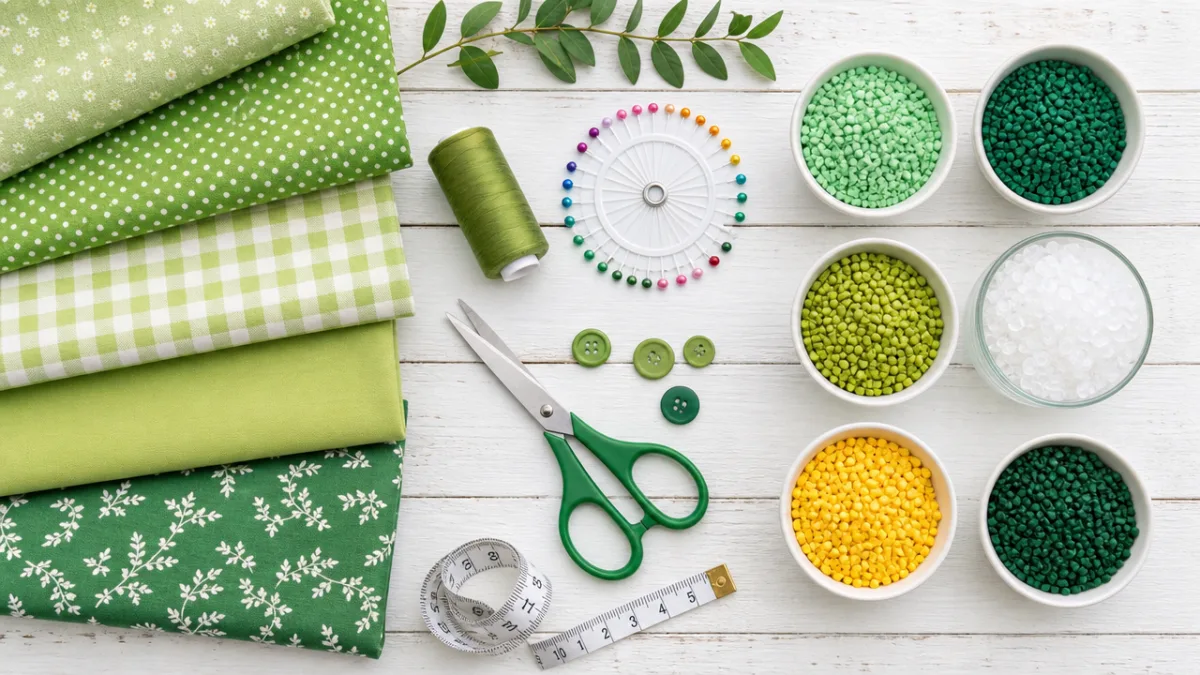
Gathering the right materials before you begin is the key to a smooth and frustration-free crafting session. For a standard beanbag frog measuring approximately five to six inches across, you will need about a quarter yard of your main fabric in a vibrant frog green or any playful color your heart desires. Fleece is an excellent choice for beginners because it does not fray at the edges, sews together beautifully, and has a soft, velvety texture that makes the finished frog wonderfully huggable. Cotton quilting fabric is another popular option that offers more pattern variety and a slightly crisper finished look.
In addition to your main fabric, you will want a small contrasting piece for the belly, which is typically a lighter green, cream, or even a fun patterned fabric that adds visual interest and dimension to your frog. For the eyes, you have several options depending on the age of the intended recipient. Safety eyes with plastic backing are quick and professional looking, but for toys intended for children under three years old, it is far safer and equally charming to embroider the eyes using black and white embroidery floss, creating expressive little faces without any choking hazard components.
The filling is arguably the most important material choice for a beanbag toy, and it deserves careful consideration. Plastic poly pellets are the classic beanbag filling, giving that satisfying weight and the ability for the frog to sit upright without flopping over. Many crafters prefer a combination of pellets in the lower half of the body and regular polyester fiberfill in the upper portion, which creates a toy that has the weight of a beanbag while still being soft and somewhat squeezable throughout. You will also need basic sewing tools including sharp fabric scissors, straight pins or wonder clips, a needle for hand sewing the final closure, matching thread, and optionally a sewing machine to speed up the straight seams considerably.
- Quarter yard of main green fleece or cotton fabric for the body
- Small piece of contrasting fabric for the belly panel
- Plastic poly pellets or a combination filling of pellets and fiberfill
- Safety eyes or black and white embroidery floss for the face
- Sharp fabric scissors and straight pins or clips
- Matching thread and hand sewing needle
- Optional: sewing machine, fabric marker, iron and pressing cloth
Understanding and Preparing Your Pattern Pieces
A basic beanbag frog pattern typically consists of just three to five main pieces, which is one of the reasons this project is so accessible to crafters of all skill levels. The primary piece is the body, which is cut twice from your main fabric to create the front and back of the frog. This piece is usually an oval or rounded rectangle shape with slightly flattened sides, measuring anywhere from four inches to eight inches depending on the size of frog you want to create. Larger frogs are actually easier for absolute beginners to sew because the seam allowances are more forgiving and the pieces are easier to handle.
The belly piece is a slightly smaller oval that gets stitched to the front body piece before the front and back are sewn together. This layered construction is what gives the finished frog that lovely dimensional quality, where the belly appears to be a distinct lighter area set against the richer green of the back. Some patterns also include separate leg pieces, which are simple elongated ovals or D-shapes, while others simply cut the legs as extensions of the main body piece, eliminating one assembly step entirely. For your first frog, the version with integrated legs is highly recommended because it reduces both cutting time and the number of seams you need to manage.
Before cutting into your fabric, take the time to trace your pattern pieces onto paper or cardstock and check that the dimensions feel right by holding the pieces against your hand or comparing them to a similar toy you already own. Seam allowances of a quarter inch are standard for this type of project, and most simple patterns include this allowance in the printed piece, but it is always worth double-checking the instructions that accompany your specific pattern. Once you are satisfied with your paper pieces, pin them securely to your folded fabric, cut carefully along the edges, and label each piece lightly with a fabric marker so you always know which is the front, which is the back, and which is the belly before you begin assembling.
Step-by-Step Assembly Process
Assembly begins with attaching the belly piece to the front body piece, and this first step sets the tone for the entire project. Place your belly oval in the center of your front body piece, right sides both facing up, and either pin it in place or use a thin line of fabric glue to baste it temporarily. Stitch around the perimeter of the belly piece using a straight stitch close to the edge, or for a slightly more polished look, use a zigzag stitch that catches both layers beautifully. If you are using fleece, this step is optional since the belly can be attached during the final assembly, but stitching it down first makes for a much neater finished product.
With the belly secured, you are ready to add the eyes to the front body piece, and this must be done before closing up the frog since you need access to the inside of the fabric. If you are using safety eyes, mark their placement with a small dot from a fabric marker, push the post of each eye through from the right side, and secure the washer firmly on the wrong side of the fabric. The eyes typically sit just above the belly piece, slightly to the outside of center, giving the frog that wide-eyed, endearing expression that makes these toys so instantly lovable. If you are embroidering the eyes instead, complete your embroidery on the front piece at this stage before moving forward.
Now comes the satisfying step of bringing the frog together. Place the front body piece and the back body piece with right sides together, aligning all edges carefully, and pin around the entire perimeter. Stitch around the edge using your chosen seam allowance, leaving a gap of approximately two to three inches along one of the straighter sides for turning and filling. Clip the curves carefully with small snips that come close to but do not cross the stitching line, which allows the curves to lie smoothly once the piece is turned right side out. Turn your frog right side out through the opening, use a pencil or chopstick to gently push out any corners or tight curves, and admire the emerging shape of your little amphibious friend before moving on to the filling stage.
- Attach the belly piece to the front body using a straight or zigzag stitch around the perimeter.
- Insert safety eyes or embroider the facial features onto the front body piece.
- Place front and back body pieces right sides together and pin around the edges.
- Stitch around the perimeter, leaving a two-to-three-inch opening for turning.
- Clip curves, then turn the frog right side out through the opening.
- Fill the body with poly pellets and fiberfill to your desired weight and firmness.
- Hand stitch the opening closed using a ladder stitch for an invisible seam.
Filling, Finishing, and Adding Personality
Filling your beanbag frog is one of the most tactilely satisfying steps in the entire process, and the amount and type of filling you use will dramatically affect the finished character of the toy. Begin by pouring a small amount of poly pellets into the body through the opening, using a small funnel or a rolled piece of paper to direct the pellets without making a mess. For a roughly palm-sized frog, you will typically use somewhere between a quarter cup and a half cup of pellets to achieve that ideal beanbag weight. The frog should sit flat and stable on a surface without any support, which tells you the pellet quantity is just right.
Once your pellets are in place, add a small amount of polyester fiberfill on top of them, working it up into any areas of the frog that feel too flat or hollow, particularly around the head area and any leg extensions. The fiberfill softens the overall feel of the toy and prevents the pellets from creating hard, uncomfortable lumps when the frog is squeezed. Check the overall shape frequently as you fill, squeezing and reshaping the frog to ensure the filling is distributed evenly and the toy has the rounded, satisfied look of a well-fed frog sitting contentedly on a lily pad. When you are happy with the shape and weight, it is time to close the opening.
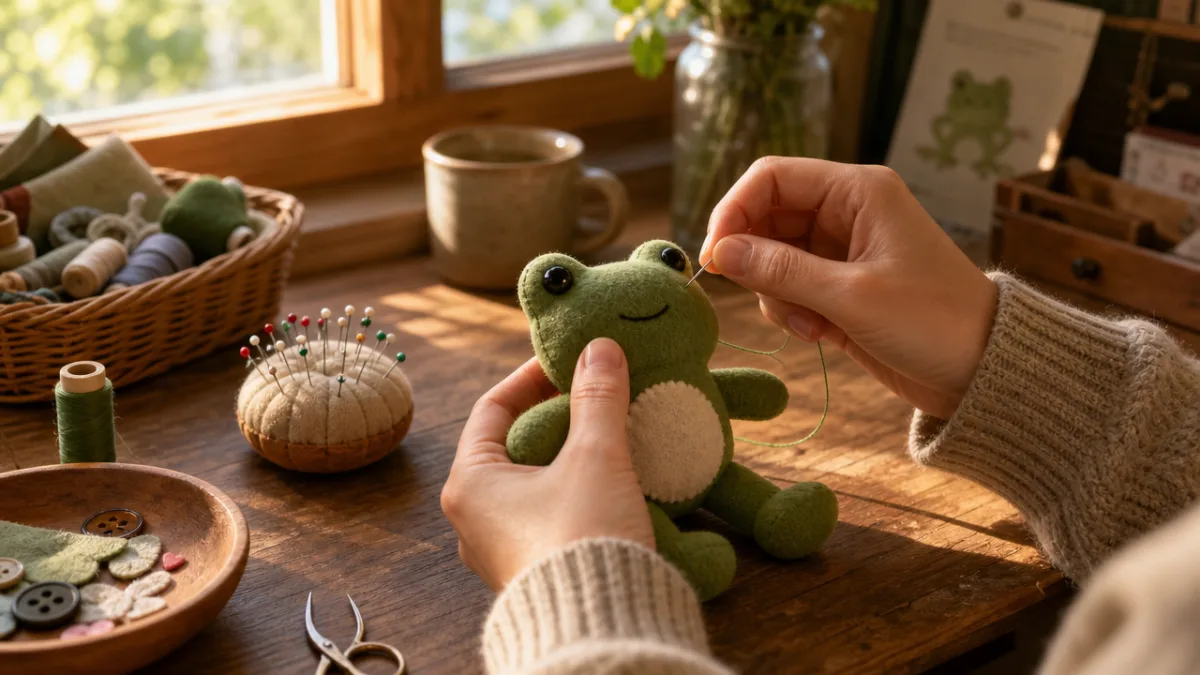
The ladder stitch, also called the invisible stitch or slip stitch, is the professional finishing technique that closes the opening without any visible stitching on the outside of the toy. Thread a hand sewing needle with thread that closely matches your fabric color, knot the end, and bring the needle up through one folded edge of the opening. Take a small horizontal stitch along the fold of the opposite side, then return to the first side and take a similar stitch, continuing to alternate between sides in a pattern that resembles the rungs of a ladder. When you pull the thread gently taut after every few stitches, the two edges draw together invisibly, leaving a seamless closure that looks as though it was sewn by a machine.
Now for the truly fun part: adding the finishing touches that give each frog its unique personality and charm. A simple smile embroidered with a length of black embroidery floss transforms the frog’s expression from neutral to absolutely beaming. Tiny rosy cheeks can be suggested with a few dots of pink fabric paint or a gentle rub of pink chalk pastel sealed with a light spray of craft sealer. Some crafters add a small felt tongue in bright red peeking out from the bottom of the smile, while others embroider tiny nostrils or add miniature lily pad accents cut from green felt and attached to the frog’s back. Every additional detail is an opportunity to make your frog completely one of a kind.
Creative Variations and Customization Ideas
Once you have mastered the basic beanbag frog pattern, a whole world of creative variations opens up before you, each one as enjoyable to make as the last. Size variation alone offers enormous creative potential: a tiny two-inch frog made from scraps of minky fabric makes an adorable keychain charm when finished with a small jump ring and lobster clasp, while a generous ten-inch frog stuffed generously with fiberfill and fewer pellets becomes a cuddly plush that doubles as a pillow for young children. Making a family of frogs in graduated sizes is a particularly lovely project that results in a charming display grouping or a playful set of nesting toys.
Fabric choice is perhaps the easiest way to completely transform the personality of your beanbag frog without changing the pattern at all. A frog cut from a bold geometric print fabric feels modern and graphic, perfect for a contemporary nursery or a teenager’s room. Floral cotton gives a vintage, cottagecore quality that pairs beautifully with a natural linen belly and embroidered botanical details. Sparkly or metallic fabric transforms your frog into something magical and fairy-tale adjacent, while a classic solid green fleece with a cream belly is the timeless version that will always feel familiar and beloved. Liberty of London prints, novelty fabrics featuring tiny flies or insects, and even upcycled fabrics from beloved old clothing all make for frogs with extraordinary sentimental value.
Beyond fabric and size, consider exploring themed variations that take the basic frog silhouette in delightfully unexpected directions. A graduation frog wearing a tiny felt mortarboard glued in place makes a memorable and personal gift for a graduate. A holiday frog with a small Santa hat attached at the top of the head and a jingle bell tied around its waist is a charming seasonal ornament or stocking stuffer. For a baby shower, a set of twelve tiny frogs in rainbow colors, each nestled in an individual compartment of a divided gift box, makes a presentation that is as visually stunning as it is practical, giving the new baby a set of safe, tactile toys that support sensory development throughout the first years of life.
- Graduation frog with a tiny felt mortarboard and tassel accent
- Holiday frog with a felt Santa hat and miniature jingle bell collar
- Rainbow collection of twelve small frogs for a sensory baby gift set
- Keychain frog charm made from scraps of minky or leather fabric
- Giant floor pillow frog stuffed primarily with fiberfill for cuddling
- Botanical frog with embroidered floral details on the belly and back

Tips for Success, Troubleshooting, and Sharing Your Creations
Even the simplest sewing projects come with a small learning curve, and beanbag frogs are no exception, though most common issues are easy to anticipate and prevent with a bit of forethought. One of the most frequent challenges beginners encounter is pellets escaping through the seams, which is both messy and deflating after the effort of assembling the toy. The best prevention is to sew each seam twice, either by stitching a second parallel line just inside the first or by using a French seam technique that fully encloses the raw edges. Checking your stitch length before beginning is also valuable; very long stitches leave larger gaps between threads that pellets can squeeze through over time with repeated handling.
Another common stumbling block is achieving smooth, rounded curves without puckering or gathering. The solution lies almost entirely in how thoroughly you clip the curves before turning the piece right side out. On tight curves, such as those around the frog’s head or the rounded ends of the legs, make your clips very close together and come as close to the stitching line as you dare without actually cutting through it. On the more gradual curves of the belly sides, clips can be spaced a bit farther apart. Taking the extra minute to clip carefully will reward you with a beautifully smooth silhouette that requires very little manipulation once turned and filled, and the difference in the finished look is genuinely remarkable.
Once your frogs are finished and you are justifiably proud of your work, sharing them with your community is one of the great pleasures of handcraft. Pinterest itself is a wonderful platform for sharing finished project photos, and adding your frog to relevant group boards or saving it to a dedicated craft board helps other crafters discover your creation and the pattern that inspired it. Instagram’s crafting community is another vibrant space where a well-photographed beanbag frog, placed on a complementary background with good natural light, can reach thousands of fellow makers who will appreciate the workmanship. Tagging the pattern designer when you share your finished piece is a generous practice that supports the independent creators who develop these patterns, often for free or at very low cost, as an act of genuine passion for the crafting community.
Gifting your handmade beanbag frogs adds another dimension of joy to the crafting process, transforming the finished toy from a personal project into a meaningful connection between you and the recipient. A hand-sewn care tag attached to the frog listing the materials used and washing instructions (most fleece frogs can be spot cleaned; those made from cotton can often be gently machine washed in a mesh laundry bag if the pellets are secured with double seaming) makes the gift feel considered and professional. Pairing your frog with a relevant children’s book, such as a classic frog-themed picture book, creates a gift set that delights both the child and the parents, and packaging the duo in a simple kraft paper bag with a handwritten tag elevates the presentation beautifully without requiring any additional craft skill or significant extra expense.








What do you think?
It is nice to know your opinion. Leave a comment.