










How to Build a DIY Wooden Garden Arch Trellis Connecting Two Raised Beds for Vertical Growing
Introduction: The Power of Vertical Growing in Your Garden
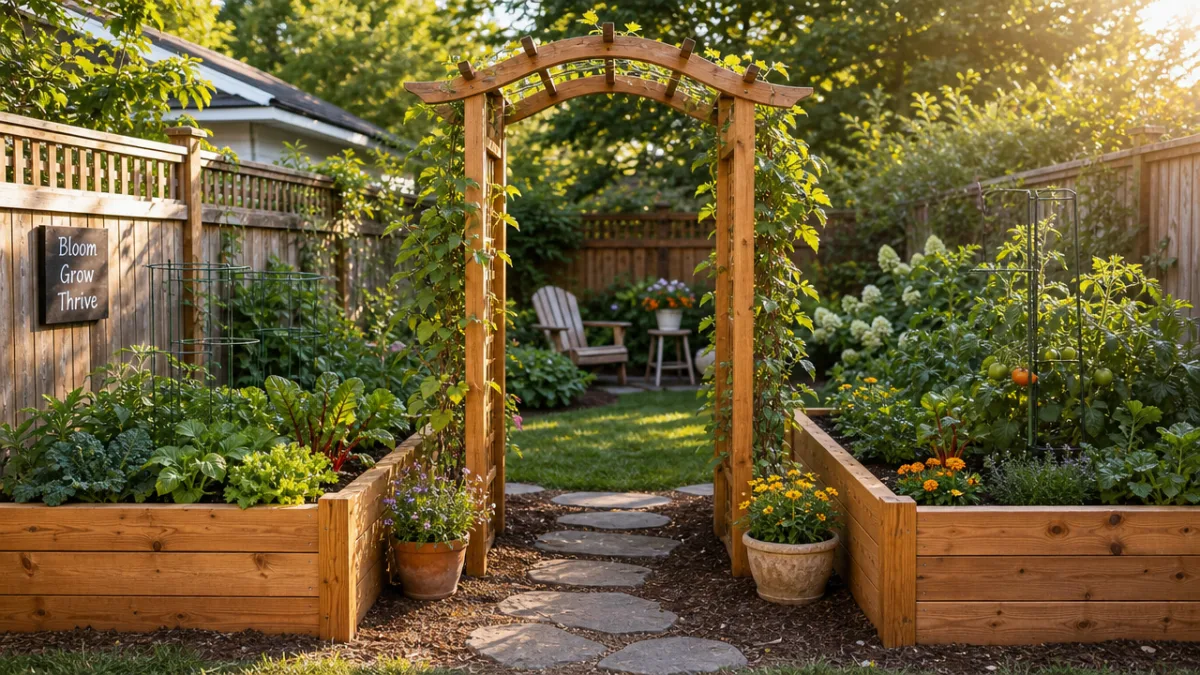
Gardening is an endlessly creative pursuit, and one of the most rewarding ways to expand your growing space without expanding your footprint is to think vertically. A wooden arch trellis connecting two raised beds is not just a functional structure — it is a stunning focal point that transforms an ordinary backyard into a productive, beautiful growing sanctuary. Whether you are working with a compact urban garden or a sprawling rural plot, vertical growing opens up an entirely new dimension of possibility for vines, climbers, and cascading vegetables.
The concept of linking two raised beds with an overhead arch creates a garden tunnel or corridor that serves multiple purposes at once. It provides structural support for climbing plants like cucumbers, pole beans, squash, and ornamental vines. It also creates natural shade beneath the arch, which can be used to grow shade-tolerant herbs or lettuces during the heat of summer. This dual-use approach maximizes every square foot of your growing area, making your garden far more efficient and productive season after season.
Beyond pure functionality, a wooden arch trellis adds tremendous aesthetic value. The sight of lush green vines trailing over a handcrafted wooden arch, framing a garden path between two raised beds, is one of the most charming and inviting images in all of home gardening. Building this structure yourself means you can tailor it precisely to your garden’s dimensions, the species you wish to grow, and the visual style you want to achieve — whether that is rustic and naturalistic or clean and contemporary.
Planning Your Arch Trellis: Measurements, Materials, and Design Considerations
Before you cut a single piece of wood, thorough planning will save you time, money, and frustration. Start by measuring the distance between your two raised beds. The arch will span this gap, so you need to know the exact width you are working with. A typical raised bed spacing for an arch trellis falls between four and eight feet apart, which allows comfortable walking access beneath the arch while creating a visually pleasing proportion. The height of the arch at its peak should be generous enough to walk under comfortably — a minimum of seven feet is recommended, though eight feet creates a more gracious feel.
When selecting your timber, pressure-treated lumber is the conventional choice for any wood that will contact soil, but many gardeners rightly prefer untreated cedar or redwood for raised bed applications, as these naturally rot-resistant species avoid introducing chemical preservatives near edible plants. For the vertical posts that anchor into or alongside the raised beds, four-by-four cedar posts are an excellent choice, offering both strength and longevity. For the horizontal crossbars and the arching overhead elements, two-by-four lumber works well and keeps the overall weight manageable during installation.
Your design should also account for the type of trellis surface you intend to create between the arch supports. Options include stretched galvanized wire, wooden lattice panels, woven jute netting, or a simple grid of horizontal wooden dowels. Each material has different implications for plant support, aesthetics, and durability. Wire is low-maintenance and strong; wooden lattice is beautiful but heavier; netting is inexpensive and easy to replace annually. Sketch your design on paper before purchasing materials, and include a cut list so that your lumber purchase is precise and waste is minimized.
Tools and Materials You Will Need
Gathering the right tools before you begin ensures that your build goes smoothly from start to finish. This project requires a modest toolkit that most home DIY enthusiasts will already own or can easily rent from a local hardware store. Having everything on hand before you break ground prevents those frustrating mid-project hardware runs that disrupt your momentum and extend the timeline unnecessarily. Take the time to organize your workspace and lay out your materials before the first cut.
The essential tools for this project include a circular saw or miter saw for cutting lumber to length, a power drill with a full set of bits for pilot holes and driving screws, a level for ensuring your posts are plumb and your crossbars are horizontal, a measuring tape and carpenter’s square for accurate layout, and a post hole digger or long-bit auger drill attachment if you plan to anchor posts into the ground rather than directly into the raised beds. A rubber mallet is useful for persuading joints together, and clamps help hold pieces in position while you drive fasteners.
For materials, the following list covers a standard arch trellis connecting two raised beds spaced approximately five feet apart with an eight-foot peak height:
- Four four-by-four cedar posts, each eight feet long (for vertical uprights)
- Four two-by-four cedar boards, each six feet long (for the arching horizontal supports and bracing)
- Two sheets of cedar lattice or a roll of galvanized garden wire for the trellis surface
- Exterior-grade structural screws (three-inch and one-and-a-half-inch lengths)
- Post anchors or metal post bases if attaching to the raised bed frame rather than into the ground
- Exterior wood glue for reinforcing mortise joints (optional but recommended)
- Waterproof wood sealant or stain to protect the finished structure
- Sand paper (80 and 120 grit) for smoothing cut ends and edges
It is worth investing in high-quality exterior screws rather than standard interior ones. Exterior structural screws are coated to resist rust and corrosion, which is critical given that this structure will be exposed to rain, irrigation, and seasonal temperature swings for many years. Similarly, choosing a quality UV-resistant wood sealant will dramatically extend the life of your arch trellis, keeping it looking beautiful and structurally sound for a decade or more with minimal maintenance.
Step-by-Step Construction Guide
Begin by positioning your two raised beds at your chosen spacing and confirming the final placement before you start building. Once the beds are in their permanent positions, mark the four corner post locations — one at each inner corner of each raised bed, or just outside the outer corners if you prefer a wider, more monumental look. Use a measuring tape and batter boards to ensure the four post positions are perfectly square to one another; small errors in post placement multiply as the structure rises, so precision at this stage pays dividends throughout the build.
Set your vertical posts first. If you are anchoring into the ground beside the raised beds, dig holes at least two feet deep — deeper in colder climates where frost heave is a concern — and set the posts in concrete or packed gravel depending on your soil type and preference. If you are attaching the posts directly to the raised bed frames, use heavy-duty metal post anchors rated for the post size you are using and secure them with structural screws through the raised bed wall material. Either approach can be very strong when executed correctly; ground burial offers the greatest rigidity, while surface mounting is easier to adjust or remove if your garden layout changes.
Once the four posts are plumb, level, and cured (if concrete was used), begin adding the horizontal crossbars. The first set of crossbars runs between the two posts on each side, at the top of the upright section before the arch begins. These should sit at approximately seven feet of height. Cut each crossbar to the exact inside span between your posts and secure them with two three-inch screws at each end, drilling pilot holes first to prevent splitting. Check for level across the top of each crossbar before final fastening, and add exterior wood glue to the joint faces for additional strength if desired.
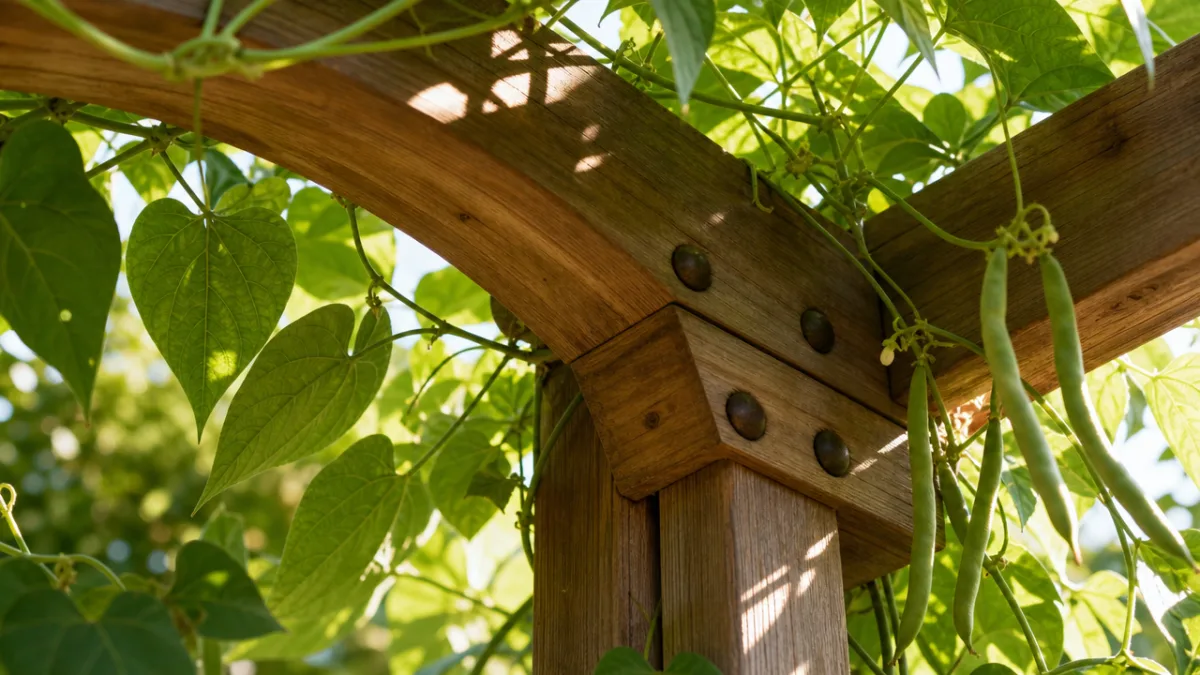
Creating the arch itself can be accomplished in several ways depending on your skill level and available tools. The simplest approach is to use straight two-by-four lumber cut at matching angles on each end to create a shallow peaked roof shape rather than a true curve. This “Gothic arch” silhouette is structurally sound and visually striking. A true curved arch requires either laminating thin strips of wood around a form or using flexible PVC pipe as a form inside a cedar wood veneer sandwich — a more advanced technique that yields a classically beautiful result. For most home gardeners, the angled peaked approach offers the best balance of simplicity, strength, and visual appeal.
Adding the Trellis Surface and Installing Support Systems for Plants
With the main arch structure standing and secure, the next step is installing the trellis surface that will actually support your climbing plants. This is where the structure transitions from architectural skeleton to living support system, and the choice you make here will significantly influence which plants thrive on your arch and how much maintenance the trellis requires year to year. Think about the mature size and weight of the plants you intend to grow, as heavier crops like winter squash or melons require a far more robust support grid than lightweight bloomers like morning glories or sweet peas.
For a wooden lattice trellis surface, cut panels to fit each section of the arch — the two vertical side panels and the angled or curved overhead section — and attach them using one-and-a-half-inch screws through the lattice border into the arch frame. Pre-drill pilot holes in the lattice border to prevent splitting the thin wood. Wooden lattice typically comes in four-by-eight-foot sheets and can be cut to size with a circular saw fitted with a fine-tooth blade. Paint or seal the lattice before installation for easier coverage, and touch up cut edges with a brush after trimming.
If you prefer a wire trellis, stretch horizontal runs of fourteen-gauge galvanized wire at six-inch intervals between the posts and overhead frame, tensioning each wire with a turnbuckle at one end for easy adjustment and tightening over time as the wire stretches under the weight of growing plants. Staple or wrap the wire around eye screws driven into the frame members. This approach is particularly popular for heavy-producing vegetable crops because the wire can bear extraordinary weight and the open grid is easy for plants to twine through naturally without requiring constant tying and training.
Regardless of the trellis material you choose, adding a few additional training aids will help your plants get established quickly and reach the overhead structure before the heat of summer. Install horizontal jute twine at intervals of twelve inches along the vertical sections during the early weeks of the growing season, providing an intermediate ladder for young vines before they are strong enough to grip the main trellis grid. Loose figure-eight ties of soft garden twine or silicone plant clips can guide leading shoots in the right direction without constricting the stem as it grows in diameter.
Choosing the Best Plants for Your Arch Trellis
One of the great joys of building a garden arch trellis is the exciting process of deciding which plants will clothe it in green, flowers, and fruit. The arch is suitable for an enormous variety of climbing and vining plants, from edible vegetables to ornamental annuals and perennials. Matching your plant choices to your arch’s structural capacity, your climate, and your aesthetic goals ensures that the trellis reaches its full potential as both a productive and beautiful garden feature every season.
For edible gardens, the following plants are outstanding performers on a wooden arch trellis:
- Pole beans — Fast-growing, productive, and lightweight, pole beans are ideal for first-time arch gardeners. They climb readily and produce abundantly from midsummer through autumn.
- Cucumbers — Vining cucumber varieties produce straighter, cleaner fruit when grown vertically and use far less horizontal space than sprawling ground varieties.
- Peas — Both shelling peas and snap peas are natural climbers that thrive in the cool shoulder seasons of spring and autumn.
- Squash and small melons — Heavier fruits require sling supports made from old pantyhose or mesh netting tied to the trellis, but the reward of producing these crops vertically is extraordinary space savings.
- Tomatoes — Indeterminate varieties can be trained up the trellis with regular tying and pruning for impressive vertical harvests.
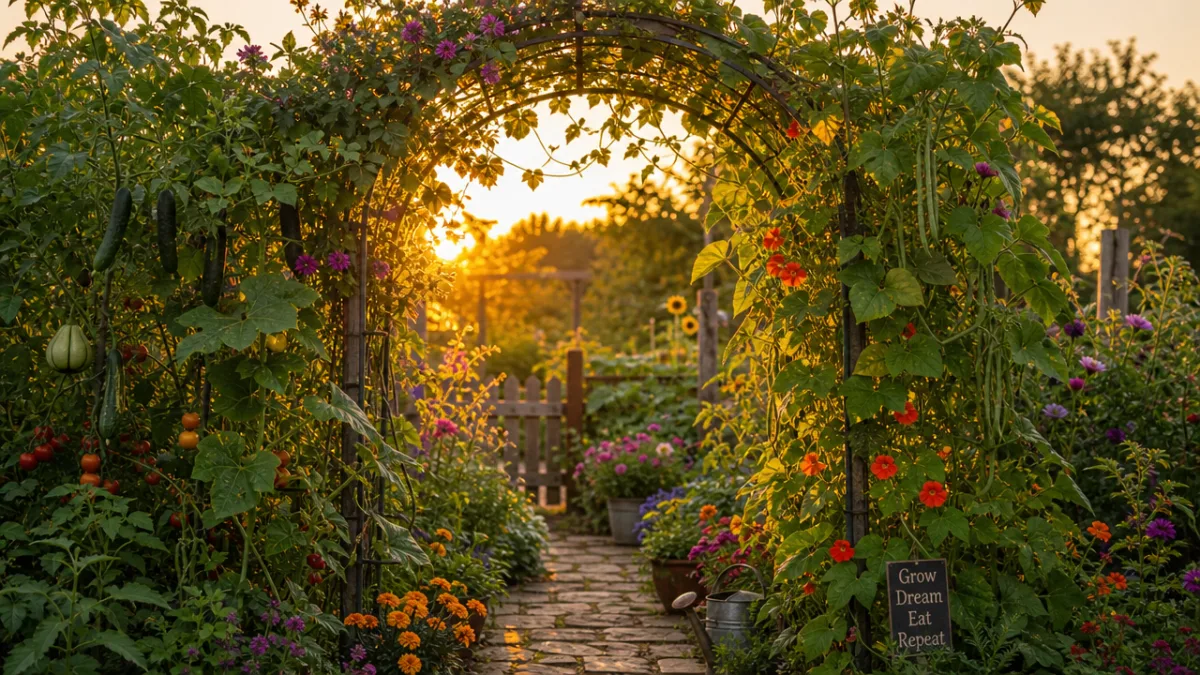
For ornamental beauty, few sights match a wooden arch draped in flowering vines during high summer. Annual climbers like scarlet runner beans (which are also edible), nasturtiums, and Spanish flag bring vivid color from early summer through frost. Perennial options such as clematis, climbing roses, wisteria, and honeysuckle create a permanent living canopy that grows more magnificent with each passing year. Many gardeners combine both edible and ornamental plants on the same arch, interplanting vegetables with flowers to create a garden tunnel that delights the senses while feeding the household.
Maintenance, Longevity, and Seasonal Care for Your Arch Trellis
A well-built wooden arch trellis requires relatively little maintenance, but some annual attention will keep it looking great and performing reliably for a decade or more. At the end of each growing season, clear all dead plant material from the trellis surface thoroughly, as decaying stems and foliage trap moisture against the wood and accelerate deterioration. Use a stiff brush or gloved hands to remove tendrils and clips, and compost all organic material promptly to reduce overwintering pest and disease pressure in the garden.
Inspect all structural joints and fasteners each spring before the new growing season begins. Tighten any screws that have worked loose during winter freeze-thaw cycles, and replace any fasteners that show signs of rust or corrosion even if they are still holding adequately. Pay particular attention to the post bases and any areas where wood contacts soil or the raised bed wall, as these are the zones most prone to moisture accumulation and wood decay. At the first sign of soft or discolored wood, treat the area with a penetrating borate-based wood preservative, which is safe for use near edible gardens and highly effective at halting the decay process.
Re-apply your chosen exterior wood finish every two to three years, or whenever the wood begins to look dry, gray, and weathered. Lightly sand the surface first to remove any peeling or chalky old finish, then apply a fresh coat of UV-resistant exterior stain, oil, or sealant. This single maintenance step has the greatest impact on the long-term lifespan of the structure, protecting the wood from the twin enemies of UV radiation and moisture infiltration. With this level of care, a well-constructed cedar arch trellis can easily serve your garden for fifteen to twenty years, maturing beautifully alongside the perennial plants that come to call it home.
Beyond wood care, keep an eye on the trellis’s plumb and level throughout the growing season, especially during periods of heavy crop loading. If one side begins to lean, address it promptly by adding a diagonal brace or adjusting the post anchor before the problem escalates. A little seasonal vigilance protects both the structure and the plants depending on it. With thoughtful annual care, your DIY wooden garden arch trellis will remain one of the most treasured and productive features in your entire garden for many growing seasons to come.








What do you think?
It is nice to know your opinion. Leave a comment.