










Home Studio Essentials: Your Complete Guide to Building the Perfect Creative Space
Whether you are a musician, podcaster, content creator, photographer, or visual artist, building a home studio is one of the most rewarding investments you can make in your creative career. A dedicated space designed specifically for your craft transforms not only the quality of your output but also the consistency of your practice. When your environment is optimized for creation, you spend less time fighting your tools and more time doing what you love. This guide walks you through everything you need to know to build a functional, inspiring, and professional home studio from the ground up.
Choosing and Preparing Your Space
The foundation of any great home studio begins with the room itself. Before purchasing a single piece of equipment, spend time evaluating the spaces available to you. Ideally, you want a room that offers some separation from the rest of the home, both for acoustic reasons and to create a psychological boundary between your creative life and your domestic one. Spare bedrooms, basement rooms, converted garages, and even large closets have all been successfully transformed into excellent studios with the right preparation and planning.
Once you have selected your room, consider its dimensions carefully. Square rooms and rooms with parallel walls create acoustic problems known as standing waves, which cause certain frequencies to build up and others to cancel out. If you have flexibility, a room with slightly irregular dimensions or one where you can position equipment asymmetrically will serve you better. Take note of windows, doors, HVAC vents, and any other architectural features that will influence both sound behavior and your overall workflow inside the space.
The next step is to address noise control, which encompasses two distinct challenges. The first is soundproofing, which refers to preventing sound from traveling in or out of the room. The second is acoustic treatment, which refers to controlling how sound behaves within the room. These are often confused but serve very different purposes. Soundproofing typically involves adding mass to walls, sealing gaps around doors and windows, and decoupling surfaces. Acoustic treatment involves adding absorption panels, diffusers, and bass traps to shape the sonic character of the room itself.
For most home studio builders working with a realistic budget, some combination of budget-friendly acoustic treatment and careful attention to noise during recording sessions is the practical path forward. Dense moving blankets, bookshelves filled with books, thick rugs, and purpose-built acoustic foam panels all contribute meaningfully to improving a room’s sound. Do not underestimate the role that soft furnishings play. A well-furnished room with upholstered furniture and heavy curtains will always sound better than a bare, reflective one, even before any dedicated acoustic treatment is applied.
Core Audio Equipment for Every Home Studio
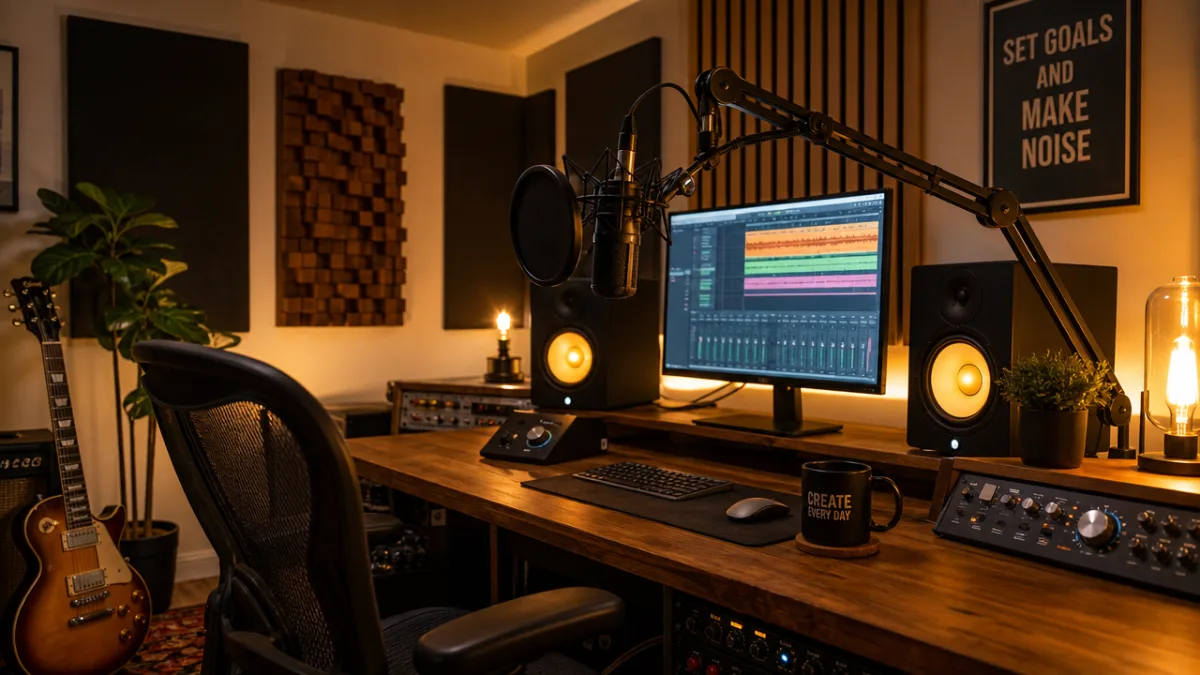
Regardless of what you create, audio quality matters. Even video creators and podcasters who do not consider themselves audio engineers benefit enormously from investing in good foundational audio equipment. The three pillars of a home studio audio setup are a reliable audio interface, a quality microphone appropriate to your needs, and a pair of accurate studio monitor speakers or headphones for playback and mixing. Getting these three elements right will carry you further than any amount of additional gear purchased without this foundation in place.
An audio interface is the bridge between your microphone or instrument and your computer. It converts analog signals into digital data that your recording software can process, and it also converts digital audio back into analog signals for playback through your monitors. When choosing an interface, pay attention to the number of inputs and outputs you need, the quality of the preamps built into the device, the latency performance, and the compatibility with your computer’s operating system. Brands like Focusrite, Universal Audio, PreSonus, and MOTU have all earned strong reputations across a range of price points and are excellent starting places for your research.
Microphone selection depends heavily on your primary use case. Large-diaphragm condenser microphones are the workhorses of home studios where voice recording, acoustic instruments, and studio-quality vocal takes are the priority. Dynamic microphones, on the other hand, are more forgiving in untreated rooms and handle high sound pressure levels with ease, making them excellent choices for louder instruments and broadcast-style podcasting setups. Ribbon microphones offer a warm, vintage character beloved by many producers working with strings, brass, and room ambience. Understanding the pickup pattern of your microphone, whether it captures sound in a cardioid, omnidirectional, or figure-eight pattern, is equally essential to using it effectively in your particular space.
Studio monitor speakers deserve special mention because they are so often undervalued by beginners who reach for consumer headphones or computer speakers instead. Consumer audio products are designed to make music sound flattering and enjoyable, which means they often exaggerate bass and high frequencies. Studio monitors, by contrast, are engineered to be as neutral and accurate as possible, allowing you to make mixing and production decisions that translate well across different playback systems. Popular choices for home studios include models from Yamaha, KRK, Adam Audio, Genelec, and Focal, with options available at nearly every budget level.
Essential Visual and Lighting Equipment
For creators working in video, photography, or live streaming, lighting is arguably the single most impactful upgrade you can make. Poor lighting immediately signals low production value to an audience, no matter how expensive the camera behind it. The good news is that excellent lighting is achievable at a modest cost when you understand the principles at work. The most fundamental concept in studio lighting is the three-point lighting setup, which uses a key light, a fill light, and a backlight to create dimensional, flattering illumination that separates the subject from the background.
Your key light is your primary source of illumination and should be positioned at roughly a 45-degree angle to your subject, slightly above eye level. Softboxes and large LED panels are popular choices for key lights because they produce soft, diffused light that minimizes harsh shadows on the face. Your fill light is placed on the opposite side of the key light at a lower intensity to soften the shadows the key light creates without eliminating them entirely. The backlight, sometimes called a hair light or rim light, is placed behind the subject to create separation from the background and add a sense of depth to the image.
Color temperature is another critical consideration in your lighting setup. Measured in Kelvin, color temperature describes how warm or cool a light source appears. Daylight sits around 5500K to 6500K and appears crisp and neutral, while tungsten light sits around 3200K and produces that warm, golden glow associated with indoor domestic settings. Most modern LED studio lights are bi-color, meaning they allow you to dial in a color temperature anywhere between warm and cool to match your aesthetic or blend with ambient light sources in your room. Maintaining consistent color temperature across all your light sources in a single shot is essential to achieving a professional, cohesive look.
Beyond the three-point setup, many home studios benefit from practical lights, which are visible light sources within the frame such as LED strips, neon signs, lamp fixtures, and desk lights that contribute both illumination and aesthetic character to the image. Practical lights have become enormously popular in content creation spaces because they add visual interest, personality, and depth to the background without requiring a dedicated set construction. Colored RGB LED strips placed behind monitors, shelving units, or along the edges of walls and ceilings can dramatically enhance the mood of a space and signal a specific creative identity to your audience.
The Digital Toolkit: Software and Technology
Hardware is only half of the equation in a modern home studio. The software tools you choose to work with are equally important and, in many cases, have a more profound impact on your productivity and creative output than the physical equipment surrounding you. For audio creators, the central piece of software is your Digital Audio Workstation, commonly referred to as a DAW. This is the environment in which you record, edit, arrange, mix, and export your audio projects. The major DAWs available today, including Ableton Live, Logic Pro, Pro Tools, FL Studio, Studio One, and Reaper, each have distinct workflows, strengths, and communities, and finding the one that aligns with how your mind works is worth the time it takes to explore them.
For video creators, editing software is the equivalent centerpiece of the digital toolkit. Adobe Premiere Pro remains the industry standard in many professional environments, valued for its deep integration with the rest of the Adobe Creative Suite and its robust feature set. DaVinci Resolve has emerged as a powerful free alternative that rivals professional paid software in its editing, color grading, and audio post-production capabilities. Final Cut Pro is the preferred choice of many Mac-based creators thanks to its tight hardware integration and intuitive magnetic timeline system. Choosing an editing platform is a long-term commitment, since your skills, templates, presets, and project files accumulate over time, so research thoroughly before committing.
Beyond the core creative software, a well-equipped home studio leverages a range of supporting tools to streamline the workflow from creation to delivery. Cloud storage solutions such as Google Drive, Dropbox, and Backblaze provide backup and collaboration capabilities that protect your work from hardware failure. Project management tools like Notion, Trello, or Asana help creators plan content calendars, track project status, and manage deliverables across multiple clients or platforms. Communication platforms like Slack or Discord facilitate collaboration with collaborators and team members regardless of physical location, turning even a solo home studio into a connected creative hub.
Plugin and virtual instrument libraries represent another significant area of the digital toolkit, particularly for music producers and audio engineers. Plugins extend the capabilities of your DAW with additional synthesizers, samplers, effects processors, and mixing tools. The world of audio plugins is vast and can quickly become overwhelming, but a few foundational categories deserve early attention. A good equalizer plugin, a versatile compressor, a convolution reverb for realistic spatial effects, and a solid collection of virtual instruments will cover the vast majority of production needs for someone building their home studio from the ground up.
Ergonomics, Organization, and Workflow Design
A home studio that is uncomfortable to work in will never reach its full potential, no matter how excellent the equipment inside it. Ergonomics, the science of designing a workspace to fit the human body and minimize physical strain, is a foundational consideration that many creators overlook in their enthusiasm for acquiring gear. Spending long hours recording, editing, composing, or creating in a poorly designed workspace leads to chronic pain, fatigue, and ultimately a reduction in the time and energy you can dedicate to your craft. Investing in an ergonomic chair, a correctly positioned desk, and a well-arranged monitor setup pays dividends in both comfort and creative longevity.
Your chair is arguably the most important physical investment in your studio after your core creative equipment. Look for a chair that provides lumbar support, allows you to position your feet flat on the floor with your knees at approximately a 90-degree angle, and has adjustable armrests that allow your shoulders to relax rather than hunch. Your monitor or monitors should be positioned at eye level or very slightly below, approximately arm’s length away, to reduce neck strain and eye fatigue during long sessions. If you use a keyboard and mouse, they should sit at a height where your elbows are at or slightly above the level of your desk to prevent wrist and shoulder tension from accumulating over time.
Cable management is an often-overlooked aspect of studio organization that has a meaningful impact on both the aesthetics and the functionality of your space. A desk buried in tangled cables creates visual chaos that can subtly undermine your focus and creativity, while also creating practical problems when you need to trace a connection or add new equipment. Cable raceways, velcro ties, cable clips, and under-desk cable trays are all affordable and widely available solutions that make an enormous difference in the cleanliness and professionalism of your setup. Taking the time to organize your cables when you first build your studio is far easier than trying to untangle and reorganize them after the fact.
The physical layout of your workspace should reflect the sequence of your creative workflow. Equipment and tools you reach for most frequently should be closest at hand, while less frequently used items can be stored further away or on secondary surfaces. Many creators benefit from designating distinct zones within their studio: a primary creation zone at the main desk, a secondary zone for reviewing and consuming reference material, and a standing area or separate surface for tasks that benefit from a change of posture. A thoughtfully organized studio is one you look forward to entering, and that psychological dimension of your space matters as much as any technical specification.
Personalizing Your Space for Creative Inspiration
A home studio should be more than a functional workspace. It should be a place that actively fuels your creative motivation and reflects your artistic identity. The most productive and enduring home studios are ones where the creator genuinely enjoys spending time, where the environment itself feels like an extension of their creative voice rather than a sterile utility room filled with equipment. Personalizing your space is not a luxury or an afterthought but a genuine investment in your long-term creative output and the sustainability of your practice over months and years.
Visual inspiration plays a powerful role in maintaining creative energy. Many creators surround themselves with artwork, photography, mood boards, and objects that connect them to the work they aspire to create or the creators they admire. Shelving that displays meaningful books, vinyl records, figures, or instruments turns the walls of your studio into a curated environment that tells the story of your creative influences and aspirations. Plants add life, warmth, and even modest air quality benefits to a studio space and have been shown in numerous studies to have a positive effect on mood and cognitive function in workspace environments.
Color psychology also deserves consideration when designing your home studio. The colors that surround you during creative work have a documented influence on mood, energy levels, and the nature of the creative thinking you engage in. Deep blues and greens tend to promote calm focus and are popular in studios where analytical or precision-oriented work dominates, such as mixing, editing, and technical production. Warmer tones like amber, terracotta, and warm wood finishes create an atmosphere of warmth and intimacy that many musicians and songwriters find conducive to emotionally expressive creative work. Neutral backgrounds with strategic pops of color offer the flexibility to shift the mood of the space with lighting changes.
Sound design in your space extends beyond acoustic treatment to include the ambient sonic character of the room when you are not actively working. Some creators find that having a small Bluetooth speaker that plays curated playlists or ambient soundscapes helps them enter a focused creative state as soon as they enter the studio. The ritual of your creative space, the way it smells, sounds, and feels when you first walk in, can be deliberately designed to serve as a psychological trigger that signals to your brain that it is time to create. This kind of intentional environmental design is what separates a room with equipment from a true creative sanctuary.
- Curate your wall art and visual references to reflect the aesthetic and emotional tone of the work you want to create, refreshing these periodically as your creative direction evolves.
- Invest in quality lighting that you can adjust throughout the day to match your energy levels and the nature of the task, from bright focused light for technical work to warm ambient light for creative exploration.
- Keep a physical notebook or whiteboard in your studio for capturing ideas quickly without breaking your creative flow to navigate software or interfaces.
- Build in a comfortable listening or reading area separate from your primary workstation where you can step back, consume reference material, and give your mind space to process and integrate what you are creating.
- Maintain the space with regular organization sessions, treating the upkeep of your studio as an integral part of your creative practice rather than a chore separate from it.
Ultimately, your home studio is a living environment that will evolve alongside your skills, your goals, and your creative practice. The best studios are not the ones built all at once with unlimited budgets but the ones that grow organically, piece by piece, as the creator’s needs become clearer and their investment in their craft deepens. Start with what you have, optimize thoughtfully, add intentionally, and never lose sight of the fact that the most important element in any studio is not the gear but the person sitting at the center of it, bringing ideas to life.








What do you think?
It is nice to know your opinion. Leave a comment.