










Torn Paper Watermelon Craft: A Complete Guide to Creating Stunning Textured Art
Introduction to Torn Paper Crafting
Torn paper crafting is one of those wonderfully approachable art forms that requires almost no special tools or advanced skills, yet produces results that look impressively detailed and visually rich. The torn paper watermelon craft, in particular, has captured the hearts of parents, teachers, and creative enthusiasts everywhere because it combines the playful subject matter of a summer fruit with a tactile, hands-on creative process. Whether you are a seasoned crafter or someone picking up a glue stick for the first time, this project welcomes you with open arms and produces something genuinely delightful.
What makes torn paper art so special is the organic quality of the edges. Unlike cut paper, which gives you crisp, predictable lines, torn paper creates soft, irregular boundaries that mimic the textures found in nature. When applied to a watermelon design, those ragged edges become part of the charm, suggesting the natural variation in the fruit’s rind, flesh, and seeds in a way that no scissors could replicate. The result feels alive, handmade, and full of personality, which is exactly what great craft projects should feel like.
This guide will walk you through every aspect of the torn paper watermelon craft, from gathering your materials to displaying your finished artwork. Along the way, you will discover tips for working with different age groups, ideas for expanding the project into larger thematic displays, and suggestions for adapting the technique for different skill levels. By the time you finish reading, you will have everything you need to dive in with confidence and create something truly beautiful.
Why Watermelon Makes the Perfect Subject
The watermelon is an almost ideal subject for a torn paper craft project because its visual structure is bold, simple, and immediately recognizable. The contrast between the bright red or pink interior, the white inner rind, and the deep green outer shell gives crafters a clear, satisfying color palette to work with. Even a child who is just beginning to develop fine motor skills can tear paper into rough semicircles and layered shapes that read unmistakably as a watermelon slice, making the project highly rewarding for participants of all ages.
Beyond its visual simplicity, the watermelon carries rich cultural associations with summer, picnics, warmth, and joy. Creating a watermelon craft can serve as a wonderful anchor for summer-themed learning units, seasonal classroom decorations, or just a fun afternoon activity when the weather outside is too hot for outdoor play. The fruit’s cheerful colors translate beautifully into paper art, and the finished pieces have a brightness and energy that makes them wonderful additions to any wall or bulletin board display.
There is also something inherently satisfying about recreating the layered cross-section of a watermelon. The project naturally teaches children and adults alike about how fruits are structured internally, making it a gentle introduction to botanical observation through an artistic lens. Crafters learn to look closely at the real object, noticing where colors shift and how the shapes relate to one another, and then they translate those observations into a physical art piece through the simple, meditative act of tearing and layering paper.
Materials and Tools You Will Need
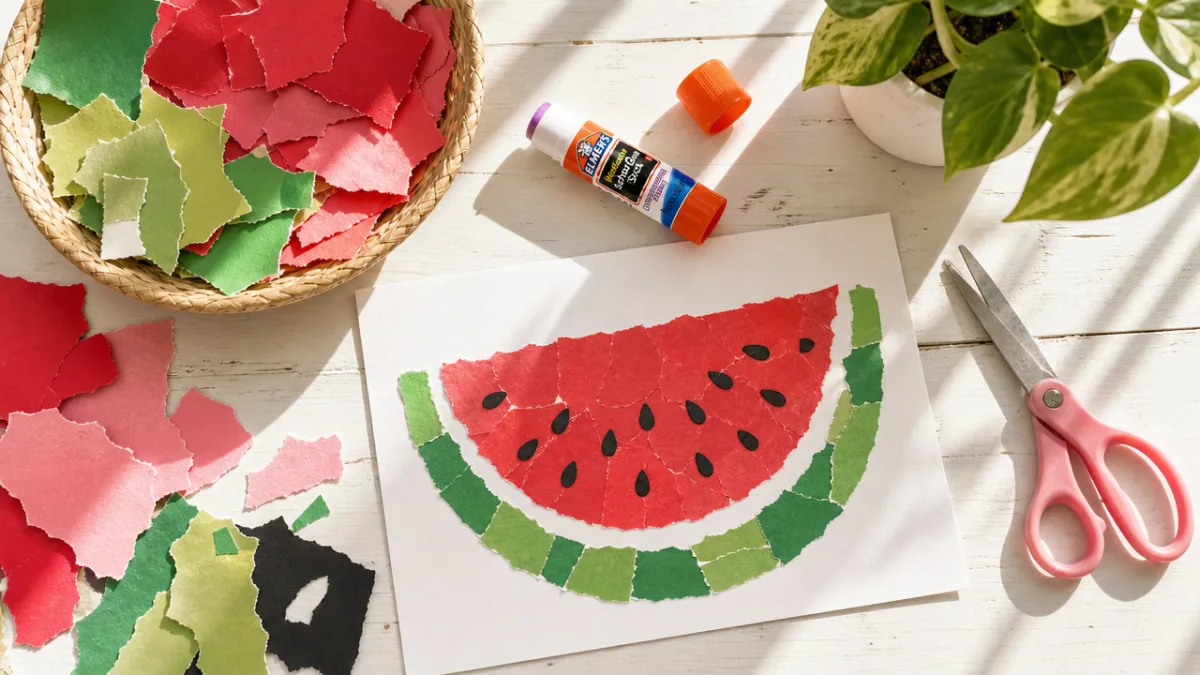
One of the greatest advantages of the torn paper watermelon craft is that it requires very few materials, most of which you likely already have at home or can find inexpensively at any craft store. At its most basic, you need paper in red, pink, white, green, and black, along with some kind of adhesive and a backing surface. The simplicity of the supply list makes this project incredibly accessible, meaning it can be set up quickly for impromptu creative sessions without any elaborate preparation or expense.
For the paper itself, construction paper is the most common choice because it tears easily, comes in a wide range of colors, and is sturdy enough to layer without becoming too bulky. However, many crafters also love using tissue paper for certain sections because its translucency creates a beautiful, almost watercolor-like effect when layers are built up. Wrapping paper, magazine pages, or even painted newspaper can also be incorporated for interesting textural variety, and experimenting with different paper types is part of the fun of the project.
In terms of adhesive, a simple glue stick works perfectly well for younger crafters because it is easy to control and dries cleanly. White school glue thinned slightly with water can be applied with a brush in the style of decoupage, which helps pieces lie flat and gives the finished work a unified, cohesive surface. For older crafters who want a more archival result, acid-free craft glue is a worthwhile investment. Whatever adhesive you choose, the key is to apply it generously enough that all edges stay down, since lifted paper edges can curl over time and diminish the visual impact of the finished piece.
Preparing Your Workspace
Before you begin tearing and gluing, taking a few minutes to set up your workspace thoughtfully will make the entire process more enjoyable and less stressful. Cover your work surface with newspaper, a plastic tablecloth, or a craft mat to protect it from glue and stray paper scraps. Lay out all your paper colors within easy reach so you are not hunting for supplies mid-project, and place your adhesive, a small cup of water if you are using white glue, and any other tools you need in accessible spots before you begin.
If you are running this project with children, consider pre-sorting the paper into small piles by color and placing them in separate containers or on separate plates. This organizational step helps young crafters find what they need without having to sort through a jumbled pile, which can be frustrating and distracting. It also provides a natural visual prompt for the layering sequence, reminding participants which color goes where as they build their watermelon composition from the outside in or inside out, depending on your preferred construction method.
Good lighting is also worth considering, especially if you are working with darker shades of green or black that can be harder to see and position accurately in dim conditions. Natural light near a window is ideal, both for seeing the colors accurately and for keeping the mood of the project bright and pleasant. If natural light is not available, a daylight-spectrum lamp can make a significant difference in how the colors appear and how precise you are able to be with your paper placement, particularly when it comes to those small, delicate black seed shapes.

Step-by-Step Instructions for Creating Your Watermelon
Begin by deciding on the size and orientation of your final piece. Many crafters choose to work on a standard sheet of white cardstock or cardboard as their backing, which provides a stable, smooth surface for layering torn paper pieces. If you want to create a large, statement artwork, you can use a piece of poster board or even a canvas panel. Sketch the basic outline of your watermelon slice lightly in pencil if it helps you feel more confident about placement, though many crafters prefer to work entirely freehand and let the composition develop organically.
Start with the outermost layer of your watermelon, which is the dark green rind. Tear strips of dark green construction paper into irregular pieces with softly jagged edges, then arrange them along the curved outer edge of your watermelon shape. Glue them down generously, pressing each piece flat with your fingers and overlapping the pieces slightly so there are no gaps. This layered, overlapping technique is key to achieving a rich, textured look rather than a flat, uniform one, so take your time and build the rind up with multiple torn pieces rather than trying to achieve coverage with a single large piece.
Next, add the lighter green or white inner rind section by tearing a slightly narrower band of lighter paper and layering it just inside and slightly overlapping the dark green edge. Follow this with the main red or pink flesh section, which should fill the interior of the slice. Tear the red paper into a variety of shapes and sizes, mixing large torn pieces with smaller ones to create visual interest and depth. Finally, tear tiny oval or teardrop shapes from black paper to serve as seeds and press them onto the red flesh section, distributing them naturally and unevenly as they would appear in a real watermelon.
Techniques for More Advanced Results
If you want to elevate your torn paper watermelon beyond the basic version, there are several techniques that can add remarkable depth and realism to your artwork. One approach is to use multiple shades of red and pink paper, mixing pale blush tones with vibrant crimson to suggest the natural color variation in watermelon flesh. Placing the palest shades near the center and building toward darker, richer reds toward the outer edge creates a subtle gradient effect that is visually compelling and surprisingly true to life.
Another technique that experienced crafters love is to wet the paper slightly before tearing it, which produces an even softer, more feathered edge. Simply dampen the area where you intend to tear with a slightly wet finger or a small damp paintbrush, wait a few seconds, and then tear slowly and steadily. The resulting edge will be extremely soft and fibrous, almost like torn fabric, which creates beautiful transitions between color zones and gives the overall piece an almost painterly quality that stands apart from the look achieved with dry tearing.
You can also experiment with layering tissue paper over construction paper or vice versa to create areas of visual complexity that reward close looking. A layer of pale pink tissue paper over red construction paper, for instance, softens the intensity of the red and creates a luminous, glowing effect that beautifully captures the way light passes through the flesh of a real watermelon slice. These subtle layering effects are what separate a thoughtful, refined torn paper artwork from a simple beginner project, and they are well worth exploring once you are comfortable with the basic construction technique.
Educational Benefits and Learning Opportunities
The torn paper watermelon craft is far more than just a fun activity; it is a genuinely rich learning experience that supports development across multiple domains simultaneously. For young children, the act of tearing paper builds fine motor strength and control in the small muscles of the hands and fingers, which are the same muscles needed for writing, buttoning clothing, and other essential self-care tasks. Educators and occupational therapists often recommend paper tearing activities precisely because they provide challenging, satisfying resistance that exercises the hands in a way that feels like play rather than therapy.
The project also supports color recognition and sorting skills, as children must identify and select the correct colored papers for each section of the watermelon. For older children and teens, the project can be extended into a lesson on color theory, exploring concepts like complementary colors, the way layering affects color perception, and the difference between warm and cool tones. A watermelon palette, with its combination of warm reds and pinks against cool greens and the neutral of the white rind, is actually a wonderful case study in how contrasting colors create visual energy and interest.
Beyond the purely visual and motor dimensions, the torn paper watermelon craft encourages patience, focus, and the ability to work through a multi-step process toward a completed goal. In an era when many children and adults are accustomed to rapid digital gratification, the slow, hands-on nature of this project provides a valuable counterpoint. Participants learn to sit with a task that cannot be rushed, to make iterative decisions about where to place each torn piece, and to experience the quiet satisfaction of seeing a composition emerge gradually from their own sustained effort and attention.
Adapting the Project for Different Age Groups
For toddlers and preschoolers, the torn paper watermelon craft works best when adults pre-tear much of the paper into manageable pieces and focus the child’s participation on placing and pressing pieces onto a pre-glued surface. This approach keeps the activity achievable and frustration-free while still giving young children genuine agency and the satisfying sensory experience of pressing paper into glue. Simple guidance like “find a red piece” and “put it here in the middle” gives toddlers enough structure to succeed while keeping the interaction playful and encouraging.
Elementary-age children, roughly between five and ten years old, can typically handle the full tearing and gluing process with minimal adult assistance. This age group benefits from a brief demonstration at the start of the project and then the freedom to work independently, problem-solving placement decisions on their own. Encouraging children in this age range to look carefully at a real watermelon or a reference photo before beginning helps develop their observational skills and gives them a genuine visual goal to work toward rather than simply following a pattern by rote.
For teens and adults, the project becomes an opportunity to explore artistic concepts in greater depth. Discussions about texture, composition, color harmony, and the differences between torn and cut edges can transform the activity into a meaningful studio art experience. Adults working on this project often find it unexpectedly meditative, discovering that the repetitive rhythm of tearing and placing paper induces a calm, focused state similar to that associated with drawing or painting. Encouraging adult crafters to work without a rigid template and to make all composition decisions intuitively tends to produce the most interesting and personal results.
Display Ideas and Creative Extensions
Once your torn paper watermelon is complete and fully dry, the fun is really just beginning. A single watermelon slice looks charming framed under glass or mounted on a piece of burlap or complementary colored background paper. For a more dramatic display, consider creating a series of watermelon slices at different scales and arranging them in a grid pattern, which creates a lively, pop-art inspired composition that is striking enough to serve as a genuine piece of home decor rather than just a craft project.
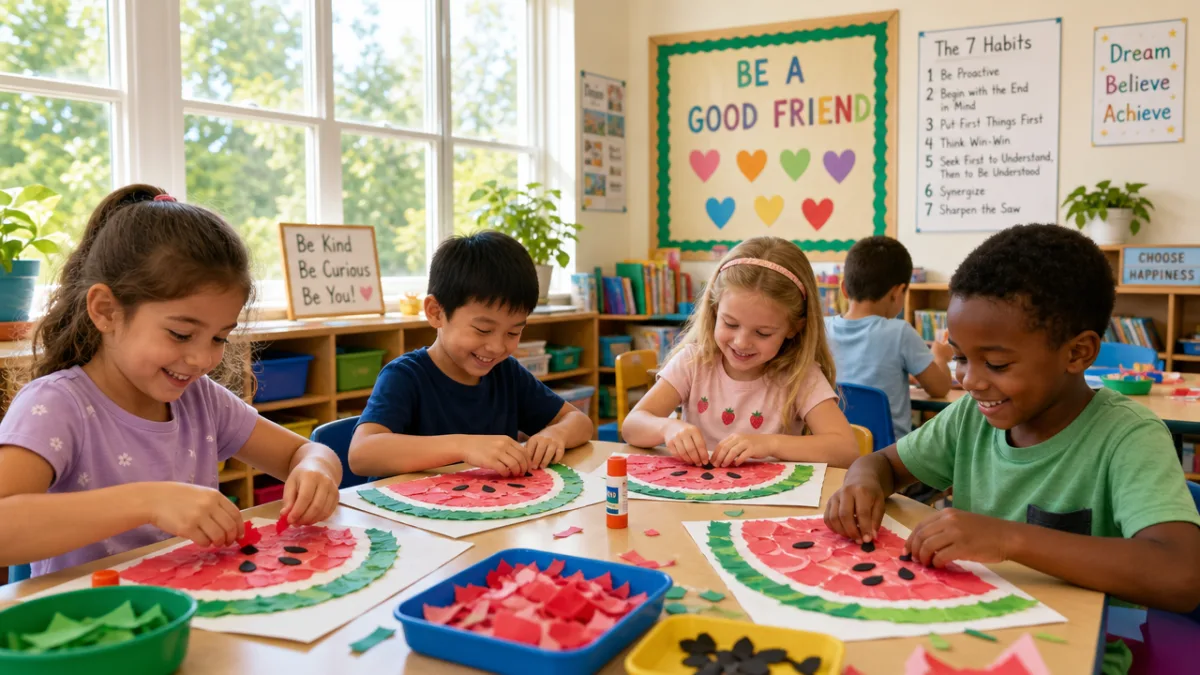
In classroom or camp settings, torn paper watermelons make a wonderful collective display when every participant contributes one slice and the slices are assembled into a large, communal watermelon on a bulletin board or wall. This collective approach celebrates individual contributions while creating something larger and more impressive than any single piece could be alone. Adding other summer-themed torn paper elements, such as lemonade glasses, sandals, or sunflowers, around the watermelon slices creates a full seasonal mural that can anchor an entire classroom’s thematic decor for a unit or season.
The torn paper technique itself also extends beautifully to other fruit subjects, making the watermelon project a wonderful gateway into a whole series of fruit-themed artworks. Strawberries, pineapples, lemons, and kiwi slices all translate wonderfully into torn paper compositions, each offering its own interesting color palette and structural challenge. A collection of these fruit artworks displayed together makes a vibrant, cohesive series that works brilliantly in a kitchen, dining room, or any space that would benefit from a lively injection of color and handmade warmth.
Sharing Your Work and Finding Inspiration
One of the great joys of completing a torn paper watermelon craft is sharing it with others, both in person and through online creative communities. Platforms like Pinterest, Instagram, and craft-focused Facebook groups are full of wonderfully diverse interpretations of this project, from highly realistic renderings that push the boundaries of what torn paper can achieve to playful, abstract versions that prioritize bold color and joyful energy over representational accuracy. Browsing through others’ watermelon crafts before or after completing your own can be deeply inspiring and can spark ideas for your next project.
When photographing your finished watermelon art for sharing online, pay attention to the background you photograph it against, as a clean, contrasting surface will make the colors of your work pop and allow the beautiful texture of the torn paper to read clearly in the image. Natural sidelight, which rakes across the surface of the paper at a low angle, is particularly effective at highlighting the dimensional quality of the layered torn edges, giving your photo a depth and richness that communicates just how tactile and beautiful the finished piece really is in person.
Whether you keep your torn paper watermelon as a cherished personal keepsake, gift it to someone who would love a piece of handmade art, or add it to a larger creative display, what matters most is the experience of making it. The torn paper watermelon craft is a reminder that beautiful, meaningful art does not require expensive tools, professional training, or elaborate preparation. It requires only the willingness to pick up some paper, let your hands work freely, and trust that something wonderful will emerge from the simple, ancient pleasure of making something by hand.








What do you think?
It is nice to know your opinion. Leave a comment.