










How to Make Denim Yarn from Old Jeans: A Complete Guide
Introduction: Giving New Life to Old Denim
Denim is one of the toughest, most well-loved fabrics out there — and yet millions of pairs of jeans get thrown away every year just because they wore out, stopped fitting, or went out of style. Before yours end up in a landfill, here’s an idea worth trying: turn them into denim yarn. It sounds a little wild, but this upcycling technique transforms old jeans into a versatile crafting material you can actually knit, crochet, or weave with.
Making denim yarn at home fits right in with the slow fashion and zero-waste movements that so many of us are trying to embrace. Instead of buying new synthetic yarn that might contain harmful chemicals or shed microplastics, you’re repurposing something you already own. And the process itself is pretty accessible — you really just need scissors, a flat surface, and some patience.
Whether you’ve been doing fiber arts for years or you’ve never picked up a crochet hook in your life, denim yarn is a genuinely fun entry point into upcycled crafting. The finished yarn has this earthy, textured, rustic quality that gives projects a character you just can’t get from store-bought yarn. Market bags, coasters, placemats, wall hangings — once you’ve got a good stash of homemade denim yarn, you’ll find yourself looking at every old pair of jeans differently.
What You’ll Need: Tools and Materials
One of the best things about this project is that you barely need to buy anything to get started. The star of the show is, obviously, the denim itself. Any color or wash will work, though lighter-weight denim is a bit easier to cut through if you’re just starting out. Round up as many pairs as you can — thrift stores are great for this, and friends and family are usually happy to hand over jeans they were going to toss anyway. The more you collect, the more yarn you’ll have to play with.
Beyond the jeans, the single most important thing you’ll need is a sharp pair of fabric scissors or a rotary cutter with a cutting mat. Sharp tools genuinely make or break this project. Dull scissors will fray the edges, leave you with uneven strips, and give your hands a real workout — so if yours have seen better days, it’s worth getting a fresh pair before you start. A ruler or quilting guide is also helpful for keeping your strip widths consistent.
Here’s a complete list of what to have on hand before you dive in:
- Old denim jeans (multiple pairs if you’re planning a larger project)
- Sharp fabric scissors or a rotary cutter
- Self-healing cutting mat (if using a rotary cutter)
- Metal ruler or quilting guide
- Seam ripper for removing seams and hems
- Flat workspace or large table
- Clothes pins or clips for holding fabric in place
- A bowl or basket for collecting finished yarn
One thing that’s optional but honestly really helpful, especially the first time around: a fabric marking pen or tailor’s chalk. Being able to draw your cutting lines directly onto the denim before you start takes a lot of the guesswork out of the spiral cutting technique and helps you end up with even, consistent strips. After a few sessions you’ll probably cut freehand without even thinking about it, but those markings are a great confidence booster when you’re learning.
Preparing Your Denim: Breaking Down the Jeans
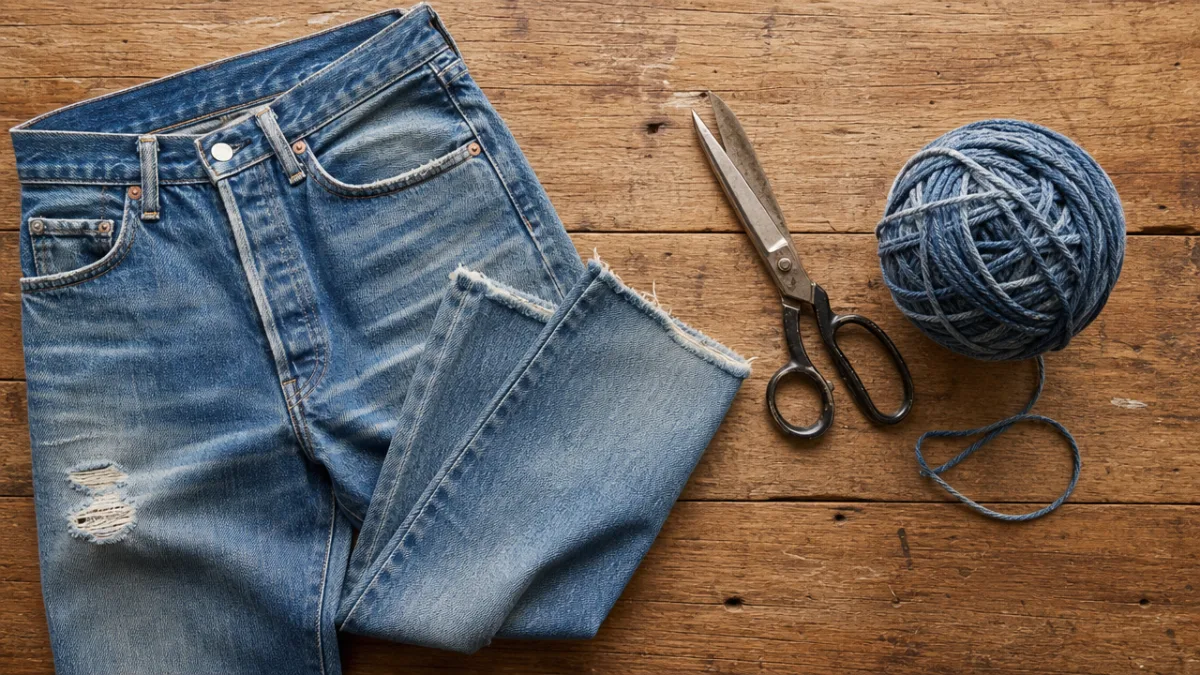
Before any cutting happens, you need to get your denim ready. If the jeans haven’t been washed recently, go ahead and run them through a wash cycle first — you don’t want any oils, dirt, or mystery odors ending up in your finished yarn. Once they’re clean and dry, lay them flat and start taking them apart. Use your seam ripper to remove the waistband, belt loops, and hemmed edges; those thick, multi-layered sections are nearly impossible to cut into usable strips and will just give you lumpy, frustrating yarn.
From there, cut the jeans apart at the major seams. Run your scissors along the inseam on both legs and separate the front and back panels. You should end up with four fairly flat pieces of fabric — two front panels, two back panels. If you prefer, you can also leave the leg tubes intact and use a spiral cutting method directly on the tube, which cuts down on seam removal work and gives you a nice long continuous strip. There’s no single right way to do it, so go with whatever feels more intuitive to you.
Keep an eye out for the really thick seam areas — the crotch seam and side seams especially. Either cut those away entirely or plan your cutting lines to steer clear of them. Running your scissors through a thick, folded-over seam in the middle of a strip is one of the most common beginner mistakes, and it’s not great for your scissors. If you’re working with jeans that have embroidery, rhinestones, or patches, just cut around those areas and save the decorated pieces for something else — patchwork or appliqué projects would love them.
The Cutting Process: Creating Continuous Strips
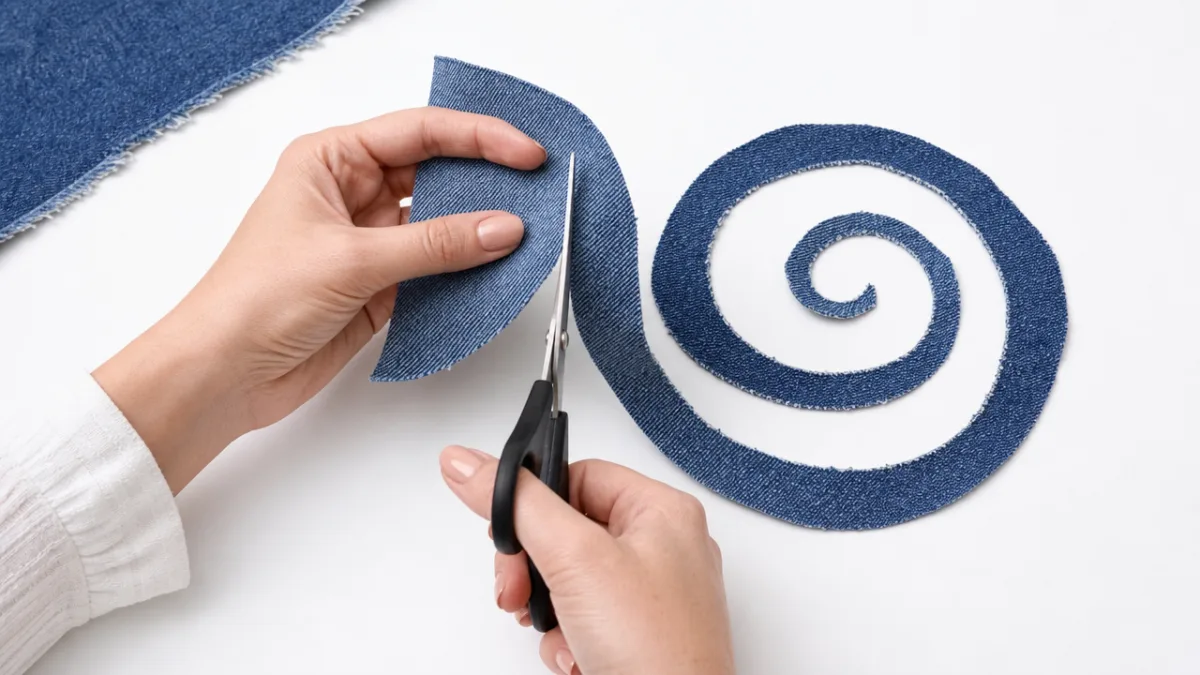
The technique that makes all of this work is called spiral cutting, and it’s the key to turning a flat piece of denim into one long, unbroken strip of yarn. It sounds more complicated than it is — once you see the logic behind it, it’s actually pretty clever. Think of it like peeling an apple in one continuous spiral rather than in separate pieces. You’re essentially doing the same thing with your fabric.
Start by taking one of your flat denim panels and marking a series of horizontal lines across it with your fabric marker. Space them somewhere between half an inch and one inch apart, depending on how thick you want the finished yarn to be. Thicker strips — around an inch — will give you a chunky, rope-like yarn that’s great for baskets and rugs. Thinner strips — around half an inch — produce something more delicate that works beautifully for woven bags and accessories. The trick to making it one continuous strip is to stop cutting about half an inch from the edge on every other line, which creates the little connections that link each row to the next.
Once your lines are marked, start cutting along the first line all the way across. At the end of that cut, leave the half-inch uncut “bridge” that connects to the next strip, then turn the fabric and cut the second line all the way through to the opposite edge. Keep alternating — full cut, partial cut, full cut, partial cut — until you’ve worked your way through the whole panel. When you’re done, you’ll have one satisfyingly long, continuous strip of denim spiraling through the entire piece.
The width you choose will shape the whole personality of your finished yarn. Here’s a rough guide to help you decide:
- ¼ inch strips — Very fine, almost thread-like; best for detailed weaving or macramé accents
- ½ inch strips — Light and flexible; ideal for crochet and knitting projects
- ¾ inch strips — A good all-purpose width suitable for bags and wall hangings
- 1 inch strips — Chunky and robust; excellent for baskets, trivets, and floor rugs
- 1½ inch or wider strips — Extremely bulky; best for finger weaving or very large-scale projects
Finishing and Winding Your Denim Yarn
Once all your panels are cut, it’s time to get the yarn ready to use. A lot of fiber artists like to give each strip a gentle stretch as they wind it into a ball, and it makes a real difference — the edges naturally roll inward, turning what was a flat ribbon into a rounder, more yarn-like cord. To do it, just hold the strip between your fingers and give it a firm but gentle tug lengthwise as you wind. Denim has a bit of natural give on the bias, so it’ll start to curl on its own once you apply some tension.
If you’ve got strips from several different pairs of jeans that you want to join into one continuous length, the loop-through join is your best friend. Cut a small slit near the end of each strip, thread the new strip’s end through the slit in the old one, then pass the far end of the new strip back through its own slit and pull snug. It creates a flat, secure little knot that sits quietly and won’t catch on your needles or hooks while you’re working.
Once everything’s joined and stretched, wind your yarn into balls or skeins for storage. A center-pull ball is especially handy for knitting and crocheting since it unwinds smoothly from the inside and doesn’t go rolling across the floor. To make one, start winding around your fingers, then slide the bundle off and keep wrapping around the outside while tucking the starting tail into the center. Store your finished yarn somewhere cool and dry, away from direct sunlight — prolonged sun exposure can fade that beautiful indigo dye over time.
Creative Projects to Make with Denim Yarn
Here’s the fun part. Denim yarn has this rustic, organic quality that pairs really naturally with handmade aesthetics and earthy design styles. Crocheted tote bags are probably the most popular thing people make with it, and for good reason — denim is sturdy enough to actually hold weight without stretching out of shape, and those natural blue tones give finished bags an effortlessly casual look that goes with almost everything.
Weaving is another craft where denim yarn really gets to shine. On a simple frame loom or even a cardboard loom, you can create wall hangings, table runners, and placemats with a gorgeous depth of texture. Using jeans from different washes and different eras naturally gives you a range of blues that adds visual interest without needing any dye or extra decoration. Mixing denim yarn with cotton, jute, or wool makes for especially striking pieces.
Here are some of the most popular beginner-friendly projects to try:
- Crocheted tote bags or grocery bags
- Woven wall hangings and tapestries
- Braided or knotted trivets and coasters
- Macramé plant hangers
- Knitted dishcloths and pot holders
- Finger-woven friendship bracelets
- Coiled rope baskets and bowls
- Rag rugs using traditional looping or braiding techniques
If you’ve got more advanced fiber art skills, denim yarn opens up even more ambitious territory. A knitted throw blanket made entirely from recycled denim has a wonderful weight and drape, and it gets softer with every wash. Some textile artists use denim yarn as warp thread on floor looms, weaving intricate patterns that really lean into the material’s industrial roots. Whatever your skill level, there’s a denim yarn project that’ll stretch you creatively — and you’ll feel good about making it, knowing every bit of that fabric was headed for the trash before you got to it.
Tips for Success and Troubleshooting Common Issues
Like any new craft, making denim yarn has a small learning curve, and a few frustrations tend to come up for most beginners. Uneven strip widths are the most common one — you end up with yarn that looks inconsistent and is awkward to work with. The fix is almost always just slowing down during the prep phase. A few extra minutes spent marking clean, even lines before you start cutting will save you a lot of headache later. It’s not a step worth rushing.
Fraying along the cut edges is another thing you’ll run into, and honestly, a little bit of it is totally fine — it’s part of what gives denim yarn its rustic charm. But if the fraying is heavy enough that the strip feels like it might fall apart, that’s a problem. Keep your scissors as sharp as possible, and consider giving your finished yarn a gentle wash and dry before you start a project. The wash helps set those frayed edges and results in a slightly softer, more unified texture overall.
If your strips keep snapping when you try to stretch them, the denim itself is probably too worn to hold up as yarn. Heavily faded jeans or pairs with thin, threadbare patches are the usual culprits — the fabric just doesn’t have enough integrity left in those spots. Either cut around the weak areas or set that pair aside entirely. Good, solid denim — even if it’s faded in color — will handle the cutting and stretching process just fine and produce yarn that holds up well over time.
And finally, don’t get discouraged if your first batch doesn’t look the way you hoped. This is one of those crafts where the improvement between your first and second try is genuinely dramatic, and by your third or fourth time, you’ll be cutting long, even strips almost on autopilot. There’s also something deeply satisfying about the whole process — taking something worn out and done with its first life and turning it into a material that’s going to be useful and beautiful all over again.








What do you think?
It is nice to know your opinion. Leave a comment.