










DIY Beautiful Floral Bow: A Complete Guide to Crafting Stunning Handmade Florals
Introduction to Floral Bow Crafting
Creating a beautiful floral bow by hand is one of those deeply satisfying craft projects that blends artistry with practicality. Whether you are dressing up a gift, adding a finishing touch to a wedding arrangement, or decorating your home for the holidays, a handmade floral bow brings a level of warmth and elegance that store-bought alternatives simply cannot replicate. The process itself is meditative and rewarding, allowing you to express your personal style while developing a genuinely useful skill that you will return to again and again throughout the year.
Floral bows have a rich history in decorative arts, appearing everywhere from Victorian gift wrapping traditions to modern event styling and bridal décor. What makes them so enduringly popular is their versatility. A floral bow can be rustic and wildflower-inspired, with loose loops and trailing ribbons in earthy tones, or it can be formal and polished, crafted from satin ribbon with tightly structured petals and a jeweled center. The wide range of styles, materials, and techniques means that no matter your aesthetic or skill level, there is a floral bow design perfectly suited to you.
This guide is designed to walk you through everything you need to know to create your own stunning floral bow from scratch. From selecting the right materials and understanding the foundational techniques, to adding professional finishing touches that will make your creation look like it came from a high-end florist or boutique gift shop, every step is covered in detail. By the time you finish reading, you will have the knowledge and confidence to craft beautiful floral bows for any occasion, season, or recipient.
Materials and Tools You Will Need
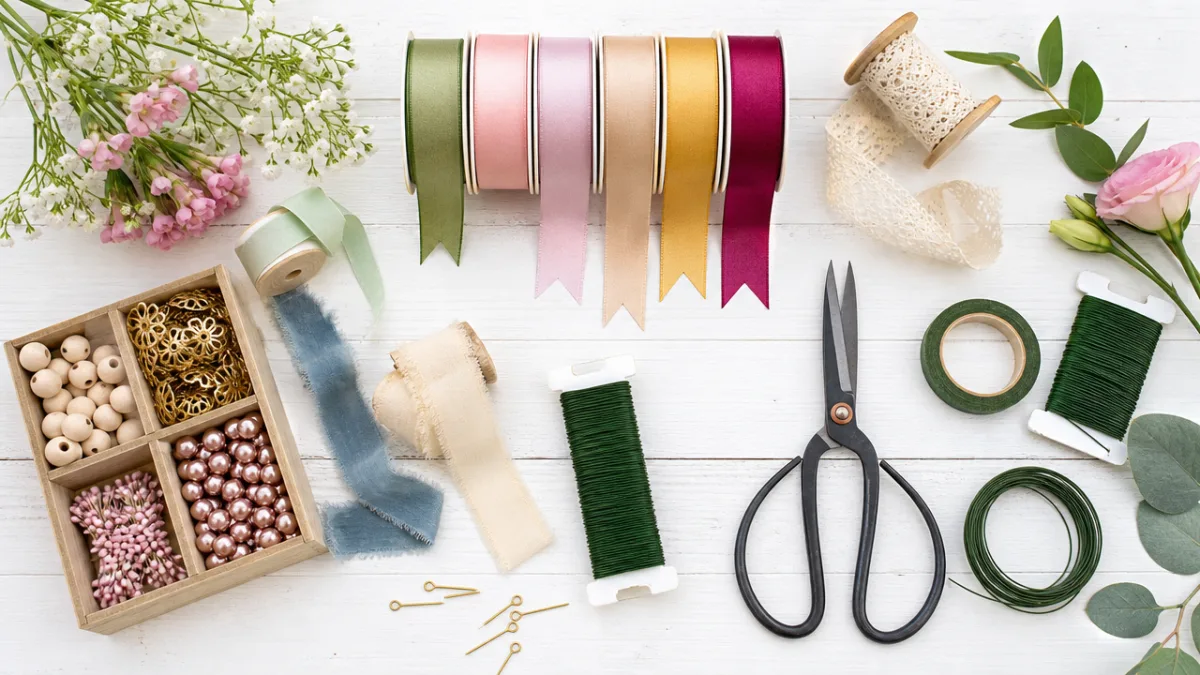
Before diving into the crafting process, it is essential to gather all the materials and tools you will need. Having everything on hand before you begin prevents frustrating interruptions mid-project and allows you to work with a smooth, unbroken creative flow. The good news is that most supplies are readily available at craft stores, dollar stores, or online retailers, and many can be repurposed from items you may already have at home. Starting with quality materials will significantly elevate the finished appearance of your bow, so it is worth investing a little thought into your selections.
Ribbon is the heart of any floral bow, and the type you choose will define the overall character of your finished piece. Wired ribbon is especially popular for floral bows because the wire running along each edge allows you to shape and sculpt each loop, helping the bow hold its structure even over time. Wired ribbon comes in countless patterns, textures, and widths, from narrow half-inch satin to wide four-inch burlap or velvet. For a lush, full floral bow, a width of two and a half to four inches tends to give the most satisfying results, producing loops large enough to resemble flower petals without becoming unmanageable.
Beyond ribbon, you will want to have a few additional supplies ready before you begin. These items are inexpensive and widely available, and most crafters find that once they have assembled their bow-making toolkit, it stays in regular use for years to come.
- Floral wire or pipe cleaners for securing the center of the bow
- Wire cutters or sharp scissors for trimming ribbon cleanly
- A ruler or measuring tape for consistent loop sizing
- Hot glue gun and glue sticks for adding embellishments
- Decorative accents such as faux flowers, berries, greenery, or pearl pins
- A floral pick or loop of wire for attaching the finished bow to arrangements or gifts
Step-by-Step Instructions for Creating Your Floral Bow
Now that your materials are assembled, it is time to begin building your floral bow. The process may look intimidating at first glance, but it is actually built on a simple, repeating motion that quickly becomes intuitive once you understand the basic structure. Think of the bow as a flower: you are building layers of petals from the outside in, with each loop you create forming one petal of the finished bloom. Taking it one loop at a time makes the project feel approachable and satisfying from the very first step.
Begin by leaving a tail of ribbon approximately six to eight inches long, which will hang down as one of the streamers at the bottom of the finished bow. Pinch this starting point firmly between your thumb and forefinger — this pinch point is where your entire bow will be anchored, so maintaining a secure grip here is crucial. From the starting pinch point, create your first loop by bringing the ribbon up and around in a circle back to your pinch point, then give the ribbon a half-twist before creating a matching loop on the opposite side. This half-twist ensures that the patterned or shiny side of your ribbon faces outward on every loop, giving your bow a polished, professional look throughout.
Continue building loops of equal size, alternating from one side to the other and remembering to give the ribbon a half-twist at the center each time. As you add more loops, the bow will begin to look full and rounded at the center. For a lush floral bow that resembles a peony or garden rose, aim to create between eight and twelve loops depending on your ribbon width and your desired finished size. Once all your loops are in place, cut the ribbon, leaving another six-to-eight-inch tail to match your first streamer. Secure the entire center tightly with a length of floral wire, twisting the wire firmly behind the bow to lock all loops in place.
With the bow secured, it is time to fluff and shape it. Gently pull each individual loop outward and slightly upward, fanning them apart so they radiate evenly around the center like the petals of a flower. Take your time with this step — the shaping process is where a flat bundle of ribbon loops transforms into a truly beautiful, dimensional floral bow. Adjust each loop until the bow looks balanced and full from all angles, and use your fingers to cup or curve individual loops for a more natural, organic petal effect.
Adding Floral Embellishments and Personal Touches
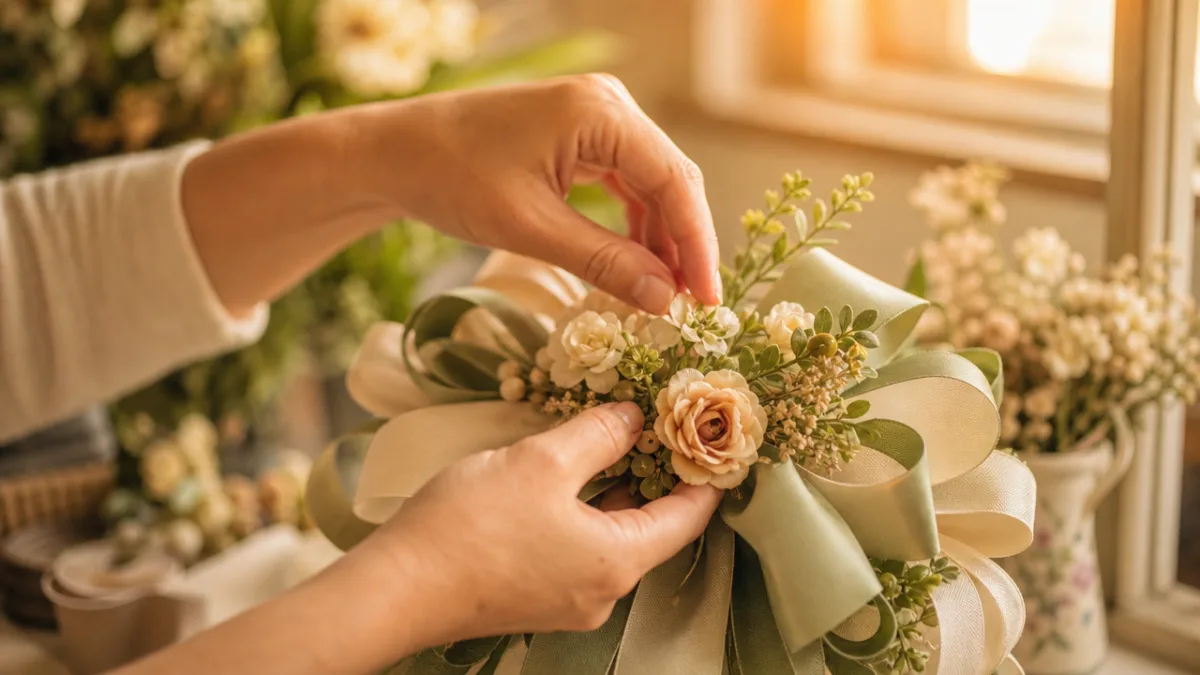
A basic ribbon bow is beautiful on its own, but adding floral embellishments is what transforms it from a simple decoration into a truly show-stopping piece of handmade art. This is where your personal style and creativity come fully into play, and the options are virtually limitless. You can lean into a romantic, garden-party aesthetic with clusters of soft pink and cream faux roses nestled in the center, or create a woodland-inspired bow accented with sprigs of eucalyptus, tiny pinecones, and rustic burlap ribbon. The embellishments you choose should complement both the ribbon you have used and the occasion or setting where the bow will be displayed.
Faux or dried flowers work beautifully for bow embellishments because they are lightweight, long-lasting, and available in an enormous variety of styles at most craft stores. Small blooms like baby’s breath, lavender sprigs, and rosebuds are particularly popular choices because their scale is proportionate to the bow without overwhelming it. If you are crafting a bow for a specific holiday or season, lean into thematic elements: holly berries and pine sprigs for Christmas, tiny orange and gold maple leaves for autumn, or delicate cherry blossoms and butterflies for spring celebrations. Each of these additions costs very little but dramatically elevates the finished piece.
To attach your embellishments cleanly and securely, a hot glue gun is your best friend. Apply a small dot of hot glue to the base of each element and press it firmly into the center of the bow, holding it in place for a few seconds until the glue sets. Build your floral cluster in layers, starting with any greenery or filler at the base and finishing with your focal flowers on top. Pearl-headed pins or small rhinestone brooches can be inserted directly into the center of the bow for an extra touch of sparkle, making them especially popular for wedding and special occasion bows. Step back and evaluate your arrangement from a short distance as you work to ensure the overall composition is balanced and visually pleasing.
Creative Variations and Style Ideas
One of the most exciting aspects of DIY floral bows is how endlessly adaptable the basic technique is. Once you have mastered the fundamental loop-and-twist method, you can begin experimenting with variations that produce entirely different visual effects. Mixing two or three complementary ribbons of different textures and widths within a single bow creates a layered, complex look that feels luxurious and bespoke. Try pairing a wide floral-printed ribbon with a narrower solid satin ribbon and a thin metallic accent ribbon — the combination produces a bow that is rich with visual interest while still reading as cohesive and intentional.
For a more rustic or farmhouse-inspired aesthetic, consider working with non-traditional materials alongside your ribbon. Lengths of natural twine, strips of burlap, or even fabric cut from a beloved vintage print can be woven into your bow loops for a charming, homespun effect. These bows look wonderful on mason jar arrangements, harvest wreaths, and country-style gift wrapping. Alternatively, for a glamorous and dramatic look suitable for formal events or luxurious gift presentation, opt for deep jewel-toned velvet ribbon paired with gold wired mesh and accented with clusters of metallic berries and tiny crystal picks.
Seasonal and holiday variations offer a wonderful opportunity to build a collection of bows that you can rotate throughout the year to keep your home décor feeling fresh and festive. Consider making a set of bows at the start of each season and storing them carefully in a box when not in use. With minimal effort, a single afternoon of bow-making can produce enough decorations to accent a wreath, a mantelpiece arrangement, a staircase garland, and a gift pile all at once. Below are some popular seasonal style ideas to inspire your next bow-making session.
- Spring: Soft pink and yellow ribbons with small faux cherry blossoms and a trailing length of pale green satin
- Summer: Bright coral and turquoise striped ribbon with sunflower accents and raffia streamers
- Autumn: Burnt orange and deep burgundy wired ribbon layered with plaid flannel strips and miniature gourds
- Winter/Christmas: Rich red velvet with gold wired mesh, pine sprigs, cinnamon sticks, and shimmering berry clusters
- Valentine’s Day: Deep red satin with white lace ribbon and pearl or rhinestone embellishments at the center
Displaying, Gifting, and Caring for Your Floral Bows
Once your floral bow is complete, there are countless beautiful ways to display or use it. One of the most popular applications is attaching a finished bow to a front-door wreath, instantly refreshing the look of a wreath you may have displayed for multiple seasons. Simply use the floral wire tails at the back of your bow to twist it securely onto the wreath base, positioning it at the bottom center or slightly off to one side for an asymmetrical, dynamic look. Seasonal ribbon choices mean you can update the same wreath multiple times a year simply by swapping out the bow, making this an extremely cost-effective approach to year-round door décor.
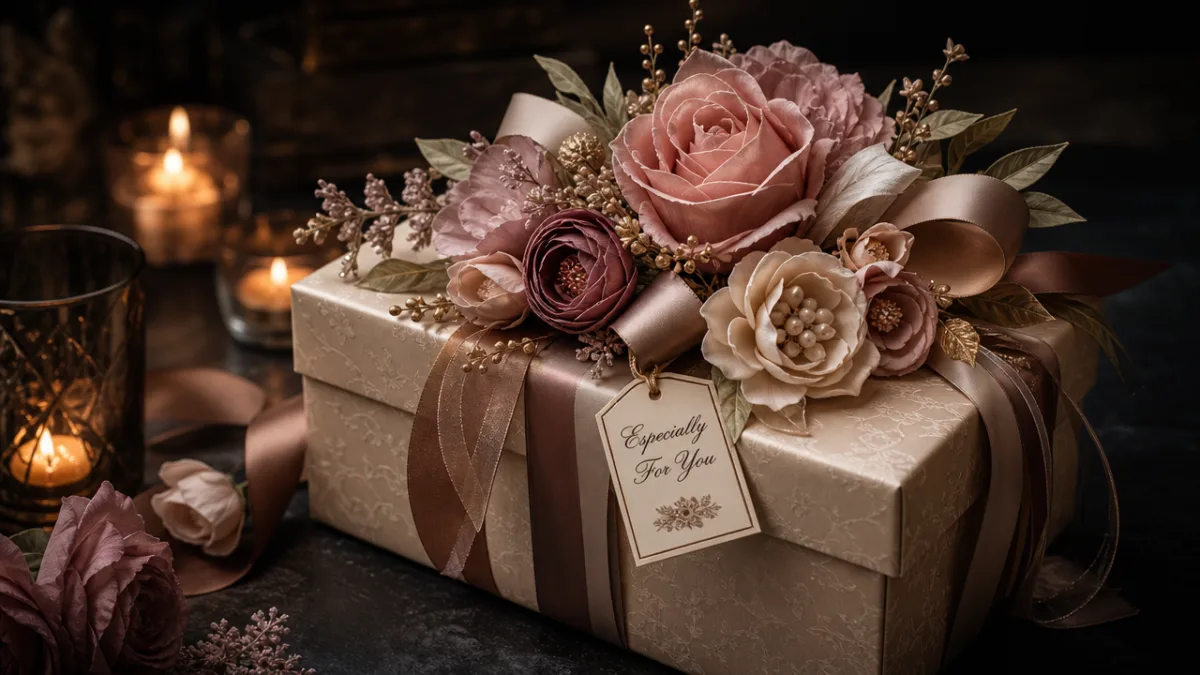
Floral bows also make exceptionally thoughtful and personal gift toppers. In a world of peel-and-stick store bows, a handmade floral bow signals genuine care and effort that any recipient will immediately appreciate and often choose to keep and reuse long after the gift itself has been enjoyed. When attaching a bow to a gift, use a length of coordinating ribbon to tie around the package first, then slip your floral bow’s wire tails under this ribbon and twist them to secure the bow in place. The finished presentation looks polished and intentional, transforming even a simple wrapped box into something that feels truly special and celebratory.
Caring for your handmade floral bows properly will keep them looking beautiful for many seasons. Store finished bows in a dry, cool location away from direct sunlight, which can fade ribbon colors over time. A shallow cardboard box lined with tissue paper works wonderfully, allowing you to stack bows gently without crushing their loops. If a bow becomes slightly flattened during storage, use a hair dryer set to low heat to gently warm and reshape the ribbon loops back into their original form. With proper care, a well-made floral bow can be enjoyed for multiple years, making the time you invest in creating it a truly worthwhile endeavor.
Tips for Beginners and Troubleshooting Common Issues
Every crafter encounters a few stumbling blocks when learning a new skill, and bow-making is no exception. One of the most common challenges beginners face is maintaining a consistent loop size throughout the bow. Uneven loops can make the finished bow look lopsided or asymmetrical in an unintentional way. The simplest solution is to use your fingers as a measuring guide: decide on your loop size before you begin, position your fingers to mark that length on the ribbon, and use them as a consistent reference point every time you bring the ribbon back to the center. After a little practice, you will develop an intuitive feel for the sizing without needing to think about it consciously.
Another frequent issue is ribbon that refuses to hold its shape after fluffing, particularly with lightweight or non-wired ribbon. If you find your bow loops collapsing inward, there are a couple of approaches that can help. First, consider switching to wired ribbon for future projects, as the edge wire is specifically designed to hold shaped loops in place. If you prefer the look or texture of non-wired ribbon, a light application of spray starch on the inside of the loops before shaping can provide enough structure to keep the bow looking full and upright. Alternatively, small drops of hot glue applied discreetly at the base of individual loops can anchor them in their fluffed positions permanently.
If you find that your finished bow looks flat or sparse rather than lush and dimensional, the most likely cause is too few loops or loops that are too narrow. Do not be afraid to use a generous amount of ribbon — a truly beautiful, full floral bow typically requires between three and five yards of ribbon depending on width and loop size. It can feel surprising at first how much ribbon a single bow consumes, but the fullness and visual impact of the finished piece make every inch worthwhile. Embrace the abundance, and remember that the most impressive handmade bows are always the most generously constructed ones.
Finally, remember that bow-making improves dramatically with practice. Your first bow may not look exactly as you envisioned, and that is perfectly normal and expected. Each bow you make will teach you something new about shaping, sizing, and embellishing, and the progression from your first attempt to your tenth is genuinely remarkable. Keep your early bows as a reminder of how far you have come, share your creations with friends and family who will appreciate the handmade effort, and most importantly, enjoy the creative process. Crafting with your hands is a joyful, grounding activity, and floral bow-making is one of its most accessible and rewarding expressions.








What do you think?
It is nice to know your opinion. Leave a comment.