










Beginner Furniture Flip Tutorial: Complete Nightstand Makeover DIY Guide
Introduction to Furniture Flipping for Beginners
Furniture flipping is one of the most rewarding and budget-friendly hobbies you can pick up, and a nightstand makeover is the perfect place to start your journey. Whether you’ve stumbled across a worn-out piece at a thrift store, inherited an outdated bedside table, or simply want to breathe new life into something already sitting in your bedroom, this project is approachable, affordable, and deeply satisfying. The transformation you can achieve with a little time and the right materials will genuinely surprise you.
The beauty of flipping furniture as a beginner is that nightstands are small enough to feel manageable but interesting enough to teach you all the core skills you’ll need for larger projects down the road. You’ll learn how to assess a piece’s condition, how to prepare a surface properly, how to apply paint or stain evenly, and how to add finishing touches that make the piece look professionally done. These are skills that translate directly to dressers, coffee tables, dining chairs, and beyond.
Beyond the creative satisfaction, furniture flipping can save you significant money and reduce waste. A secondhand nightstand that costs five to fifteen dollars at a thrift store can be transformed into something that looks like it belongs in a designer showroom. Many people also turn furniture flipping into a side income, selling their finished pieces on platforms like Facebook Marketplace or Etsy. Whatever your motivation, this guide will walk you through every step of the process with clarity and confidence.
Sourcing the Right Nightstand and Gathering Your Supplies
Finding the right candidate for your first furniture flip is more important than many beginners realize. You want a piece that has good bones, meaning solid construction, sturdy joints, and a shape or silhouette that appeals to you, even if the surface looks rough. Check thrift stores like Goodwill or Habitat for Humanity ReStores, browse Facebook Marketplace or Craigslist, or keep an eye on your neighborhood’s curbside trash days. Estate sales and garage sales are also goldmines for affordable, quality older furniture that simply needs some cosmetic attention.
When evaluating a nightstand, look for real wood or MDF construction rather than pieces that are laminate-only, as these can be harder to paint and don’t absorb finishes as well. Press on the joints to check for wobbling, open and close any drawers to ensure they slide smoothly, and look for signs of water damage or pest infestation that would make restoration impractical. Minor scratches, outdated hardware, old paint, or chipped veneer are all easily fixable. Don’t be scared off by a piece that looks ugly on the surface; that’s exactly what you’re there to fix.
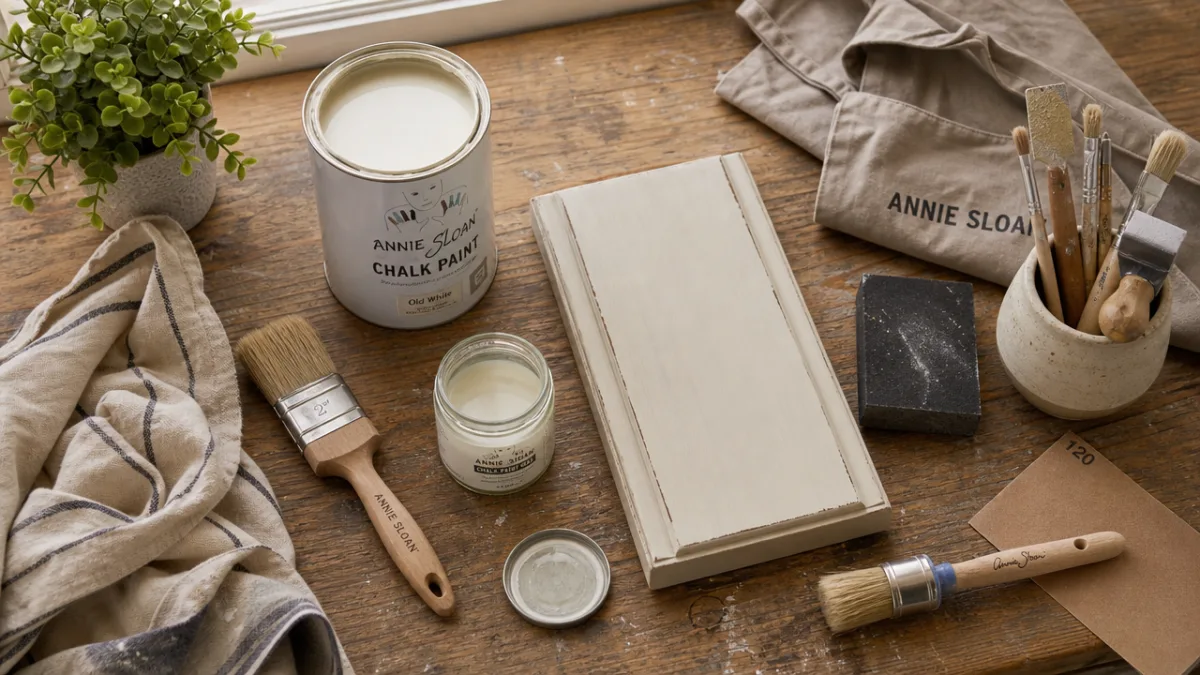
Once you’ve chosen your nightstand, it’s time to gather your supplies. Having everything ready before you start will make the process smoother and prevent frustrating mid-project runs to the hardware store. Here is a comprehensive list of what you’ll need for a standard painted nightstand makeover:
- Sandpaper in multiple grits (80, 120, and 220 are a great starting trio)
- A sanding block or electric orbital sander for larger flat surfaces
- Tack cloth or a damp microfiber cloth for dust removal
- A good quality primer suitable for furniture (shellac-based or water-based depending on your piece)
- Chalk paint, milk paint, or furniture-grade latex paint in your chosen color
- High-density foam rollers for smooth surfaces and small brushes for detail work
- A topcoat such as polycrylic, wax, or polyurethane for protection
- New hardware like knobs or pulls to replace any outdated pieces
- Painter’s tape, drop cloth, and gloves to protect your workspace
- A screwdriver and possibly wood filler for any holes or dents
Investing in quality supplies, particularly your primer and topcoat, makes a noticeable difference in the final result. Budget brushes and rollers can leave streaks and shed bristles into your finish, which is frustrating and time-consuming to fix. Spending a few extra dollars on mid-range materials at a hardware store will pay dividends in a smoother, more professional-looking result, especially when you’re still learning the technique.
Preparing Your Nightstand for Paint
Surface preparation is the single most important step in any furniture makeover, and it’s also the step that most beginners are tempted to rush or skip entirely. No matter how beautiful your paint color is or how expensive your topcoat, a poorly prepared surface will result in peeling, chipping, and an uneven finish within weeks. Taking the time to prepare your nightstand properly is what separates a piece that looks great for years from one that starts to fall apart after a few months.
Begin by removing all hardware, including drawer pulls, knobs, and hinges. Label or photograph where each piece came from if there are multiple different ones, and set them aside. If you plan to reuse your existing hardware, you can also give these pieces a makeover using spray paint designed for metal surfaces. Next, clean the entire nightstand thoroughly using a degreaser or a mixture of dish soap and warm water. Furniture accumulates oils, grime, and residue over time, and painting over a dirty surface will prevent proper adhesion. Let the piece dry completely before moving on.
Sanding is your next crucial step. Start with a medium-grit sandpaper, around 80 to 120 grit, to scuff up the existing finish and remove any peeling paint or rough patches. You don’t need to strip the piece down to bare wood unless the existing finish is severely damaged or flaking. The goal is simply to give the surface enough texture that your primer and paint have something to grip. After your initial sanding pass, move to a finer grit, around 220, to smooth everything out. Always sand in the direction of the wood grain to avoid visible scratches in your final finish.
After sanding, remove every trace of dust from the surface before applying primer. Use a tack cloth, which is a slightly sticky cheesecloth specifically designed to pick up fine dust particles, or a clean damp microfiber cloth followed by a dry wipe. Any dust left on the surface will become permanently embedded in your primer and paint layers, creating a rough, gritty texture. Fill any holes, dents, or deep scratches with wood filler, let it dry fully according to the package instructions, and sand those areas smooth before priming. A little extra care at this stage makes everything that follows dramatically easier.
Priming and Painting Techniques for a Flawless Finish
Primer is the unsung hero of any furniture makeover. It creates a uniform surface for your paint to adhere to, blocks stains and tannins from bleeding through lighter paint colors, and significantly extends the life of your finished piece. For most furniture projects, a water-based primer is an excellent choice because it dries quickly, cleans up with soap and water, and sands easily between coats. If your nightstand has knots, heavy staining, or you’re painting over a very dark existing finish, consider a shellac-based primer like Zinsser BIN, which offers superior blocking power.
Apply your primer in thin, even coats using a foam roller for flat surfaces and a small brush for corners, edges, and carved details. Thick coats of primer dry unevenly, run, and can obscure fine details. Two thin coats with light sanding using 220-grit sandpaper between coats will always outperform one thick coat. Allow each coat to dry fully according to the manufacturer’s instructions before adding another. Once your final primer coat is dry and lightly sanded, wipe away the dust and you’re ready for the most exciting part: paint.
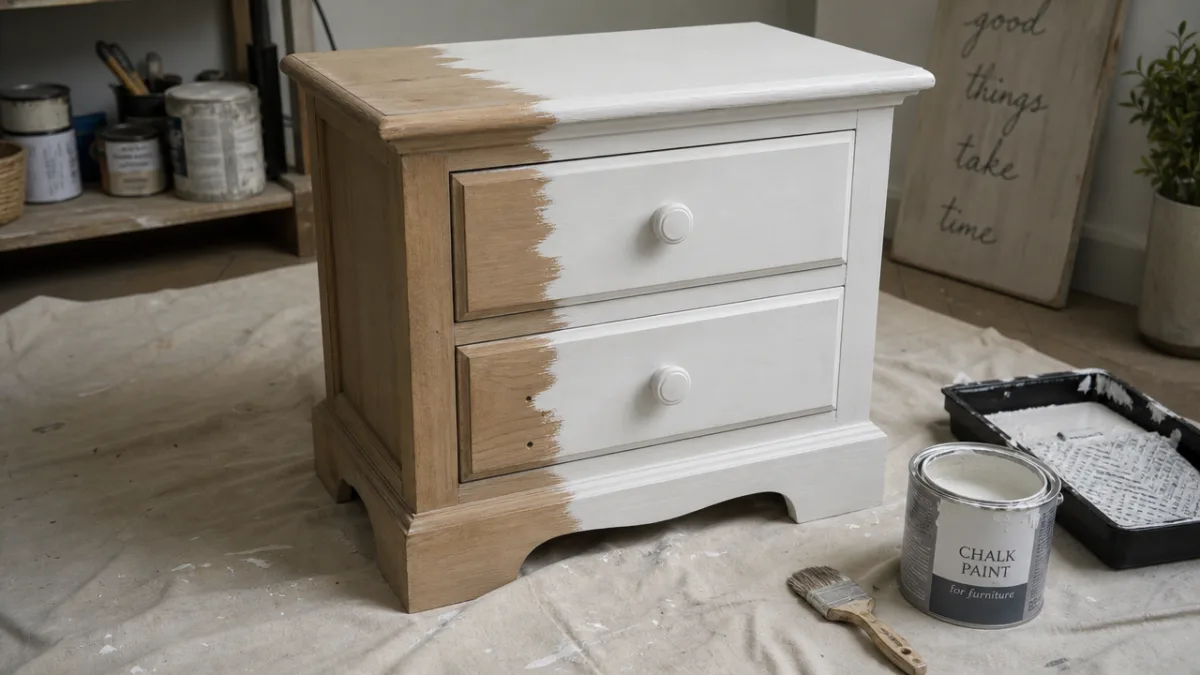
Chalk paint has become enormously popular in the furniture flipping community, and for good reason. It adheres to most surfaces without primer, dries quickly, has a beautiful matte finish, and is easy to distress for an intentionally aged look. However, it does require a wax or polycrylic topcoat for durability. Milk paint gives a more organic, slightly chippy look that many people love for farmhouse or vintage-style pieces. Standard furniture-grade latex paint gives the smoothest, most uniform finish and is very durable when topped with polycrylic. Choose the type that suits the look you’re going for.
Regardless of which type of paint you choose, the application technique is the same: thin coats, patience, and light sanding between layers. Apply your first coat and don’t panic if it looks streaky or uneven — that’s completely normal. Let it dry fully, sand very lightly with 220-grit, wipe away the dust, and apply your second coat. Most furniture pieces need two to three coats of paint for full, even coverage. Foam rollers are your best friend for achieving a smooth finish on flat surfaces, while a high-quality angled brush handles edges and details beautifully.
Applying a Protective Topcoat and Finishing Details
A topcoat is what transforms your painted nightstand from a craft project into a durable, functional piece of furniture. Without protection, paint on a nightstand, which endures daily contact with glasses of water, alarm clocks, books, and hands, will chip and wear through surprisingly quickly. Your choice of topcoat depends on the look you want to achieve and the paint type you used. Polycrylic is a water-based protective finish that dries clear without yellowing, making it ideal for white or light-colored pieces. It comes in matte, satin, and gloss sheens, giving you control over the final look of your piece.
If you used chalk paint, a finishing wax is the traditional topcoat choice. Apply clear furniture wax using a wax brush or a lint-free cloth, working it into the surface in circular motions before buffing to a soft sheen with a clean cloth. Wax provides a beautiful, tactile finish with a slight warmth that polycrylic doesn’t replicate. The tradeoff is that wax requires occasional reapplication every year or so and isn’t as water-resistant as polycrylic. For a nightstand in a high-humidity environment like a bathroom or in a home with young children, polycrylic is the more practical choice.
Apply your topcoat in the same thin, even manner as your paint and primer. Two coats of polycrylic or wax will provide excellent protection for a nightstand. Allow each coat to dry fully before adding another, and lightly sand between polycrylic coats using 400-grit sandpaper for an ultra-smooth final surface. Be careful not to over-brush polycrylic once it starts to get tacky, as this causes streaking. A foam roller is again ideal for flat surfaces to minimize brush marks. Take your time with this final stage, because the topcoat is what gives the piece its final look and long-term protection.
Replacing the hardware is one of the most impactful and affordable finishing touches you can add to a furniture flip. New knobs or pulls can completely change the style of a piece, shifting it from rustic to mid-century modern, from traditional to minimalist, with just a simple swap. Hardware stores, online retailers like Etsy and Amazon, and even dollar stores carry an enormous variety of options at every price point. When selecting new hardware, consider the scale of the piece — a small nightstand looks best with smaller, more delicate pulls rather than large statement handles that would overwhelm it visually.
Styling Your Finished Nightstand and Selling Your Flips
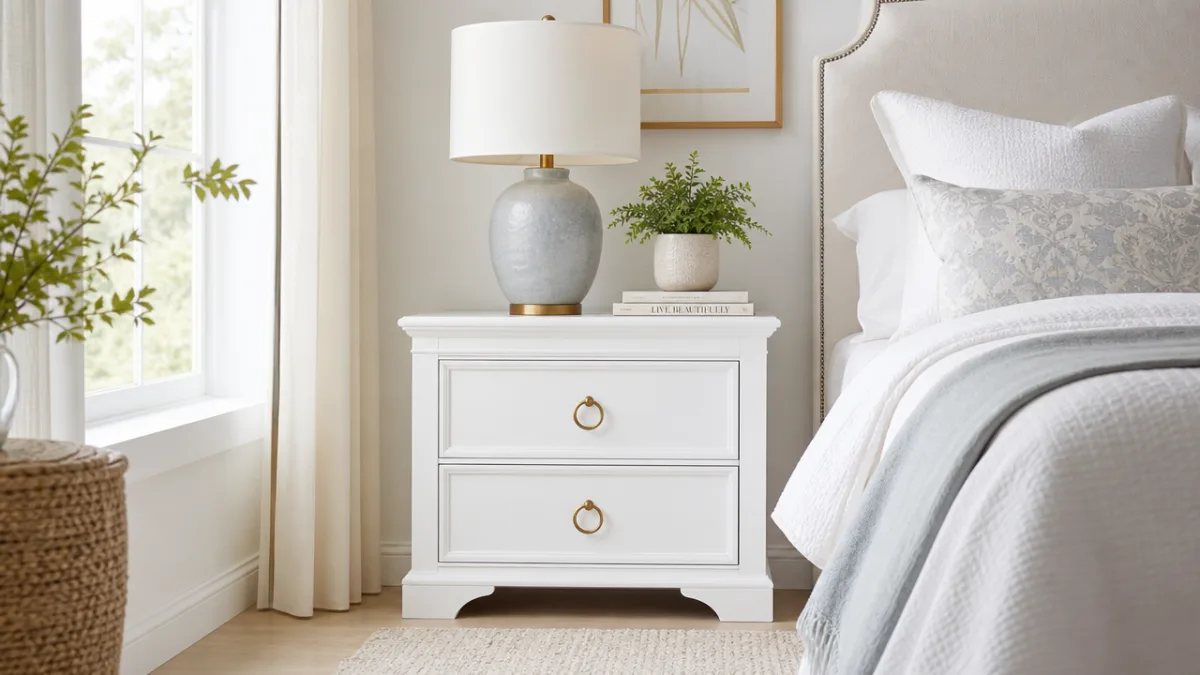
Once your nightstand is fully dry and cured, usually 24 to 48 hours after your final topcoat, it’s time to style it and enjoy your work. A well-styled nightstand can anchor a bedroom and make the entire space feel more intentional and put-together. Keep the surface relatively uncluttered for a clean, designer-inspired look: a small lamp, a plant or a single stem in a bud vase, a stack of one or two books, and a small tray to corral items like a phone, chapstick, or jewelry. The goal is functional beauty, not minimalism for its own sake.
If you’re thinking about turning your furniture flipping hobby into a side income, photographing your finished pieces well is essential. Natural light is your best friend — move the nightstand near a window and shoot during the golden hour of late morning or mid-afternoon for warm, flattering light that makes the paint color and finish look their best. Shoot from multiple angles: straight on, slightly above, a close-up of the hardware detail, and a styled vignette. Good photos on Facebook Marketplace, Craigslist, or Etsy listings dramatically increase your chances of selling quickly and at a price that reflects your work.
Pricing your flips fairly requires accounting for your material costs, the time you invested, and the current market value of similar pieces in your area. A rule of thumb that many furniture flippers use is to price finished pieces at three to four times their total cost in materials and acquisition. So if you paid ten dollars for the nightstand and twenty-five dollars in supplies, a reasonable asking price would be between one hundred and one hundred forty dollars, depending on the quality of the finish and the desirability of the style. Research comparable listings in your area to stay competitive while still honoring the value of your work.
As you complete more projects, you’ll naturally develop your own style, preferred techniques, and favorite product combinations. Some flippers specialize in a particular aesthetic, like all-white coastal pieces or bold jewel-toned maximalist furniture, which helps them build a recognizable brand and a loyal customer following. Others prefer to match their work to current trends, keeping a close eye on what’s popular in interior design and thrift accordingly. Either approach can be successful, and the most important thing at the beginning is simply to start, to learn from each piece, and to enjoy the deeply satisfying process of creative transformation.
Common Beginner Mistakes and How to Avoid Them
Every beginner makes mistakes, and furniture flipping is no exception. The good news is that most mistakes in this craft are fixable, and each one teaches you something valuable for your next project. One of the most common pitfalls is skipping or rushing the prep work. Painting over a dirty or un-sanded surface leads to poor adhesion, and no amount of extra coats will save a piece that wasn’t properly cleaned and prepped. If you ever notice your paint not going on smoothly or peeling after it dries, the culprit is almost always insufficient preparation.
Another very common mistake is applying paint that is too thick. When you load too much paint onto your brush or roller, it runs, sags, and dries with an uneven texture. Thick coats also take much longer to dry and are more prone to chipping. Embracing the thin-coat philosophy is one of the most important mindset shifts you can make as a beginner. Yes, it takes more patience to build coverage through multiple thin layers, but the result is incomparably smoother and more durable than anything you can achieve with thick, hurried application.
Many beginners also underestimate the importance of allowing adequate drying and curing time between steps. Paint may feel dry to the touch in an hour, but it isn’t fully hard or cured, which means sanding too soon will gum up your sandpaper and pulling tape off too early will peel your paint. Similarly, using a newly painted piece before the topcoat has fully cured, usually three to seven days for polycrylic, can result in scuffs and scratches in what is still a soft surface. Patience is genuinely one of the most valuable skills in furniture flipping.
Finally, don’t be discouraged if your first piece isn’t perfect. Even experienced flippers encounter challenging pieces, tricky paint adhesion issues, or colors that don’t look the way they imagined once applied. What matters is that you learn something from each project and apply those lessons going forward. The furniture flipping community online, on platforms like Pinterest, YouTube, and Instagram, is remarkably generous and supportive. There are thousands of tutorials, troubleshooting guides, and before-and-after transformations to inspire and educate you at every stage of your journey. Your first nightstand flip is just the beginning of a deeply creative and rewarding practice.








What do you think?
It is nice to know your opinion. Leave a comment.