










TP Rolls as Seed Starters: The Ultimate Guide to Sustainable Gardening
Why Toilet Paper Rolls Make Perfect Seed Starters
Every year, gardeners shell out good money on plastic seed trays, peat pots, and all sorts of starting supplies that get tossed after a single season. Toilet paper rolls turn out to be a surprisingly clever fix for this problem — they take something you’d normally throw away and turn it into a genuinely useful gardening tool. The tubes are naturally sized just right for most seedlings, deep enough for roots to get established but small enough that you can fit dozens of them on a windowsill or under a grow light without any trouble.
What really makes cardboard tubes special as seed starters is the material itself. Unlike plastic containers, cardboard breaks down completely in the soil, which means you can plant the whole thing — roll and seedling together — directly in the ground. There’s no need to disturb the roots at all. As the cardboard softens, roots simply grow right through the walls and out the other side, making the move from your windowsill to the garden bed about as seamless as it gets. If you’ve ever tried transplanting tomatoes, cucumbers, or squash and watched them sulk for two weeks afterward, you’ll really appreciate this.
The financial case is pretty hard to argue with, too. A typical household produces enough toilet paper rolls over the course of a year to start hundreds of seedlings without spending an extra cent. Even buying plants from a nursery runs two to five dollars each, while seeds cost a fraction of that — and the containers are free. Over a full growing season, a modestly sized home garden could easily save fifty to a hundred dollars or more just by swapping out plastic trays for cardboard tubes.
Collecting and Preparing Your Rolls Throughout the Year
The trick to having enough rolls on hand when planting season rolls around is just saving them consistently throughout the year. Most gardeners start stashing them in the fall, tucking them into a dry spot like a garage shelf, a paper bag in a closet, or a dedicated bin in the utility room. A family of four goes through roughly two to four rolls a week, so between October and February you can easily build up sixty to a hundred without any real effort. Don’t overlook paper towel rolls either — cut them into thirds and you’ve effectively tripled your supply.
Before you start filling rolls, give them a quick once-over for moisture damage or mold. Rolls that got damp in storage might already be breaking down, and using them can introduce fungal spores into your seedling mix that won’t do your plants any favors. Anything that looks discolored, feels soft, or smells musty is better off in the compost bin. The ones you want are firm, dry, and still holding their shape without any serious crushing or flattening.
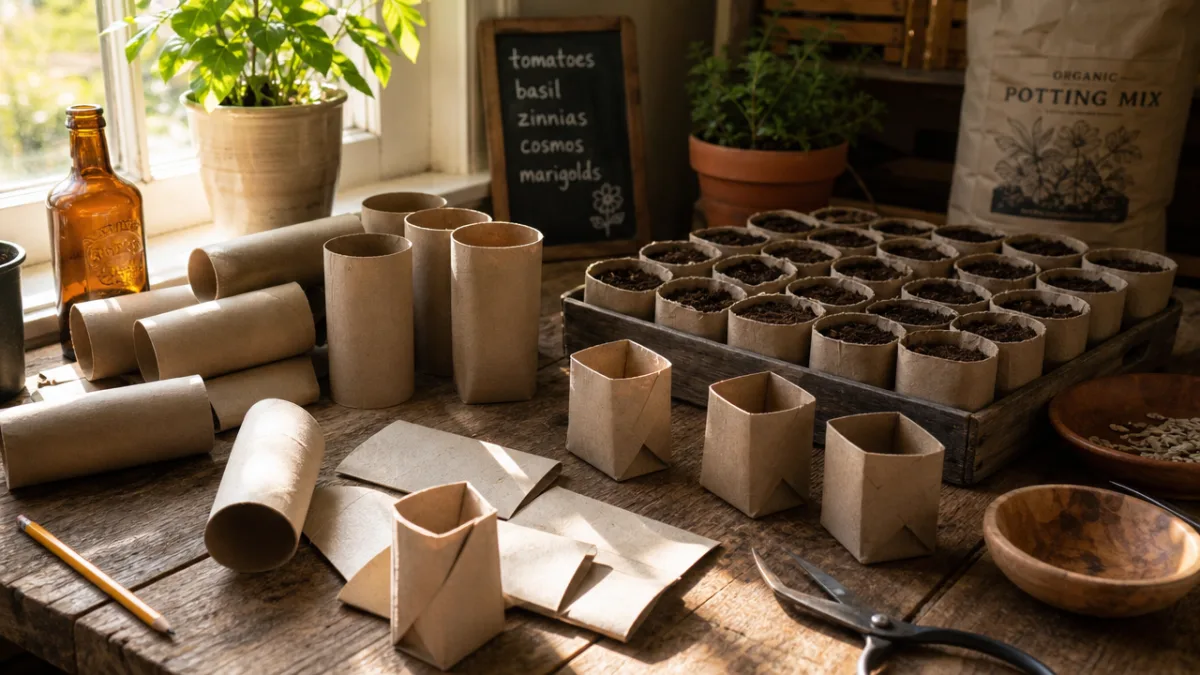
Getting the rolls ready takes just a few minutes with no special tools needed. The most popular approach is to fold the bottom of each roll inward to create a built-in base — basically the same idea as closing up a cardboard box. Make four evenly spaced cuts about an inch deep around the bottom edge of the roll, then fold the resulting flaps inward so they overlap and seal the bottom closed. It sounds flimsy but holds up surprisingly well through the whole indoor growing period. If that sounds like too much fuss, you can also just stand the rolls upright in a snug tray and let them lean against each other for support — no individual bottoms required.
Choosing the Right Soil Mix and Filling Techniques
The mix you use in your toilet paper roll starters has a real impact on how well seeds germinate and how strong those early seedlings get. Regular potting mix from a garden center will work in a pinch, but a dedicated seed starting mix is noticeably better. These mixes have a finer texture, allow for better airflow around roots, and hold just enough moisture without staying soggy. That fine consistency also means tender little roots don’t have to fight their way around chunky bits of bark or compost as they start to grow.
Plenty of experienced gardeners mix their own seed starting blend at home, which saves money and lets you control exactly what goes in it. A reliable homemade recipe combines equal parts of the following to produce a light, well-draining medium that gives seedlings a strong start:
- Coconut coir or peat moss for moisture retention and aeration
- Perlite or coarse sand for drainage and root penetration
- Finished compost for a gentle, slow-release source of nutrients
- A small amount of worm castings to introduce beneficial microbial life
How you fill the rolls matters just as much as what you fill them with. Moisten your seed starting mix before it goes into the rolls — you’re aiming for something that feels like a wrung-out sponge. Dry mix is surprisingly difficult to wet evenly once it’s packed into a narrow cardboard tube, and it tends to pull away from the walls and leave air pockets that throw off moisture distribution. Fill each roll to about half an inch from the top, then tap it on the table a few times to settle the mix and close up any gaps. That bit of headspace at the top isn’t wasted space — it gives water somewhere to sit for a moment when you water, rather than just running straight off the edge.
Planting Seeds and Managing Germination Conditions
Different seeds want pretty different things to get going, and paying attention to those differences will determine whether your toilet paper roll starters succeed or stall. Warm-season crops like tomatoes, peppers, and eggplant need soil temperatures between 70 and 85 degrees Fahrenheit to germinate reliably, and they should be started indoors six to eight weeks before your last expected frost. Cool-season crops like broccoli, kale, and lettuce are happy germinating at cooler temperatures between 55 and 70 degrees and can be started a bit closer to transplant time. The seed packet or a regional planting calendar for your growing zone will tell you exactly when to start what.
Once your rolls are planted, keeping the moisture consistent is your main job during germination. Cardboard can actually pull moisture away from the soil when the surrounding air is dry, so it’s a good idea to water from the bottom up by adding water to the tray and letting it wick upward through the mix. This keeps the surface from forming a hard crust and ensures the whole column of soil stays evenly moist. Check on things daily — small containers dry out a lot faster than you might expect, especially in a heated house in winter.
Covering your planted rolls with a clear plastic dome, plastic wrap, or even a sheet of glass traps warmth and humidity during germination, which can speed things up noticeably and improve your germination rates. That said, take the cover off as soon as you see the first seedlings pushing through. Warm, humid, still air is exactly what a fungal disease called damping off loves, and it will mow down seedlings at the soil line before you know what happened. Once the covers come off, running a small fan on low for a few hours a day keeps the air moving and actually helps your seedlings build stronger stems from the gentle resistance.
Caring for Seedlings Until Transplant Time
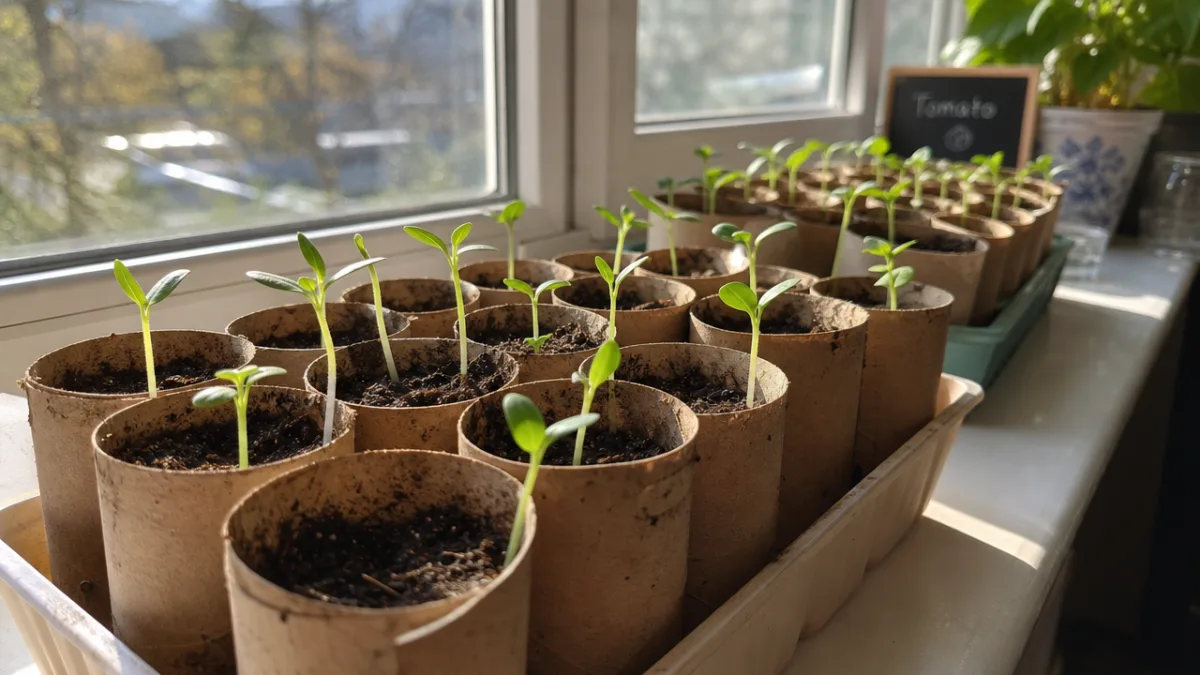
Once seedlings are up and growing, your focus shifts from germination conditions to helping them grow into stocky, healthy little plants. Light is the single most important thing at this stage. Not enough of it is the most common reason seedlings end up tall, spindly, and weak before they ever make it outside. A bright south-facing window can work for crops with modest light needs, but most vegetable seedlings really do best under grow lights hung just two to four inches above the tops of the plants. Running those lights for fourteen to sixteen hours a day mimics a long summer day and keeps growth compact and vigorous rather than pale and stretched out.
Fertilizing in toilet paper rolls calls for a light hand. The small amount of growing medium runs low on nutrients fairly quickly, but overfeed and you risk salt buildup that can damage the roots in such a confined space. Start feeding with a half-strength liquid fertilizer once your seedlings have their first true leaves — those are the second set of leaves to appear, and the first ones that actually look like the adult plant rather than the rounded seed leaves that emerge first. A gentle fish emulsion or kelp-based liquid fertilizer applied weekly hits the right balance, giving plants what they need without overwhelming them.
As you get close to transplant time, hardening off your seedlings is a step you really don’t want to skip. It’s the process of gradually getting them used to outdoor conditions — the temperature swings, the wind, the unfiltered sun — over the course of one to two weeks. Start by setting your toilet paper roll starters outside in a sheltered, partly shaded spot for just an hour or two on a mild day, then bring them back in. Each day, leave them out a little longer and move them into slightly more exposed spots, until they’re spending full days and eventually nights outside without any signs of stress. It feels slow, but it saves you from the heartbreak of watching plants you’ve tended for weeks wilt the moment they hit the garden.
Transplanting Into the Garden
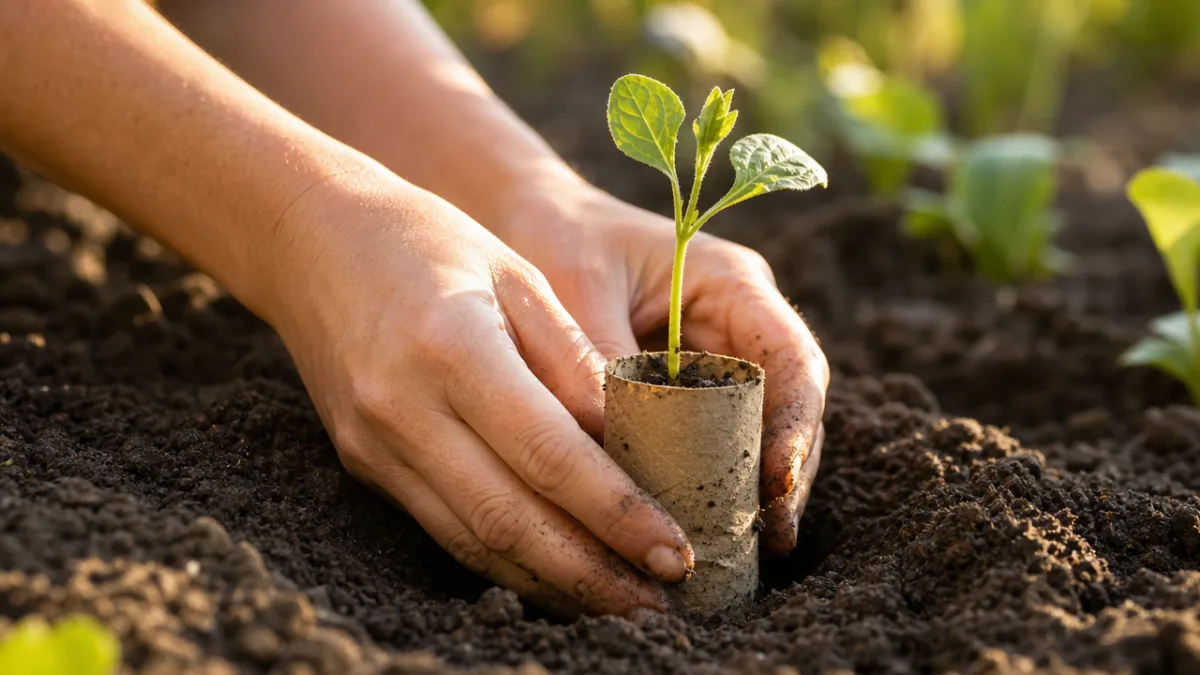
Transplanting day is where using toilet paper rolls really pays off. With plastic cells or trays, you have to carefully pop out each root ball and hope you don’t snap anything in the process. With cardboard rolls, you just plant the whole thing as-is. The cardboard breaks down within a few weeks once it’s in moist soil, and roots start pushing through the softening walls almost right away. Transplant shock — that frustrating period where disturbed plants just sit there and sulk instead of growing — essentially disappears, which can save you one to two weeks of lost growth time in plants that are especially root-sensitive.
To get them in the ground, dig a hole just a little wider than the roll and deep enough for the full length of it. If you’re planting tomatoes, take advantage of the fact that they can root along their buried stems — plant them extra deep so only the top few inches show above the soil line. Before you set the roll in the hole, score the sides with a knife or pull off that folded bottom flap if you used one, just to make sure roots won’t meet any resistance on their way out even if the cardboard is slow to soften. Fill in with soil, firm it down gently to get rid of air pockets, and give everything a thorough watering to settle it in and kick off decomposition.
The cardboard doesn’t just disappear, either — it actually does a small but real amount of good for your soil as it breaks down. It adds organic matter back into the planting zone, temporarily improves the soil’s texture and water retention right where the roots are, and attracts earthworms, which aerate the surrounding soil and leave behind nutrient-rich castings as they feed. In a bed that receives dozens of these transplants season after season, the cumulative effect on soil health is genuinely measurable. It’s one of those rare gardening habits that’s easier than what it replaces and better for the garden in the long run.
Troubleshooting Common Problems and Expanding the Technique
Toilet paper roll starters are pretty forgiving, but there are a few things that can go wrong, and knowing what to watch for makes a big difference. The most common issue is rolls that start falling apart before you’re ready to transplant. This happens when they stay too wet for too long indoors — the cardboard loses its structure and the whole thing gets mushy, making it tricky to move without the root ball crumbling. The fix is simple: water from the bottom as much as possible, don’t overwater, and try to get seedlings into the garden as soon as they’re ready rather than holding them in small containers longer than necessary.
Some gardeners also notice mold growing on the outside of the rolls, which can look alarming. In most cases it’s just surface mold feeding on the cardboard fibers rather than anything that will actually harm your plants, but it’s still worth dealing with. Spacing your rolls a bit farther apart, running a small fan, and keeping the air from getting too humid will usually clear it up on its own. If it persists, a very dilute hydrogen peroxide solution misted lightly on the outsides of the rolls takes care of it without affecting the seedlings or the beneficial organisms in your soil mix.
Once you’ve got the basic technique down, there’s a lot of room to run with it. Toilet paper rolls work just as well for starting herbs for a kitchen garden, flowers for a cutting garden, or native plants for a habitat project. They drop right into raised beds, in-ground plots, containers, and hanging baskets without any adjustment. Some gardeners even use them to start cover crop plugs to plant between rows of vegetables, building soil health in the off-season. The core idea — turning something disposable into a resource, and letting plants settle into their new home without any root disturbance — turns out to be useful in just about every gardening context you can imagine, no matter how big or small your space is.








What do you think?
It is nice to know your opinion. Leave a comment.