










Teal Oil Paint Blue Rose Branch Decoupage Tissue Paper: A Complete Guide to This Stunning Artistic Medium
Understanding Decoupage Tissue Paper and Its Artistic Heritage
Decoupage has been around for a remarkably long time — it traces its roots back to East Asian lacquerwork before catching on across Europe in the 17th and 18th centuries. The name comes from the French word “découper,” which simply means to cut out. The basic idea is to layer paper, fabric, or other thin materials onto a surface and seal everything with varnish or adhesive. What started as a fairly simple craft technique has, over the centuries, grown into something genuinely impressive — capable of producing work that holds its own alongside painted masterpieces in terms of visual depth and emotional impact.
Tissue paper in particular has become a real favorite for modern decoupage, and it’s not hard to see why. That thin, almost translucent quality lets the colors and textures underneath peek through in the most subtle, painterly way — something thicker papers just can’t pull off. When you apply it with the right medium, tissue paper practically melts into whatever surface it’s on, creating a seamless look that can feel almost dreamlike. That transparency also means you can layer pieces on top of each other to build up incredible depth and dimension.
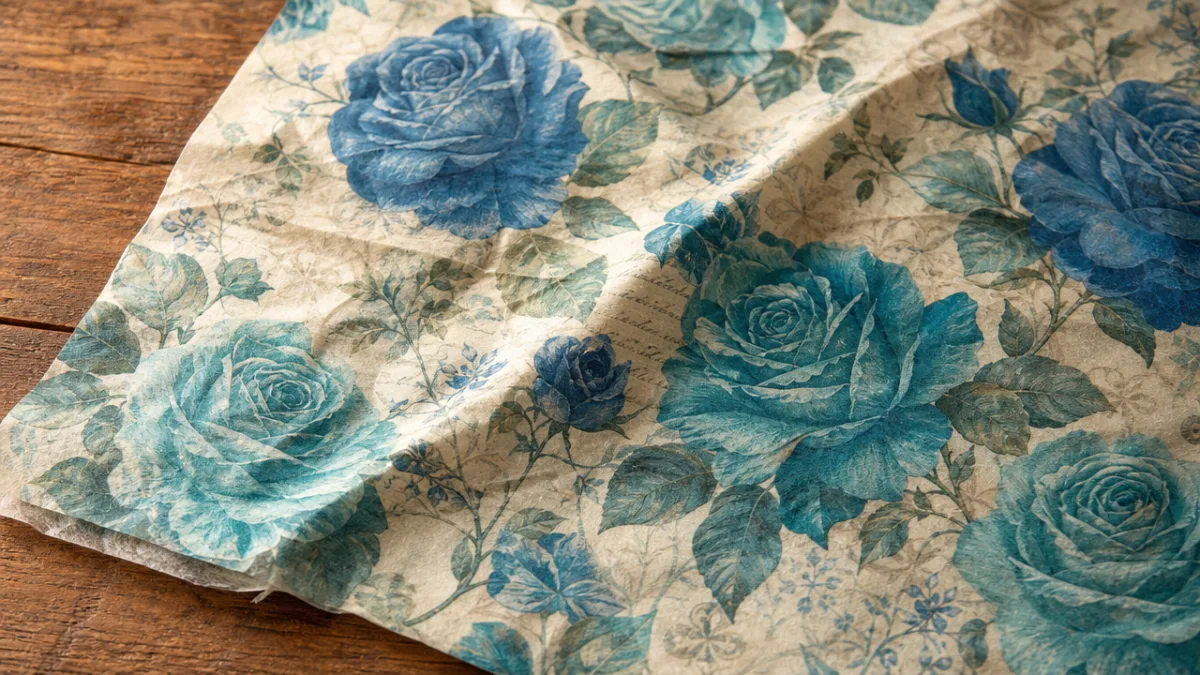
The design we’re talking about here — a teal oil paint blue rose branch — is a step beyond the typical decoupage tissue paper you might find. Rather than imitating a simple floral print or a vintage illustration, this style draws directly from the visual language of fine art oil painting. You can actually see the textures, the brushstrokes, the color gradients — it genuinely feels like paint on canvas, even though you’re looking at paper. That blend of painterly fine-art energy with the accessibility of a craft medium is exactly why designs like this have become so popular with everyone from professional artists to weekend hobbyists.
The Color Story: Why Teal and Blue Create Such Powerful Visual Impact
Color choices in well-designed decoupage tissue paper are never random, and the teal and blue palette here is a great example of that intentionality at work. Teal sits right at the intersection of blue and green — it carries the calm, reflective quality of blue alongside the organic energy of green. It naturally calls to mind ocean depths, peacock feathers, aged copper — all things that feel rich and a little mysterious. Placed against warm wood, smooth ceramics, or glossy glass, teal has this quality of almost glowing from within that very few other colors can match.
The blue roses in this design bring their own long history of meaning. Unlike red roses (passionate love) or white roses (purity), the blue rose doesn’t actually exist in nature — which is precisely why it’s always been associated with mystery, longing, and the world of dreams. In Victorian flower symbolism, giving someone a blue rose was a way of expressing a desire for something out of reach. For today’s crafters and artists, working with blue rose imagery taps into all of that romantic, poetic weight while also making a bold visual choice that stands well apart from more conventional floral patterns.
When teal and blue come together in an oil paint style like this, something genuinely interesting happens visually. They don’t just sit next to each other — they interact. Darker teal shadows recede and create depth while brighter blue highlights push forward, giving what is technically a flat piece of paper a real sense of three-dimensional volume. That kind of dynamic visual tension is what makes this design so adaptable across such a wide range of projects and surfaces.
- Teal tones evoke the natural world, adding organic warmth and depth to any project surface.
- Blue rose symbolism brings layers of romantic and poetic meaning to finished decorative pieces.
- The interplay of cool blues and deeper teals creates natural contrast and visual movement without additional embellishment.
- This palette pairs beautifully with gold, brass, white, ivory, and warm wood tones in finished compositions.
The Oil Paint Aesthetic: Capturing Brushstroke Texture in Paper Form
What really sets this design apart from regular printed tissue paper is how convincingly it captures the feel of actual oil paint. Oil painting is celebrated for exactly this reason — the way a loaded brush leaves a visible mark, the way two colors blend softly where they meet, the way a bright highlight applied over a dried layer can make something leap off the canvas. All of that is here in the blue rose branch design. You can see the implied drag of a brush, the soft transitions between colors, and those confident little highlight strokes that make everything feel alive.
This effect comes from a combination of skilled digital illustration and quality printing on tissue-weight paper. The artists behind these designs work with digital brushes that genuinely replicate the behavior of bristle brushes loaded with thick, slow-drying paint, building the image stroke by stroke much the way a traditional oil painter would. The result captures both the spontaneity and the energy of real oil painting while still being consistent enough for commercial production. Hold a sheet up to the light and you get this lovely contrast between the paper’s delicacy and the bold confidence of the imagery printed on it.
For crafters, the oil paint aesthetic offers some genuinely practical perks beyond just looking beautiful. Because the style is impressionistic rather than photorealistic, small imperfections in application — a minor wrinkle here, a small air bubble there — tend to read as part of the artistic effect rather than obvious mistakes. This makes oil paint style tissue papers wonderfully forgiving for beginners still getting comfortable with the process, while also giving more experienced crafters a rich foundation for expressive, layered work that develops organically as they go.
There’s also a lovely advantage when it comes to partial application. The organic, asymmetrical branch composition means you can tear — rather than cut — the tissue paper at natural points along stems or between leaf clusters, creating soft feathered edges that blend right into the surrounding surface. This tearing technique is one of the most valued skills in advanced decoupage work, and with an oil paint design like this one, those torn edges look entirely intentional — painterly and artistic rather than like cut paper. It genuinely starts to blur the line between decoupage craft and fine art painting.
Surface Applications: Where and How to Use This Tissue Paper
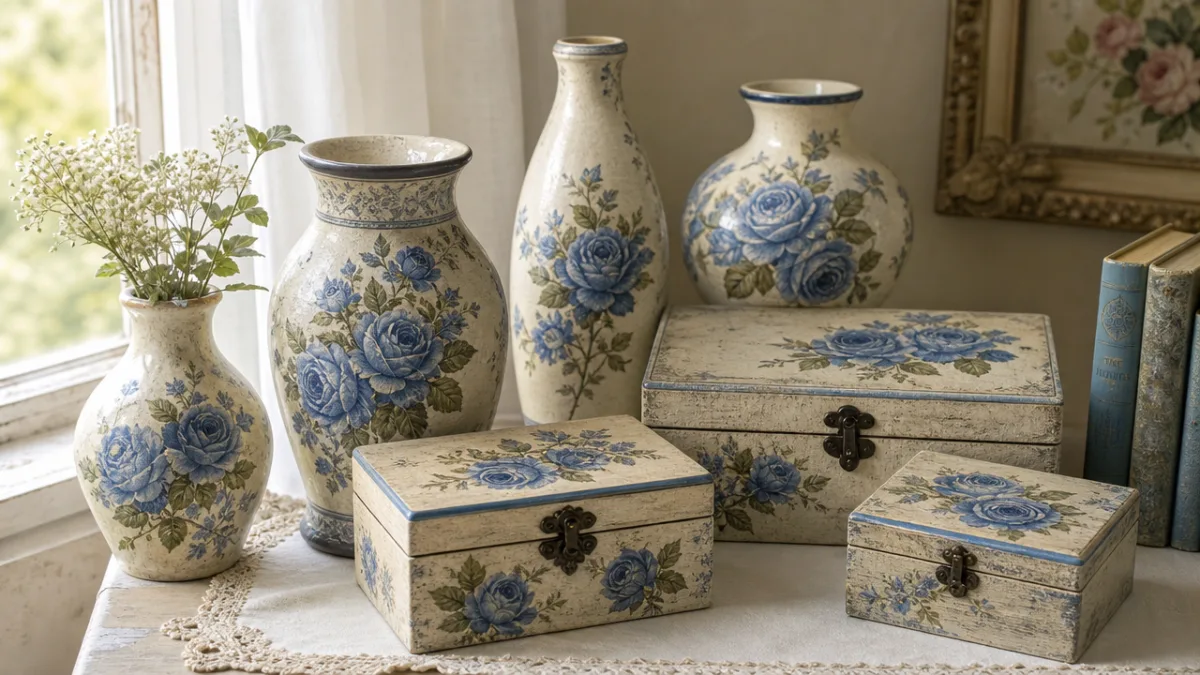
One of the best things about this tissue paper is just how many different surfaces it works on, and thinking through the possibilities opens up a lot of creative territory. Furniture transformation is probably the most dramatic option — an old dresser, side table, or jewelry box can be completely reinvented when you apply this tissue paper to drawer fronts, tabletops, or cabinet panels. The scale of the rose branch composition works especially well on larger flat surfaces where the full sweep of the design has room to breathe, and that rich teal and blue palette brings a genuinely gallery-worthy quality to even the most battered thrift store find.
Ceramic and glass surfaces are another exciting category to explore. Applied to the outside of vases, bowls, candle holders, or decorative plates with the right decoupage medium, this tissue paper creates an effect that looks remarkably hand-painted. The tissue’s translucency plays beautifully against the smooth, reflective quality of glazed ceramic or glass, and a final coat of gloss varnish brings everything together with a polished, professional look. People who love decorative ceramics are particularly drawn to this technique because the result is something genuinely one-of-a-kind.
Smaller home accessories are equally well-suited to this tissue paper. Picture frames, wooden boxes, trays, lampshade bases, terracotta pots, and paper mâché forms all take decoupage tissue paper beautifully. In terms of seasonal use, this teal and blue rose palette is actually quite versatile year-round — the cool tones feel fresh and light in summer arrangements, then take on a jewel-like richness in winter setups alongside metallic accents and candlelight. And for gift wrapping or card-making, the tissue paper works wonderfully as a decorative element on its own, without needing to be bonded down as a proper decoupage layer.
- Furniture: Apply to drawer fronts, tabletops, headboards, and cabinet panels for dramatic transformations of secondhand or plain furniture pieces.
- Ceramics and Glass: Use on vases, bowls, and decorative plates to create hand-painted effects on smooth, reflective surfaces with outstanding visual results.
- Small Accessories: Perfect for picture frames, decorative boxes, wooden trays, terracotta pots, and paper mâché forms of any size or shape.
- Candle Vessels: Apply to glass candle holders for a stained-glass effect when lit from within, the tissue translucency creating gorgeous illuminated color.
- Paper Crafts: Incorporate torn pieces into mixed media collage, altered books, scrapbooking layouts, and handmade greeting card designs.
Step-by-Step Technique: Achieving Professional Results with Decoupage Tissue Paper
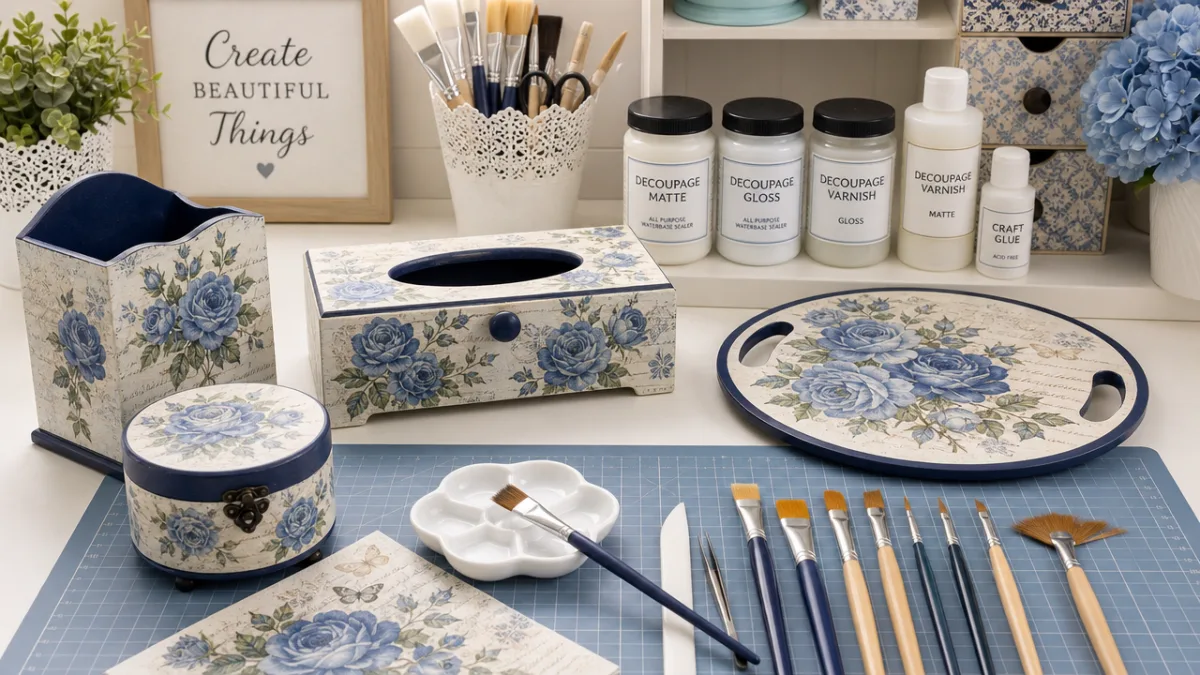
Getting truly polished results with decoupage tissue paper comes down to paying attention at every stage, not just the fun decorating part. Surface preparation is where it all starts, and it’s easy to underestimate how much it matters. Whatever you’re working on needs to be clean, dry, and free of oils, wax, or dust before you touch it with tissue paper. For wood, a light sanding followed by a coat of gesso or acrylic primer sets you up well — for a teal and blue rose design, a soft white or pale grey primer makes a particularly good foundation, letting those colors appear at their most vivid and saturated.
When it comes to applying the decoupage medium, this is where a light, confident touch makes a real difference, and it genuinely does take a little practice to get there. Work in sections roughly the size of your tissue paper piece, and brush a generous, even coat of decoupage medium onto the surface rather than onto the tissue paper itself — wet tissue tears almost immediately if you try to brush it directly. Carefully position the tissue paper, then use a soft brush or brayer to smooth from the center outward, coaxing out any air bubbles or wrinkles with gentle, deliberate strokes. To seal the top, use a soft stippling motion rather than dragging strokes across the wet tissue, which can cause it to tear or shift.
Drying time is one of those steps that’s tempting to skip past, especially when you’re excited to see the finished piece — but rushing it almost always causes problems. Most decoupage mediums need 20 to 30 minutes between coats at normal room temperature and humidity, and handling the piece or adding another coat before that time is up typically results in tearing or smearing that’s genuinely hard to fix. Once the tissue paper is fully adhered and dry, plan on three to five additional coats of sealing medium, with a light pass of very fine grit sandpaper between coats to build up a smooth, even finish that makes the tissue paper look like part of the surface itself.
One technique worth trying once you’re comfortable with the basics is deliberate layering to build color depth and visual complexity. Apply a first layer of tissue paper in a lighter, more background-appropriate tone, let it dry completely, then carefully place torn pieces of the blue rose branch tissue on top. Because the tissue is translucent, each layer influences the ones above it, creating subtle color interactions that you couldn’t quite plan for in advance — they simply emerge from the process. This is part of what makes each finished piece genuinely unique, even when working with the same tissue paper design.
Caring for Finished Decoupage Pieces and Building Your Collection
Once you’ve put real time and creative energy into a decoupage project, it’s worth knowing how to take care of it properly so it stays looking its best. The single most important protective step is good sealing — for pieces that will actually get used, like decorative trays, tabletops, or boxes, a final coat of hard-wearing polyurethane or enamel varnish on top of your standard decoupage medium adds meaningful durability. Water-based formulas are generally the better choice here, since oil-based varnishes can yellow over time and shift the blue and teal tones of the design in unpredictable ways.
Cleaning decoupage surfaces calls for a gentle approach. For most light cleaning, a barely damp soft cloth is all you need, followed immediately by a dry cloth to make sure no moisture sits on the surface for long. Steer clear of abrasive cloths, scouring pads, or any spray cleaners containing alcohol or acetone — these can soften and cloud the sealing layers, dulling the finish and potentially lifting tissue paper edges. For display pieces that aren’t regularly handled, a gentle weekly dusting with a soft dry cloth is really all the upkeep they need.
Building a collection of tissue papers across complementary colors and design styles opens up more and more creative possibilities over time. The teal and blue rose design layers especially well with other botanical papers — sage green leaf designs, blush pink florals, or deep navy abstract patterns can all be combined with it in layered or collaged compositions for wonderfully rich, complex results. Many crafters find it helpful to store their tissue paper collection flat between sheets of acid-free paper in a shallow drawer or portfolio case, which makes it much easier to hold pieces up together and audition combinations before committing to a project.
The decoupage community online is lively, welcoming, and genuinely generous with knowledge, which makes it a great space to grow in whether you’re just starting out or have been crafting for years. Pinterest in particular is a fantastic resource — part discovery platform, part searchable archive of finished project photography, technique tutorials, and curated design collections that let you see exactly how different tissue paper designs look across different surfaces. Following artists whose work connects with your own aesthetic is one of the fastest ways to develop your eye, pick up new techniques, and discover surface combinations you might never have thought to try on your own.








What do you think?
It is nice to know your opinion. Leave a comment.