










How to Make Beautiful Butterfly Crafts Using Plastic Spoons: A Complete DIY Guide
Introduction to Plastic Spoon Butterfly Crafts
If you’ve spent any time scrolling through Pinterest or TikTok lately, you’ve probably come across plastic spoon butterfly crafts — and honestly, it’s easy to see why they’ve caught on the way they have. There’s something almost magical about turning a plain disposable spoon into a delicate, beautiful butterfly decoration. It’s the kind of project that looks impressive but doesn’t require any special talent or expensive tools to pull off, which is exactly why crafters of all ages keep coming back to it.
What really makes this craft stand out is how well the simplicity and the end result balance each other. You don’t need an art background or a fully stocked craft room. A few plastic spoons, some paint, a candle or lighter, and a little patience are genuinely all it takes to make something that looks like it came from a boutique gift shop. The heating and shaping step in particular is strangely satisfying — watching the plastic soften and curve into something that actually resembles a butterfly wing never really gets old.
There’s also a feel-good environmental angle here that’s worth mentioning. Single-use plastic is a real problem, and while one craft project isn’t going to solve it, finding a creative use for something that would otherwise end up in a landfill does feel meaningful. Every butterfly you make is one more spoon that didn’t get thrown away. For parents, teachers, or anyone running a group activity, that makes this project doubly worthwhile — it’s a chance to make something beautiful and have a genuine conversation about sustainability at the same time.
Materials You Will Need
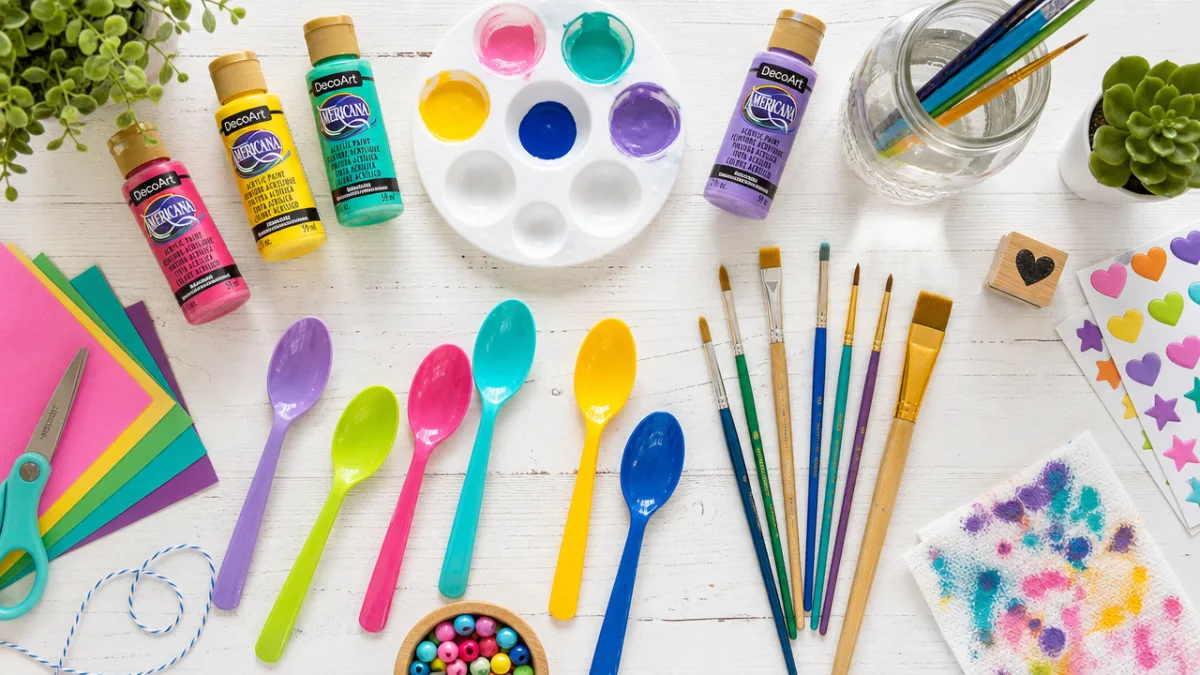
Getting everything together before you start makes the whole experience a lot more enjoyable. The good news is that most of what you need is probably already around your house, and anything you don’t have can be picked up cheaply at a dollar store or ordered online. This isn’t a project that requires any investment in fancy supplies, which is a big part of why it’s so accessible. Having it all laid out and ready to go means you can move smoothly from one step to the next without having to stop and hunt for things.
The foundation of the project is, naturally, plastic spoons — standard disposable ones from a bulk pack work perfectly. Try to avoid the really flimsy ones, though, as they tend to warp in unpredictable ways when heated. For your heat source, a candle or lighter does the job well for a spoon or two at a time, but a heat gun gives you much better control and is worth using if you have one, especially for a bigger batch. You’ll also need acrylic paints, a couple of different brush sizes, and something to mount your finished butterfly on, like a twig, a wire frame, or a piece of driftwood.
Here is a convenient checklist of everything you should gather before starting:
- Plastic spoons — at least 8 to 10 per butterfly (4 for wings, plus extras for experimentation)
- A candle, lighter, or heat gun for shaping
- Acrylic paints in multiple colors, including metallics if desired
- Fine-tipped and medium paintbrushes
- Black pipe cleaners or floral wire for the body and antennae
- Strong craft glue or a hot glue gun
- A thin wooden skewer or twig for mounting
- Glitter, rhinestones, or sequins for embellishment
- A well-ventilated workspace and heat-safe surface
- Optional: Mod Podge or clear varnish for sealing the finished piece
A quick word on safety, because it genuinely matters here. Melting plastic gives off fumes, so make sure you’re working somewhere with good airflow — near an open window or outside if possible. Keep a glass of water close by just in case, and if you’re working directly over a flame, heat-resistant gloves are a smart idea. If kids are involved, an adult should handle all of the heating — a heat gun is safer than an open flame in that situation. Once the safety side of things is sorted, this is a really fun project for the whole family.
Step-by-Step Instructions for Shaping the Wings
Shaping the spoons is probably the most interesting part of the whole process, and it’s one of those things that feels a little tricky at first but clicks into place pretty quickly. Hold the bowl of the spoon a few inches above your heat source and rotate it slowly so the warmth spreads evenly. Within a few seconds you’ll see the plastic start to soften — that’s your cue to gently press and curve it into a wing shape, either against a flat surface or with your fingertips if you’re wearing gloves. It takes a bit of experimenting to get a feel for it, but you’ll find your rhythm fast.
Each butterfly needs four wing pieces — two larger upper wings and two smaller lower ones. For the upper wings, use a full spoon with the handle trimmed down or removed. For the lower wings, either trim a spoon bowl to a slightly smaller size or use a dessert spoon if you have one. The difference in size between the upper and lower wings is actually what makes the butterfly look real, so don’t stress about getting everything perfectly uniform. A bit of natural variation is part of the charm.
Once all four pieces are shaped and completely cooled, lay them out on your work surface and start playing with the arrangement. Position the upper wings at a slight upward angle and let the lower wings curve gently downward, the way a butterfly holds them when it lands. This is really the moment to get the proportions and symmetry right before any glue gets involved, so take your time with it. A few extra minutes here will make a noticeable difference in how the finished butterfly looks. When you’re happy with everything, set the pieces aside and move on to painting.
Painting and Decorating Your Butterfly
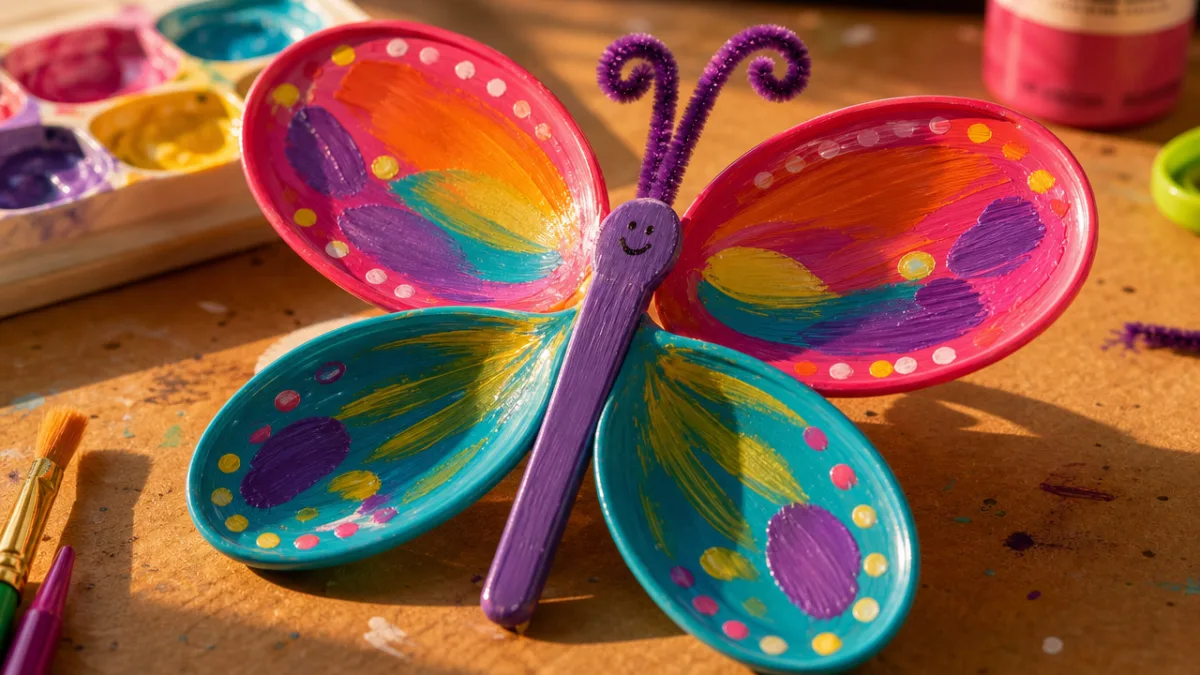
This is where things get really fun, because painting is where your butterfly stops being a craft project and starts becoming something genuinely yours. There are no rules about color — you could recreate a Monarch butterfly with careful, realistic markings, or you could go completely off-script with colors that have never appeared in nature. Acrylics are the way to go here because they stick well to plastic, dry fast, and come in every color imaginable, from deep jewel tones to neons to shimmering metallics.
Start with a base coat of white or a light color across all four wing pieces. This makes a bigger difference than you might expect — it gives your colors something solid to sit on and makes them look much more vivid, especially since plastic spoons can be a bit translucent. Let that dry completely before adding your actual design. For a classic butterfly look, fill the upper wings with a bold color like deep orange, cobalt blue, or rich purple, then use a fine brush to add black borders and markings. Dots, swirls, and delicate vein lines all add a lot of life to the wings.
Embellishment is the final touch that takes a butterfly from nice to genuinely stunning. Once your paint is dry, a light dusting of iridescent glitter over wet Mod Podge creates a beautiful shimmer. Tiny rhinestones or seed beads along the wing edges or centered on painted spots add texture and catch the light in a really lovely way. Metallic paint used to highlight veins or borders can give the whole piece an almost stained-glass quality — especially striking when it’s displayed on a windowsill with light coming through.
Here are some popular butterfly wing design styles to inspire your own creations:
- Monarch Butterfly: Deep orange base with bold black borders and white dot accents along the edges
- Blue Morpho: Brilliant iridescent blue with dark outer edges and subtle eye-spot markings
- Swallowtail: Yellow and black striped pattern with small blue and orange spots near the lower wings
- Fantasy Butterfly: Any combination of your favorite colors with glitter, rhinestones, and freeform patterns
- Ombre Butterfly: A gradient wash from one color to another, such as pink fading to deep violet
Assembling the Finished Butterfly
With your wings painted, decorated, and fully dry, it’s time to put everything together — and this is the moment the whole project really comes alive. Start by making the body from a black pipe cleaner. Cut a piece about three to four inches long, fold it in half, and twist the two halves together to form a firm, slightly tapered shape. Leave two short untwisted ends at the top and curl them outward for antennae, with a small curl at each tip for that finishing detail that makes it look just right.
Run a generous bead of hot glue along the center of the body, then press the upper wings firmly into place on either side and hold them there for about thirty seconds while the glue sets. The angle you choose here actually shapes the whole personality of your butterfly — wings held nearly flat look calm and settled, while wings angled upward at forty-five degrees give it an in-flight energy. Once the upper wings are secure, attach the lower wings just beneath them, overlapping slightly, and hold those in place until the glue sets too.
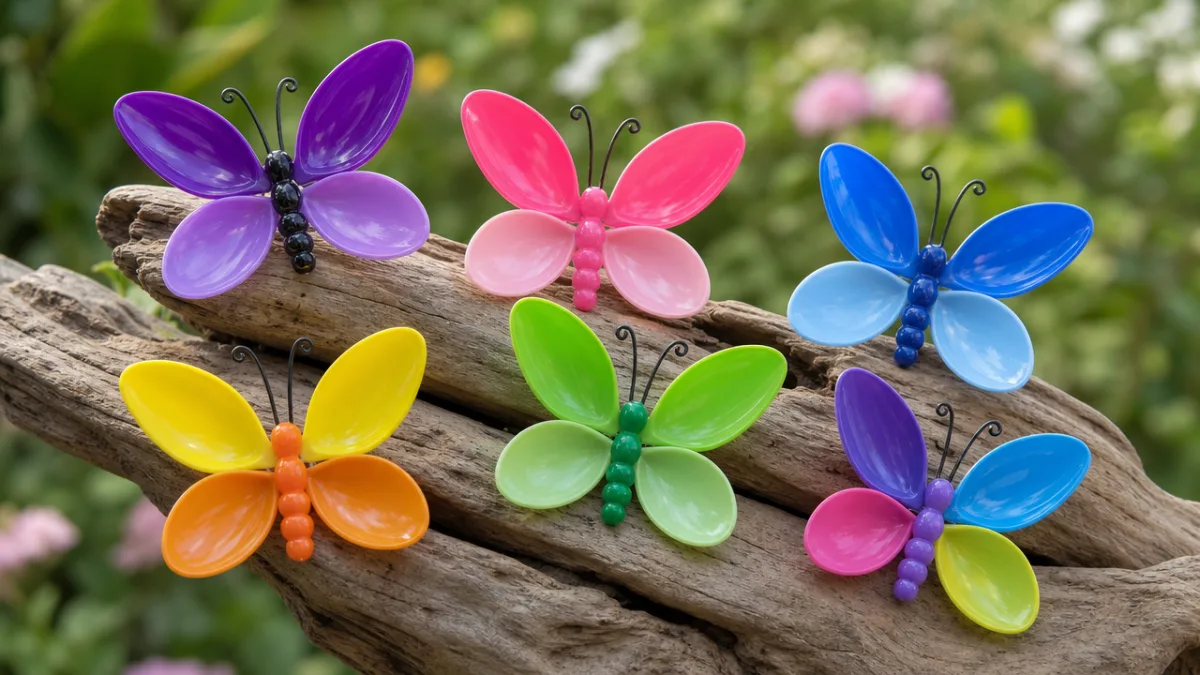
When it comes to displaying your butterfly, you’ve got some really appealing options. A single butterfly on a wooden skewer can be tucked into a potted plant or floral arrangement for a sweet decorative accent. Grouping three to five butterflies in different sizes on a piece of driftwood or an old picture frame makes a beautiful wall piece. You can also attach a small loop of wire or ribbon to the back of the body to turn it into a hanging ornament — lovely in a window, on a tree, or out in the garden.
Creative Variations and Project Ideas
Once you’ve made your first butterfly, you’ll probably find yourself already thinking about what to make next — and there really is a lot of room to explore. The basic technique opens up into all kinds of directions. One idea that tends to get a lot of attention is a three-dimensional mobile: string several butterflies of different sizes from a piece of driftwood or an embroidery hoop using transparent thread at varying heights, and they’ll catch any breeze and move beautifully. It’s one of those things that looks much more elaborate than it actually is to make.
You can also tailor the butterflies to specific occasions or color schemes. Ivory, gold, and blush pink butterflies make genuinely elegant additions to wedding table decor or as handmade favor items. Black, deep purple, and burnt orange versions fit perfectly into Halloween arrangements. For a child’s bedroom, a cascading display of rainbow-colored butterflies above a bed or bookshelf is cheerful and whimsical in a way that’s hard to beat with store-bought decor. The palette really does set the whole mood of the piece.
Teachers and activity leaders will find this project adapts really well to group settings. Children as young as six or seven can handle the painting and assembly independently, with an adult taking charge of the heating step. It fits naturally into lessons about recycling and environmental awareness, color theory, fine motor skills, and even basic biology if you bring in real butterfly species as design references. For the cost involved, it delivers a surprising amount of educational value alongside the creative fun.
And the technique doesn’t have to stop at butterflies, either. The same heat-shaping method works beautifully for flower petals, fish scales for mosaic-style artwork, and feather shapes for dream catchers or wall hangings. Once you get comfortable with how the plastic behaves under heat, you’ll start seeing creative potential in every spoon you come across. A lot of people who start with one butterfly project end up building a whole collection of plastic spoon artwork — drawn in by how meditative the shaping process feels and how endlessly customizable the painting stage is.
Tips for Success and Common Mistakes to Avoid
Like most crafts, this one has a bit of a learning curve, and knowing what to watch out for ahead of time can save you some real frustration. The most common beginner mistake happens during shaping — holding the spoon directly in a flame instead of above it. That tends to scorch or bubble the plastic, leaving brown marks that paint won’t really cover. The fix is just patience: slow, even heat held a safe distance from the source gives you far more control and produces much cleaner wing shapes.
Another thing that trips people up is moving too fast between paint layers. Acrylic dries quickly in general, but on plastic it can stay slightly tacky longer than you’d expect. If you rush it, you end up with smears, lifted paint, and fingerprints embedded in your design — all of which are surprisingly hard to fix once they’re there. Build up your color in thin, even layers and let each one dry properly before moving on. If you’re working on several butterflies at once, rotating through them while each one dries is a great way to keep the momentum going without rushing anything.
Here are some additional tips gathered from experienced crafters to help ensure your project is a success:
- Test heat shaping on spare spoons before working on your actual wing pieces, to build confidence and feel for the material
- Use a heat gun rather than a candle if available — it offers significantly more control and reduces the risk of scorching
- Sand the surface of the spoon lightly with fine-grit sandpaper before painting to help the paint adhere more strongly
- Apply a coat of Mod Podge or clear acrylic varnish over the finished painted wings to protect the design and add a professional finish
- When using hot glue, work quickly and hold pieces firmly — hot glue sets fast and repositioning is difficult once it begins to cool
- Store finished butterflies away from direct sunlight for extended periods, as UV exposure can fade acrylic paints over time
One last thing: if your first butterfly doesn’t turn out the way you pictured, that’s completely normal. The first attempt is really just you getting to know the material — no written guide can fully replicate that hands-on experience. Hold onto your imperfect early butterflies, because they’re actually a record of how much you learned, and they often end up being surprisingly charming in their own right. Each one you make after that will be a little more confident in the shaping, a little more refined in the painting, a little bolder in the design choices. Before you know it, you’ll be the one whose work is showing up in other people’s Pinterest feeds.








What do you think?
It is nice to know your opinion. Leave a comment.