










The Art of Decoupage: Transforming Furniture with Paper Napkins
What Is Napkin Decoupage and Why Is Everyone Obsessed With It?
If you’ve recently scrolled through Pinterest or TikTok and stumbled upon someone pressing a paper napkin onto a piece of old furniture and somehow ending up with a stunning, professionally finished result, you’re not alone in your amazement. Napkin decoupage is one of those techniques that seems almost too simple to be real, yet the results are consistently breathtaking. The process involves separating the decorative top layer of a patterned paper napkin and adhering it to a surface using a decoupage medium, creating the illusion that an intricate design was painted directly onto the furniture itself.
The reason this technique has exploded in popularity, especially on short-form video platforms like Pinterest Shorts and TikTok, is the sheer contrast between the effort required and the outcome achieved. Viewers watch creators smooth a delicate, tissue-thin piece of napkin onto a dresser drawer or tabletop, brush over it with a clear medium, and within minutes have something that looks like hand-painted folk art or expensive wallpaper-lined furniture. The transformation is genuinely jaw-dropping, which explains the flood of surprised comments and millions of shares across social media platforms worldwide.
Beyond the visual drama, napkin decoupage appeals to a wide audience because it sits at the intersection of several powerful trends: sustainability through upcycling, budget-friendly home decor, and the deeply satisfying world of DIY crafting. Rather than throwing out a scratched coffee table or a thrift-store find with bad paint, crafters are giving these pieces a second life with nothing more than craft store supplies and a little patience. It democratizes interior design in a meaningful way, allowing anyone with a few dollars and an afternoon to create something that looks genuinely expensive and thoughtful.
The Supplies You Need to Get Started
One of the most attractive aspects of napkin decoupage is how minimal the supply list truly is. You don’t need a workshop full of tools or a background in fine art. The core supplies can typically be gathered in a single trip to a craft store, and many people already have some of these items at home. Getting familiar with what you need and why each item matters will set you up for a much smoother and more satisfying crafting experience from the very first attempt.
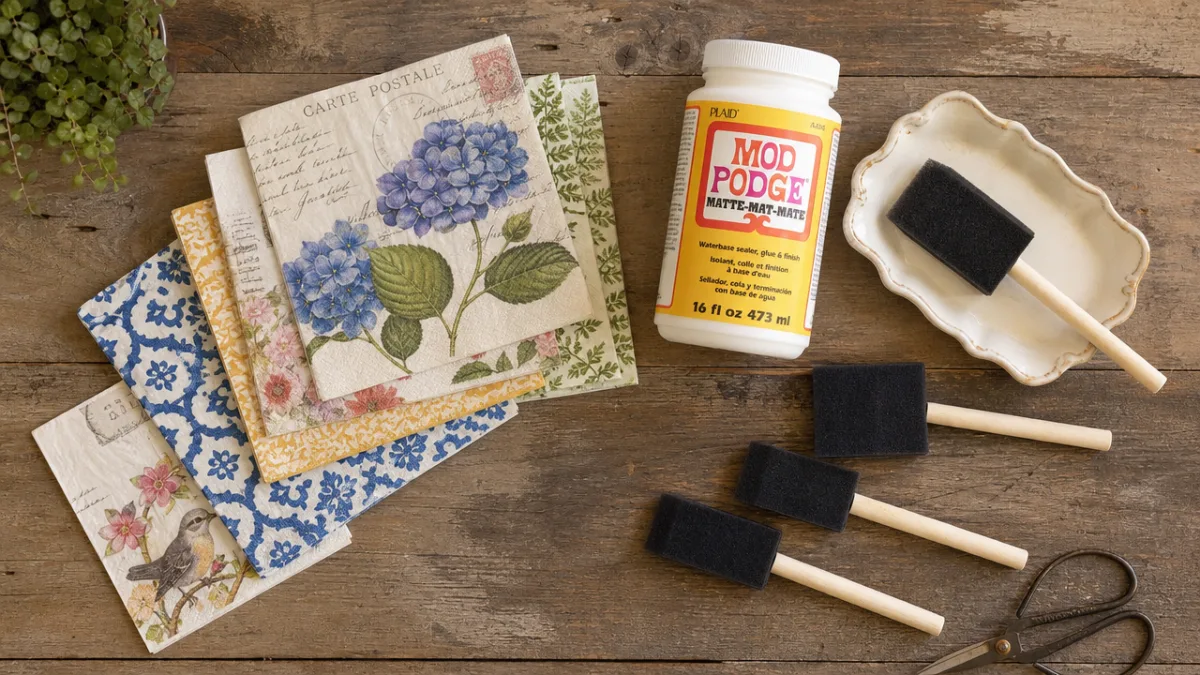
The star of the show is, of course, the decorative paper napkin itself. These are available at craft stores, home goods shops, and even some grocery stores, particularly around holidays. The key is to look for napkins with bold, clear patterns — florals, botanicals, geometric designs, and vintage illustrations all work beautifully. Three-ply napkins are standard, and you’ll need to separate the layers before use, keeping only the thin top printed layer. The other layers can be discarded or used as padding in packaging. The thinner the layer you work with, the more seamlessly it will blend into the surface of your furniture.
Beyond the napkin, your essential supply list includes the following items that each play a specific role in achieving a clean, durable finish:
- Decoupage medium (such as Mod Podge) — acts as both the adhesive and the protective sealant, available in matte, gloss, and satin finishes
- Flat foam brush or soft bristle brush — used to apply the medium smoothly without tearing the delicate napkin layer
- Fine-grit sandpaper (220 grit) — for lightly scuffing the furniture surface so the medium adheres properly
- Clean damp cloth — for wiping down the surface before you begin
- Scissors or a craft knife — for cutting the napkin to the shape or size you need
- Chalk paint or base coat paint — optional but recommended if you want a cohesive colored background beneath the napkin design
- Finishing wax or polyurethane topcoat — for sealing and protecting the final piece, especially on high-use surfaces like tabletops
Having all of these supplies organized and within reach before you begin is genuinely important. Because the napkin layer is so delicate, working quickly and confidently once you’ve applied the decoupage medium to the surface is essential. Stopping mid-application to search for scissors or a brush will lead to the medium drying unevenly, which can cause tearing or bubbling in the napkin. Preparation, as with most creative endeavors, is more than half the battle.
Step-by-Step: How to Apply a Napkin to Furniture
The application process, while straightforward, does require a steady hand and a calm approach — particularly when handling the separated napkin layer, which is extraordinarily thin and prone to tearing if rushed. Before touching a single napkin, your first task is to prepare your furniture surface properly. Sand it lightly with 220-grit sandpaper to remove any gloss or loose paint, then wipe it clean with a damp cloth and allow it to dry completely. If your piece has significant scratches, dents, or rough patches, fill them with wood filler and sand smooth before moving forward. A clean, smooth surface is the foundation of a beautiful result.
Once your surface is prepared, apply a base coat if desired. Many decoupage artists prefer to paint the entire piece in a chalk paint that complements or contrasts the napkin design before beginning the decoupage process. This ensures that any tiny gaps between sections of napkin, which are nearly invisible once sealed, blend in rather than exposing raw wood or old paint. Allow the base coat to dry fully — typically one to two hours depending on the paint and humidity — before moving on to the decoupage step itself.
To apply the napkin, follow this careful sequence for the best possible results:
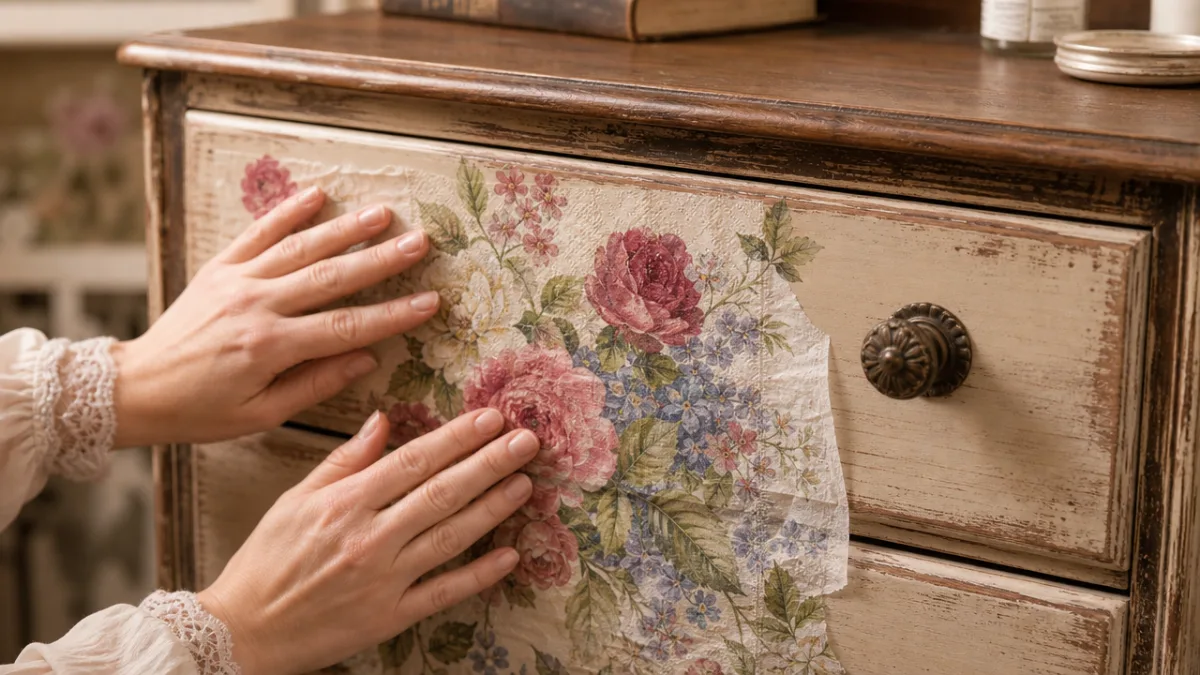
- Gently separate the napkin layers by pulling them apart from one corner, keeping only the thin top printed layer and setting the others aside.
- Cut or tear the napkin to roughly the size and shape of the area you’re covering. Torn edges tend to blend more seamlessly than cut edges.
- Using your foam brush, apply a thin, even layer of decoupage medium directly to the furniture surface in the area you’re about to cover.
- Carefully lay the napkin layer onto the wet medium. Don’t press hard yet — just lay it down and let it make contact.
- Using your brush, gently work from the center outward, smoothing the napkin flat and pushing out any air bubbles. Use light, feathering strokes rather than heavy pressure.
- Apply a thin coat of decoupage medium over the top of the napkin immediately, again working from center to edges to prevent tearing.
- Allow to dry completely before applying additional napkin sections or a second coat of medium.
Layering multiple napkin sections to cover a larger surface is entirely achievable and is actually one of the more exciting aspects of this technique. You can overlap sections slightly, blend different napkin patterns for a collage effect, or create a seamless repeat of a single pattern across a wide drawer front. The decoupage medium is forgiving in the sense that it dries clear, so overlapping edges become virtually invisible once the piece is finished and sealed. What might look slightly messy during application almost always smooths out beautifully once dry.
Once all napkin sections are applied and the decoupage medium is fully dry — usually after a minimum of 24 hours — apply your final protective topcoat. For furniture pieces that will see regular use, such as dining tables, coffee tables, or desks, a water-based polyurethane in a matte or satin finish provides excellent durability. For decorative pieces that won’t take much wear, finishing wax or a final coat of Mod Podge Hard Coat is sufficient. Always apply protective coats in thin layers, allowing each to dry before adding the next, for the smoothest possible finish.
Design Inspiration and Creative Directions to Explore
One of the most exciting things about napkin decoupage is the sheer breadth of aesthetic directions you can take it. Because the range of decorative paper napkins available is enormous — from delicate watercolor botanicals to bold Scandinavian folk patterns, from vintage toile designs to abstract contemporary prints — you can use this single technique to create furniture that fits almost any interior style imaginable. The technique itself is neutral; it’s the napkin you choose that determines whether the finished piece feels like something out of a French country cottage or a modern maximalist apartment.
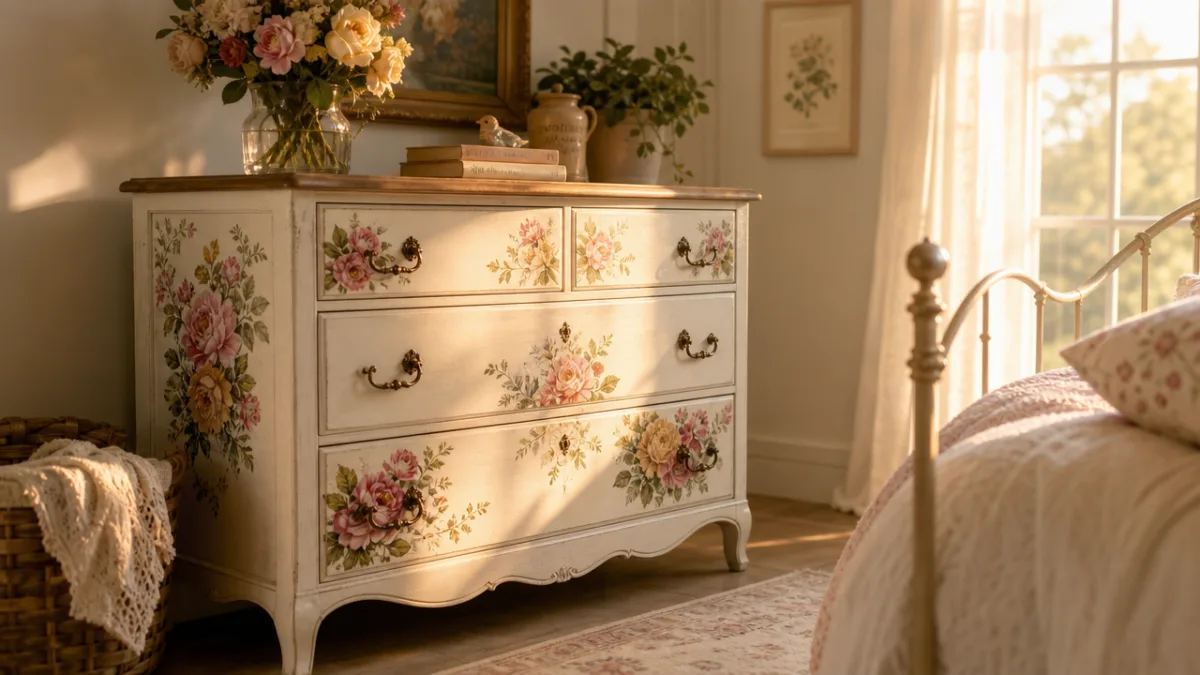
For those drawn to the cottage-core or grandmillennial aesthetic that has been so dominant in interior design trends over the past several years, floral napkins with soft, watercolor-style illustrations are a natural fit. Applied to a whitewashed side table, a linen chest, or even the top of a wooden stool, these botanical designs create pieces that look like genuine antiques or expensive hand-painted heirlooms. Layering two or three complementary floral patterns together, with slightly different scales and color palettes, creates a richly layered look reminiscent of English country house decor.
For a more contemporary or eclectic approach, consider these creative directions that push beyond the expected:
- Abstract and geometric patterns — applied to clean-lined mid-century furniture for a modern, graphic look that reads as intentional and editorial
- Map and typography napkins — layered across the top of a writing desk or bookshelf for a worldly, intellectual aesthetic
- Vintage illustration napkins — featuring mushrooms, insects, birds, or botanical specimens for a nature-cabinet or curiosity-shop vibe
- Marble and stone-effect napkins — applied to side tables or nightstands to mimic the look of expensive stone surfaces at a fraction of the cost
- Holiday and seasonal patterns — used to refresh accent pieces temporarily, since finished decoupage can be painted over and re-done when you’re ready for a change
Beyond pattern selection, the area of furniture you choose to decoupage also dramatically shapes the final effect. Full coverage — where the entire exterior surface of a piece is covered in napkin designs — creates a maximalist, statement-making piece that becomes the focal point of a room. Selective coverage, where perhaps only the drawer fronts, the tabletop, or the interior of a cabinet is decorated, produces something more subtle and elegant. Many experienced decoupage artists use selective placement strategically, drawing the eye to just one or two surfaces while leaving the rest painted in a solid, complementary color.
Troubleshooting Common Mistakes and How to Fix Them
Even experienced crafters run into challenges with napkin decoupage, and understanding the most common mistakes before you encounter them will save you significant frustration. The single most universal issue is tearing, which happens when the napkin layer is handled too aggressively or when the decoupage medium is applied too thickly beneath it, causing the napkin to shift and tear as you try to smooth it. The fix, if the tear is small, is to gently press the torn edges back together with the tip of a damp brush while the medium is still wet. For larger tears, the best solution is often to cut a fresh piece of napkin and overlap it slightly over the damaged area, blending it in seamlessly with additional medium.
Bubbling and wrinkling are the next most common complaints, particularly from beginners who apply the napkin to a vertical surface like a cabinet door. The key to avoiding this is working in small sections, never trying to lay a large piece of napkin down all at once, and always smoothing from the center outward with light, feathering brush strokes. If bubbles appear after the medium has dried, lightly sand the affected area with very fine grit sandpaper, apply a thin layer of medium, and smooth again. In most cases, subsequent coats of medium will press down and seal minor imperfections so they’re invisible in the finished piece.
Another frustrating problem is color bleeding, where the dye from the napkin bleeds outward into the surrounding medium, creating a halo of color around the design. This is more common with darker, more saturated napkin colors applied to pale backgrounds. To minimize bleeding, seal the prepared surface with a coat of clear medium and let it dry completely before applying the napkin. This creates a barrier that the dye is less likely to bleed through. Additionally, avoid saturating the area with too much decoupage medium at once — thin, controlled layers are always better than heavy, wet applications when working with delicate napkin layers.
Finally, durability is a concern many crafters raise, particularly for functional furniture pieces. A decoupage finish that is properly sealed with multiple coats of a hard-wearing topcoat is actually quite durable for everyday use, but it’s not entirely impervious to damage. Avoid placing wet glasses directly on decoupaged surfaces without coasters, and wipe up spills quickly. If a finished surface does sustain damage over time, the beauty of this technique is that it can be repaired or completely redone — sand back the damaged area, re-apply napkin and medium, reseal, and the piece looks fresh again. It’s a forgiving, renewable approach to furniture decoration that rewards experimentation and continued learning.
Why Upcycling with Napkin Decoupage Matters Beyond the Aesthetic
While the visual results of napkin decoupage are undeniably the main draw for most people who try it, there’s a deeper and increasingly important dimension to this practice that deserves acknowledgment: its role in the broader movement toward sustainable consumption and circular design. Every piece of furniture that is transformed and kept in use through techniques like decoupage is one fewer piece ending up in a landfill. The furniture industry generates enormous amounts of waste globally, and the culture of fast furniture — cheap pieces designed to be discarded and replaced within a few years — has significant environmental consequences that extend from raw material extraction all the way through to disposal.
Choosing to flip, upcycle, and refinish furniture rather than purchasing new is a genuinely meaningful environmental choice. When you shop at thrift stores, estate sales, or even collect discarded furniture from the curb, you’re intercepting items that would otherwise be wasted and giving them not just a second life, but often a better and longer-lasting one than they had before. A solid wood dresser from the 1960s or 1970s, even if it looks dated or worn, is almost certainly better built than its modern flat-pack equivalent. Strip it back, repair it, give it a fresh decoupage finish, and you have a piece that could genuinely last another fifty years.
The economic argument for upcycling through decoupage is equally compelling, especially in a period of rising costs of living. A decorative paper napkin costs between one and three dollars. A bottle of Mod Podge costs around eight to twelve dollars and covers many projects. Chalk paint, if you choose to use it, runs about fifteen to twenty dollars per container, again sufficient for multiple pieces. Compare this to the cost of purchasing a new, comparably sized and styled piece of furniture from a retail store, which might run anywhere from one hundred to several hundred dollars or significantly more for solid wood construction, and the savings are immediately obvious. The financial case for learning this technique is strong at any income level.
There is also a growing community dimension to the upcycling and furniture-flipping world that makes the practice richer than a solo hobby. Online communities on Pinterest, Instagram, Reddit, and dedicated Facebook groups bring together crafters of all skill levels to share their work, troubleshoot problems, exchange tips, and celebrate each other’s transformations. Watching someone else’s before-and-after photos — especially when the before looks genuinely hopeless and the after looks professionally finished — is both motivating and educational. Many practitioners also turn their skills into small businesses, selling flipped furniture at markets, through Etsy shops, or via local social media marketplace listings, creating supplementary income from what began as a personal creative interest.
Ultimately, the paper napkin on furniture trend that has captivated millions of people on social media represents something more than a satisfying craft video. It represents a shift in how people think about the objects in their homes — not as disposable commodities to be replaced when styles change, but as canvases for ongoing creativity and personal expression. Each decoupage project is unique, reflecting the specific taste, vision, and skill of its creator. In a world increasingly dominated by mass-produced sameness, there is genuine cultural value in the handmade, the repurposed, and the one-of-a-kind. The paper napkin, humble and inexpensive as it is, turns out to be a surprisingly powerful tool for making that value visible in our everyday spaces.








What do you think?
It is nice to know your opinion. Leave a comment.