










How to Make a Braided Rag Rug Using a Weaving Method for Natural Stretch
The Art of Braided Rag Rugs: A Timeless Craft Reimagined
Braided rag rugs carry with them a rich heritage that stretches back centuries, rooted in the resourceful traditions of homemakers who refused to let worn fabric go to waste. These rugs were once the hallmark of frugal households across rural America and Europe, where every scrap of worn clothing, bedding, and household textile found its way onto a sturdy floor covering. Today, this craft has experienced a wonderful renaissance, embraced not just for its sustainability but for the unique, handcrafted beauty it brings to any living space. Making your own braided rag rug is a deeply satisfying project that results in something both beautiful and functional.
What makes this particular approach so exciting is the incorporation of a weaving method into the traditional braiding process. Standard braided rugs, while lovely, can sometimes feel stiff or rigid underfoot, with little give when walked upon. By introducing a weaving technique into the braid construction, you create a rug that has a natural, pleasing stretch to it. This stretch not only makes the rug more comfortable to stand on for extended periods, but it also allows the rug to conform more easily to the floor surface beneath it, reducing slipping and bunching in high-traffic areas of your home.
This guide will walk you through every stage of the process, from selecting and preparing your fabric strips all the way through to finishing your rug with a durable edge. Whether you are an experienced textile crafter or someone picking up a needle and fabric for the very first time, this method is approachable and forgiving. The materials required are minimal, largely drawn from items you may already have at home, and the techniques involved build naturally on one another so that confidence grows with every yard of braid you complete. Prepare to transform humble rags into a rug you will be proud to display for years to come.
Gathering Your Materials and Preparing Your Fabric
The foundation of any great braided rag rug is the fabric you choose to work with. Natural fibers tend to perform best in this application because they are easier to tear into clean strips, they have a pleasing drape that braids beautifully, and they wear well underfoot over time. Cotton is by far the most popular choice, sourced from old bed sheets, worn t-shirts, lightweight curtains, or any cotton garment that has seen better days. Wool is another excellent option, particularly for a rug intended for a bedroom or sitting room, as it adds warmth and a subtle texture that elevates the final piece considerably.
Before you begin tearing or cutting your fabric, it is worth spending time sorting your materials by weight and thickness. Mixing very heavy denim with lightweight cotton voile in the same braid strand, for example, will create an uneven, lumpy braid that is difficult to work with and produces an inconsistent finished surface. Aim to group your fabrics into categories of similar weight, and where you do want to mix textures, do so intentionally and evenly across all three strands of a given braid section. Pre-washing all fabrics before you begin is also essential, both to pre-shrink the material and to ensure that any excess dye is removed before it can transfer to your floor.
To prepare your strips, you have two main options: tearing or cutting. Tearing works wonderfully with woven cotton fabrics and produces a strip with slightly frayed, soft edges that integrate seamlessly into the braid. Simply snip a small notch at your desired width and pull firmly across the grain. For knits, synthetic blends, or wool, scissors or a rotary cutter and mat will give you cleaner, more consistent results. Aim for strips approximately one and a half to two inches wide, keeping in mind that the strips will fold in on themselves as you braid, so the finished braid will appear narrower than the raw strip width. Cut generously, as running out of one fabric mid-braid creates unnecessary joins.
- Old cotton bed sheets in neutral or complementary tones
- Worn denim jeans cut into strips for durability and structure
- Flannel shirts or lightweight wool garments for warmth and texture
- Jersey knit t-shirts for a soft, stretchy element that enhances the weave
- Upholstery scraps or canvas for areas requiring extra firmness
- Safety pins or binder clips for holding your braid securely while you work
- A large blunt needle or lacing needle for joining rows together
- Heavy linen or waxed thread for lacing and finishing edges
Understanding the Weaving Method and How It Creates Stretch
The key innovation that distinguishes this approach from a conventional braided rug is the deliberate integration of a weaving pass between the braided strands. In a traditional three-strand braid, each strand simply crosses over the central strand in an alternating left-right pattern, producing a compact, tightly interlocked structure. In the weaving method, an additional thread or strip is woven horizontally through the loops of the braid at regular intervals as you work. This extra element creates small pockets and flexible connections between the braid segments, allowing the finished rug to flex and stretch without distorting its shape.
Think of it as the difference between a tightly woven fabric and a loosely knit one. The woven fabric has virtually no give, while the knit fabric can stretch in multiple directions before returning to its original dimensions. By introducing even a modest amount of horizontal weaving into your braid structure, you shift the finished rug along that spectrum toward greater flexibility. This is particularly valuable for rugs placed in entryways or kitchens, where people stand in one place for long periods, because a rug with some give is significantly more comfortable underfoot than a completely rigid one and reduces fatigue over time.
The weaving element also serves a structural purpose beyond comfort. As you coil or sew your braid into the finished rug shape, the woven connections distribute tension more evenly across the entire piece. A conventional braided rug can develop tight spots and loose spots over time as the lacing thread stretches unevenly. The woven interconnections in this method act as a secondary support network, meaning the rug maintains its flat, even profile far longer with regular use. It is a small technical adjustment that yields disproportionately large improvements in both the feel and the longevity of the finished piece.
Step-by-Step Braiding and Weaving Technique
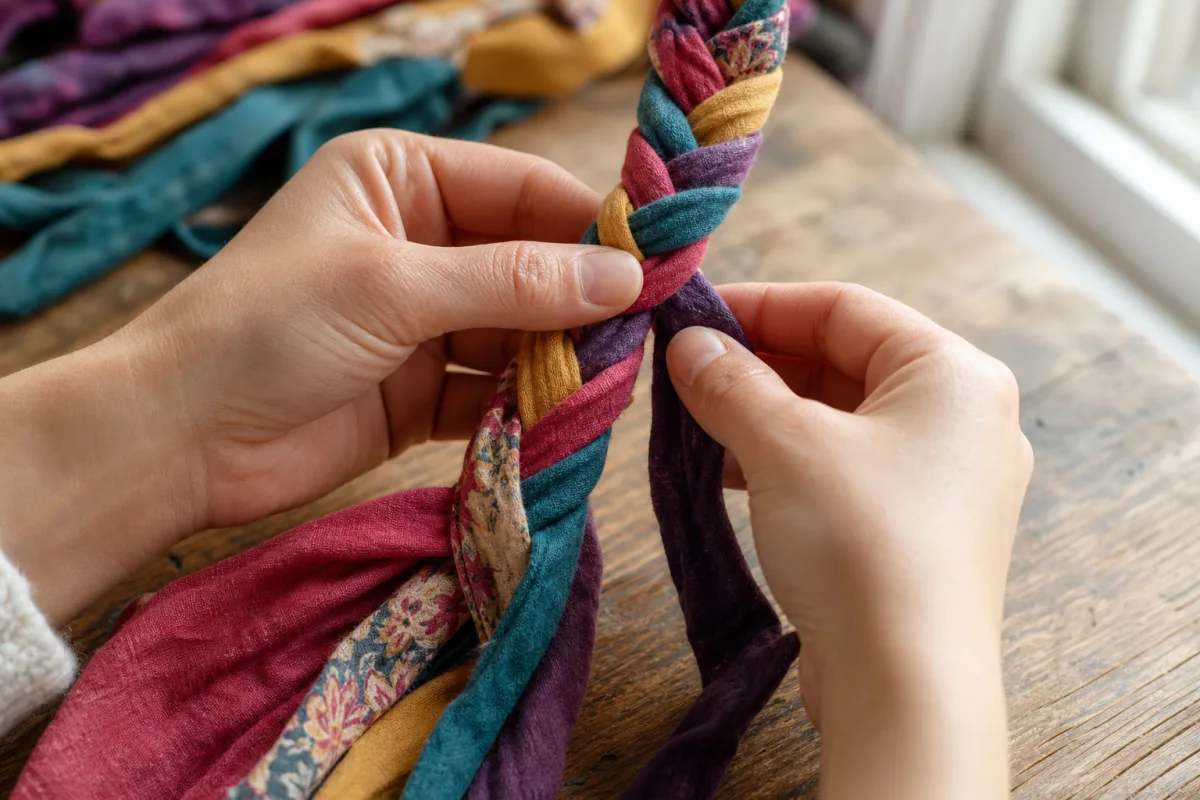
Begin your braid by securing three prepared fabric strips at one end. Many crafters use a simple overhand knot, while others prefer to pin the joined end to a firm cushion or clip it to the edge of a table to provide resistance as they work. Arrange your three strands so they hang or lie parallel, and take a moment to fold the raw edges inward on each strip so that no fraying edges are visible. This folding is what gives a handmade braided rug its clean, professional appearance, and it is worth taking the time to do it carefully right from the beginning of your project.
Work a standard three-strand braid for approximately six to eight inches, keeping your tension even and your folded edges consistently tucked inward. After this initial section, introduce your weaving element. Take a separate narrow strip of fabric — roughly half the width of your braid strips — and weave it horizontally through the loops on one side of your braid. Pass it under the first loop, over the second, under the third, and so on, pulling it through gently so it sits snugly but does not pucker the braid. Continue your standard braiding pattern for another six to eight inches, then repeat the horizontal weaving pass on the opposite side of the braid.
This alternating pattern of braid-then-weave creates a beautifully rhythmic, textured surface that you can see developing even before the rug is assembled. As you build up length, you will notice that the braid feels slightly more flexible and three-dimensional than a standard braid of the same materials. Keep your weaving strips consistent in color if you want a subtle, tonal effect, or use contrasting colors to create a deliberate pattern that will show attractively in the finished rug. When you need to add new fabric to any of your strands, simply overlap the new strip with the end of the old one by about an inch and continue braiding; the braid tension will hold the join securely.
- Secure three fabric strips at one end and fold all raw edges inward as you work.
- Braid six to eight inches using a standard three-strand technique with even tension.
- Weave a narrow horizontal strip through the side loops of the braid, alternating under and over.
- Continue braiding for another six to eight inches before repeating the weaving pass on the opposite side.
- Add new fabric strips by overlapping ends by one inch within the braid as needed.
- Continue this braid-and-weave sequence until you have enough length to begin coiling your rug shape.
Assembling the Rug: Coiling, Lacing, and Shaping
Once you have produced a sufficient length of braided and woven strip — typically at least six to eight feet for a small oval rug of approximately eighteen inches by twenty-four inches — you are ready to begin assembling the body of your rug. The most common shape for a braided rag rug is an oval, which begins with a straight center section whose length determines the final proportions of the rug. If you want a nearly circular rug, start with a very short center section of just a few inches. For a longer oval runner, begin with a center section of a foot or more. Plan this out in advance rather than improvising, as the center length is the one dimension you cannot easily adjust once lacing has begun.
To lace the braid into shape, fold your completed braid back on itself at the point where your center section ends and use your lacing needle threaded with heavy linen or waxed cotton thread to stitch through the loops on the edge of each adjacent row. The goal is to catch the loops of the braid rather than piercing the fabric itself, which keeps the rug surface clean and allows the braid to lie completely flat. The stitches should be firm but not so tight that they cause the rug to cup upward at the edges. Working on a flat surface as you lace helps enormously, allowing you to press the rug down and check regularly that it is lying perfectly flat and even.
As you coil outward from the center, you will notice that the outer rows of the rug must cover more ground than the inner rows. To accommodate this without causing the rug to ruffle or buckle, you will occasionally need to work two loops on the outer row for every one loop on the inner row. This technique, called easing, is the key to producing a flat, professional-looking rug rather than one that domes upward in the center or ripples at the edges. The woven elements in your braid actually make easing slightly more forgiving in this method, as the additional flexibility in the braid allows it to spread naturally as it curves outward around the growing rug body.
Finishing Techniques and Long-Term Care
Finishing the edge of your rug properly is what transforms a handsome craft project into a polished, durable home furnishing. When you have reached your desired rug size, taper the end of your final braid section by gradually narrowing the strips over the last six to eight inches of braiding. This creates a naturally tapered tail that blends smoothly into the edge of the rug without creating a noticeable lump or bump. Tuck the tapered end under the last full row of braid, securing it with several firm stitches through the adjacent loops. Trim any excess and press the finished edge down firmly to ensure it lies flat.
For extra durability, particularly for rugs that will see heavy daily use, consider applying a thin bead of fabric glue along the underside of the final edge row and allowing it to cure completely before placing the rug in use. Some crafters also apply a non-slip rug backing to the underside of the finished piece. This can be purchased as a pre-cut sheet from most craft or home goods stores and is simply trimmed to size and adhered with spray adhesive. The combination of a well-finished edge and a non-slip backing significantly extends the working life of your rug and makes it far safer in areas where slipping could be a hazard.
Caring for your braided rag rug is straightforward and largely depends on the fabrics you used in its construction. Most cotton and cotton-blend rugs can be laundered in a washing machine on a gentle cycle with cold water and a mild detergent. Avoid high heat in the dryer, which can cause uneven shrinkage, and instead lay the rug flat to air dry on a clean surface. Wool rugs should be hand-washed or professionally cleaned to avoid felting. Whichever materials you used, regular shaking and periodic airing outdoors will keep your rug fresh and extend the intervals between full washings. With proper care, a well-made braided rag rug can last for decades and only grows more characterful with age.
Inspiration, Customization, and Taking Your Skills Further
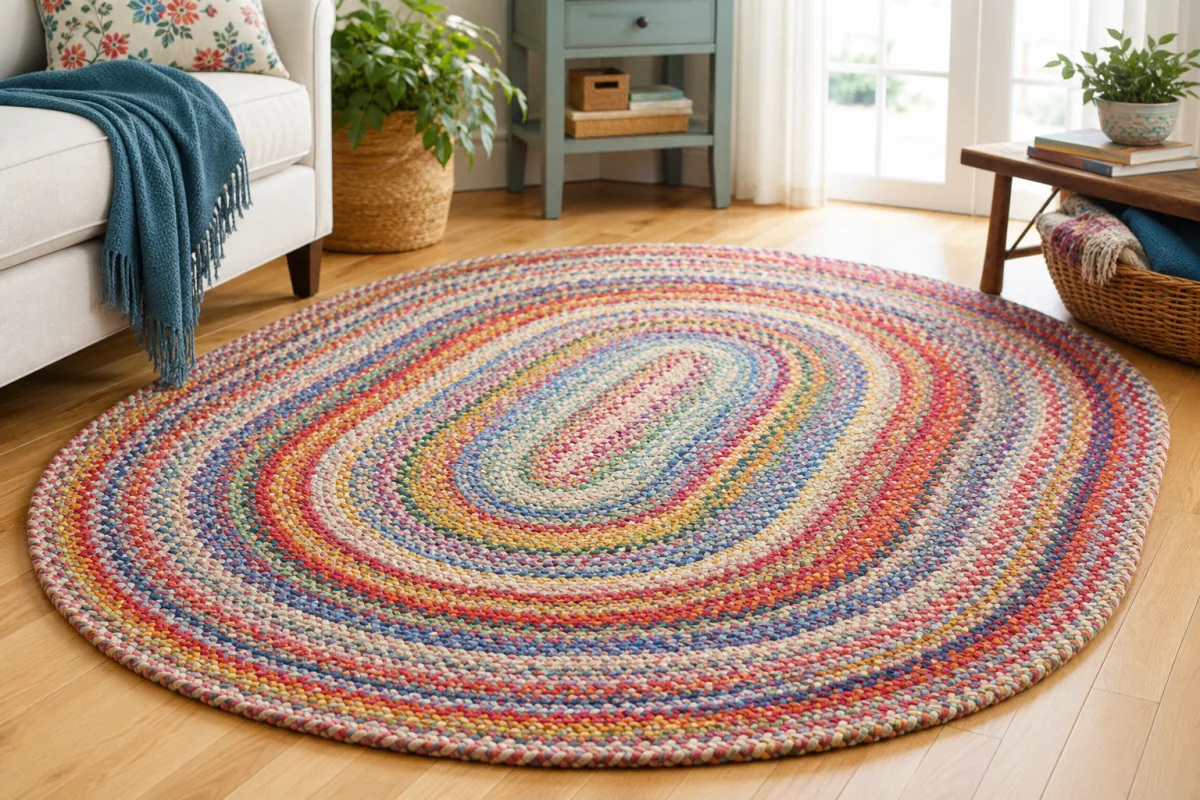
One of the greatest joys of the braided rag rug method is its almost infinite scope for creative customization. The color story of your rug can be as simple or as complex as you choose, from a tightly controlled palette of two or three complementary tones drawn from a single fabric source to a joyfully exuberant riot of every color in your fabric stash. Planning your color arrangement before you begin braiding allows you to create deliberate patterns — concentric rings of color, radiating stripes, gradual ombre transitions from one end of the rug to the other — that give the finished piece a sense of intentional design rather than happy accident.
Beyond color, you can experiment with the scale of your braid by using wider or narrower fabric strips. Very wide strips — up to three or four inches before folding — produce a chunky, bold braid that works beautifully for a statement rug in a large living room or hallway. Narrower strips of half an inch or less, while more time-consuming to prepare and braid, create an elegant, fine-textured surface reminiscent of traditional New England parlor rugs. Mixing braid scales within a single rug — perhaps a finer braid for the center and a chunkier outer border — is a more advanced technique but one that produces spectacular results for those willing to invest the time.
Once you have mastered the basic oval form, consider experimenting with other shapes. A rectangular braided rug requires a slightly different approach to easing at the corners but follows the same fundamental lacing technique. Round rugs are in many ways the simplest of all, since every row is a consistent arc with no straight sections to contend with. Heart-shaped rugs, while more challenging, make wonderful gifts and conversation pieces. Each new shape will teach you something new about how the braid behaves under tension and how to manage the distribution of easing for a flat, even result. The skills you develop with each project compound beautifully, making every subsequent rug faster, more confident, and more refined than the last.
The braided rag rug tradition is one that connects modern makers to a long lineage of resourceful, creative hands that came before them. There is something profoundly meaningful about taking materials that have already lived one useful life — as a shirt, a set of curtains, a beloved blanket — and transforming them into something new that will serve your home for another generation. By adding the weaving method described in this guide, you are not just preserving a tradition but actively improving upon it, creating a rug that is more comfortable, more durable, and more adaptable than its purely braided predecessors. Every loop, every pass of the weaving strip, every careful lacing stitch is a small act of making that accumulates into something genuinely beautiful and entirely your own.








What do you think?
It is nice to know your opinion. Leave a comment.