










How to Make a Suitcase Desk From a Wardrobe Trunk: A Complete DIY Guide
Turning a vintage wardrobe trunk into a working desk might just be one of the most satisfying upcycling projects you’ll ever take on. These beautiful old pieces of luggage — the kind that once crossed oceans on grand steamships — have the bones and the charm to become genuinely stunning furniture. With the right tools, a little patience, and a solid plan, you can end up with something that feels both personal and actually useful in your home office, bedroom, or living room.
Understanding Your Wardrobe Trunk
Before you touch anything, it’s worth really getting to know the trunk you’re working with. Wardrobe trunks — sometimes called steamer trunks — were made roughly between the 1880s and the 1950s, and they vary a lot in quality, materials, and how they’re set up inside. Some have cedar-lined interiors with hanging rods and built-in drawers; others are much simpler rectangular boxes with a basic tray. On the outside, you might find vulcanized fiber, canvas over a wooden frame, leather-wrapped wood, or even early plastic on the later models.
Give your trunk a thorough once-over before you buy it or start any work. You’re looking for structural problems like broken hinges, cracked wood along the frame, rusted hardware, or water damage that’s warped the interior panels. Surface issues — patchy rust, worn canvas, faded paint — are totally fine and often add character to the final piece. But deeper structural damage needs to be sorted out before you go any further. Run your hands along the inside walls too, and check for any mold or mildew smell. If you find it, treat it with diluted bleach or an antimicrobial spray before doing anything else.
The internal dimensions of your trunk will make or break how useful your desk actually is. Ideally, you want something that measures at least 36 inches wide, 20 inches deep, and 22 inches tall when standing on its end. That gives you enough room for a fold-out desk surface, some storage, and maybe a shelf or pegboard section too. Measure everything carefully and sketch out a rough plan before you buy a single piece of material — it’s much easier to figure out what’s possible on paper than halfway through the build.
Gathering Your Tools and Materials
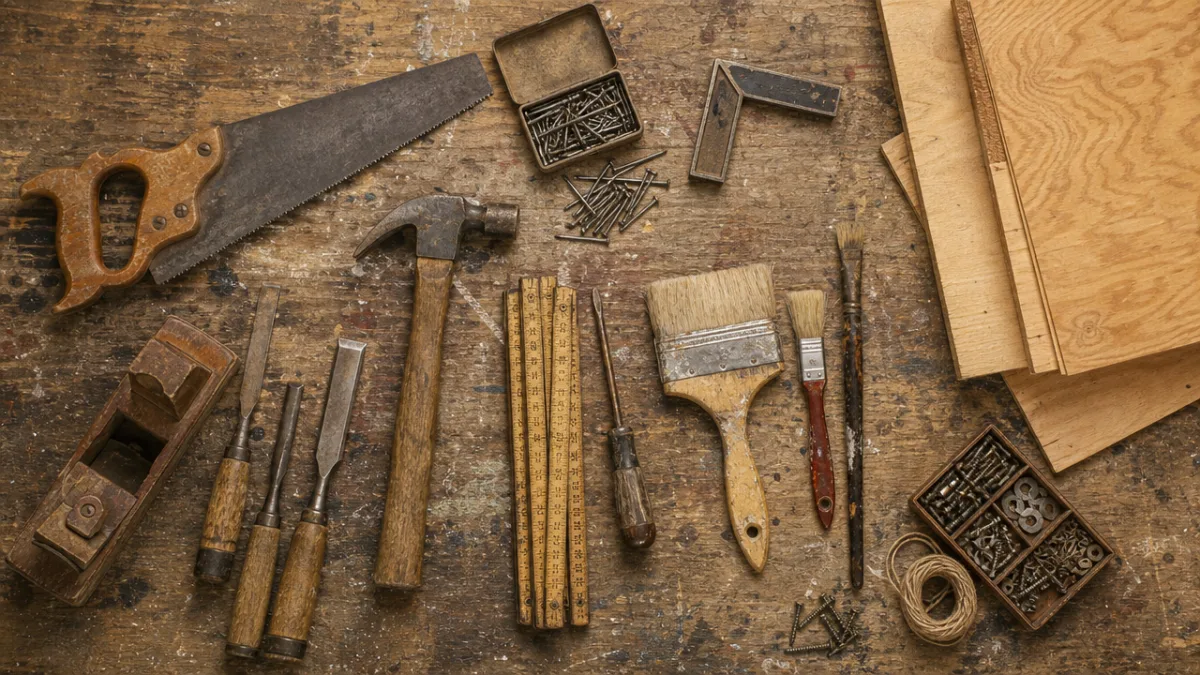
Getting your tools and materials sorted before you start will make the whole process so much smoother. You don’t need a full workshop for this project, but a few key power tools will save you a lot of time and frustration compared to doing everything by hand. A circular saw or jigsaw, an electric drill with a good range of bits, a sander with multiple grit papers, and a staple gun will handle most of what you need.
For the desk surface, you’ll want a piece of plywood or MDF cut to fit the interior width of your trunk. Three-quarter inch plywood is a great choice — it’s sturdy enough for a proper writing surface without being so heavy that it strains the hinge. You’ll also need piano hinge hardware to attach the folding surface, a length of chain or a leather strap to hold it open, and the right screws and bolts for your trunk. If your trunk has a metal interior frame, you may need metal screws or rivets rather than standard wood screws, so check before you buy.
The finishing materials are where you really get to make it your own. Chalk paint in a matte color gives a lovely rustic or farmhouse feel; wood stain and varnish look more traditional and natural; wallpaper or fabric lining on the interior walls can make the whole thing feel almost theatrical when it opens. You’ll also want felt or thin foam if you plan to pad the desk surface, plus any organizational bits and pieces — small hooks, elastic loops, pencil holders, adhesive pockets — to make the inside genuinely functional.
- Three-quarter inch plywood or MDF for the desk surface, cut to trunk interior dimensions
- Piano hinge hardware, approximately the full width of the desk surface
- Support chain or leather strap with appropriate hardware
- Electric drill, jigsaw or circular saw, and sander
- Chalk paint, wood stain, or chosen interior lining material
- Organizational accessories including hooks, clips, and holders
- Wood filler and fine sandpaper for surface preparation
- Adhesive and fasteners appropriate to your trunk’s construction
Preparing and Restoring the Trunk
Preparation is honestly the most important part of this whole project, even though it’s also the part people most want to skip. When you’re excited to see something come together, cleaning and repairing an old trunk doesn’t feel nearly as satisfying as building and decorating. But trust the process — a trunk that’s been properly cleaned, repaired, and prepped will hold paint, adhesive, and hardware so much better than one you’ve rushed through. Start by emptying everything out and vacuuming the interior thoroughly to get rid of dust, debris, and any old lining material.
Sort out any structural repairs before you touch the cosmetic stuff. Cracks or splits in the wooden frame can be fixed with wood glue and clamps — just give the adhesive a full 24 hours to cure. Replace any broken or missing clasps, corner pieces, or hinges now, sourcing period-appropriate replacements from antique hardware suppliers or specialist online shops. For surface rust on metal components, a wire brush followed by a rust converter product does the job nicely; seal it with metal primer before applying any topcoat.
Once everything’s structurally sound, clean all the surfaces properly. The exterior can be wiped down with a mild soap solution or a specialist antique cleaner. For the interior, the approach depends on the material — upholstery cleaner for canvas interiors, light sanding plus a wipe with a tack cloth for wooden ones. If you’re planning to paint or stain the interior, prime it first for even coverage. Then let everything dry completely — ideally 48 hours in a well-ventilated space — before you move on to the actual modifications.
Building and Installing the Fold-Out Desk Surface
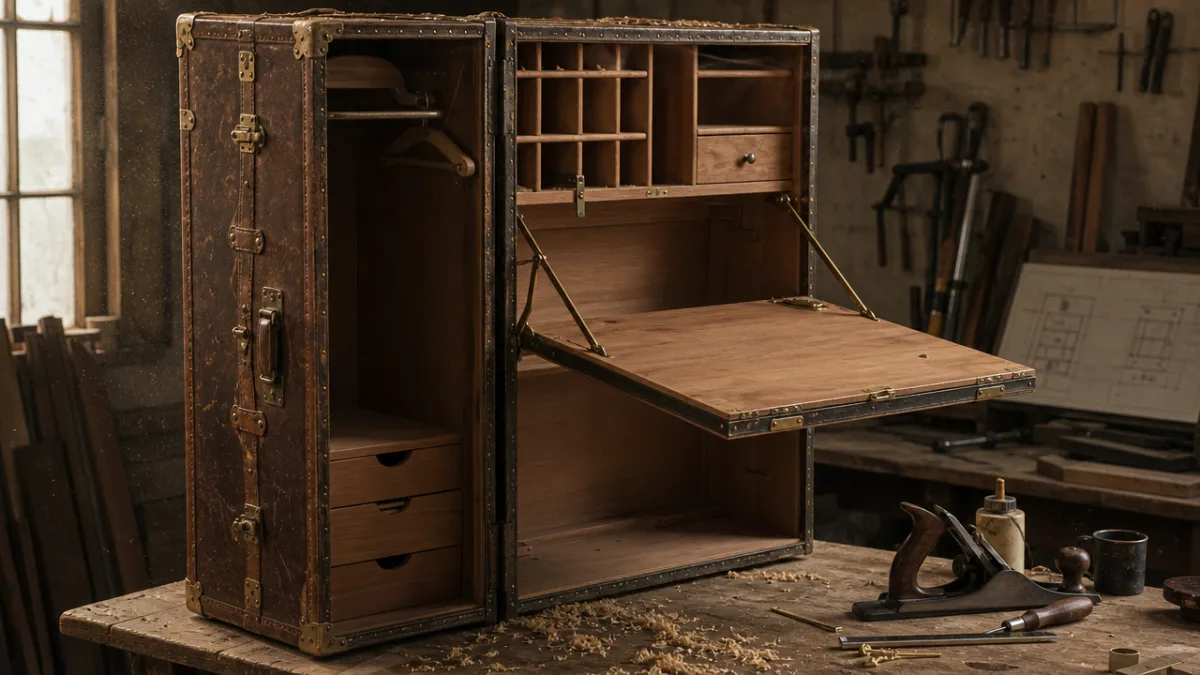
The fold-out desk surface is the heart of this whole conversion, so it’s worth taking your time to get it right. Start by measuring the interior width and depth of your trunk at the point where you want the desk to sit. In most wardrobe trunk builds, the desk lands roughly at the midpoint of the trunk’s height when it’s standing upright — that way you get an upper section for display or storage and a lower section that swings out to become the actual work surface.
Cut your plywood or MDF to those measurements, then sand all the edges smooth, working through progressively finer grits and finishing with 220 for a really silky result. If you want a padded writing surface, now’s the time to apply a thin layer of foam and stretch your fabric over it, stapling or gluing it neatly to the underside of the board. The underside itself — the face that looks into the trunk when it’s closed — can be turned into something interesting too: cork board, a chalkboard finish, or decorative paper all work well depending on your vision.
Attach the piano hinge along the full width of one edge of the desk surface and the matching edge of the trunk interior. A full-width piano hinge is really worth it over two smaller hinges — it spreads the load much more evenly and stays significantly more stable under the weight of a laptop or books. Before you drill anything, position the desk carefully and check it with a spirit level to make sure it’ll open to a proper horizontal. Once the hinge is in, attach your support chain or leather strap between the underside of the desk and the interior wall of the trunk to stop it swinging past 90 degrees and putting strain on the hinge.
- Measure the interior dimensions precisely at the planned desk height location
- Cut the plywood or MDF and sand all edges to a smooth finish
- Apply padding and fabric covering to the top surface if desired
- Position and align the piano hinge carefully before drilling any pilot holes
- Attach the hinge to both the desk surface and the trunk interior
- Install the support chain or strap with appropriate length for a flat 90-degree opening
- Test the mechanism multiple times and adjust as needed before finishing
Organizing and Finishing the Interior
With the mechanical side of things done, this is where the project really starts to feel like yours. The organization and interior finishing are where your desk gets its personality — and where it becomes genuinely useful in your day-to-day life rather than just a cool-looking object. Before you start attaching things, think honestly about what you actually need from your workspace. Someone working remotely on a laptop has very different storage needs from an artist or a student who works primarily with physical materials and books.
The upper section of the trunk interior, above the fold-out desk, is perfect for vertical storage and display. A small shelf, a pegboard panel cut to fit, or a row of hooks for headphones, bags, or frequently used tools all work well here. Adhesive-backed organizational pockets on the interior walls are great for phones, tablets, notebooks, and chargers. If you want the interior to really make an impression, consider lining the walls with wallpaper, fabric, or a fresh coat of paint in a color that contrasts with the exterior — there’s something genuinely delightful about opening a battered old trunk to find something bright and deliberate inside.
The lower section, beneath the desk surface, is ideal for hidden storage. Depending on how much depth you have, you might fit a small filing box, a portable document wallet, a power strip for charging devices, or just things you want close at hand but out of sight. Running a power cable through a small hole drilled in the back of the trunk is a pretty simple modification that turns the whole thing from a purely analog workspace into a properly equipped modern workstation. Use a cable grommet at the entry point to protect the cord and keep everything looking intentional.
Finishing Touches and Styling Your Suitcase Desk
This final phase is what takes your trunk desk from a functional DIY project to something that actually looks like it was designed that way. The finishing touches might feel minor individually, but together they’re what separates a carefully considered piece from something that looks unfinished. Step back regularly during this stage and look at the whole thing from a distance — the way you’d assess a room — rather than getting too close and focused on individual details.
Think about refreshing the exterior hardware to give the trunk a more cohesive look while keeping its vintage character. Swapping worn clasps for polished brass fittings, adding new corner guards in an aged bronze finish, or running decorative nail heads along the edges of canvas panels are all relatively small changes that make a big visual difference. If your trunk has original labels, stickers, or painted lettering from its life as actual luggage, take a moment to decide whether they add to or work against the look you’re going for — rather than automatically removing or keeping everything, make a deliberate choice.
Once the desk is in your home, consider its height and whether it actually works for how you sit. Most wardrobe trunks, standing on their end, land roughly at desk height — but adding hairpin legs, tapered wooden legs, or a custom base lets you fine-tune the working height to suit your body and your chair. Casters or wheels on the base make the whole piece easy to move around, which is genuinely useful in smaller spaces where furniture tends to pull double duty. Then style it: a small plant, a lamp you love, a few things that mean something to you. That’s what makes it feel finished.

Tips for Long-Term Care and Maintenance
Like all vintage furniture, a wardrobe trunk desk needs a bit of ongoing attention to stay in great shape. The age of the materials, the mix of old and new components, and the daily demands of actual use all mean that a little periodic maintenance goes a long way. Build a few simple habits around caring for the piece and it’ll stay beautiful and functional for years — and may even hold or grow its value as a collectible over time.
For the exterior, a soft dry cloth to dust it regularly is the baseline. Beyond that, treat the surfaces according to their material. Leather exteriors benefit from a specialist leather conditioner every few months to stop them drying out and cracking. Canvas can be gently brushed and treated with a fabric protector spray. Metal hardware is worth checking every so often for rust or corrosion — especially if you live somewhere humid — and touched up with metal paint or a clear sealant before any deterioration has a chance to spread.
Pay particular attention to the fold-out desk mechanism during your routine checks. Open and close the desk surface every now and then to make sure the piano hinge is still secure and that the mounting screws haven’t worked loose through regular use. Tighten anything that needs it promptly, and add a small amount of appropriate lubricant to the hinge if it starts to feel stiff or noisy. Check the support chain or leather strap for any signs of wear — fraying, stretching, or weakening at the attachment points — and replace it if needed. Look after it well, and this desk can genuinely be something you pass on.








What do you think?
It is nice to know your opinion. Leave a comment.