










DIY Cardboard Shelf: A Complete Guide to Decorative Cutting Techniques
Introduction to Cardboard Furniture Crafting
Cardboard furniture has come a long way from something kids throw together on a rainy afternoon. These days it’s a genuinely respected form of sustainable interior design, and for good reason. Crafters, interior designers, and eco-minded homeowners have figured out that this stuff is surprisingly strong and endlessly creative. A well-made cardboard shelf can hold books, show off plants, or keep small things organized — and it’ll have your guests doing a double-take and asking where you got it.
And honestly, the appeal goes well beyond saving money — though you’ll definitely save money. There’s something genuinely satisfying about turning something you’d normally toss in the recycling bin into a beautiful, functional piece of furniture. Old appliance boxes, moving cartons, thick packaging — all of it can become sturdy shelving that, once finished properly, is hard to distinguish from something you paid real money for.
What really takes a cardboard shelf from “cute craft project” to actual home décor is the decorative cutting. Through careful scoring, layering, and shaping, you can create intricate geometric patterns, flowing curves, or architectural details that give the whole thing a custom, designer feel. This guide walks you through every step of the process — from picking your materials to the final coat of sealant — so even if you’ve never done anything like this before, you’ll end up with results you’re genuinely proud of.
Materials and Tools You Will Need
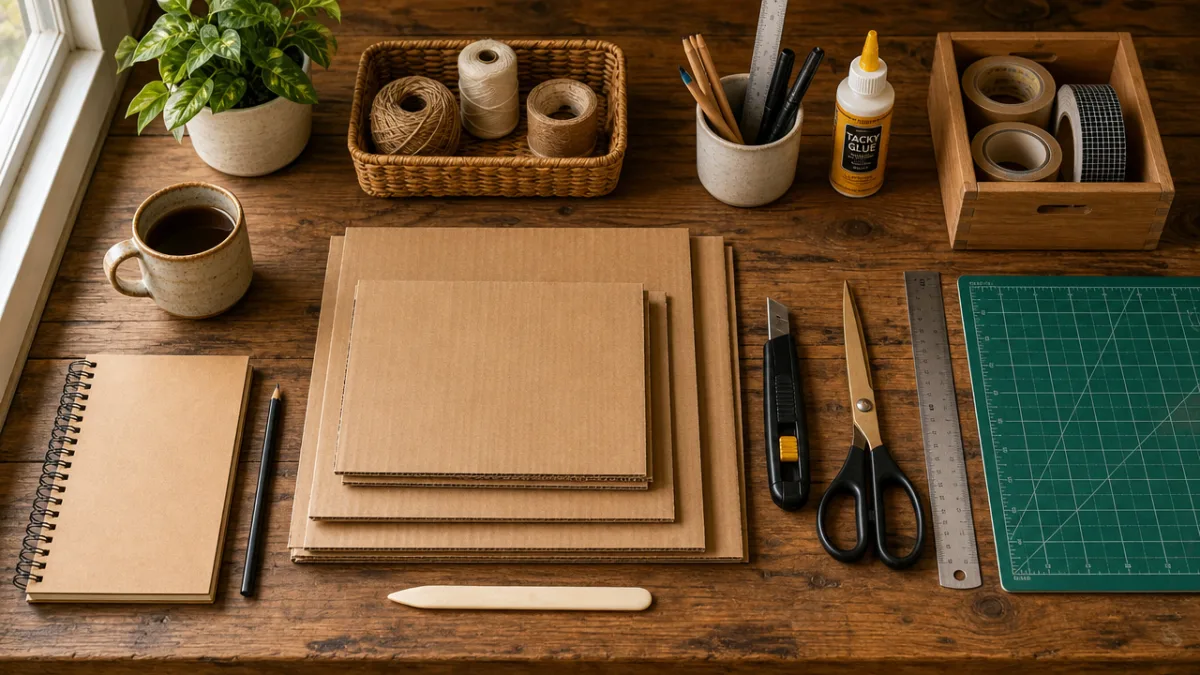
Getting your materials sorted before you start will save you a lot of headaches down the line. The cardboard you choose matters more than you might think — it directly affects how strong and how good-looking your finished shelf will be. Double-walled corrugated cardboard is really what you want here. It’s the thick stuff that comes in large appliance boxes — the kind refrigerators, washing machines, or big TVs ship in — and it’s dense and rigid enough to actually hold weight over time.
For cutting tools, you need something sharp and reliable. A craft knife or box cutter is essential, and it’s worth buying a decent one and swapping out the blades often, because a dull blade tears rather than cuts and will ruin your decorative lines. A self-healing cutting mat will protect your table and keep your cuts on track. Go with a metal ruler over a plastic one — it’s much safer when you’re dragging a blade along it and you’ll get far cleaner lines.
The finishing materials are just as important as everything else, both for durability and for how the shelf looks when it’s done. PVA glue mixed with a little water, brushed over the whole surface, hardens the cardboard and creates a plaster-like finish that takes paint really well. From there, acrylic paint in whatever color you like, some sandpaper in fine and medium grits, and a sealant spray or mod podge will round out your kit. If you want to go further, decorative paper, fabric, or metallic foil can add a really personal touch.
- Double-walled corrugated cardboard (large appliance boxes are ideal)
- Sharp craft knife or box cutter with plenty of replacement blades
- Self-healing cutting mat (A2 size or bigger works best)
- Metal ruler, at least 50 cm long
- PVA glue and a wide brush for applying it
- Acrylic paint in your chosen base color
- Fine and medium grit sandpaper
- Pencil, compass, and stencils for marking out your patterns
- Hot glue gun for holding things in place during assembly
- Matte or gloss sealant spray for final protection
Planning Your Shelf Design and Measurements
Before you cut a single thing, spend some real time planning — it pays off at every stage of the build. Start by thinking about where the shelf will live and what it needs to do. A shelf meant for heavy books needs a sturdier internal structure than one that’s just holding a few small plants or decorative objects. Decide on your height, width, and depth, and sketch something out on paper before you commit to any dimensions. Even a rough drawing helps you see the proportions and catch problems before they become expensive mistakes.
Your decorative cutting pattern should be planned alongside the overall shape of the shelf, not bolted on as an afterthought. Geometric patterns — hexagons, triangles, interlocking diamonds — work really well because they’re based on simple math and you can reproduce them consistently across multiple panels. Organic shapes like waves, leaves, or arched cutouts can look stunning too, but they require a bit more freehand confidence or a printed template. Whatever direction you go, test your pattern on a scrap piece of cardboard before touching your final panels. Scale it out on paper first and make sure you actually like it before you commit.
When working out your measurements, don’t forget to account for the thickness of the cardboard itself. Double-walled corrugated cardboard is around a centimeter thick, and when you’re laminating several layers together to build up the shelf’s body, those millimeters add up fast and can throw everything off if you haven’t planned for them. Mark all your cut lines clearly in pencil, and check every measurement twice before you start cutting. The old carpenter’s rule — measure twice, cut once — really couldn’t be more relevant here, because a miscut panel can’t just be stuck back together.
Cutting and Layering Techniques for Structural Strength
The strength of a cardboard shelf doesn’t come from one big thick piece — it comes from laminating multiple layers together with the corrugated grain running in alternating directions. This cross-lamination approach is basically the same engineering principle behind plywood, and it makes a huge difference in how well the shelf resists bending and compression. For each structural component — the top, bottom, sides, and any internal dividers — aim to laminate at least four to six layers of double-walled cardboard, alternating the grain with each one.
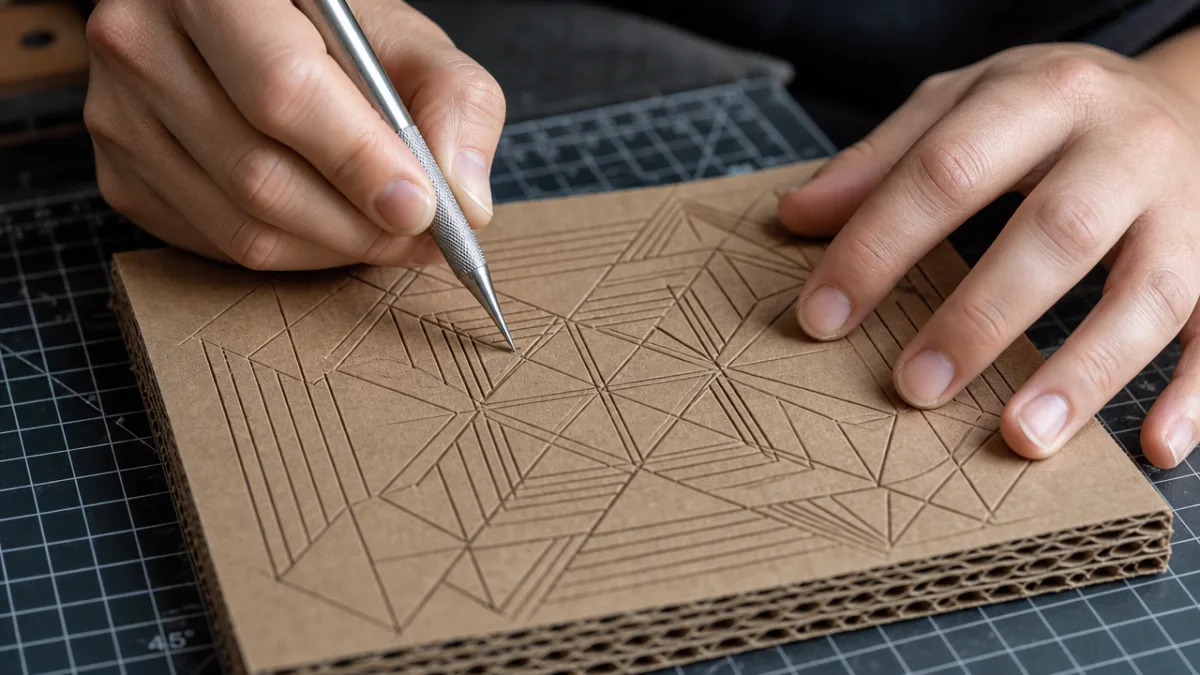
When it comes to the decorative cutting, the most important thing to remember is to go slowly and let the blade do the work. Trying to cut through thick cardboard in one forceful pass will send the blade wandering off your line and leave you with ragged, messy edges. Instead, make three or four light passes along the same line, getting a little deeper each time until the piece separates cleanly. For curves, rotate the cutting mat rather than fighting the ruler, and use just the tip of the blade in short, controlled strokes. This is what produces those crisp, clean edges that make decorative patterns look like they were meant to be there.
Cutout patterns — lattice designs, geometric windows, repeating motifs cut all the way through a panel — need a slightly different approach. Start by poking a starter hole in the middle of the area you want to remove, so the blade has somewhere to enter without having to pierce from the edge. Then carefully cut along each line of your pattern, keeping the blade perfectly upright so the cut edge is square and not angled. Once you’ve removed the waste, run some fine sandpaper or a nail file along the cut edges to smooth everything out. It’s a small step, but it makes the finished pattern look so much cleaner once it’s painted.
- Cut all your cardboard panels to the right dimensions before starting any decorative cutting.
- Mark your decorative pattern on the top layer with a pencil, using your template or stencil.
- Pierce a starter hole in the interior of each cutout area using a sharp awl or skewer.
- Make multiple shallow passes along each cut line, gradually going deeper.
- Remove the waste pieces carefully and sand all the cut edges smooth.
- Laminate the layers together with PVA glue, pressing firmly and letting each layer dry before adding the next.
- Clamp or weigh down the laminated panels while they dry to stop them from warping.
Assembling the Shelf Structure
Assembly is the moment all your carefully cut pieces finally come together, and it calls for equal parts patience and precision. Before you reach for any glue, do a dry fit — put everything together without adhesive just to confirm that all the panels line up properly and the proportions look right. This step almost always reveals something small that needs fixing: a panel that’s a millimeter too wide, a divider that doesn’t quite reach the back. These things are quick to correct now and a nightmare to deal with once glue is involved. Sort out any issues, then protect your work surface with plastic sheeting or waxed paper before you begin.
A hot glue gun is ideal for the initial structural bonding because it grabs fast and holds things in position while the stronger PVA glue does its job. Run a bead of hot glue along a joint, press the pieces together for about thirty seconds, then go back and fill each interior joint with a generous fillet of PVA glue, working it into the seam with your fingertip or a small brush. Those PVA fillets are what make the structure genuinely strong — they spread the stress across the whole joint rather than concentrating it at one line, which is what keeps the shelf together over the long term.
As you build, keep checking your angles with a carpenter’s square or anything you know has a true right angle. Even a small deviation compounds as you add more pieces, and a shelf that leans or wobbles is annoying to look at and annoying to use. If a joint starts drifting before the glue has set, nudge it back into position and hold it there until things firm up. Once the whole structure is assembled and the glue has had a few hours to cure, you can add cardboard triangles or gussets to the interior corners for extra reinforcement — especially worth doing if the shelf is going to carry any real weight.
Finishing and Decorating Your Cardboard Shelf
This is the stage where everything clicks — where your shelf stops looking like a craft project and starts looking like something you’d actually see in a home décor shop. Start by mixing PVA glue with water at roughly a three-to-one ratio and brushing it generously over every exposed surface, including the inside of any decorative cutouts. Work it into seams and gaps, smooth out any bubbles, and let it soak in. This first coat stiffens the cardboard surface, seals those porous edges, and gives the paint something solid to grip. Let it dry completely — usually one to two hours, depending on how humid your space is.
Once that first coat is dry, sand the whole surface lightly with medium-grit sandpaper to knock back any raised fibers or drip marks, then apply a second coat and let that dry too. Some people go three or even four coats this way, sanding between each one, and the result genuinely starts to feel like plaster or papier-mâché rather than cardboard. When you’re happy with the surface, start painting. A white or light gray primer coat first will make your final color look even and vibrant — especially important if you’re going pale or pastel. Apply acrylic paint in thin, even coats: a foam roller for the flat areas, a small brush for getting into the decorative cutouts.
The final sealant coat is what decides how well the shelf holds up in daily life. A few light passes of matte or satin sealant spray, held about thirty centimeters from the surface, will protect the paint from scratches, moisture, and general handling. Glossy finishes look bold and are great at repelling water, but they show every fingerprint and imperfection. Matte finishes are more forgiving and give the piece a softer, more sophisticated feel. Whichever you go with, let each coat dry fully before adding the next, and finish with a very light sand using ultra-fine sandpaper for a surface that feels almost professionally made.
Mounting, Styling, and Long-Term Care
Don’t underestimate the mounting step just because the shelf itself is lightweight. Cardboard construction handles downward pressure pretty well, but it’s more vulnerable to the sideways forces that come with being cantilevered off a wall. For a floating wall-mounted shelf, the best approach is to attach a mounting rail — a strip of wood or thick metal — to the wall using proper wall anchors or screws, then fasten the cardboard shelf unit to that rail with screws driven into a reinforced section inside the shelf. This way the load is spread across the solid rail rather than relying on cardboard alone to handle the stress at the wall.
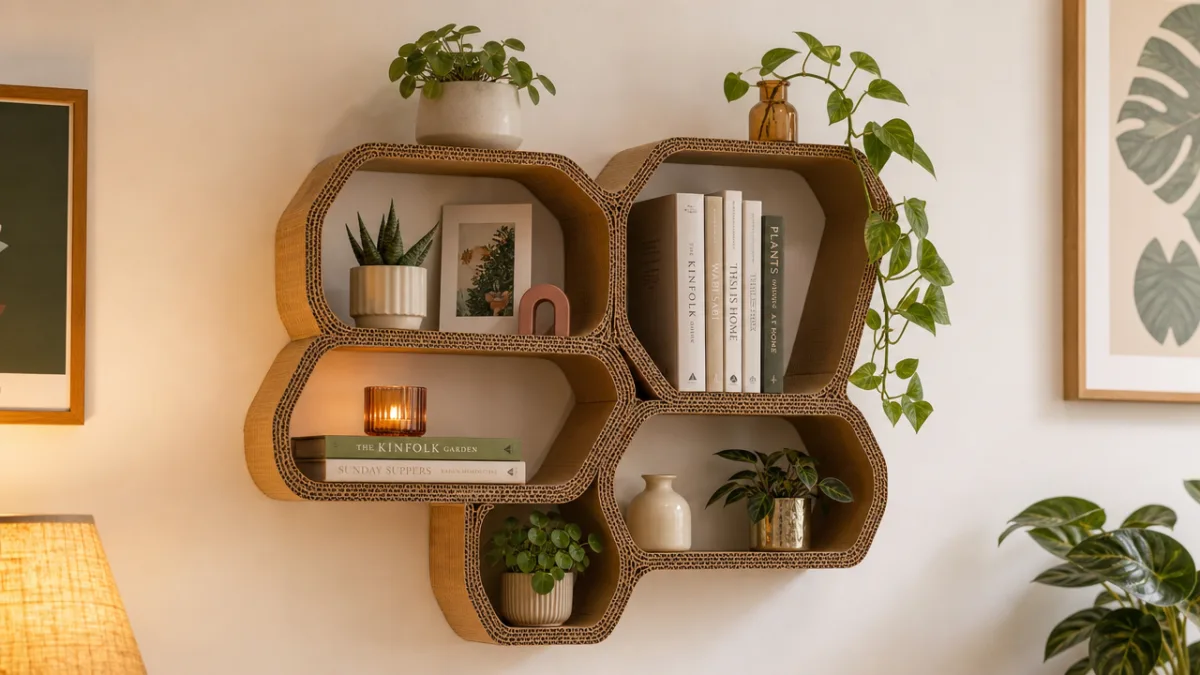
Styling the shelf is honestly one of the most fun parts of this whole project, and it’s worth putting the same thought into it that you put into building the thing. All those decorative cutouts and patterns you worked so hard on should be visible — don’t bury them under clutter. A small, curated selection of objects works much better than cramming the surface: a trailing plant, a few books in complementary colors, a candle, or a small sculpture will show off both the items and the shelf they’re sitting on. Vary the heights, leave some breathing room, and let the shelf’s own design be part of the display.
Keeping a finished cardboard shelf looking great is easier than most people expect. Dust it regularly with a soft dry cloth to stop buildup in the decorative cuts. Keep it away from direct moisture or sustained humidity — even a well-sealed surface will eventually soften and deform if water works its way in over time. Spots like directly above a stove or in a bathroom with poor ventilation are best avoided. With a bit of sensible care, a well-built and properly finished cardboard shelf can look genuinely beautiful for years, which feels like pretty solid proof that sustainability and style aren’t at odds — and that sometimes the most creative ideas start with what you were about to throw away.








What do you think?
It is nice to know your opinion. Leave a comment.