










Introduction: Giving Old Canvas Art a New Life Through Upcycling
There is something deeply satisfying about transforming something old, overlooked, or unwanted into a stunning piece of home décor that draws compliments from every guest who walks through your door. Upcycling large canvas art is one of the most rewarding DIY projects you can undertake, combining sustainability with creativity in a way that produces genuinely beautiful results. Rather than discarding a canvas that no longer fits your style or purchasing expensive new artwork, you can breathe entirely fresh life into what you already have using simple materials and techniques that even beginners can master with confidence.
The concept of upcycled textured wall art has surged in popularity across platforms like Pinterest, Instagram, and home design blogs because it sits at the perfect intersection of affordability, personalization, and visual impact. A large canvas with dimensional texture commands attention in a room, creating depth and interest that flat printed artwork simply cannot replicate. The tactile quality of textured pieces adds warmth and a handcrafted feel that resonates with current interior design trends favoring organic, artisanal aesthetics over mass-produced goods.
What makes this particular DIY project so accessible is that you likely already own many of the supplies needed to get started. Whether you are working with a thrifted canvas from a garage sale, an old painting inherited from a relative, or a piece of your own artwork from years past that no longer suits your taste, any large canvas becomes a legitimate starting point for something spectacular. Throughout this guide, you will discover the techniques, materials, and creative approaches that transform ordinary canvases into extraordinary textured wall art that looks like it belongs in a high-end gallery or boutique hotel.
Gathering Your Materials and Preparing the Canvas Surface
Before you apply a single stroke of texture medium, proper preparation is the foundation that determines whether your finished piece looks polished and intentional or rough and amateurish. Start by assessing your canvas and deciding whether the existing image beneath needs to be primed over or whether it can serve as an interesting underlayer that peeks through your texture in unexpected ways. If you want a completely fresh start, apply two coats of gesso, a white primer used by artists, allowing each coat to dry fully before proceeding. Gesso seals the surface, provides tooth for your materials to adhere properly, and gives you a neutral foundation to build upon.
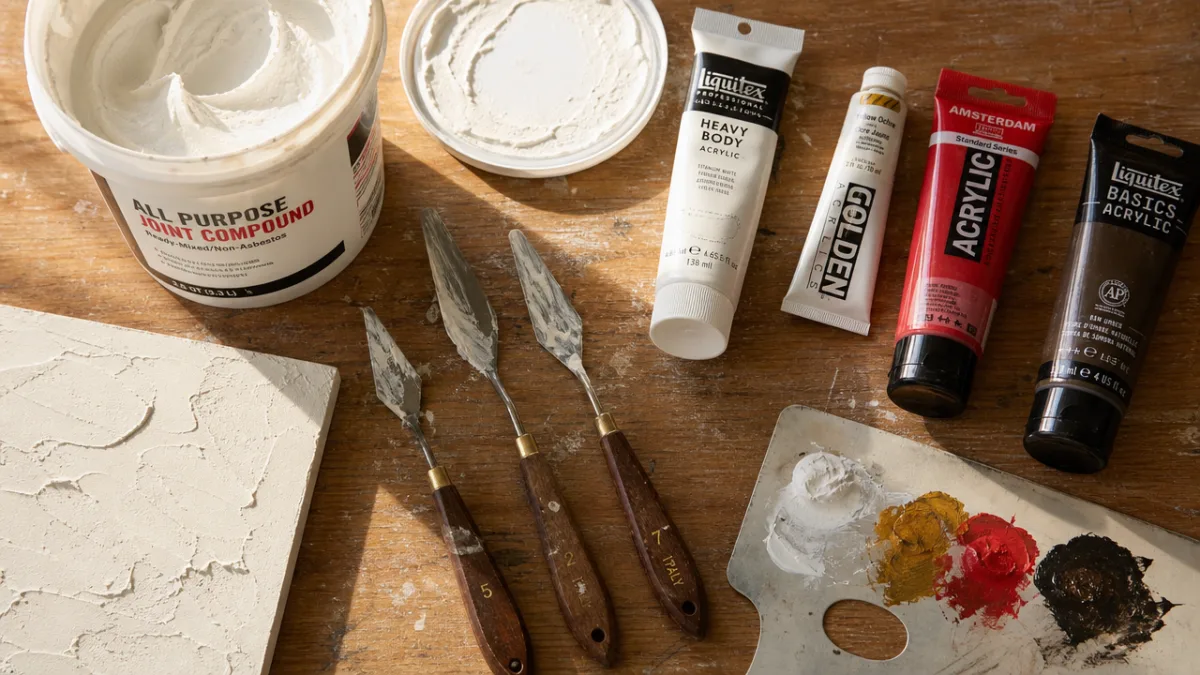
The materials you gather will largely dictate the kind of texture and finish your finished piece displays, so it is worth spending time thinking about your desired aesthetic before heading to the craft store or raiding your kitchen cabinets. Joint compound, also known as drywall mud, is one of the most popular choices for DIY textured canvas art because it is inexpensive, widely available, easy to manipulate, and dries to a hard, paintable surface. Other excellent texture-building materials include modeling paste, heavy body acrylic gel medium, spackling compound, sand mixed into paint, baking soda combined with white glue and paint, or even crumpled tissue paper adhered to the surface with Mod Podge.
Beyond texture mediums, you will want to assemble your application tools before beginning, since working quickly and intuitively often produces the most dynamic results. Gather palette knives in various sizes, old credit cards, foam rollers, stiff-bristled brushes, silicone spatulas, combs, bubble wrap, and even your own fingers and palms, all of which create entirely different surface effects when dragged, pressed, dabbed, or swirled through wet compound. Having everything within reach means you can work fluidly without stopping mid-application, which is especially important when working on a large canvas where drying edges can create unwanted seams if you pause too long.
Once your gesso is dry and your supplies are assembled, mix your chosen texture medium to the consistency that suits your application method. Joint compound straight from the container is usually ideal for palette knife work, while thinning it slightly with water makes it easier to spread with a roller for broader, more uniform coverage. If you are incorporating pigment directly into your texture medium rather than painting over it afterward, mix your acrylic paint in thoroughly at this stage, keeping in mind that the color will lighten significantly as the compound dries.
Exploring Texture Techniques That Create Stunning Visual Effects
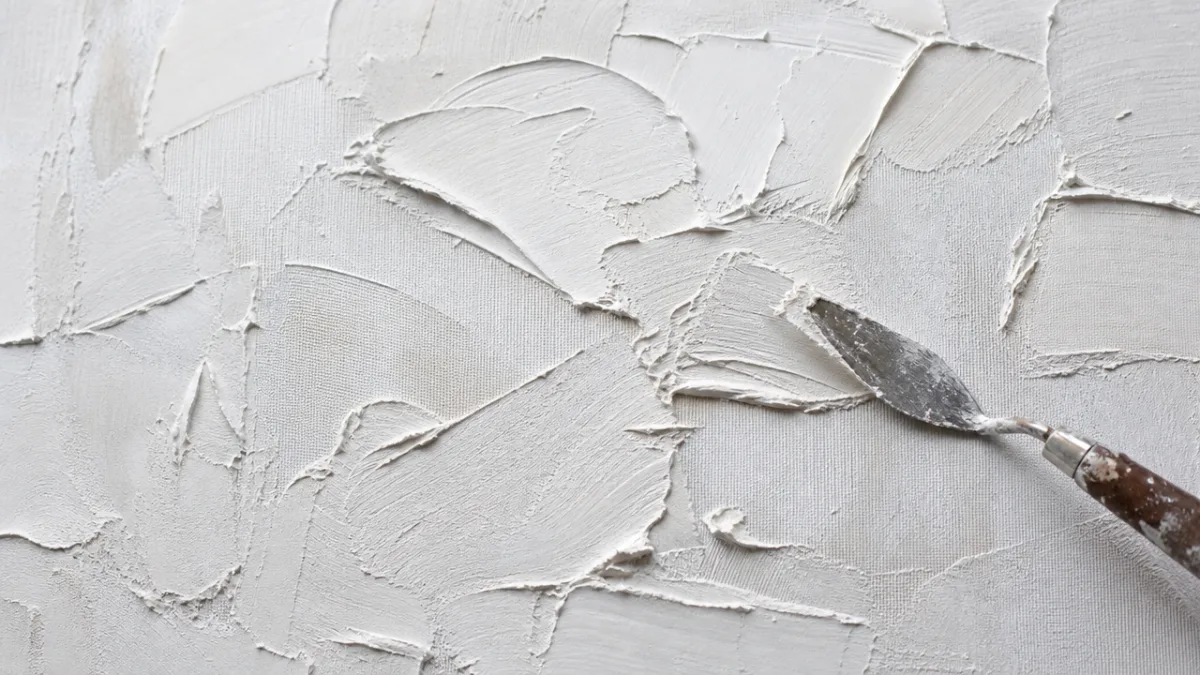
The beauty of textured canvas art lies in the virtually unlimited range of effects you can achieve depending entirely on how you apply your medium and what tools you use to manipulate it while it is still wet and workable. One of the most beginner-friendly approaches is the palette knife technique, where you load a flexible palette knife with joint compound or modeling paste and apply it to the canvas in broad, confident strokes, overlapping and layering as you go. The ridges and valleys left behind by the palette knife catch light beautifully when the piece is hung, creating dimension that shifts dramatically throughout the day as natural light moves across the surface.
For those who prefer a more organic, naturalistic texture reminiscent of weathered plaster walls found in Mediterranean villas or rustic European farmhouses, the skim coat approach works wonderfully. Apply a layer of thinned joint compound across the entire canvas surface using a wide drywall knife or broad spatula, then immediately use a crumpled piece of plastic wrap pressed and lifted across the wet surface to create irregular, organic patterns that mimic aged plaster, stone, or natural materials. This technique requires minimal artistic skill while producing results that look genuinely complex and intentional, making it ideal for first-time DIYers who feel nervous about freehand application.
Geometric and abstract line work is another incredibly popular approach that produces sophisticated, gallery-worthy results using simple application techniques. Using painter’s tape, mask off sections of your canvas in geometric shapes, triangles, diagonals, grids, or asymmetric abstract divisions, then apply your texture medium freely within each masked section before carefully removing the tape while the compound is still slightly wet. Each section can be built up to different heights, applied in different directions, or left with different surface qualities, creating a unified composition that feels both deliberate and dynamic.
Do not overlook the dramatic possibilities offered by impasto-style application, where thick dollops of paste are applied and left largely undisturbed to create highly sculptural, three-dimensional surfaces. This technique draws inspiration from the work of artists like Vincent van Gogh and Rembrandt, who applied paint in thick, expressive strokes that created physical relief on the canvas. For a contemporary interpretation, load your palette knife generously and drag it across the canvas in long, sweeping arcs, building up peaks and ridges that will cast deep shadows once the piece is painted and hung under directional lighting.
Popular Texture Patterns to Consider
- Organic swirling patterns that mimic ocean waves or wind-blown sand dunes, created with circular motions using a wide brush or gloved hand pressed into wet compound
- Linen or fabric impressions made by pressing actual burlap or textured cloth into wet paste and peeling it away to leave a delicate woven grid pattern on the surface
- Cracked earth effects achieved by applying a thick layer of compound, allowing it to partially dry, and then applying heat with a hair dryer to encourage natural cracking patterns
- Botanical reliefs created by pressing dried leaves, ferns, or flowers into wet paste, allowing it to dry completely, and then removing the organic material to leave a perfect impression behind
- Layered sediment effects that build up multiple thin coats of different toned compounds, sanding lightly between layers to reveal glimpses of each stratum below
Painting and Finishing Your Textured Masterpiece
Once your texture medium has dried completely, which typically takes anywhere from twelve to forty-eight hours depending on the thickness of your application and the humidity in your workspace, the real magic begins with the painting and finishing stage. This is where your dimensional surface transforms from a sculptural exercise into something that genuinely resembles fine art, and the good news is that the texture does a significant portion of the work for you simply by catching and diffusing light in ways that create natural-looking depth and tonal variation. Begin by applying a base coat in your chosen primary color using a foam roller, which will deposit paint across the raised portions of your texture while leaving the recesses partially unpainted.
The dry brushing technique is perhaps the single most transformative finishing step you can apply to a textured canvas, and it is remarkably simple to execute once you understand the basic principle. Load a wide, stiff-bristled brush with a small amount of paint that is slightly lighter than your base coat, then wipe most of it off onto a paper towel until almost no paint is transferring to the towel. Drag this nearly-dry brush lightly across the textured surface so that paint catches only on the very tips of the raised ridges while leaving the recesses in your original base color. This creates a subtle gradient effect across every bump and ridge that makes the texture appear genuinely three-dimensional rather than flat and painted.
For a more dramatic, high-contrast finish that creates real depth and visual punch, work in the opposite direction by applying dark paint into the low recesses of your texture using a small detail brush or a dry foam brush, then wiping back with a damp cloth before it dries completely. This antiquing or glazing technique is borrowed from furniture restoration and decorative faux finishing, and it creates the impression of accumulated shadows in crevices exactly the way shadows naturally fall in real sculptural or architectural surfaces. The combination of dry-brushed highlights on the peaks and darkened glazing in the valleys produces a level of sophistication that is genuinely difficult to achieve even with expensive purchased artwork.
Seal your finished piece with a matte or satin varnish once all paint layers are fully cured, typically after twenty-four hours. Varnish protects your work from dust, moisture, and UV fading, and it also unifies the surface sheen so that areas where paint was applied more thickly do not appear shinier than surrounding sections. Apply varnish in thin, even coats using a wide soft brush, working in one direction across the entire canvas to avoid streaks. Two to three light coats will give you far better results than one heavy application, which risks dripping, pooling in texture recesses, or creating a plasticky appearance that diminishes the organic quality of your handcrafted piece.
Color Palette Suggestions by Interior Style
- Coastal and Scandinavian: Soft whites, warm creams, sandy beiges, and pale grey-blues with gentle dry-brushed highlights in near-white for an airy, light-filled atmosphere
- Earthy Bohemian: Terracotta, burnt sienna, raw umber, warm ochre, and deep rust tones layered to suggest desert landscapes and sun-baked earth
- Modern Minimalist: Stark white or off-white textures with subtle cool grey shadows that allow the dimensional quality of the texture to be the sole source of visual interest
- Warm Contemporary: Deep charcoal or slate base coats with gold or bronze dry-brushed highlights that catch warm artificial lighting in the most spectacular fashion
- Romantic and French Country: Dusty rose, sage green, warm ivory, and antique gold combinations that evoke aged European plaster walls and patinated architectural details
Hanging, Displaying, and Styling Your Upcycled Canvas Art
A magnificent piece of textured wall art can be significantly diminished or magnificently enhanced by the way it is hung, lit, and styled within its space, making this final stage every bit as important as the creation process itself. The most critical consideration for textured artwork is directional lighting, because texture only reveals its full dimensional quality when light falls across it at an angle rather than directly in front of it. Position your canvas so that a nearby window, floor lamp, picture light, or recessed ceiling spotlight casts light from one side, creating those dramatic shadows and highlights across the ridges and valleys that make the piece come alive and shift throughout the day.
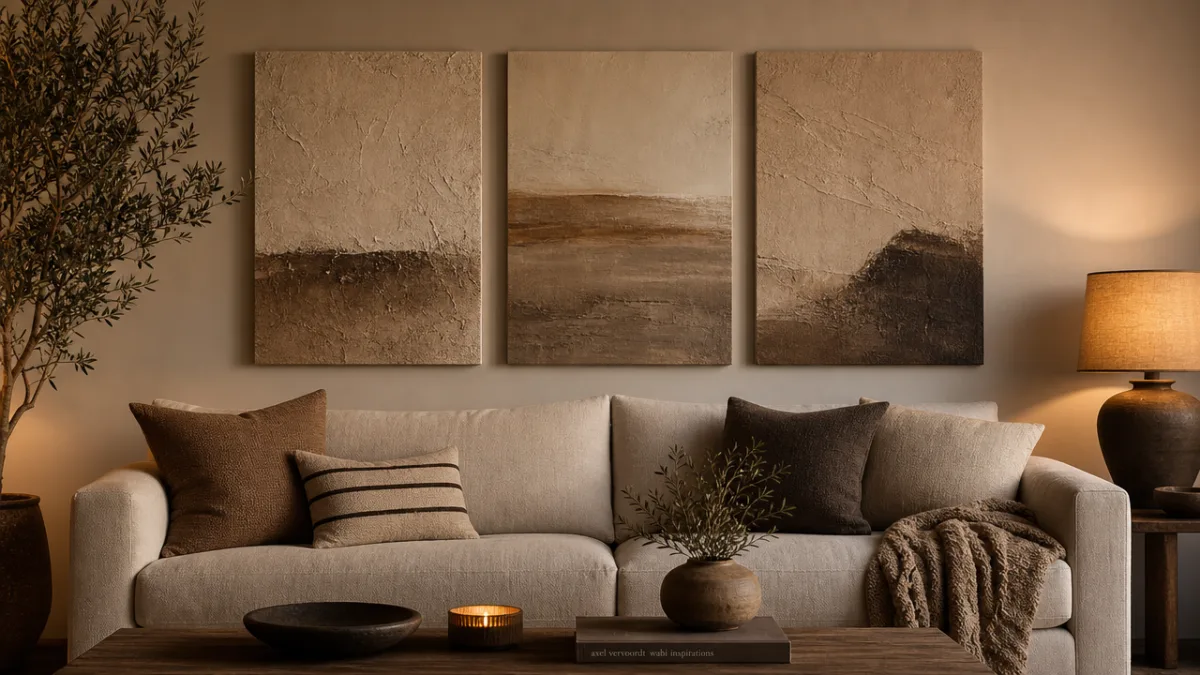
When determining placement on your wall, consider the canvas as an anchor for a broader styled vignette rather than an isolated object. A large textured canvas hung above a sofa, console table, bed headboard, or fireplace mantle becomes the foundation for a layered composition when accompanied by thoughtfully chosen supporting elements. Lean smaller framed pieces against the wall in front of it, allow trailing plants or sculptural dried botanicals to interact with the lower edge of the frame, or place a collection of ceramics, candles, or objects on the surface below that share the color palette and tactile quality of your artwork to create a cohesive, curated feeling throughout the entire vignette.
The frame, or deliberate absence of one, makes a substantial statement about the tone and style of your finished piece. Leaving the canvas unframed with natural wooden stretcher bars visible is perfectly appropriate for casual, organic, or bohemian interiors and emphasizes the handmade quality of the work. A simple floating frame in natural wood, black, or antique gold can elevate the same canvas into something that reads as more formal and gallery-worthy, suitable for contemporary or traditional spaces. Some artists choose to wrap their texture and paint around the sides of the canvas, creating a finished edge that looks complete from every angle without requiring any framing hardware or materials.
Consider creating a series of upcycled textured canvases in varying sizes and arranging them as a gallery wall rather than hanging a single large piece in isolation. A collection of three to five canvases using a consistent color palette but varying texture techniques creates a cohesive body of work that is deeply personal and utterly unlike anything available in a retail store. Gallery wall arrangements are most visually successful when they maintain consistent spacing between pieces, usually two to four inches, and when the overall grouping is treated as a single visual unit whose collective shape is as carefully considered as the individual pieces within it.
Sustainability, Cost Savings, and the Deeper Value of Making Art by Hand
One of the most compelling reasons to embrace upcycled canvas art as a DIY practice extends well beyond the aesthetic results to encompass genuine environmental responsibility and the deeply satisfying experience of contributing to a circular economy with your own two hands. Every large canvas rescued from a thrift store, garage sale, estate clearance, or the back of a closet represents not only the material cost savings of avoiding a new purchase but also the meaningful diversion of a canvas, stretcher bars, and potentially a frame from a landfill. The art world generates enormous quantities of waste as tastes change and canvases are discarded, making upcycling a genuinely impactful form of creative stewardship that aligns your making practice with values of sustainability and mindful consumption.
From a purely financial perspective, the economics of DIY textured wall art are difficult to argue against when you consider what comparable artwork costs at retail or through galleries. A single large canvas in the thirty-by-forty-inch or larger range commands prices starting at several hundred dollars in home décor stores like Pottery Barn, West Elm, or Restoration Hardware, with gallery-quality textured pieces frequently priced in the thousands. By contrast, your entire investment in an upcycled piece might amount to the cost of a thrifted canvas, a container of joint compound costing a few dollars, and acrylic paints you likely already own, keeping your total material cost well under twenty dollars for something that could convincingly sell for twenty times that amount at a craft fair or artisan market.
There is also a profound psychological dimension to making art by hand that no purchased object can replicate, something that behavioral researchers and psychologists increasingly recognize as the IKEA effect, the well-documented tendency for people to assign significantly greater value, pride, and emotional attachment to things they have made themselves. When you hang a piece of textured wall art that you created from something discarded and forgotten, you are not merely decorating a wall. You are displaying tangible evidence of your own creativity, patience, problem-solving, and skill, all of which contribute to a sense of competence and self-efficacy that genuinely enhances wellbeing in ways that simply purchasing décor cannot.
Teaching this project to children, hosting it as a group crafting activity among friends, or approaching it as a meditative solo practice are all equally valid ways to engage with upcycled textured canvas art as a continuing creative practice rather than a single project completed once and forgotten. The skills you develop applying and manipulating texture mediums translate directly into other decorative arts including furniture refinishing, decorative wall treatments, sculptural ceramics, and mixed media collage. Many people who complete their first textured canvas find themselves immediately planning their second, experimenting with new materials, bolder colors, or more ambitious compositions as their confidence grows and their creative vocabulary expands with every subsequent piece they make.








What do you think?
It is nice to know your opinion. Leave a comment.