










Kitchen Cabinet Organization Hacks: 7 Step-by-Step Ideas to Maximize Storage
Why Kitchen Cabinet Organization Changes Everything
If you’ve ever opened a kitchen cabinet only to have a avalanche of mismatched lids, forgotten spice jars, and mystery containers tumble out at you, you already understand the quiet frustration of a disorganized kitchen. The kitchen is the heart of the home, a place where meals are prepared, conversations happen, and daily routines take shape. When the cabinets are chaotic, that chaos bleeds into everything else — meal prep takes longer, grocery shopping becomes redundant, and the simple act of cooking feels like a chore before you’ve even turned on the stove.
The good news is that kitchen cabinet organization doesn’t require a full renovation, a massive budget, or even a full weekend of effort. With the right strategies and a few clever tools, you can completely transform how your kitchen functions. The difference between a cluttered cabinet and a well-organized one often comes down to using vertical space wisely, grouping items by purpose, and investing in a handful of inexpensive organizers that make everything accessible at a glance. Small changes compound quickly when applied consistently across your cabinets.
This article walks you through seven practical, step-by-step hacks that real home organizers swear by. Whether you’re starting from scratch after a move, trying to reclaim a single drawer, or completely overhauling your entire kitchen storage system, these ideas are scalable and adaptable. You don’t need a perfectly designed kitchen to have a perfectly organized one — you just need a solid plan, a bit of intention, and the willingness to let go of items that no longer serve you.
Hack 1 — Declutter Before You Organize
The single biggest mistake people make when trying to organize their kitchen cabinets is skipping the decluttering step entirely. They buy bins and baskets, rearrange everything, and then wonder why the system falls apart within a week. The truth is that no organizational system can rescue a cabinet overstuffed with things you don’t actually use. Before you place a single organizer, you need to pull everything out, examine it honestly, and make some decisions about what truly earns a place in your kitchen.
Start by emptying one cabinet at a time rather than pulling everything out at once, which can feel overwhelming and often leads to giving up halfway through. As you remove each item, place it into one of three categories: keep, donate, or discard. Keep items you use at least once a month. Donate duplicates, gadgets you’ve never touched, and items in good condition that simply don’t fit your cooking style. Discard anything broken, expired, or damaged beyond practical use. This process alone tends to free up a surprising amount of space — often 20 to 30 percent of your total cabinet capacity.
Once you’ve decluttered, take stock of what remains before buying any organizational products. Lay everything out on your counter and group similar items together: baking supplies, pots and pans, dry goods, spices, snacks, and so on. This inventory step helps you understand what types of organizers you actually need rather than guessing or buying things that won’t fit your specific collection of items. Measuring your cabinet interiors at this stage is also essential — a well-intentioned purchase that doesn’t fit the space is money wasted.
Quick Decluttering Checklist
- Check expiration dates on all pantry items and spices — toss anything past its prime.
- Look for duplicates of the same tool or appliance and keep only the best version.
- Ask yourself honestly: “Did I use this in the last six months?” If not, it’s a candidate for donation.
- Remove anything that belongs in a different room, such as tools, craft supplies, or mail.
- Evaluate appliances stored in cabinets — if you haven’t plugged it in this year, it may not need prime real estate.
Hack 2 — Use Vertical Space With Shelf Risers and Stackable Organizers
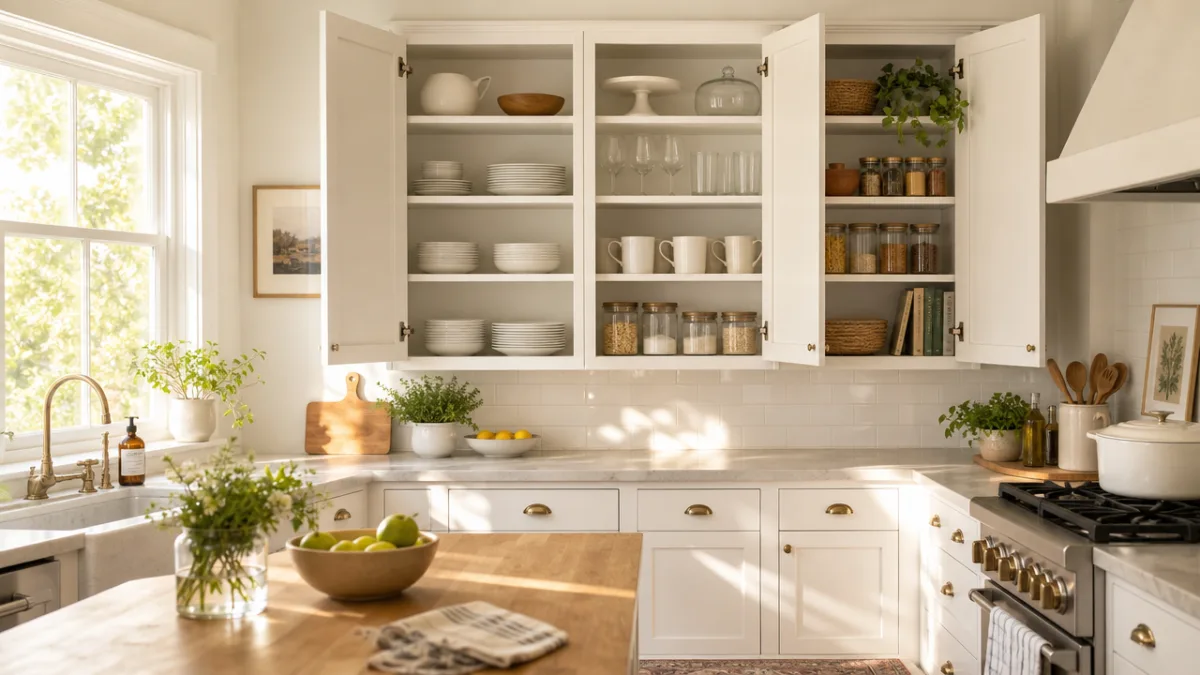
Most kitchen cabinets are designed with a generous amount of vertical space between shelves, and most people fill only the bottom portion of that space, leaving a significant portion unused. Shelf risers are one of the most transformative tools in any organizer’s toolkit precisely because they address this problem directly. By adding a riser inside a cabinet, you effectively double the usable surface area on a single shelf, allowing you to store items on two levels instead of one without any installation required.
Shelf risers work especially well in upper cabinets where dishes, bowls, and glasses are stored. Instead of stacking plates until the pile becomes unstable, you can use a riser to create two distinct tiers: one for everyday dishes and one for items used less frequently, like serving platters or seasonal bowls. The same concept applies to pantry cabinets, where canned goods and boxed items often get lost behind taller items placed in front. A simple riser brings the back row up to eye level, ensuring nothing gets buried and forgotten.
Stackable organizers take this principle even further by allowing you to build upward in cabinets with adjustable or taller interiors. Wire stackable shelves, modular acrylic organizers, and bamboo risers all offer flexibility to customize the configuration based on what you’re storing. When shopping for these organizers, look for options with a small footprint but significant height capacity, and always measure your cabinet depth and width before purchasing. The goal is to use every cubic inch of space intentionally rather than allowing the interior to become a jumbled pile that requires excavation to find anything.
Hack 3 — Organize Pots, Pans, and Lids With Dedicated Systems
Pots and pans are among the most challenging items to organize in any kitchen because of their varied shapes, sizes, and the awkward relationship between the pots and their corresponding lids. The most common approach — stacking everything inside one another — works until it doesn’t, which is usually the moment you need the pan at the very bottom of the pile. Dedicated pot and pan organization systems solve this problem by storing each item separately and accessibly.
A vertical pot rack or a deep drawer with dividers is often the most efficient solution for pots and pans. Vertical storage, whether inside a cabinet using a rack or a series of vertical dividers similar to those used for baking sheets, allows you to pull out individual pieces without disturbing everything else. This approach also protects the coating on nonstick pans, which degrades over time when pans are stacked directly against each other. Placing a layer of felt or a pan protector between stacked pieces is a good interim solution if vertical storage isn’t possible in your space.
Lids deserve their own dedicated storage area, separate from the pots themselves. A lid organizer — either a tension rod setup inside a cabinet door, a freestanding wire rack, or a drawer-mounted system — keeps lids upright, visible, and easy to match with their corresponding pots. One of the most satisfying small wins in kitchen organization is opening a cabinet and being able to grab both a pot and its lid in a single motion without any searching. This level of accessibility is achievable in virtually any kitchen layout with minimal investment in the right organizers.
Top Options for Pot and Lid Storage
- Tension rod lid organizer: Mount inside a cabinet door to hold lids vertically without any drilling.
- Deep drawer with peg system: Adjustable pegs let you customize spacing for pots of different diameters.
- Vertical divider rack: Stores pans, baking sheets, and cutting boards upright in a lower cabinet.
- Pull-out cabinet organizer: A soft-close pull-out tray that brings the back of a deep cabinet to you.
- Hanging pot rack: Overhead ceiling or wall-mounted solution ideal for frequently used cookware.

Hack 4 — Conquer the Spice Cabinet With Labels and Uniform Containers
The spice cabinet is one of those areas that tends to become disorganized almost immediately after any attempt to tidy it. This is partly because most households accumulate spices from multiple sources — grocery stores, specialty shops, gift sets — in containers of wildly different shapes, heights, and label orientations. The result is a visual jumble where finding cumin requires moving six other jars and squinting at sideways labels. A cohesive spice organization system doesn’t just look better; it genuinely saves time during cooking when every second counts.
Transferring spices into uniform containers is the gold standard approach for spice organization, and while it requires an initial investment of time and money, the payoff is substantial. Matching glass or clear acrylic jars of the same size create visual harmony and allow you to see at a glance how much of each spice you have remaining. Pair this with a label maker or printed labels applied to the jar lids, and you have a system that allows you to store spices in a single layer in a drawer or on a tiered shelf riser with all labels visible at once — no more lifting jars to read what’s underneath.
For those who prefer to keep original containers, a tiered spice rack that creates two or three levels inside the cabinet brings everything into view without the need to transfer anything. Alphabetical organization works well for people who cook with a wide variety of spices and struggle to remember where each one lives. Others prefer to organize by cuisine type — keeping Mexican spices together, Italian seasonings together, and baking spices in their own group — which speeds up meal prep significantly when you’re cooking a specific type of dish and need several spices at once.
Hack 5 — Maximize Deep Cabinets With Pull-Out Drawers and Lazy Susans
Deep cabinets are both a blessing and a curse in kitchen design. They offer abundant storage space, but that depth becomes a liability when items slide to the back and disappear into a dark abyss. Most people have experienced the phenomenon of discovering a forgotten can of soup or an ancient bottle of vinegar lurking at the rear of a deep lower cabinet. Pull-out drawer inserts and lazy Susans are the two most effective solutions for making deep cabinet interiors fully accessible and usable.
Pull-out drawer inserts slide into existing cabinet spaces and convert a standard cabinet into something functionally similar to a deep drawer, where you can see and access everything without crouching down and reaching into the back. Many of these inserts are designed to be installed without professional help, using simple screws or adhesive mounting systems. For corner cabinets, which are notoriously difficult to access efficiently, a full-extension pull-out unit that swings out and rotates can effectively triple the usable storage compared to leaving items statically placed in the corners.
Lazy Susans — the rotating circular trays that allow you to spin items to the front rather than reaching for them — work exceptionally well in both corner cabinets and deep pantry cabinets. Stackable two-tier lazy Susans are particularly effective for storing oils, vinegars, sauces, and condiments, where the variety of bottle heights makes standard shelving inefficient. Because the tray rotates, every item is always within easy reach with a simple spin, which dramatically reduces the likelihood of items being pushed to the back and forgotten. Choose models with a slight lip or edge to prevent items from sliding off during rotation.
Hack 6 — Use Cabinet Doors as Additional Storage Space
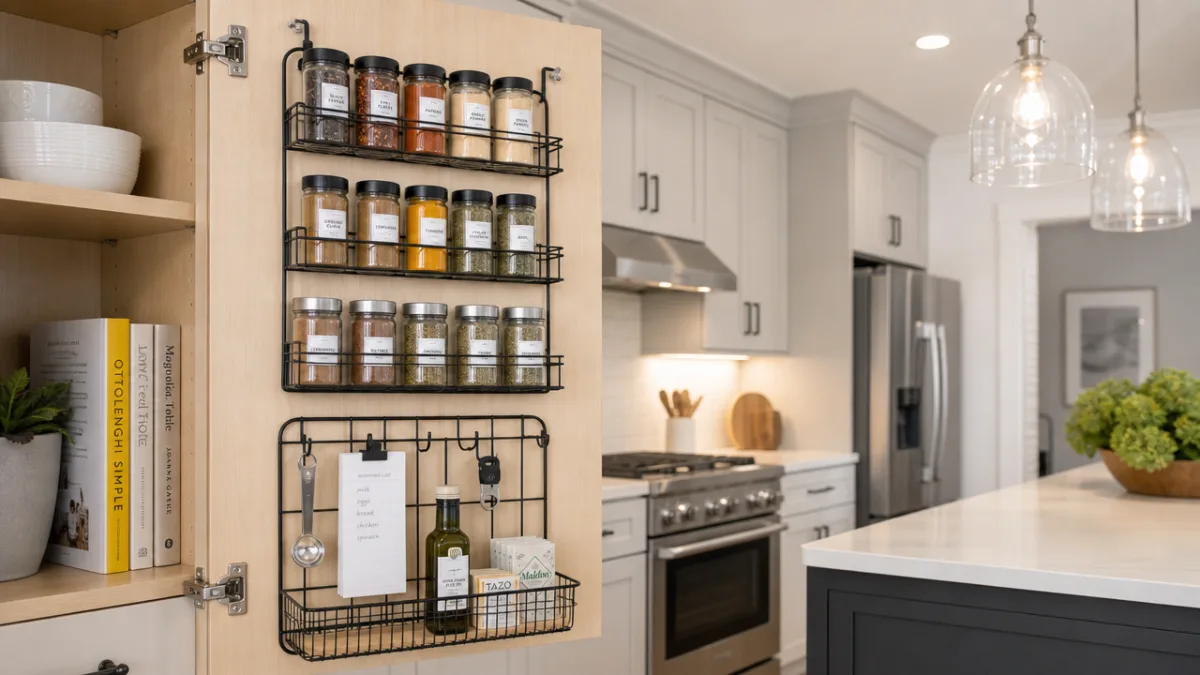
Cabinet doors represent some of the most overlooked storage real estate in any kitchen. The interior face of a cabinet door is a flat, sturdy surface that can accommodate a surprising variety of organizers, transforming what was previously dead space into highly functional storage. Door-mounted organizers are particularly valuable in kitchens where every interior shelf inch is already in use and finding additional space requires a creative approach rather than a traditional one.
Over-the-door organizers come in many configurations: narrow wire racks for spice jars, clear pocket organizers for small packets and pouches, towel bars for hanging measuring cups and spoons, and small shelves designed to hold cleaning supplies under the sink. For upper cabinet doors, a slim wire rack that holds three to six frequently used spice jars or small bottles can free up significant shelf space inside the cabinet. These racks mount using adjustable clips that fit over the door, requiring no drilling and leaving no permanent marks — ideal for renters or those who prefer reversible solutions.
Under-sink cabinet doors are especially well-suited for door-mounted storage. A cleaning caddy mounted to the door keeps dish soap, sponges, and cleaning sprays organized and off the cabinet floor, making it easier to access the space beneath for items like garbage bags and larger cleaning products. Adding a towel bar to the door provides a place to hang a dish towel or cleaning cloth within reach of the sink. When combined thoughtfully, door storage can add the equivalent of an entirely new shelf’s worth of capacity to each cabinet — a significant gain in kitchens where space is at a premium.
Hack 7 — Maintain Your System With a Weekly Reset Routine
Every organizational system, no matter how thoughtfully designed, requires maintenance to stay effective over time. The most common reason kitchen cabinet organization fails is not that the system was poorly designed — it’s that no maintenance routine was established to support it. Life moves quickly, groceries get unloaded in a hurry, cooking creates creative chaos, and children or partners who weren’t involved in the organization process don’t always share the same instinct for returning things to their designated places. A weekly reset routine is the antidote to this gradual entropy.
A kitchen reset doesn’t need to take more than ten to fifteen minutes. Designate a specific time each week — many people find Sunday evening or Monday morning works well — to do a quick audit of each cabinet. Look for items that have drifted from their assigned spots and return them. Check that lids are paired with their pots, spices are in their correct positions, and the pantry is arranged with oldest items in front. Wipe down any sticky shelves or spill-prone areas while you have everything out. This brief, consistent habit prevents the small daily drifts from accumulating into the overwhelming chaos that required a full organization overhaul in the first place.
It’s also worth revisiting your organizational system as a whole every three to six months and asking whether it’s still working for how your household actually functions. Cooking habits change with the seasons, new items are purchased and old ones used up, and family needs evolve over time. An organization system is not a permanent installation — it’s a living arrangement that should adapt as your life does. The seven hacks in this article are tools, not mandates, and the best kitchen organization system is always the one that you and your household will actually maintain consistently over the long term.
Your Weekly Kitchen Reset Checklist
- Return any items that have migrated from their designated spots back to their correct locations.
- Check the pantry for expired items and add any running-low staples to your shopping list.
- Wipe down shelf liners, lazy Susans, and organizer trays that collect crumbs or spills.
- Confirm all pot-lid pairs are matched and stored together correctly.
- Spend two minutes straightening the spice rack and ensuring labels are facing forward.
- Quick-scan the under-sink cabinet and restock cleaning supplies as needed.
The kitchen you deserve is not the one you’ll have after a complete renovation — it’s the one you’ll have after applying these seven focused, achievable strategies to the cabinets you already own. Organization is less about perfection and more about creating systems that reduce friction in your daily life. When your kitchen works with you instead of against you, cooking becomes more enjoyable, grocery shopping becomes more intentional, and the simple act of preparing a meal becomes something to look forward to rather than dread. Start with one cabinet, apply these principles one at a time, and watch how quickly the cumulative effect transforms your entire kitchen experience.








What do you think?
It is nice to know your opinion. Leave a comment.