










DIY Floral Backdrop: A Complete Guide to Creating Stunning Flower Walls
Introduction to Floral Backdrops
Floral backdrops have become one of the most beloved decorative elements in modern event design, photography, and home décor. Whether you are planning a wedding, a birthday celebration, a baby shower, or simply want to add a touch of botanical beauty to your living space, a DIY floral backdrop offers an incredibly versatile and visually striking solution. The great news is that with the right materials, a little patience, and some creativity, you can craft a breathtaking flower wall entirely on your own without spending a fortune on professional event decorators.
The appeal of a floral backdrop lies in its ability to transform any ordinary space into something truly magical and memorable. A lush wall of blooms creates an instant focal point that draws the eye, elevates the atmosphere, and provides the perfect background for photographs. In the age of social media, a beautiful floral backdrop is not just a decoration — it becomes an experience in itself, encouraging guests to pose, share, and remember the occasion for years to come. From soft pastels to bold jewel tones, the color possibilities are virtually limitless.
Creating your own floral backdrop also gives you complete creative control over every detail. You decide the color palette, the size of the installation, the types of flowers used, and the overall aesthetic — whether that is romantic and garden-style, sleek and modern, tropical and vibrant, or rustic and wildflower-inspired. This guide will walk you through every step of the process, from choosing your materials and planning your design to assembling the backdrop and keeping it looking fresh throughout your event.
Planning Your Design and Choosing a Color Palette
Before you purchase a single flower or piece of foam, the most important step is to sit down and plan your design thoroughly. Start by determining the size of your backdrop. A standard photo backdrop is typically around eight feet tall and eight feet wide, but you can scale this up or down depending on your venue and intended use. Sketch a rough layout of how you want to arrange the flowers, noting where you would like denser clusters, trailing greenery, or pops of contrasting color. Having a visual reference — even a simple hand-drawn diagram — will save you enormous time and frustration during assembly.
Choosing your color palette is one of the most exciting parts of the planning process and should be done with careful consideration of the overall theme of your event or space. For weddings, soft blush pinks, creamy whites, and dusty mauves create a timeless and romantic atmosphere. For a garden party or spring celebration, consider a mix of lavenders, yellows, and mint greens. If you want something bold and editorial, deep burgundies paired with burnt oranges and lush emerald greenery make a dramatic statement. Always pull color swatches and test combinations in natural lighting before committing to your final palette.
Consider the ratio of flowers to greenery in your design, as this balance will significantly affect the final look. A backdrop that is heavy on greenery with strategically placed blooms tends to feel lush, organic, and slightly wild — reminiscent of an English cottage garden. A backdrop dominated by tightly packed florals with minimal greenery feels more opulent, formal, and intentional. Most designers recommend aiming for roughly sixty to seventy percent florals and thirty to forty percent greenery to achieve a balanced, full appearance. You should also consider incorporating varying textures through the use of different flower varieties, which adds depth and visual interest to the finished piece.
Gathering Your Materials and Tools
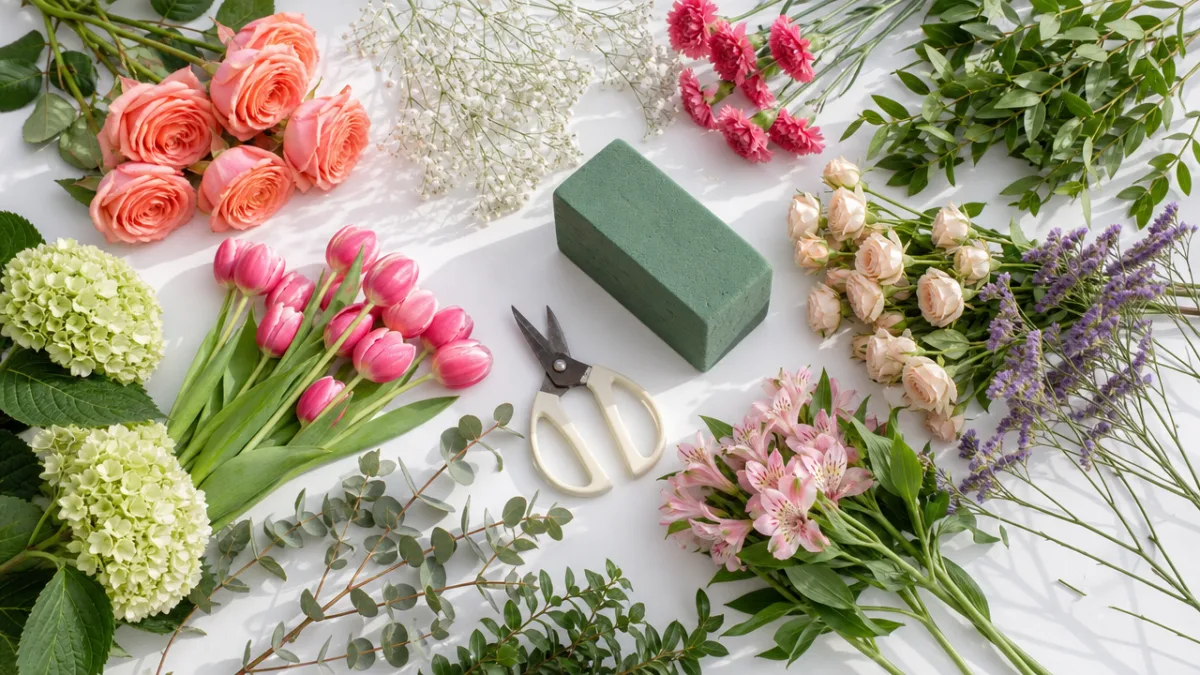
Having the right materials on hand before you begin will make the entire assembly process far smoother and more enjoyable. The materials you need will depend largely on whether you are working with fresh flowers, silk flowers, or a combination of both. Fresh flowers create the most stunning and realistic results, but they require more careful handling and must be assembled close to the event date to ensure they remain vibrant. Silk or high-quality artificial flowers, on the other hand, can be assembled weeks in advance and reused multiple times, making them an excellent option for those on a tighter timeline or budget.
For a fresh flower backdrop, you will need floral foam bricks, which keep the stems hydrated and hold everything securely in place. You will also need a sturdy base structure — this can be a wooden frame, a metal pipe grid, a lattice panel, or even a simple chicken wire frame attached to a wall. Additional supplies include floral wire, floral tape, zip ties or cable ties for securing elements to the frame, sharp floral scissors or snips, a spray bottle filled with water to mist the flowers during assembly, and a hot glue gun for securing any elements that are not going into foam. Protective gloves are also a good idea when working with wired stems or thorny varieties like roses.
When shopping for flowers, consider the following popular varieties that work exceptionally well in backdrop designs:
- Garden roses — large, lush blooms that create a romantic, high-end look and come in a wide range of colors from blush to deep crimson.
- Hydrangeas — voluminous flower heads that fill space quickly and efficiently, making them both beautiful and cost-effective for large installations.
- Ranunculus — delicate, ruffled blooms with a tissue-paper-like appearance that add softness and texture.
- Baby’s breath (gypsophila) — a classic filler flower that adds an airy, cloud-like quality and works beautifully in both minimalist and maximalist designs.
- Eucalyptus — a versatile greenery choice with a subtle silvery hue and a lovely natural fragrance.
- Fern fronds — lush, arching greenery that adds movement and a tropical or woodland feel depending on the variety chosen.
Purchase your flowers from a wholesale flower market if possible, as this will significantly reduce your costs compared to buying from a traditional florist. Many cities have flower districts or wholesale suppliers that sell directly to the public, particularly on weekends. Alternatively, online wholesale flower retailers ship fresh-cut blooms directly to your door and often offer far better pricing than local retail stores. When calculating quantities, it is always wise to purchase ten to fifteen percent more flowers than your estimate suggests you will need, as some stems may be damaged in transit or may not open as expected.
Building the Frame and Base Structure
A solid, stable frame is the foundation of any successful floral backdrop, and this step should never be rushed or underestimated. The most common and accessible option for home crafters is to build a simple wooden frame using two-by-four lumber. Cut four pieces to your desired dimensions — two for the top and bottom rails and two for the side uprights — and connect them with corner brackets and wood screws. Sand the edges lightly to prevent splinters, and if your backdrop will be visible from the back at any point, consider painting or staining the wood in a complementary color.
For a more professional and portable option, consider purchasing a pre-made backdrop stand made from heavy-duty aluminum or steel pipe. These stands are widely available online through event supply retailers and can typically be adjusted to various heights and widths. They break down for easy transport and storage, making them ideal if you plan to reuse your backdrop at multiple events. When using a pipe stand, you will attach your floral elements using zip ties, S-hooks, or by weaving wire through the pipe grid and threading it through your foam or fabric backing.
Once your frame is built and standing securely, you need to create a surface to attach your floral elements to. The most effective method for a foam-based fresh flower backdrop is to cut floral foam bricks to size and attach them directly to the frame using a combination of hot glue and floral wire. Soak the foam bricks thoroughly in water before cutting or attaching — this ensures the foam is fully saturated and will keep your flowers hydrated for the duration of your event. Layer the bricks tightly together across the entire surface of the frame, leaving no gaps, so that your finished backdrop has a uniformly full appearance with no visible backing showing through.
If you are working with silk or artificial flowers, your base options are even more flexible. Many crafters use a chicken wire grid stretched over the frame, through which they thread artificial stem wire to secure each bloom. Others prefer to work with a fabric backing — burlap, muslin, or canvas — stretched over the frame and secured with a staple gun, into which they hot glue their artificial flowers directly. For very large backdrops, a modular approach using interlocking foam panels (similar to those used for gym flooring) can be particularly efficient, as you can assemble sections separately and then connect them on-site.

Assembling and Arranging Your Flowers
With your frame and base fully prepared, it is time to begin the most rewarding part of the entire project — actually arranging your flowers. The key to achieving a professional, cohesive look is to work in deliberate layers rather than randomly placing flowers across the surface. Begin by establishing your greenery base layer first, inserting stems of eucalyptus, fern, or other foliage throughout the entire backdrop evenly. This creates a lush, full foundation and ensures that no bare foam or backing is visible once the final florals are in place. Angle your greenery stems in various directions to mimic the organic, natural growth patterns found in real garden settings.
Once your greenery layer is in place, begin adding your largest anchor flowers — the statement blooms like garden roses, peonies, or large dahlias — distributing them across the backdrop in a balanced, intentional pattern. A helpful technique is to mentally divide your backdrop into a diagonal grid and place one large anchor flower within each segment of that grid. This ensures even distribution and prevents the common mistake of clustering all the large flowers in one area while leaving others looking sparse. Step back from your work frequently to assess the overall composition from a distance, as details that look balanced up close can appear uneven when viewed from several feet away.
After your anchor flowers are placed, move on to your medium-sized blooms — ranunculus, spray roses, carnations, or similar mid-size varieties. These flowers fill the gaps between your anchor blooms and begin to build density across the backdrop. Insert these stems at varying angles to create depth and dimension rather than a flat, one-dimensional surface. The goal is to create a sense that the flowers are growing outward from the wall in different directions, which gives the backdrop a naturally abundant and organic quality that looks far more sophisticated than a flat arrangement.
Finally, fill any remaining gaps with your smallest filler flowers and accent elements. Baby’s breath, wax flowers, chamomile, and similar small blooms are perfect for this stage, as they nestle neatly between larger flowers and add that final layer of fullness and texture that elevates the entire piece. At this stage you can also add any special decorative elements you have planned — trailing ivy or string of pearls for a cascading effect, small clusters of berries for an autumnal feel, or delicate butterfly accents or LED fairy lights woven through the florals for an extra touch of whimsy and magic.
Caring for Your Backdrop and Troubleshooting Tips
Once your floral backdrop is fully assembled, proper care will ensure it remains beautiful and fresh for as long as possible. For fresh flower backdrops, misting the flowers gently with a spray bottle every few hours is essential, particularly in warm or air-conditioned environments where petals can dry out and begin to wilt. If you have the option, keep the backdrop in a cool room or air-conditioned space until shortly before it is needed, as heat is the primary enemy of cut flowers. Avoid placing fresh flower backdrops in direct sunlight, which will cause petals to bleach and wilt within hours.
It is a good practice to assemble fresh flower backdrops no more than twenty-four hours before the event to ensure peak freshness and vibrancy. However, some hardier flowers like carnations, chrysanthemums, and alstroemeria can last up to forty-eight hours with proper misting and cool storage. If you notice a bloom beginning to wilt or brown during the event itself, you can often simply remove the stem carefully with a pair of scissors and fill the gap with a fresh bloom or a cluster of baby’s breath, a task that takes only a moment and goes largely unnoticed by guests. Having a small emergency kit of extra flowers, floral wire, and hot glue nearby during your event is highly recommended.
For silk or artificial flower backdrops, maintenance is considerably simpler but still requires some attention. Dust can accumulate on artificial petals over time, dulling their appearance and making them look less realistic. Use a soft-bristled brush or a can of compressed air to gently remove dust between uses. Store your artificial backdrop in a cool, dry location away from direct sunlight, which can cause color fading in even high-quality silk fabrics over time. When disassembling the backdrop after an event, take care to handle it gently and wrap individual sections in tissue paper before packing to prevent flowers from being crushed or bent out of shape.
Some common challenges you may encounter during assembly or the event itself include stems that refuse to stay in place, sections of foam that begin to dry out, and flowers that open too quickly or remain frustratingly closed. To address loose stems, reinforce them with a small piece of floral wire twisted tightly around the base of the stem and inserted deeply into the foam at an angle. For dried-out foam, carefully use a dropper or syringe to inject small amounts of water directly into the foam without disturbing the surrounding flowers. If blooms are opening too slowly, place them in a warm room overnight before assembly; if they are opening too quickly, store them in a cool location and avoid ethylene-producing fruits nearby, as ethylene gas significantly accelerates the aging process in cut flowers.
Creative Variations and Inspiration Ideas
One of the most exciting aspects of creating a DIY floral backdrop is the sheer breadth of creative possibilities available to you. Once you have mastered the basic technique, you can begin experimenting with different styles, structures, and materials to create truly unique installations. An ombre floral backdrop, for example, gradually transitions from one color to another across the surface — perhaps from deep violet at one edge to soft lavender and finally to pure white at the opposite edge — creating a stunning gradient effect that photographs beautifully and feels highly intentional and sophisticated.
For a more architectural approach, consider creating a geometric floral backdrop by dividing your frame into distinct sections — hexagons, triangles, or diamonds — and filling each section with a different flower variety or color. This style works particularly well for modern or minimalist events where clean lines and deliberate structure are part of the overall aesthetic. Another popular variation is the half-backdrop or corner installation, where florals cover only a portion of the frame — perhaps the top third and one side — allowing the natural wall behind to remain visible and creating an asymmetrical, editorial look that feels fresh and contemporary.
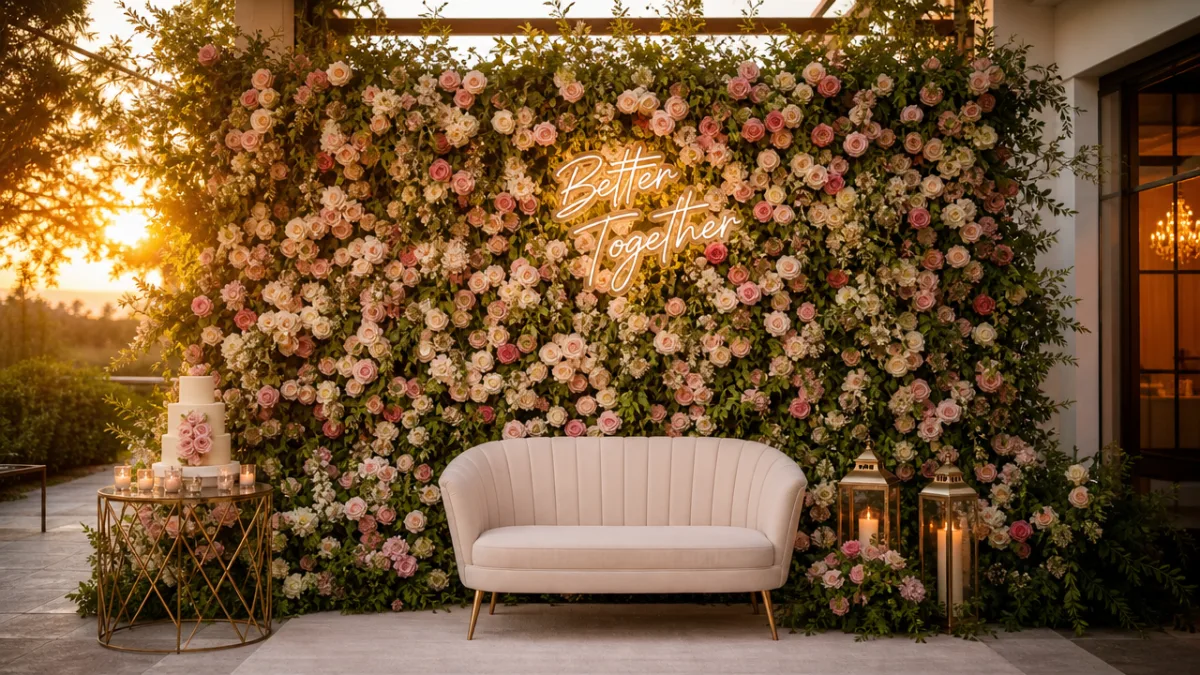
For outdoor events or garden parties, consider extending your backdrop with trailing garlands that drape from the top of the frame downward, framing the sides like living curtains. You can hang lanterns, candles in glass holders, or small framed photographs from these garlands to add additional layers of detail and personality. A moon gate — a large circular frame filled with flowers — is another spectacular option that has grown tremendously in popularity for weddings and styled photoshoots. These circular backdrops create a beautiful framing device for photographs and serve as a natural gathering point for guests throughout the event.
Beyond events, DIY floral backdrops have found a wonderful home in personal spaces and home studios. Content creators and photographers frequently install permanent or semi-permanent silk flower backdrops in their home studios, providing a beautiful and consistent background for product photography, portrait sessions, and video content. A smaller version of the floral backdrop — perhaps three feet by three feet — can serve as a beautiful piece of wall art in a bedroom, nursery, or living room, particularly when created with high-quality silk blooms in colors that complement the existing décor. The versatility of the floral backdrop truly knows no bounds, limited only by your imagination and the space available to you.








What do you think?
It is nice to know your opinion. Leave a comment.