










“`html
The Home-Building Hack Every New Homeowner Should Request From Their Contractor
Building a home from scratch is one of the biggest financial and emotional commitments most of us will ever make. Between picking floor plans, agonizing over finishes, haggling with contractors, and wading through permits, it can feel like the decisions never end. But here’s something experienced builders and savvy homeowners already know: there’s one simple thing you can request — something almost no one advertises but nearly every builder can accommodate — that could save you thousands of dollars and a whole lot of future headaches. It’s called a pre-drywall inspection, and you’ll want to pair it with a dedicated punch-list walkthrough before your walls get sealed up for good.
What Is the Pre-Drywall Hack and Why Does It Matter?
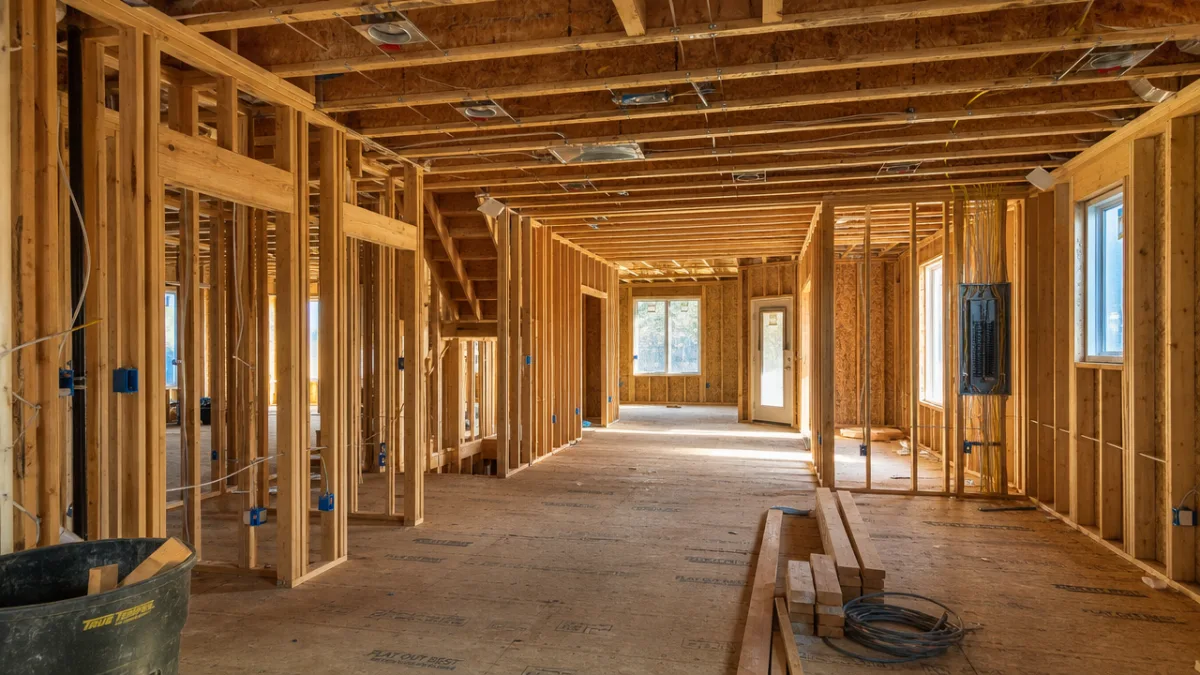
Before drywall goes up in a new construction home, there’s a short but critical window where every electrical wire, plumbing pipe, HVAC duct, insulation batt, and structural element is completely out in the open. That window usually lasts just a few days before the crew comes in and closes everything up permanently behind sheets of gypsum board. Most buyers — especially first-timers — never even think to schedule an independent inspection during this phase, assuming the builder’s own checks are enough. Honestly? They often aren’t, at least not when it comes to protecting your interests as the person who’s actually going to live there.
What makes this so powerful is how little it costs compared to what it can save you. A licensed home inspector doing a pre-drywall walkthrough typically runs $200 to $500 depending on where you live and the size of the home. Now compare that to what happens if a misrouted plumbing line, improperly installed insulation, or an out-of-code electrical panel gets discovered after the walls are already sealed. Repairs at that point can run anywhere from $2,000 to well over $20,000 — and that’s before you factor in the stress and delays that come with tearing out finished work to fix something that should’ve been caught weeks earlier.
The hack goes beyond just the inspection itself, too. Smart homeowners also ask their builder to photograph all the wall cavities before drywall goes in. That creates a permanent visual record of exactly where every wire, pipe, and duct lives inside your walls. Fast-forward a few years, and you want to mount a TV, add an outlet, or a plumber needs to find a pipe — that documentation is invaluable. A lot of builders will do this at no extra charge just because you asked. The catch is that almost nobody ever does ask.
How to Make the Request Without Alienating Your Builder
One of the biggest reasons homeowners skip this step is that they don’t want to rock the boat with their contractor. There’s a real anxiety around pushing too hard — worry that asking for independent inspections will sour the relationship or somehow result in a crew that cares less about your project. That concern is understandable, but it’s mostly unfounded as long as you frame the request the right way. A reputable builder who does good work will actually welcome a pre-drywall inspection — it’s a chance to show off what they’ve done. Builders who push back hard against independent inspections are, in a way, telling you something important about how much confidence they have in their own standards.
The best move is to get inspection rights written directly into your contract before you sign anything. Most standard new construction contracts cover builder inspections and municipal code checks, but they don’t automatically guarantee your right to bring in your own independent inspector at key stages. Ask your real estate attorney or buyer’s agent to add a clause that explicitly gives you that right at the pre-foundation, pre-drywall, and pre-closing phases, with reasonable advance notice to the builder — usually 24 to 48 hours. Having it in writing removes all ambiguity and sets a professional tone right from the start.
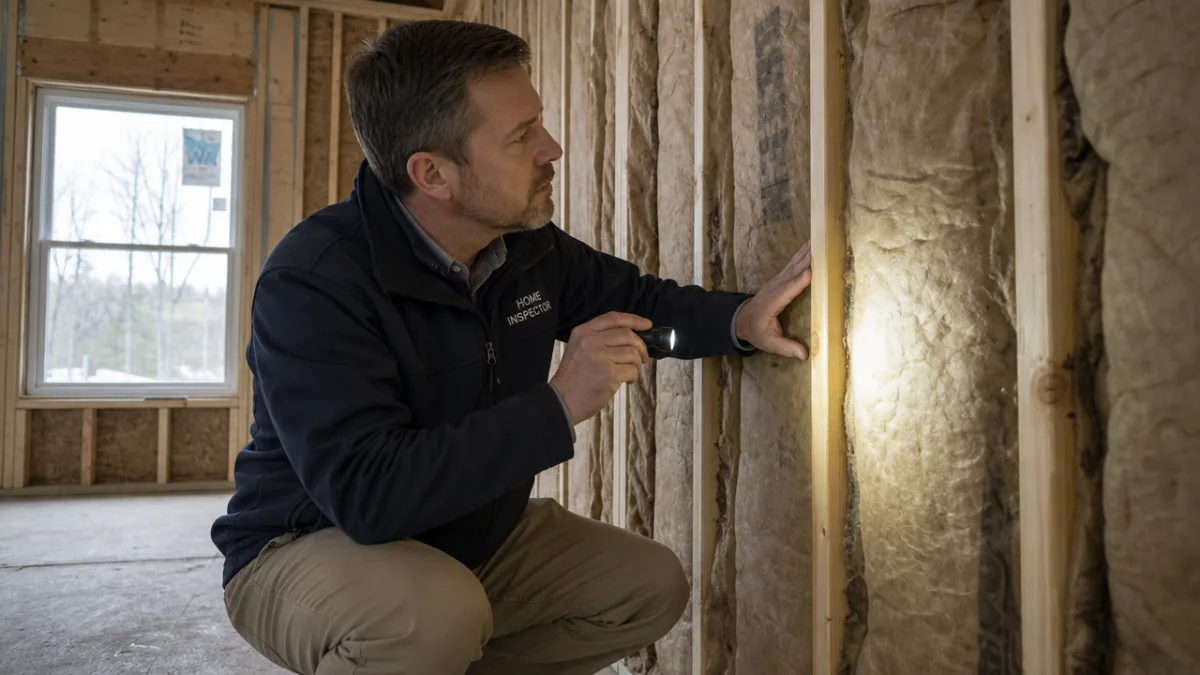
When you actually bring it up with your builder, frame it as a collaborative quality-control effort rather than an interrogation. Something like, “We’re really excited about the build and want to make sure we document everything before the walls close up,” signals that you’re a partner, not an adversary. Show up with a notebook, a flashlight, and your inspector, and walk through room by room while taking your own photos alongside the professional report. Builders tend to respond well to engaged, detail-oriented clients — and honestly, crews often do sharper work when they know someone’s paying close attention.
What Inspectors Look for During a Pre-Drywall Walkthrough
A good inspector doing a pre-drywall exam works through a detailed checklist covering every system that’s visible inside those open wall cavities. On the electrical side, they’ll check that wire gauge matches the circuit breaker ratings, that wires are properly stapled and protected where they pass through framing, that junction boxes are positioned correctly for the eventual drywall thickness, and that the panel is sized right for the home’s anticipated load. These aren’t cosmetic details — bad wiring is one of the leading causes of residential house fires and can mean failed inspections that push your move-in date back by weeks.
For plumbing, the inspector is verifying that supply lines are the right size, that drain pipes have the proper slope for gravity flow (usually a quarter inch of drop per foot), that water hammer arrestors are in place where needed, and that all penetrations through framing are protected with nail plates so a future screw or nail doesn’t accidentally punch through a pipe. They’ll also check that plumbing vents are properly connected and routed to the exterior. Improperly vented drains can let sewer gases seep into your living space — a genuine health hazard that’s notoriously difficult to diagnose and nearly impossible to fix once the walls are closed.
HVAC ductwork gets special attention at this stage because it’s one of the most commonly shortcut systems, and those shortcuts often go undetected for years. Inspectors check that duct connections are sealed with mastic or metal tape rather than cheap cloth duct tape that deteriorates quickly, that duct sizing actually matches the load calculations for each room, and that returns are properly balanced against supply vents. Insulation gets a look too — for correct R-value, proper installation without gaps or compression, and appropriate vapor barrier placement for your climate zone. A missing or misplaced vapor barrier can lead to moisture building up inside your wall cavities, which eventually turns into mold remediation that’s extremely expensive to deal with.
Beyond the Walls: Additional Requests Worth Making
The pre-drywall inspection is the centerpiece of this strategy, but it works best as part of a broader approach to protecting your investment throughout the whole build. Think about requesting documentation at every major milestone, starting with a foundation inspection before the concrete pour is finished. Structural problems that originate at the foundation are the most expensive category of home repair there is, and they can compromise the entire building if not caught early. A licensed structural engineer — which is different from a general home inspector — can review foundation plans, reinforcement placement, and concrete specs for a few hundred dollars. That’s a rounding error compared to foundation remediation that can run into the tens of thousands.
It’s also worth requesting a blower door test once the building envelope is complete but before the interior finishes go in. A blower door test depressurizes the home and measures air infiltration, showing you exactly where air is sneaking in or out of the structure. Too much air infiltration drives up your heating and cooling costs for the entire life of the home and can contribute to moisture problems inside your wall assemblies. Sealing those issues before drywall, flooring, and trim are installed is dramatically cheaper than addressing them afterward. Many energy-efficient building programs like ENERGY STAR for New Homes require blower door testing, but you can request it independently even if your builder isn’t enrolled in any of those programs.
One more thing most people never think to ask for: a detailed orientation session with your builder before closing. Walk through the home together and have them show you where every shutoff valve, circuit breaker, cleanout port, and mechanical access point is located. Ask them to demonstrate how to operate the HVAC system, water heater, and any smart home tech that got installed. Request a binder with all the product manuals, warranty documents, and as-built drawings that show any deviations from the original plans. This information is incredibly useful down the road, and builders almost always have it — they just rarely hand it over unless someone specifically asks.
The Long-Term Financial Impact of This Single Decision
It’s easy to look at these extra inspections and documentation requests as unnecessary expenses that pile more friction onto an already complicated process. But the numbers tell a pretty different story. Research from the American Society of Home Inspectors and various consumer advocacy groups consistently shows that homes with documented pre-drywall inspections have significantly fewer major defect claims in the first five years of ownership. And importantly, the kinds of defects that get caught during pre-drywall inspections — electrical issues, plumbing misroutes, insulation gaps — tend to get worse over time rather than staying stable, which means catching them early compounds in value the longer you live there.
Just look at the energy efficiency math. A home with properly installed, correctly specified insulation and a tight building envelope is going to use meaningfully less energy than an equivalent home where installation corners were cut. Over a 30-year mortgage in a moderate climate, the difference in energy costs between a well-insulated and a poorly insulated home of the same size can easily exceed $15,000 to $25,000 in today’s dollars — and that number climbs higher in extreme climates. That potential saving dwarfs whatever you’d spend on a thorough pre-drywall inspection. The inspection isn’t a guarantee of perfection, but it dramatically improves the odds that your insulation, air sealing, and mechanical systems are done right from day one.
There’s also the question of resale value and disclosure obligations. In most states, you’re legally required to disclose known defects when you sell a home. Sellers who have thorough documentation of their home’s construction — pre-drywall inspection reports, as-built photos, system warranties — are in a much stronger legal and marketing position than sellers who have nothing to show. Buyers and their agents respond well to that level of documentation because it reduces their perceived risk. You probably aren’t thinking about selling on the day you move in, but the records you gather during construction will have real value whenever that day eventually comes.
Making This Work in Practice: A Step-by-Step Approach
Turning this strategy from idea into reality takes a modest amount of planning and a willingness to advocate for yourself. The steps below will help you get the full benefit of the pre-drywall hack without creating unnecessary friction with your building team. The single most important principle is to start early — every one of these requests is far easier to accommodate when you raise it before contracts are signed than after construction is already underway.
- Before signing your contract: Have a real estate attorney review the purchase and build agreement. Ask for explicit language guaranteeing your right to independent inspections at the pre-foundation, pre-drywall, and pre-closing stages. Also request a clause requiring the builder to provide photographic documentation of wall cavities before drywall goes in.
- During design and planning: Find and hire a qualified independent home inspector with specific experience in new construction. Not all home inspectors work regularly on new builds, and the skill set is genuinely different from inspecting an existing home.
- About two weeks before drywall: Check in with your builder to confirm the expected drywall start date and schedule your independent inspection for two to three days before that. Give your inspector enough lead time to make sure they’re available.
- During the inspection: Walk through the home alongside your inspector and take your own photos and notes in addition to the professional report. Pay particular attention to the electrical panel, plumbing rough-ins, and insulation in exterior walls and the attic floor or roof deck.
- After the inspection: Go through the inspector’s report with your builder and put together a written list of anything that needs to be corrected, along with a timeline for getting it done. Confirm that everything’s been resolved before drywall moves forward.
- At final walkthrough: Gather all your documentation — inspection reports, photos, warranties, manuals, as-built drawings — into one organized binder or digital folder. Store it somewhere secure and easy to find for as long as you own the home.
None of this requires specialized knowledge, unusual access, or confrontational tactics. It just requires being proactive, staying organized, and being willing to ask questions that most buyers assume somebody else is already asking on their behalf. The reality of the construction industry is that schedules are tight, crews are often juggling multiple projects at once, and the natural economic pressure is to move fast rather than slow. Your job as the client isn’t to unreasonably pump the brakes — it’s to make sure that speed never permanently sacrifices quality in the parts of your home that will be hidden behind walls for decades.
The homeowners who benefit most from the pre-drywall hack aren’t people with construction backgrounds or engineering degrees. They’re ordinary people who simply learned to ask one well-timed question and put that question in writing before the build began. In a process that can feel completely overwhelming, this is one of those rare moments where a small, low-cost action pays off in a big way for years to come. Request the walkthrough, document everything, and let the walls close up knowing that what’s behind them was built to last.

“`








What do you think?
It is nice to know your opinion. Leave a comment.