










10 Easy DIY Kitchen Decor Ideas to Transform Your Space on a Budget
The kitchen is the heart of every home, a place where meals are crafted, memories are made, and families gather. Yet it’s also one of the most overlooked rooms when it comes to personal style and decoration. Many homeowners assume that upgrading a kitchen requires a full renovation, a professional designer, and a budget that runs into the thousands. The truth is that with a little creativity, some basic supplies, and a free afternoon, you can completely transform the look and feel of your kitchen without breaking the bank. DIY kitchen decor has surged in popularity for exactly this reason.
From handmade herb gardens to repurposed vintage finds, the world of DIY kitchen decor is rich with ideas that blend function with beauty. These projects don’t require advanced crafting skills or specialized tools. Most of them can be completed using materials you already have at home or can pick up inexpensively at a craft store or thrift shop. The key is knowing where to start and having a clear vision for the atmosphere you want to create in your kitchen space.
This article walks you through ten of the most popular and effective DIY kitchen decor ideas that home enthusiasts are currently loving. Whether your style leans toward rustic farmhouse, sleek modern minimalism, or colorful bohemian, there’s something here to inspire you. Each idea is approachable, budget-friendly, and designed to make a real visual impact. Let’s dive in and explore how a few clever touches can make your kitchen feel like a whole new room.
1. Create a Floating Herb Garden on Your Window Sill
One of the most beloved DIY kitchen projects of recent years is the floating or mounted herb garden, and it’s easy to see why. It combines practicality with visual charm, giving you fresh herbs at arm’s reach while adding a lush, living element to your kitchen decor. You don’t need a large windowsill or any special planting knowledge to pull this off. A simple row of matching terracotta pots, a few packets of herb seeds, and some potting soil is all it takes to get started. Herbs like basil, mint, rosemary, and thyme are particularly well-suited to indoor growing because they thrive in the warmth and indirect light that kitchen windows typically provide.
For a more polished look, consider painting your terracotta pots in a consistent color palette that matches your kitchen’s existing tones. White, sage green, or matte black are all popular choices that photograph beautifully and blend seamlessly with most kitchen styles. You can also use chalk paint to label each pot directly with the herb name, adding a handmade, artisanal quality that feels both personal and intentional. If windowsill space is limited, wall-mounted wooden planters or a tiered hanging planter can provide an equally charming solution while maximizing vertical space.
Beyond the aesthetics, a kitchen herb garden delivers ongoing practical rewards. Cooking with fresh herbs rather than dried ones dramatically elevates the flavor of your meals, and having them immediately accessible encourages more adventurous and frequent cooking. Guests who visit your kitchen will inevitably notice and admire the garden, making it a natural conversation piece. This is one of those rare decor projects that truly keeps on giving, growing more beautiful and useful with every passing week as the plants establish themselves and flourish.
2. Upgrade Your Kitchen with Open Shelving Displays
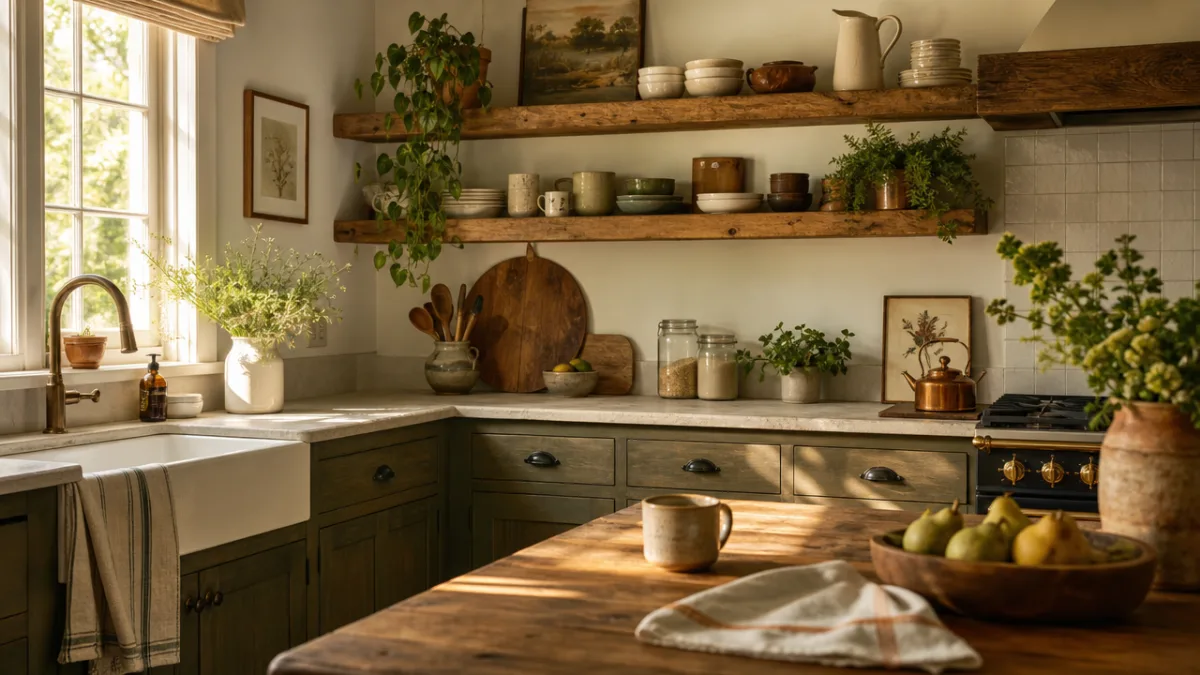
Open shelving has become a defining feature of modern and farmhouse kitchen aesthetics, and installing it yourself is far simpler than most people expect. The concept is straightforward: remove upper cabinet doors or add new floating shelves to display your most attractive kitchenware openly. This approach immediately makes a kitchen feel airier, more spacious, and more personalized. When done well, open shelves function like a curated gallery, showing off your favorite mugs, ceramics, cookbooks, and decorative objects in a way that closed cabinets simply cannot achieve.
The materials you choose for your shelves will heavily influence the overall aesthetic. Reclaimed wood planks give a warm, rustic farmhouse feel, while painted MDF or white-lacquered boards lend themselves to a clean, Scandinavian-inspired look. Pipe brackets in matte black or brushed brass add an industrial edge, while simple white bracket hardware keeps things classic and timeless. Whichever direction you choose, make sure the shelves are properly anchored into wall studs to safely support the weight of your kitchenware, especially if you plan to store heavier items like cast iron cookware or full sets of dinnerware.
Styling your open shelves is half the fun and requires a bit of editorial judgment. The key principle is to mix textures, heights, and categories in a way that feels curated but not cluttered. A stack of white plates next to a small potted succulent, a row of matching glass jars filled with dry goods, and a few colorful cookbooks standing upright creates a layered, lived-in look that is both beautiful and functional. Avoid the temptation to fill every inch of shelf space; deliberate gaps and breathing room are what distinguish a styled display from simple storage.
3. Design Your Own Chalkboard Wall or Panel
A chalkboard surface in the kitchen is one of those design elements that manages to be simultaneously stylish, functional, and endlessly versatile. You can use it to write weekly menus, grocery lists, inspirational quotes, or fun messages for your family. The beauty of chalkboard paint is that it can be applied to almost any smooth surface, whether that’s a section of wall, an old cabinet door, a wooden board hung on the wall, or even the side of a refrigerator. The project typically requires nothing more than a can of chalkboard paint, a roller, and a couple of hours of your time.
For a truly custom look, consider framing your chalkboard area with thin wooden molding painted in a contrasting color, creating the appearance of a large framed panel. This adds a polished, intentional quality to what might otherwise look like a simple painted rectangle. Alternatively, chalkboard contact paper offers an even easier and more renter-friendly option, as it can be applied and removed without causing damage to walls or surfaces. Both approaches yield a clean, attractive result that integrates naturally into a variety of kitchen styles.
The ongoing usability of a kitchen chalkboard is what makes it such a beloved DIY addition. Unlike most decorative elements that remain static, a chalkboard evolves with your household’s needs and moods. Seasonal messages, birthday greetings, recipe reminders, and doodles from children all find a natural home on its surface. This dynamic quality gives your kitchen a living, breathing personality that static art prints simply cannot replicate. And when you’re ready for a change, erasing and rewriting takes only seconds, making it one of the most flexible decor investments you can make.
4. Refresh Cabinet Hardware for an Instant Style Boost
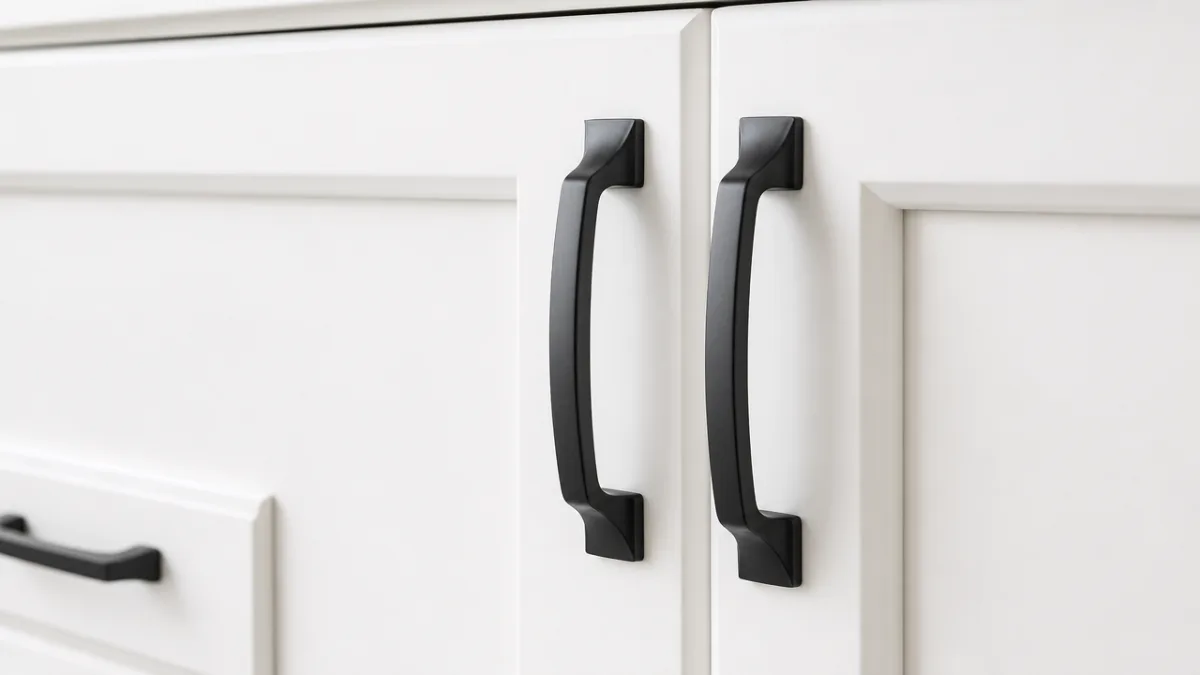
Few DIY kitchen updates offer as dramatic a visual payoff for as little effort and expense as swapping out your cabinet hardware. Drawer pulls, door knobs, and hinges are the jewelry of your kitchen cabinetry, and upgrading them can make even the oldest, most dated cabinets look refreshed and intentional. The process requires nothing more than a screwdriver, the new hardware, and perhaps thirty minutes to an hour depending on how many pieces you’re replacing. Yet the transformation is immediately noticeable and consistently impresses guests and family members alike.
The range of hardware styles available today is staggering, from sleek brushed nickel pulls that suit contemporary kitchens to ornate antique brass knobs that feel perfectly at home in a traditional or eclectic space. Matte black hardware has been particularly popular in recent years, offering a bold, modern contrast that works equally well against white, navy, or wood-tone cabinetry. Leather pulls are a newer trend that adds warmth and texture. When selecting hardware, aim for consistency in finish across the entire kitchen for a cohesive look, though mixing metals can work beautifully when done deliberately and sparingly.
Before purchasing new hardware, measure the existing hole spacing on your cabinet doors and drawers carefully. Most standard pulls are drilled at either 3-inch or 3.75-inch center spacing, but variations exist and purchasing hardware that doesn’t match your existing holes can mean additional drilling. Once you’ve confirmed your measurements and purchased your new pieces, the installation itself is genuinely quick and satisfying. It’s one of those rare home improvement tasks where you can start and finish in the same afternoon and immediately enjoy a noticeably upgraded kitchen environment.
5. Build a DIY Pegboard for Kitchen Organization and Style
Pegboards have long been a staple of workshops and garages, but the kitchen design world has fully embraced them as a stylish and supremely functional wall feature. A painted pegboard panel mounted on a kitchen wall gives you a highly customizable storage and display system that can hold everything from pots and pans to utensils, cutting boards, and small potted plants. The appeal lies not just in the organizational benefits but in the visual statement it makes: a well-arranged pegboard becomes a kind of functional art installation, revealing the tools of your culinary craft in an organized, attractive way.
Installing a kitchen pegboard is a satisfying weekend project that requires only basic tools. Start with a standard hardboard pegboard sheet from your local hardware store and cut it to your desired dimensions, or purchase pre-cut panels. Paint it in a color that complements your kitchen palette — dusty pink, deep forest green, white, or natural wood tones are all popular choices — and mount it to the wall using spacers that hold it slightly away from the surface, which is necessary for the hooks to function properly. A simple wooden frame around the perimeter gives it a more finished, furniture-like appearance.
The accessories and hooks available for pegboard systems allow for an enormous range of configurations. Straight hooks, S-hooks, shelf brackets, small bins, and even magnetic strips can all be attached and rearranged as your needs change. This flexibility is perhaps the pegboard’s greatest strength: unlike fixed shelving or drawer organizers, a pegboard layout can be completely reconfigured in minutes without tools. As your kitchen routines evolve and your collection of utensils grows, your pegboard simply adapts along with you, making it a decor investment that pays dividends for years to come.
6. Craft Personalized Kitchen Art and Printables
Wall art is one of the simplest and most affordable ways to inject personality into any room, and the kitchen is no exception. The good news for DIY enthusiasts is that creating custom kitchen art has never been easier or more accessible. Free design tools like Canva allow even complete beginners to create professional-looking prints featuring food quotes, recipe cards, botanical illustrations, or typographic designs. Once designed, these can be printed at home or sent to an online printing service for a few dollars, then framed with inexpensive frames from a craft or discount store.
For a more handmade aesthetic, consider watercolor paintings of your favorite fruits, vegetables, or herbs. You don’t need to be an accomplished artist for these to look charming and intentional; loose, impressionistic brushwork in a consistent color palette reads as stylishly artsy rather than amateurish. A grouping of three or five small watercolor paintings in matching frames creates a gallery wall effect that adds warmth and color to an otherwise neutral kitchen. Alternatively, pressed botanicals sealed under glass in simple frames make elegant, nature-inspired kitchen art that costs almost nothing to create.
Another creative approach is to incorporate meaningful personal elements into your kitchen art. A framed handwritten recipe card from a beloved family member, a vintage seed packet illustration, or a print of a map showing the origin of your family’s traditional cuisine all add layers of storytelling and sentiment that mass-produced art simply cannot replicate. These pieces become conversation starters and emotional anchors in your kitchen, connecting the daily act of cooking to something deeper and more meaningful. This is what truly transforms a functional kitchen into a space that feels genuinely and uniquely yours.
7. Upgrade Your Backsplash with Peel-and-Stick Tiles
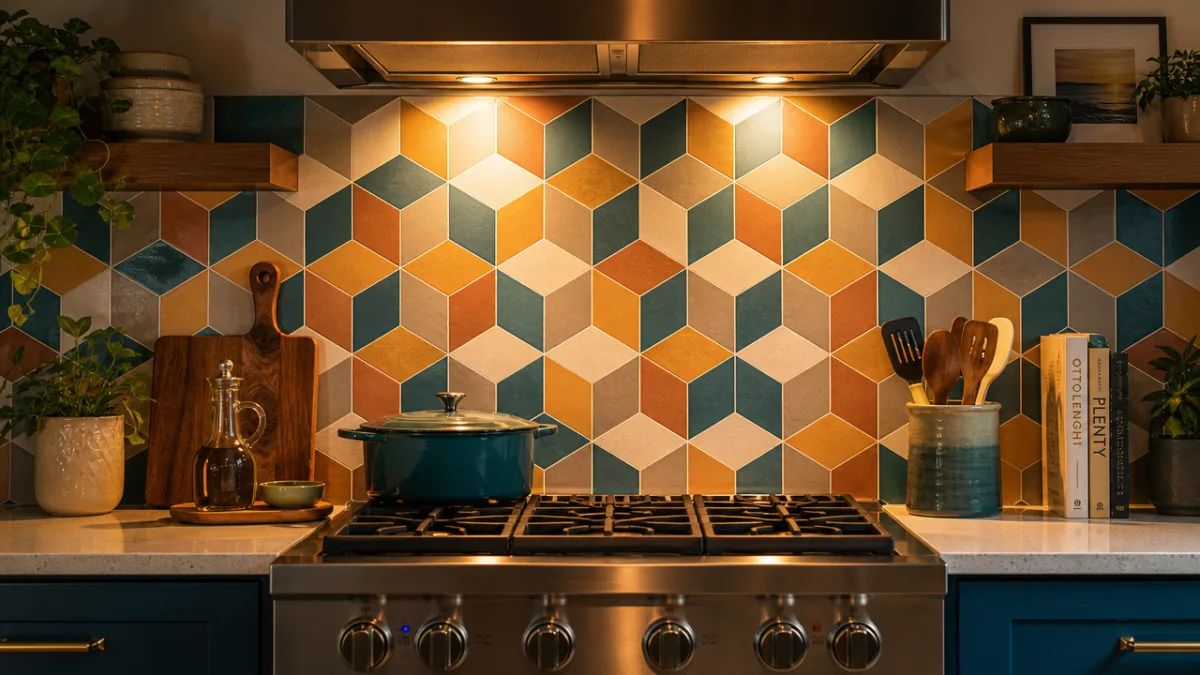
A fresh backsplash can completely redefine the visual center of a kitchen, and the advent of peel-and-stick tile options has made this upgrade genuinely achievable as a DIY project without professional installation or significant expense. These self-adhesive tiles come in an extraordinary range of patterns and finishes, from classic white subway tile to intricate Moroccan-inspired mosaics and contemporary geometric designs. Many of them are nearly indistinguishable from traditional tile at a casual glance, offering the visual impact of a high-end renovation at a fraction of the cost and effort.
The installation process for peel-and-stick backsplash tiles is refreshingly straightforward. The surface behind your stove or sink needs to be clean, smooth, and dry. From there, it’s essentially a matter of measuring carefully, cutting tiles to fit around outlets and edges, and pressing them firmly into place. Most products come with clear instructions and require only basic tools like a utility knife and a level. The entire project can typically be completed in a single afternoon, making it one of the most satisfying DIY kitchen updates in terms of effort-to-impact ratio.
For renters or those who like to change their decor regularly, many peel-and-stick tile products are designed to be removable without damaging the underlying surface, though it’s always wise to test a small section first. Even permanent installations offer significant advantages over traditional tiling in terms of cost and DIY accessibility. When selecting your pattern, consider the existing color story of your kitchen: a bold graphic tile works beautifully in a neutral kitchen that needs a focal point, while a softer textural pattern adds subtle interest without competing with existing design elements.
8. Transform Jars and Bottles into Stylish Kitchen Storage
Upcycling glass jars and bottles into kitchen storage and decor is one of the most sustainable, budget-conscious, and visually rewarding DIY projects you can undertake. Glass containers of all shapes and sizes — from pasta sauce jars to wine bottles to mason jars — can be repurposed as dry goods storage, vases, utensil holders, or decorative objects with minimal effort. When arranged thoughtfully on open shelves or a kitchen counter, a collection of matching or complementary glass containers creates a magazine-worthy aesthetic that looks expensive and intentional while costing almost nothing.
For a truly cohesive look, aim for consistency either in container shape or in lid style. Mason jars with matching metal lids, for example, create a satisfying uniformity when lined up on a shelf filled with different dry goods like lentils, rice, oats, and pasta. Adding hand-lettered or printed labels elevates the look further and makes the contents easy to identify at a glance. Chalkboard label stickers are a particularly flexible option, allowing you to update the labeling whenever you switch the contents of a jar without leaving any residue.
Beyond storage, glass bottles and jars make beautiful and free vases for fresh or dried flowers and herbs. A single stem of eucalyptus in a slim glass bottle, or a handful of wildflowers in a wide-mouth mason jar, adds a natural, effortless elegance to any kitchen surface. You can also group several different-sized bottles together for a botanical display that changes seasonally. This kind of living, organic decor brings warmth and life to the kitchen in a way that no manufactured product can truly replicate, and it reinforces the idea that beautiful design is fundamentally about curation and intention rather than expense.
9. Sew or Purchase Custom Kitchen Textiles
Textiles are among the most powerful and underutilized tools in kitchen decoration. Curtains, dish towels, placemats, table runners, and chair cushions all contribute significantly to the overall color story and tactile quality of your kitchen environment. For DIY enthusiasts with even basic sewing skills, creating custom kitchen textiles is an incredibly satisfying project that allows for complete creative control over pattern, color, and size. Even without sewing skills, the wide availability of beautiful ready-made textiles means this is an accessible upgrade for everyone.
Window curtains in particular can dramatically alter the atmosphere of a kitchen. Sheer linen panels in natural white or oatmeal tones soften light beautifully and give a kitchen an airy, casual elegance. Bold graphic prints in a window treatment can serve as the anchor of an entire kitchen color scheme, pulling together disparate elements into a unified visual story. If sewing simple cafe curtains feels too ambitious, tension rods and clip rings allow almost any fabric — even a beautiful piece of yardage that isn’t technically curtain fabric — to be hung as a window treatment with no sewing required.
Dish towels are another kitchen textile that punches well above its decorative weight. A set of beautifully printed or embroidered dish towels hung neatly from an oven handle or displayed folded on open shelves adds color and pattern to functional objects that are already present in your kitchen. Many craft enthusiasts enjoy stamping or stenciling plain cotton dish towels with food-themed motifs, creating personalized sets that also make wonderful handmade gifts. These small textile moments, accumulated throughout the kitchen, collectively create a sense of warmth, care, and lived-in beauty that elevates the entire space.
10. Install Under-Cabinet Lighting for Ambiance and Function
Lighting is the single most transformative element in any interior design project, and the kitchen is where thoughtful lighting pays perhaps its greatest dividends. Under-cabinet lighting, in particular, serves a dual purpose that makes it one of the most rewarding DIY kitchen upgrades available. Functionally, it illuminates your countertops directly, dramatically improving visibility for food preparation tasks that require precision and care. Aesthetically, it creates a warm, layered glow that makes your kitchen feel more sophisticated and inviting, particularly during evening hours when overhead lighting alone can feel harsh and flat.
The range of under-cabinet lighting options available today makes this a more accessible DIY project than ever before. Battery-operated LED strip lights or puck lights require no electrical work whatsoever and can be installed in minutes using adhesive backing. Plug-in LED strips are only marginally more complex, requiring access to an outlet or a simple extension solution. For a cleaner, more permanent installation, hardwired under-cabinet lights offer the most professional result, though this approach may require the assistance of a licensed electrician depending on your comfort level with basic electrical work.
When selecting your lighting, pay attention to the color temperature of the bulbs. Warm white light (around 2700K to 3000K) creates a cozy, inviting atmosphere that suits most kitchen environments beautifully, while cooler daylight-spectrum bulbs (5000K and above) offer superior visibility for detailed work but can feel clinical in a residential setting. Many LED strip systems now offer tunable color temperatures, allowing you to switch between warm ambient lighting in the evening and cooler task lighting when you’re actively cooking. This flexibility makes under-cabinet lighting not just a decorative addition but a genuinely functional upgrade that you’ll appreciate every single day.
Getting Started: Tips for Your DIY Kitchen Decor Journey
Embarking on a series of DIY kitchen decor projects is most successful when approached with a clear plan and a cohesive vision. Before you purchase any materials or pick up a paintbrush, take time to assess your kitchen as it currently stands. Identify the elements you love and want to preserve, the things that bother you most, and the overall atmosphere you’re hoping to create. Gathering inspiration images — whether from Pinterest, design magazines, or kitchen showrooms — and identifying the common threads between your favorites will help you define your personal style and make confident decisions about colors, materials, and textures.
Prioritization is also important when planning multiple projects. Rather than attempting everything at once, which can feel overwhelming and lead to half-finished projects, consider sequencing your upgrades logically. Start with high-impact, low-effort projects like hardware replacement or adding a herb garden to build momentum and confidence. Save more ambitious projects like pegboard installation or backsplash work for weekends when you have adequate time and energy. Completing projects one at a time also allows you to evaluate how each change affects the overall look before committing to the next step, preventing costly mistakes.
Finally, embrace the inherent imperfection and personality of DIY work. Handmade and self-installed elements carry a warmth and authenticity that mass-produced, professionally installed alternatives simply cannot replicate. Small variations in paint coverage, slight asymmetries in shelf placement, and visible brushstrokes on a painted pot all contribute to a sense of human presence and care that makes a kitchen feel genuinely lived in and loved. The goal of DIY kitchen decor is not a flawless showroom finish but a personal, comfortable, and beautiful space that reflects who you are and supports the daily rituals that make your kitchen the heart of your home.








What do you think?
It is nice to know your opinion. Leave a comment.