










10 DIY Crafts for Complete Home Organization: Transform Your Space with Rust-Inspired Style
Introduction: Why DIY Home Organization Changes Everything
There is something deeply satisfying about walking into a home where everything has its place. Clutter has a measurable psychological impact on our daily lives, contributing to elevated stress hormones, reduced focus, and a persistent sense of being overwhelmed. When your living space is disorganized, your mind often mirrors that chaos, making it harder to relax, concentrate, or feel genuinely at home in your own surroundings. The good news is that you do not need to hire a professional organizer or invest in expensive storage systems to reclaim your space.
DIY home organization projects offer something that store-bought solutions simply cannot: a perfect, customized fit for your exact space, your exact needs, and your personal aesthetic. The rustic, warm aesthetic often described as “wrapped in rust” — think weathered wood, aged metal accents, warm terracotta tones, and that beautiful oxidized patina — brings both function and soul to any room. These are not just organizational tools; they are pieces that tell a story and make your home feel lived-in and loved.
The ten DIY craft projects in this article have been curated to address the most common organizational challenges homeowners face, from chaotic entryways and overflowing kitchen drawers to tangled jewelry and cluttered home offices. Each project can be completed on a modest budget, and most require only basic tools and materials available at any hardware or craft store. Whether you are a seasoned DIY enthusiast or picking up a hot glue gun for the first time, these projects are approachable, rewarding, and genuinely transformative.
1. Reclaimed Wood and Pipe Entryway Organizer
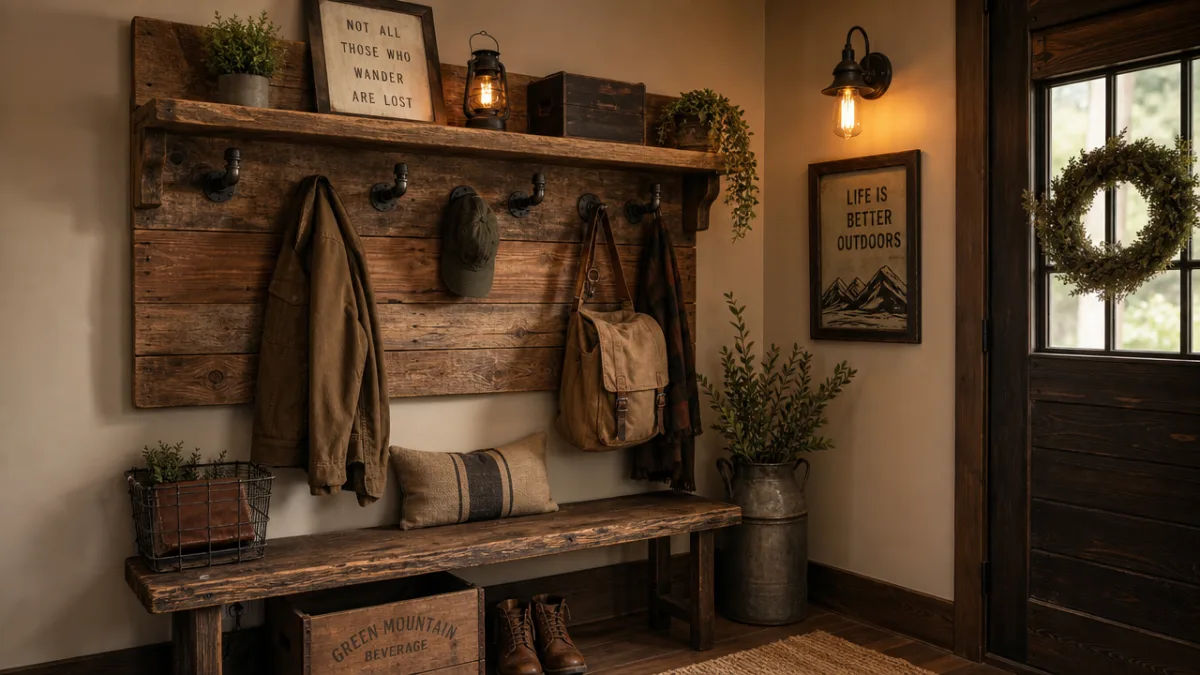
The entryway is the first thing you see when you come home and the last thing you interact with before heading out the door. An organized, beautiful entryway sets the tone for the entire house and can dramatically reduce the daily frustration of searching for keys, misplacing bags, or tripping over shoes. A reclaimed wood and pipe entryway organizer combines industrial metal pipe fittings — which naturally develop that gorgeous rust-kissed patina over time — with the warm grain of salvaged timber to create a wall-mounted station that handles coats, bags, keys, and mail all in one place.
To build this organizer, source a thick plank of reclaimed wood from a salvage yard, lumber yard, or even an old pallet. Sand it lightly to smooth any splinters while preserving the natural character marks and weathering. Mount industrial pipe flanges and short pipe sections directly into the wood to serve as hooks for coats and bags. Add a small shelf above using an L-bracket for mail, sunglasses, or a small plant. Below the main board, consider attaching a narrow tray or basket for keys and loose change.
The beauty of this project lies in its modularity. You can customize the number of hooks, the height of the shelf, and the overall dimensions to fit your specific entryway wall. The combination of raw iron pipe and aged wood creates a look that is simultaneously rustic and modern, practical and artistic. Seal the wood with a matte finish to protect it from moisture, and leave the pipe fittings uncoated if you love that natural rust progression — the oxidation is part of the charm and only deepens in beauty over time.
2. Mason Jar and Burlap Kitchen Countertop Organizer
The kitchen is often the most disorganized room in the house, and the countertop is ground zero for clutter accumulation. Utensils, spatulas, wooden spoons, scissors, and an endless parade of miscellaneous tools tend to pile up without a clear system to contain them. A mason jar and burlap countertop organizer solves this beautifully by grouping similar items together in an attractive, cohesive display that actually makes your kitchen feel warmer and more intentional rather than more cluttered.
Gather several mason jars of varying sizes — wide-mouth quart jars work well for larger utensils, while pint jars are perfect for smaller tools like peelers and melon ballers. Mount the jars to a painted or stained wooden plank using metal pipe clamps screwed directly through the back of the board. Wrap the board itself in burlap fabric, securing it with a staple gun, to add that warm, textured, farmhouse quality. The rust-toned metal clamps against the neutral burlap create a color palette that feels warm, organic, and completely at home in a cozy kitchen.
For a freestanding version, simply arrange several jars inside a shallow wooden crate or on a small tray. You can paint the lids with chalkboard paint and label the contents for even greater organization. Consider one jar for cooking utensils, one for measuring spoons and small tools, and one for pens, scissors, and other non-cooking items that inevitably end up in the kitchen. This project takes under an hour to complete and costs very little, yet it delivers an immediate, visible transformation to one of the busiest surfaces in your home.
3. Rope and Driftwood Bathroom Storage Ladder
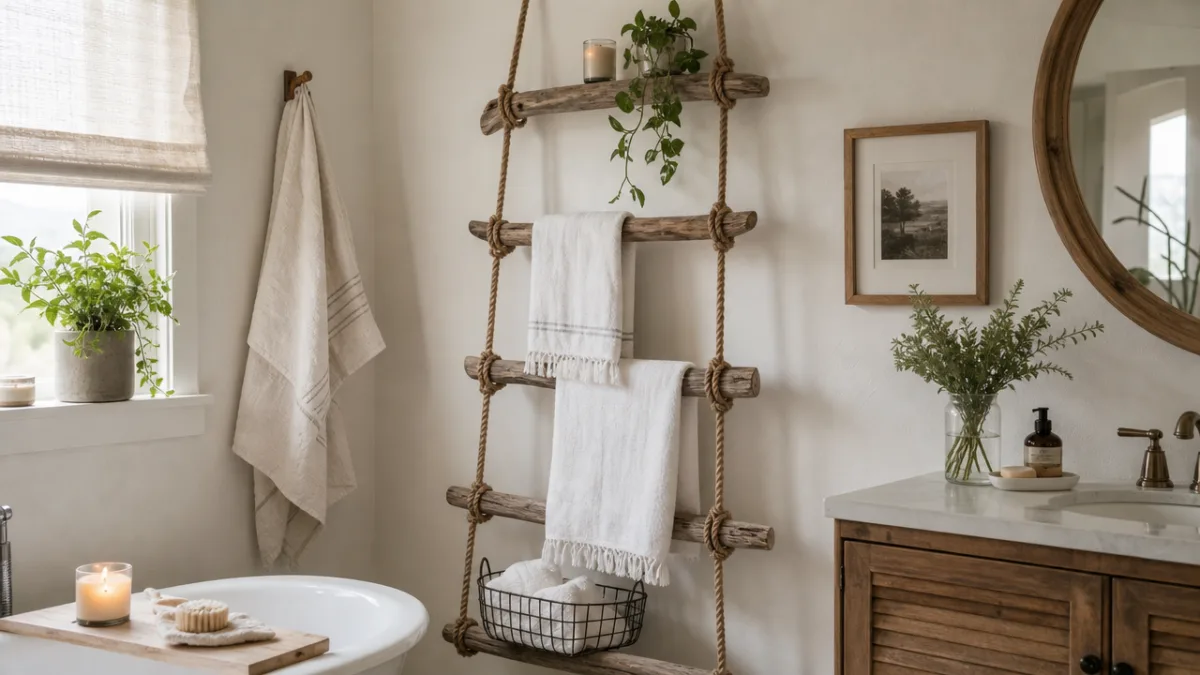
Bathroom storage is a perpetual challenge, especially in smaller homes where cabinet space is limited and the countertop fills up instantly with skincare products, hair tools, and toiletries. A rope and driftwood storage ladder offers a vertical solution that takes advantage of unused wall space while adding a sculptural, organic element to your bathroom decor. The combination of thick nautical rope and smooth, sun-bleached driftwood creates a beautiful contrast of textures, while the warm tones evoke that same earthy, natural quality central to the wrapped-in-rust aesthetic.
To build this ladder, find two lengths of thick driftwood or weathered dowels and three to four shorter crosspieces. Drill holes at even intervals through the vertical pieces and thread sturdy rope through, knotting it securely beneath each crosspiece to hold them in place. Hang the completed ladder from two ceiling hooks or wall-mounted brackets using additional rope lengths. From each crosspiece, you can hang small baskets, S-hooks, or even small canvas pouches to hold towels, toilet paper rolls, small plants, and bathroom essentials.
The ladder can also lean freestanding against the wall, propped between the wall and floor, which makes it easy to reposition and requires no drilling. This is especially appealing for renters or those who prefer a non-permanent solution. Layer towels and washcloths over the rungs for a spa-like look that keeps linens accessible without taking up drawer or shelf space. The overall effect is one of relaxed, curated organization — the kind that looks effortless but is actually highly functional.
4. Pegboard Command Center for the Home Office
The home office has become one of the most important rooms in the modern house, yet it is frequently the most disorganized. Papers pile up, cords tangle, stationery disappears into desk drawers never to be seen again, and the general sense of chaos makes it genuinely harder to focus and be productive. A pegboard command center addresses all of these problems simultaneously by bringing every tool, supply, and piece of information you need into one visible, accessible, and beautifully organized vertical display on your wall.
A standard sheet of pegboard from the hardware store forms the foundation. Paint it in a deep, earthy rust-red, warm terracotta, or muted ochre to lean into the warm organizational aesthetic. Mount the board to your office wall using spacer bolts that hold it slightly away from the surface, which allows pegboard hooks to insert properly. Then populate it with a combination of metal hooks, small wooden shelves, wire baskets, and clip holders. Arrange zones for frequently used supplies: a row of hooks for scissors, rulers, and tape; a small shelf for reference books and notebooks; wire cups for pens and pencils; and a section of clips or small frames for holding important papers, to-do lists, and inspiration images.
The pegboard’s greatest strength is its infinite reconfigurability. As your work needs change — and they always do — you simply rearrange the hooks and accessories rather than investing in a completely new system. This makes it a genuinely long-term organizational solution rather than a temporary fix. Adding small potted succulents or trailing plants to the board brings life into the workspace and has been shown in research to improve mood and productivity. The combination of warm painted tones, natural wood accessories, and metal hooks makes this board as visually appealing as it is functional.
5. Vintage Crate Modular Shelving System
Wooden crates have an enduring appeal in DIY organization, and for good reason. They are inexpensive, widely available, incredibly durable, and their open-front design makes everything stored inside instantly visible and accessible. When stacked and mounted as a modular shelving unit, vintage-style wooden crates create a storage system that feels collected and personal rather than mass-produced, lending warmth and character to any wall in the home. This project works beautifully in living rooms, bedrooms, hallways, and playrooms.
Source your crates from thrift stores, flea markets, craft stores, or online marketplaces where unfinished wood crates are available in bulk at low cost. Sand each crate lightly and then choose your finish: a dark walnut stain for a dramatic, moody look; a whitewash for something bright and airy; or a weathered grey stain for that perfectly aged, rustic character. Some crafters deliberately distress the wood with sandpaper or a wire brush after staining to deepen the vintage effect. Once finished, mount the crates directly to the wall using heavy-duty screws through the back panel into wall studs.
Arrange the crates in configurations that suit your storage needs — some oriented with the opening facing out for book and object storage, others turned on their side to create smaller divided compartments for folded textiles or categorized items. Use small label holders on the front edge of each crate for easy identification. The modular nature of this system means you can start with just four or six crates and expand the grid over time as your organizational needs grow. Add small battery-powered LED strip lights inside select crates to highlight displayed objects and create a warm, gallery-like ambiance.
6. Tension Rod Under-Sink Organizer
The cabinet under the kitchen or bathroom sink is notoriously difficult to organize. The awkward shape created by plumbing pipes, combined with the tendency to shove cleaning products and spare toiletries in without any system, creates a dark, chaotic cave that is frustrating to navigate daily. Tension rods offer a brilliantly simple DIY solution that costs almost nothing, requires zero drilling, and instantly doubles your usable storage space by creating a second level within the cabinet.
Install one or two tension rods horizontally across the inside of the cabinet, positioned at a height that allows spray bottles to hang by their triggers from the rods. This elevates the bottles off the cabinet floor, freeing up the entire lower level for larger items like bulk cleaning supplies, a small trash bin, or extra paper towels. The spray bottles become instantly visible and accessible, eliminating the need to move everything around to find what you need. You can also use the rods to hang small baskets or wire organizers that hold sponges, scrub brushes, and small cleaning accessories.
To enhance this project with a wrapped-in-rust aesthetic touch, paint the interior of the cabinet a deep, warm color — a terracotta, deep navy, or forest green — before installing the rods. Add a small removable liner to the cabinet floor for easy cleaning. This project takes about fifteen minutes from start to finish and costs under ten dollars, yet it solves one of the most persistent storage frustrations in the home. Sometimes the most impactful organization solutions are also the simplest ones, and this is a perfect example of that principle in action.
7. Copper Pipe Jewelry Organizer
Tangled jewelry is a universal frustration. Necklaces knot themselves overnight, earrings lose their partners, and rings vanish into the depths of overfull dishes. A copper pipe jewelry organizer transforms your accessories storage from a tangled mess into a beautifully displayed, easily accessible collection. Copper pipe develops a gorgeous natural patina over time — those warm, burnished tones of orange, brown, and green — that fits perfectly within the rust-inspired aesthetic and makes the organizer itself feel like a piece of decor.
Cut lengths of copper pipe into short sections using a pipe cutter, available at any hardware store. Sand the cut ends smooth and then arrange the pipes in a configuration of your choice: a tiered horizontal display mounted to a small wooden base, a hanging vertical display suspended from a piece of driftwood, or a geometric wall-mounted grid assembled with copper elbow fittings and T-connectors. Hang necklaces from the horizontal pipe sections, use the pipe ends to stack rings, and attach small S-hooks or wire loops to hold earrings and bracelets.
The copper pipe jewelry organizer is a project that scales beautifully to your collection. A small organizer might hold everyday pieces in a compact, countertop display, while a larger wall-mounted version can accommodate an extensive jewelry wardrobe. Because every piece is visible and easy to reach, you are also more likely to actually wear and enjoy your jewelry rather than forgetting about pieces buried in a drawer. The warm, metallic tones of copper against a white wall or a piece of weathered wood are genuinely stunning — this organizer is as much art as it is function.
8. Labeled Tin Can Desk and Craft Room Organizer
Tin cans are one of the most versatile and freely available crafting materials in existence. Every can of tomatoes, beans, or coffee becomes a potential storage vessel, and when grouped together with thoughtful decoration and labeling, they transform into a cohesive, charming desk organizer that keeps pens, scissors, markers, rulers, and craft supplies perfectly sorted. The metallic surface of tin cans also makes them ideal for the wrapped-in-rust aesthetic, particularly when painted in warm, earthy tones or deliberately treated to develop a faux-rust patina finish.
Collect cans of varying sizes — large coffee cans for tall items like rulers and long scissors, standard soup cans for pens and markers, and small tomato paste cans for erasers and clips. Remove labels and sand any sharp edges smooth with a metal file. Paint the cans in a cohesive color palette: warm creams, burnt oranges, deep rusts, and muted greens work beautifully together. For a faux-rust effect, layer orange and brown paint with a dry brush technique, then apply a matte sealant. Alternatively, wrap cans in twine, burlap, or kraft paper for a softer, more textured look.
Mount several cans to a wooden plank using strong adhesive or hose clamps for a wall-mounted version, or simply arrange them in a shallow tray or crate on your desk surface. Apply chalkboard paint labels or use printed kraft paper tags tied with twine to identify the contents of each can. This project costs virtually nothing beyond paint and time, yet it creates a genuinely useful, beautiful organizational system for any desk, craft table, or hobby station. The satisfaction of knowing exactly where every pen and tool lives cannot be overstated when you are mid-project and need something quickly.
9. Fabric Basket Closet and Shelf Organizer
Open shelving in closets, laundry rooms, and living spaces presents a common organizational paradox: the shelves are accessible and convenient, but they also display every bit of clutter and mess to anyone who walks by. Fabric baskets solve this elegantly by providing contained storage that keeps items organized and out of sight while still being easy to grab and access. When made from warm, natural fabrics — canvas, burlap, linen, or woven cotton in earthy rust, tan, and cream tones — these baskets become soft, beautiful accents that add texture and warmth to your shelving.
Sewing your own fabric baskets is simpler than it sounds and requires only basic straight stitching on a sewing machine or even hand-stitching for those without one. Cut fabric into a large rectangle, fold it into a box shape, stitch the corners, and fold down the top edge to create a sturdy rim. Add rope, leather, or fabric handles for easy carrying. For those who prefer a no-sew option, fold and glue fabric around a cardboard box form using craft adhesive, tucking and securing the edges cleanly. Line the inside with a contrasting fabric for an extra polished, intentional look.
Label each basket using a small chalkboard tag, a stamped leather tag, or a simple card tucked into a tag holder on the front. Designate baskets by category — seasonal clothing, spare linens, craft supplies, children’s toys, or office overflow — and assign each a consistent shelf location. The system works because it reduces decision fatigue: when everything has a designated container and a designated location, putting things away becomes automatic and maintaining the organization becomes effortless. These baskets also make excellent gifts, particularly when filled with small organizational supplies as a housewarming or hostess offering.
10. Chalkboard Wall Calendar and Meal Planning Station
Perhaps the most impactful organizational tool in any home is not a physical storage solution but rather a centralized information hub that keeps schedules, plans, and priorities visible and coordinated. A chalkboard wall calendar and meal planning station brings the entire family’s schedule into one beautiful, erasable, endlessly adaptable display. When framed in reclaimed wood with rustic, hand-drawn chalk lettering, it becomes a focal point of the kitchen or mudroom that is both deeply functional and genuinely lovely to look at each morning.
Apply chalkboard paint directly to a section of wall, or paint a large piece of plywood or MDF board and frame it with rustic timber for a portable version. Season the surface by rubbing the side of a chalk stick across the entire board and wiping clean before first use — this prevents ghosting and ensures clean erasure going forward. Divide the board into clearly defined zones: a large monthly calendar grid on one side, a weekly meal planner in the center, and a running grocery and to-do list column on the opposite side. Use chalk markers for elements you want to remain semi-permanent, like the grid lines and zone labels.
The meal planning section alone has the power to significantly reduce weeknight stress, food waste, and the recurring question of what to make for dinner. When the week’s meals are visible and planned in advance, grocery shopping becomes efficient and targeted, impulse purchases decrease, and the nightly dinner scramble disappears. Pair the chalkboard station with small hooks below for hanging aprons, reusable shopping bags, or a chalk holder, completing the picture of a fully functional, beautifully organized kitchen command center that anchors the whole home’s daily rhythm in one warm, inviting, rustic display.
Conclusion: Building an Organized Home One Craft at a Time
Home organization is not a single weekend project — it is an ongoing practice of creating systems that work for your actual life, your actual space, and your actual habits. The ten DIY crafts presented in this article offer a comprehensive toolkit for addressing organization challenges throughout every room of the home, from the first impression of the entryway to the daily rhythm of the kitchen, the sanctuary of the bathroom, and the productivity of the home office. Each project is designed to be approachable, affordable, and adaptable to your specific circumstances.
The wrapped-in-rust aesthetic thread running through these projects — the weathered wood, the oxidized metals, the earthy warm tones — does something important beyond simple visual appeal. It connects your organizational systems to a sense of craftsmanship, permanence, and care. These are not disposable plastic bins or generic store-bought containers; they are things you made with your hands, tailored to your space, and invested with your own creative vision. That sense of ownership makes you far more likely to maintain the systems you create and to take pride in the space you inhabit.
Start with one project — whichever addresses your most pressing organizational pain point right now — and allow the satisfaction of that transformation to fuel the next one. Organization is cumulative: each solved problem makes the next one easier to tackle, and the momentum of a well-organized home carries its own energy. Whether you begin with the simple tension-rod under-sink organizer or tackle the full pegboard command center, you are investing in your daily quality of life in a way that continues to pay dividends every single morning you wake up in a home that feels calm, intentional, and completely, beautifully yours.








What do you think?
It is nice to know your opinion. Leave a comment.