










Pour Wet Cement Into Stacked Red Plastic Cups: The Ultimate DIY Backyard Planter Project
The Backyard Transformation Secret No One Is Talking About
Every homeowner dreams of a backyard that makes guests stop in their tracks and ask, “Where did you get that?” Most people assume that stunning outdoor décor requires a hefty budget, professional landscaping skills, or a trip to an expensive garden boutique. But what if the most jaw-dropping yard decoration you have ever seen could be made from a bag of cement and a stack of red plastic cups you probably already have sitting in your pantry? This project is exactly that kind of creative revelation, and it has been quietly spreading through DIY communities for a good reason.
The genius behind this project lies in its simplicity and its surprising use of everyday materials. Red plastic party cups, the kind you pick up in bulk at any grocery or dollar store, serve as molds for wet cement. When stacked and filled strategically, they create a cascading, tiered planter that looks like it was designed by a professional garden architect. The finished product has the weight, durability, and elegance of stone, yet costs only a fraction of what a comparable store-bought planter would run you.
The secret yard item that elevates this project from clever craft to absolutely stunning centerpiece is a simple terracotta pot. When combined with the stacked cup cement technique, the terracotta base anchors the entire structure and gives the planter a warm, earthy aesthetic that blends seamlessly into any garden style. Together, these two ordinary objects create something genuinely extraordinary, and once you see the finished result, you will understand exactly why backyard guests are rendered speechless.
Materials You Will Need Before You Begin
Before diving into the construction process, gathering all of your materials ahead of time will save you a great deal of frustration. Cement work moves quickly once you begin mixing, and running to the hardware store mid-project is never a fun experience. Fortunately, the supply list for this project is short, inexpensive, and easy to source from stores you likely visit regularly. Most crafters complete this entire build for under fifteen to twenty dollars, which makes it one of the most cost-effective outdoor décor projects available.
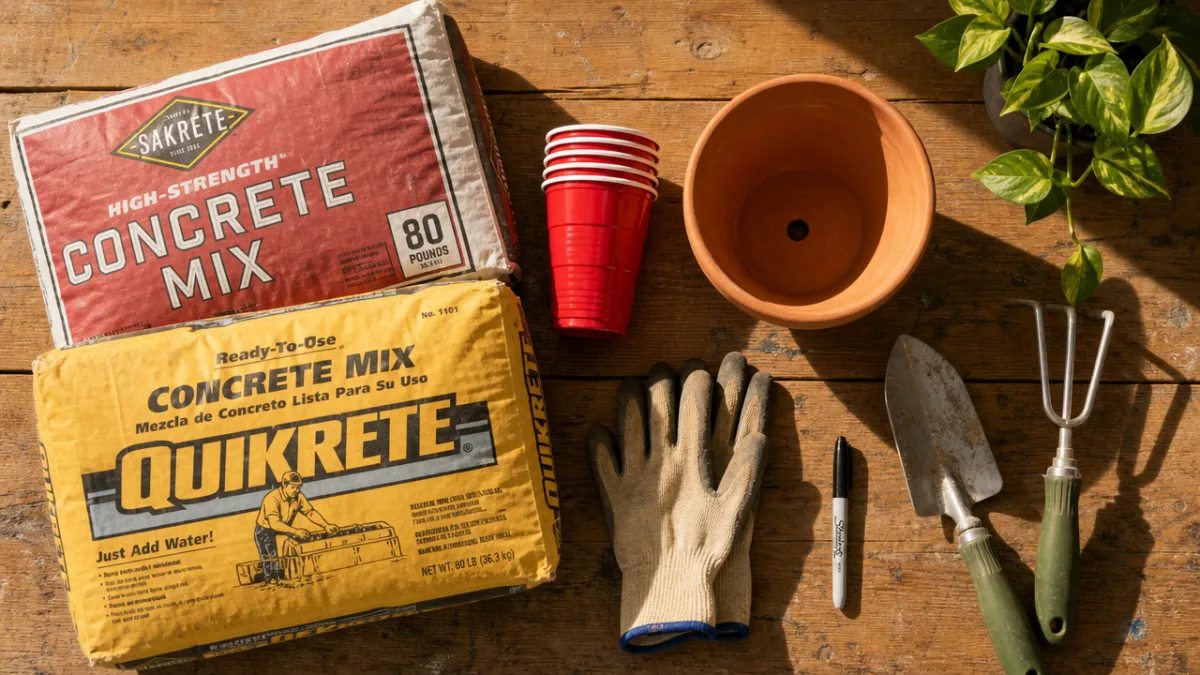
The core materials include one large bag of quick-setting concrete or cement mix, a set of red plastic party cups in varying sizes if possible, one medium-to-large terracotta pot, a plastic mixing bucket, water, cooking spray or petroleum jelly for mold release, and a stirring stick or trowel. You will also want to have rubber gloves and protective eyewear on hand, as wet cement is caustic and can irritate skin and eyes with prolonged contact. A drop cloth or plastic sheeting to protect your work surface is also highly recommended.
- One 50-pound bag of quick-setting concrete mix (brands like Quikrete work excellently)
- 12 to 20 red plastic party cups, standard 16-ounce size
- One terracotta pot, approximately 10 to 14 inches in diameter
- Cooking spray or a thin coat of petroleum jelly for mold release
- Rubber gloves and safety glasses
- A plastic mixing bucket and stirring stick or trowel
- Small pea gravel or drainage stones (optional but recommended)
- Exterior acrylic sealer for finishing
One additional item worth picking up is a small bag of pea gravel or drainage stones. Placing a layer of these at the base of each cup cavity before adding your soil and plants helps prevent root rot and ensures proper drainage through the planter tiers. This small step makes a significant difference in the long-term health of whatever flowers or herbs you choose to plant. With everything assembled on your workspace, you are ready to begin one of the most satisfying DIY projects in outdoor decorating.
Step-By-Step Instructions for Building Your Cement Cup Planter
Start by preparing your terracotta pot as the base foundation of the planter. Place it upside down on your protected work surface and coat the outside lightly with cooking spray or petroleum jelly. This mold-release agent will prevent the wet cement from permanently bonding to the pot in areas where you want clean separation later. Next, spray the insides of each red plastic cup generously with cooking spray as well, making sure to coat the bottom and all interior walls so the cured cement will release cleanly when the time comes.
Mix your concrete according to the package instructions, aiming for a consistency similar to thick peanut butter. It should be firm enough to hold its shape when scooped, but wet enough to press into molds without leaving air pockets. Begin filling your plastic cups roughly three-quarters of the way full with the wet cement mixture. Tap each cup gently on your work surface to release any trapped air bubbles, which can cause weak spots or surface imperfections in the finished pieces. Allow a slight dome at the top of each cup so the surface stays even as the mixture settles.
Now comes the most creative part of the build. Stack the filled cups onto the inverted terracotta pot in your desired arrangement before the cement begins to set. You can arrange them in a spiral pattern, a cluster formation, or offset rows to create a cascading waterfall effect. Press the base of each cup firmly into the wet cement of the cup below it, or use a thin layer of fresh cement as adhesive between layers. Work quickly and decisively, as quick-setting concrete can begin to firm up within fifteen to thirty minutes depending on temperature and humidity.
Once you are satisfied with the arrangement, allow the entire structure to cure undisturbed for at least twenty-four hours. Quick-setting concrete will be firm to the touch within an hour, but full structural strength requires a full day of curing. After curing, carefully peel away the red plastic cups by cutting them with scissors if they do not release easily. The smooth, cylindrical cavities left behind become the individual planting pockets for your flowers, succulents, herbs, or trailing vines. Finish the entire piece with a coat of exterior acrylic sealer to protect it from rain and freeze-thaw cycles throughout the seasons.
Choosing the Best Plants for Your Tiered Cement Planter
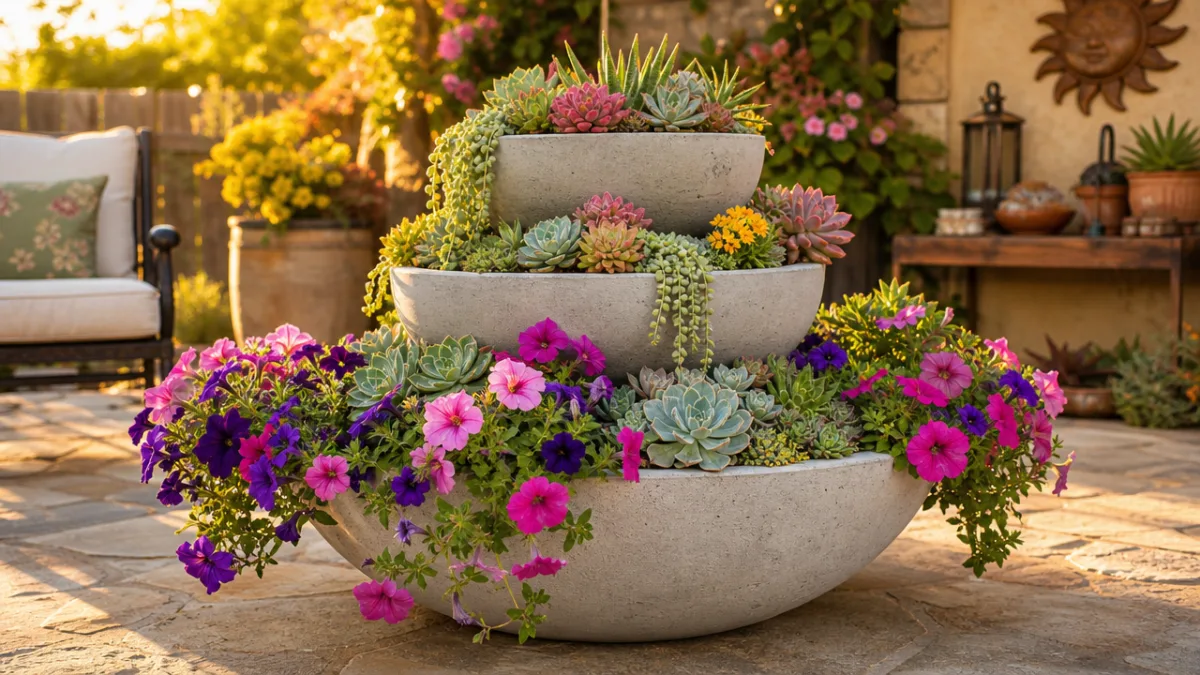
The cylindrical planting pockets created by the cup molds are relatively small, which means they are perfectly suited for compact, low-maintenance plants that thrive in tight spaces. Succulents are among the most popular choices for this type of planter because their shallow root systems adapt easily to confined cavities, and their sculptural forms complement the geometric look of the stacked cement structure. Varieties like echeveria, sedum, and sempervivum are especially well-suited and add incredible texture and color to the finished planter.
For gardeners who prefer a more lush and flowing aesthetic, trailing plants like creeping jenny, sweet potato vine, or wave petunias can create a dramatic cascading effect as they spill over the edges of each pocket and weave between the tiers. This softens the industrial look of the raw concrete and brings an organic, romantic quality to the entire piece. Mixing trailing plants with more upright varieties in alternating pockets creates a layered, professional look that genuinely rivals anything you would find at a high-end garden center.
- Succulents: echeveria, sedum, hens-and-chicks — ideal for low water requirements
- Trailing annuals: wave petunias, lobularia, bacopa — great for color and flow
- Herbs: thyme, oregano, compact basil — functional and fragrant
- Shade lovers: mini impatiens, ferns, mosses — perfect for partially shaded patios
- Evergreen groundcovers: creeping thyme, ajuga — provides year-round interest
If you plan to keep your planter indoors or on a covered porch during winter months, consider using small tropical plants like miniature bromeliads, air plants, or compact fittonia. These plants love the humidity and warmth of indoor environments and will keep your cement planter looking vibrant and alive even through the coldest months of the year. Whatever you choose, make sure to match the light requirements of your selected plants to the actual light conditions of the location where you plan to display your finished planter.
Customizing and Personalizing Your Planter’s Appearance
One of the most exciting aspects of this project is how easily it lends itself to personalization. Raw concrete has a beautiful, neutral gray color that works well in modern and industrial-style gardens, but there is absolutely no reason you have to stop there. Exterior-grade concrete paint or masonry stain opens up an enormous world of creative possibilities, allowing you to transform your planter into something that perfectly matches your home’s color palette or your personal design aesthetic. From weathered terracotta tones to bold cobalt blue or elegant matte black, the options are truly endless.
For a more rustic or aged appearance, try dry-brushing a mixture of white latex paint thinned with water over the surface of the cured cement. This technique, sometimes called whitewashing, deposits a thin layer of paint in the recesses and textured areas of the concrete while leaving the higher surfaces closer to the natural gray color. The result looks remarkably similar to aged limestone or antique European garden statuary, giving your planter an instant sense of history and sophistication that guests will assume cost a small fortune.
Embedding decorative elements into the wet cement before it cures is another fantastic personalization technique that takes almost no additional time or skill. Smooth river stones, broken ceramic tile pieces, seashells, marbles, or even fragments of vintage china can be pressed gently into the outer surfaces of the wet cement to create mosaic patterns or organic textures. This approach adds color, dimension, and a uniquely personal character to each planter you build, ensuring that no two pieces are ever exactly alike and that every creation genuinely reflects your individual creative vision.
Placement Ideas and Styling Tips for Maximum Backyard Impact
Where you place your finished cement cup planter can be just as important as the planter itself when it comes to creating a truly stunning backyard display. A single large planter placed at the end of a garden path serves as a dramatic focal point that draws the eye and invites exploration. Flanking an entryway or garden gate with a matching pair of these planters creates a symmetrical, formal look that immediately elevates the perceived value and intentionality of your entire outdoor space. Even on a small patio or balcony, one well-placed tiered planter can serve as the anchor around which the rest of your décor is organized.
Grouping several planters of varying heights together creates what interior and landscape designers call a vignette. By placing your cement cup planter alongside a taller urn, a low flat dish planter, and perhaps a decorative garden stake or lantern, you build a layered, three-dimensional composition that has real visual depth and sophistication. The rule of odd numbers applies beautifully here: groupings of three, five, or seven objects tend to feel more natural and dynamic than even-numbered arrangements, which can sometimes feel stiff or overly symmetrical.
Consider the backdrop against which your planter will be viewed, as this context dramatically affects how it reads visually. Placed against a weathered wood fence, a cement planter takes on a rustic, farmhouse quality. Positioned in front of a white stucco wall, the same planter feels crisp, modern, and Mediterranean. Against a dark evergreen hedge, the gray tones of the concrete recede beautifully while the plants pop with vibrant color. Spending a few minutes thinking about background, sightlines, and surrounding elements before finalizing your placement will yield a result that looks truly considered and professional.
Caring for Your Cement Planter Through the Seasons
Cement and concrete are remarkably durable materials, but they do require some basic care and maintenance to remain beautiful over time, especially in climates that experience freezing winters. The most important thing you can do to extend the life of your planter is to seal it properly before its first season outdoors. A high-quality exterior concrete sealer applied to the fully cured surface creates a protective barrier against moisture infiltration, which is the primary cause of cracking in concrete structures during freeze-thaw cycles. Reapply the sealer once per year, ideally at the beginning of each spring, for ongoing protection.
During winter months in cold climates, the safest approach is to bring your planter indoors or into a covered, unheated garage or shed. Even well-sealed concrete can be vulnerable to repeated freeze-thaw cycles over many years, and protecting it from the harshest weather will significantly extend its lifespan. If moving the planter is not practical due to its weight, consider emptying the planting pockets of soil and plants in late autumn, flipping the planter upside down to prevent water from pooling inside, and covering it with a breathable waterproof fabric garden cover until spring returns.
Cleaning your cement planter is straightforward and requires only occasional attention. Algae, moss, and mineral deposits from hard water are the most common issues, and all can be addressed with a stiff-bristled brush and a solution of one part white vinegar to three parts water. Avoid using pressure washers at close range, as the concentrated force can chip or etch the surface of the concrete over time. With basic seasonal care and a little attention, your handmade cement cup planter will remain a beautiful, conversation-starting centerpiece in your backyard for ten, fifteen, or even twenty years to come, which makes it one of the best returns on investment of any DIY project you will ever undertake.








What do you think?
It is nice to know your opinion. Leave a comment.