










“`html
How to Make the Easiest DIY Spring Moss Mushrooms: A Complete Guide
Spring is all about fresh starts, color, and getting a little creative — and honestly, nothing nails that whimsical woodland vibe quite like a little cluster of handmade moss mushrooms sitting on your mantle or tucked into a centerpiece. These things have been everywhere in the DIY world lately, and it’s easy to see why. They’re charming, way simpler to make than they look, and you can take them in pretty much any direction you want. Whether you craft all the time or you’re basically just now dusting off your glue gun, this is one of those projects that’s genuinely fun from start to finish.
What really makes this project special is the combination of natural texture and playful shape. Moss paired with a simple mushroom form just has this quality of looking like it wandered off an enchanted forest floor — in the best possible way. Nestled in a terracotta pot, set on a wooden tray, or peeking out of a spring wreath, these little guys add something to your décor that feels both earthy and magical without costing a fortune or demanding any serious crafting experience.
This guide walks you through everything, from rounding up your supplies all the way to the final finishing touches that make your mushrooms look like you actually know what you’re doing. Along the way you’ll pick up tips on tweaking size, color, and texture, plus ideas for displaying everything once you’re done. By the end you’ll have a full woodland vignette that people will genuinely stop and comment on.
Gathering Your Materials: Everything You Need Before You Begin
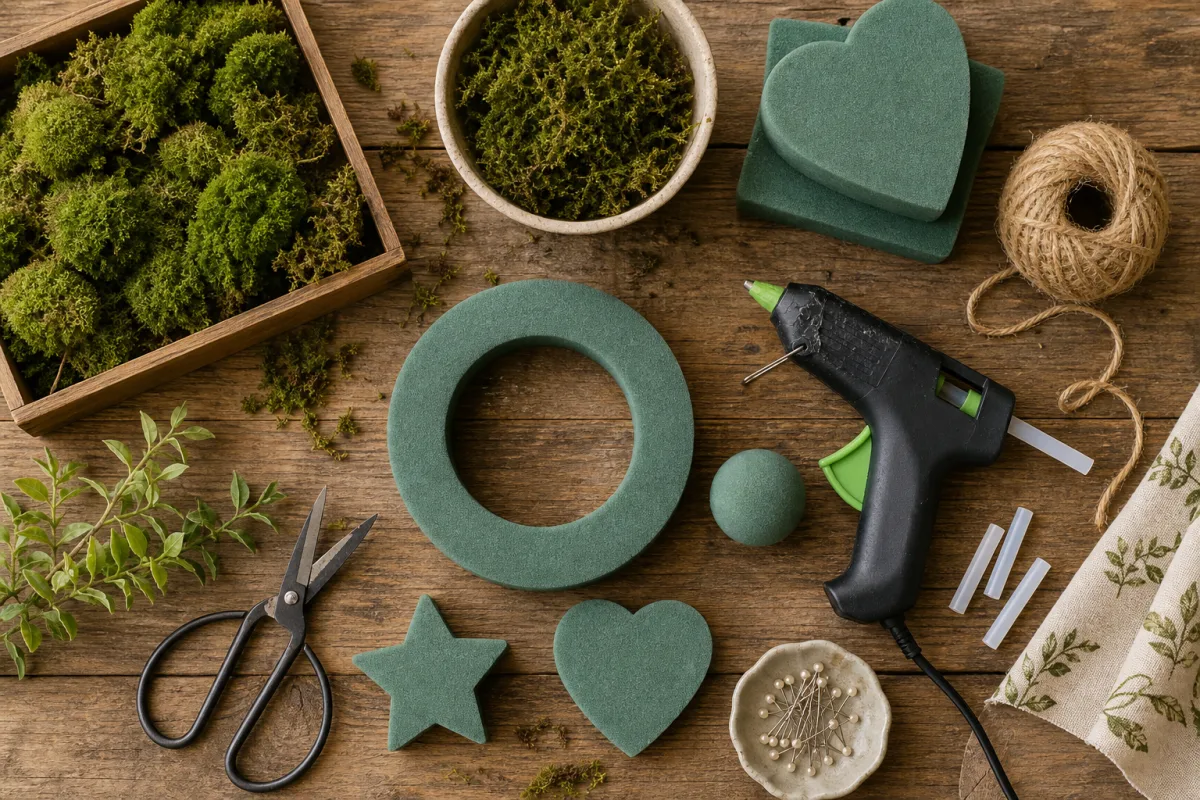
One of the best things about this project is how short the supply list is. Most of what you need is either already at home or a quick trip to the craft store away. The basics are foam balls or wooden craft mushroom shapes in a few different sizes, preserved sheet moss or faux moss, a hot glue gun with plenty of glue sticks, some acrylic paint in earthy or pastel tones, and a handful of small decorative accents like dried flowers, tiny pebbles, or faux berries. If you want to go a little further, craft wire for stems, a small decorative pot or base, and a matte sealant spray are all nice additions but totally optional.
When you’re picking out foam shapes, grab a mix of sizes. Real mushrooms don’t all pop up at the same height, and having that variety in your finished arrangement makes it look so much more alive and natural. Foam balls cut in half work perfectly for caps, while foam cones, wooden mushroom shapes, or even dowel rods handle the stem duties. Places like Michaels, Hobby Lobby, and JOANN usually have a solid selection, and dollar stores often stock foam shapes in spring too — worth a look before you spend more than you need to.
The moss you go with will really shape the final look. Preserved sheet moss keeps its soft green color and texture for a long time and gives you that lush, realistic finish. Faux moss mats from the floral section are another solid option and need zero maintenance. If you want some visual depth, try mixing types — something fine-textured for the caps and something chunkier for the bases creates a nice contrast that keeps the arrangement interesting.
- Foam balls (2-inch and 3-inch) or pre-made wooden craft mushroom sets
- Preserved sheet moss or faux moss rolls
- Hot glue gun and a generous supply of glue sticks
- Acrylic craft paint in white, cream, sage green, or your preferred palette
- Small scissors or craft knife for trimming moss
- Decorative accents: dried flowers, mini pinecones, faux berries, or lichen
- Terracotta pots, wooden bases, or trays for display
- Optional: matte sealant spray to protect finished mushrooms
Preparing Your Mushroom Bases: Shaping and Priming Your Forms
Before any moss goes on, you want to get your forms properly prepped — it makes a real difference in how sturdy and polished everything looks in the end. If you’re using foam balls for caps, cut each one in half with a sharp craft knife or a piece of fine wire pulled taut across the foam. The flat side becomes the underside of the cap, which you’ll attach to the stem later. Give the cut edges a light sanding with fine-grit sandpaper to smooth out the curve.
For stems, you’ve got a lot of options. Toilet paper rolls or paper towel tubes cut to different heights are honestly one of the better-kept secrets of this project — they’re sturdy, lightweight, and take paint and moss really well. Foam cones, thick dowels, or air-dry clay rolled into cylinders all work great too. If you’re going for something more rustic, small twigs or branches from the yard add a natural texture that plays beautifully against the moss. Whatever you use, just make sure the stem feels proportionate to the cap — a wide cap on a skinny stem is going to look a little wobbly, visually speaking.
Once everything is assembled and the glue is dry, paint your mushroom forms with a base coat. This step gets skipped a lot, but it’s worth doing because it means any small gaps in your moss coverage will blend right in instead of revealing raw white foam underneath. Sage green, warm brown, or soft taupe all work well. Use a foam brush for even coverage and let it dry fully before you move on — one coat usually does the job, but two thin coats give you a more reliable base if you want to be thorough.
Applying the Moss: Techniques for a Lush, Professional Finish
Applying the moss is honestly the most satisfying part of the whole process — it’s hands-on, it smells earthy and lovely, and it’s where your mushroom really starts to look like something. Start with the cap since it’s the most visible part and worth the extra attention. Rather than wrestling with big sheets of moss, tear or cut it into small pieces, roughly one to two inches across. Smaller pieces wrap around curves and edges so much more smoothly, and the result looks cleaner and more intentional.
Work in small sections: run a bead of hot glue onto the foam, press a piece of moss firmly into place, and hold it for a few seconds while the glue sets. Move outward from the center of the cap toward the edges, slightly overlapping each new piece over the last so there are no visible gaps. The curved edge where the dome meets the flat underside is the trickiest part — take your time tucking and folding the moss so it looks neat rather than frayed. A pair of small sharp scissors for trimming stray fibers is genuinely one of those tools you don’t realize you need until you have it.
For stems, you can be a bit more relaxed about it — natural mushroom stems aren’t uniform anyway, so a slightly organic, imperfect application actually looks better here. You can wrap moss in longer strips around the stem, or go with a patchwork style that mimics the look of moss slowly claiming something on a forest floor. Another option is to skip the moss on the stem entirely and just paint it a warm brown or creamy white. That clean, two-tone contrast between a lush mossy cap and a bare painted stem is really striking, especially when you have a whole group of them together.
Don’t forget the base of each mushroom, which is usually one of the most-seen areas once everything’s displayed. Press a small ring of moss around the bottom where the stem meets the surface and blend it outward a little to suggest that organic, emerging-from-the-earth look. You can layer on more moss, some small stones, or preserved lichen to build up a more elaborate little scene at the base — even a single mushroom can feel like a whole world with the right base treatment.
Adding Decorative Details: Elevating Your Mushrooms with Finishing Touches
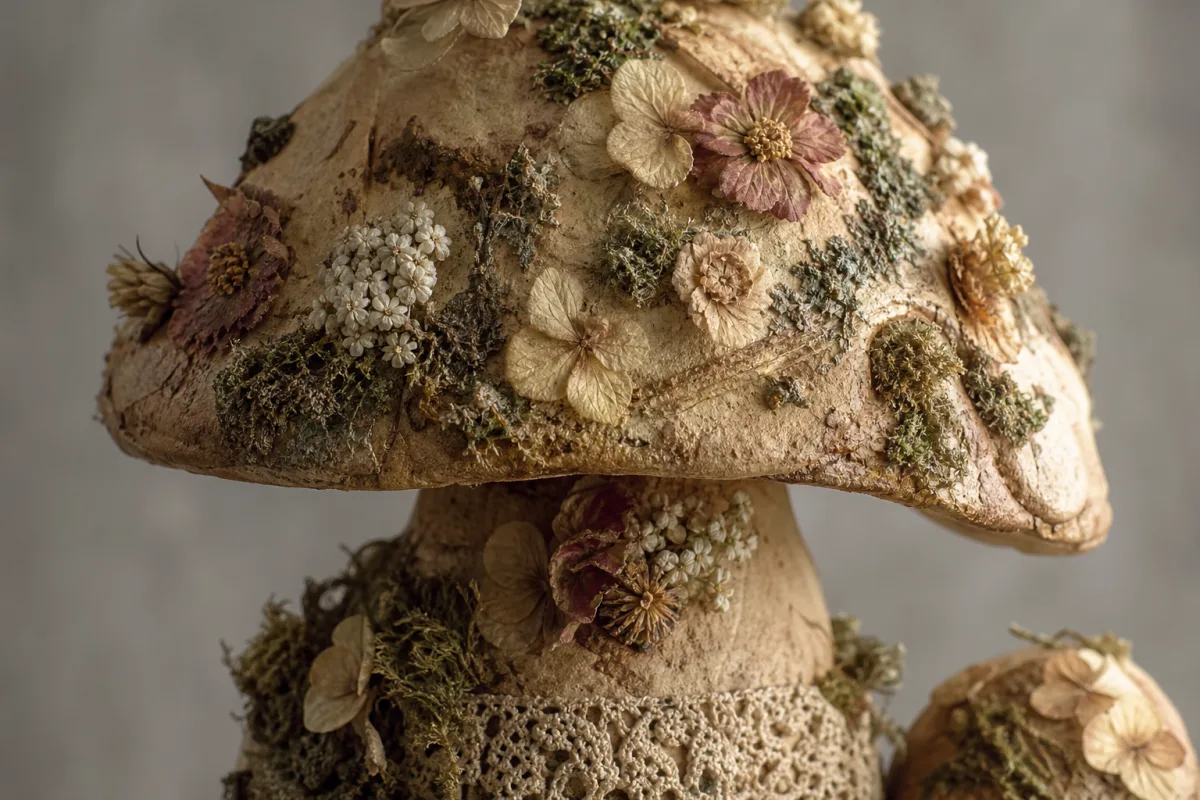
The finishing details are what separate a cute mushroom from a really memorable one, and this is where your own style gets to take over. Pick a handful of embellishments that feel like they belong together. Dried florals, tiny faux butterflies, and pearl-headed pins lean romantic and cottagecore; pebbles, bark chips, and lichen go more wild and naturalistic. Either direction is lovely — it just depends on the vibe you’re going for.
Dried flowers are probably the single most versatile thing you can add. Tiny rosebuds, lavender, baby’s breath, chamomile — all gorgeous options. Glue them directly onto the moss using a small dot of hot glue or craft adhesive, pressing them in at a slight angle rather than perfectly flat, which looks much more natural. You can cluster a few together on one part of the cap to create a focal point, or scatter them lightly all over for more of a wildflower meadow feel. Both work, it’s genuinely just personal preference.
For a little extra magic — especially if you’re making these for a fairy garden, a kids’ room, or a gift — tiny woodland animals, resin mushroom charms, faux ladybugs, or dewdrop-style accents made from clear resin or nail polish are all great additions. If you’re gifting these to a child, a small fairy door at the base or a tiny handwritten note tucked into the moss adds a storytelling element that kids absolutely love.
- Arrange mushrooms of varying heights together in odd-numbered groupings for a more natural composition.
- Add a light mist of matte sealant spray once all decorations are in place to protect against dust and humidity.
- Fill the base of a terracotta pot or wooden tray with additional moss to anchor your mushrooms and unify the arrangement.
- Mix in small natural elements like acorns, pinecone scales, or smooth river stones for organic texture.
- Consider adding a few drops of essential oil to preserved moss for a subtle botanical scent that enhances the sensory experience.
Display Ideas and Styling Tips: Showing Off Your Spring Moss Mushrooms
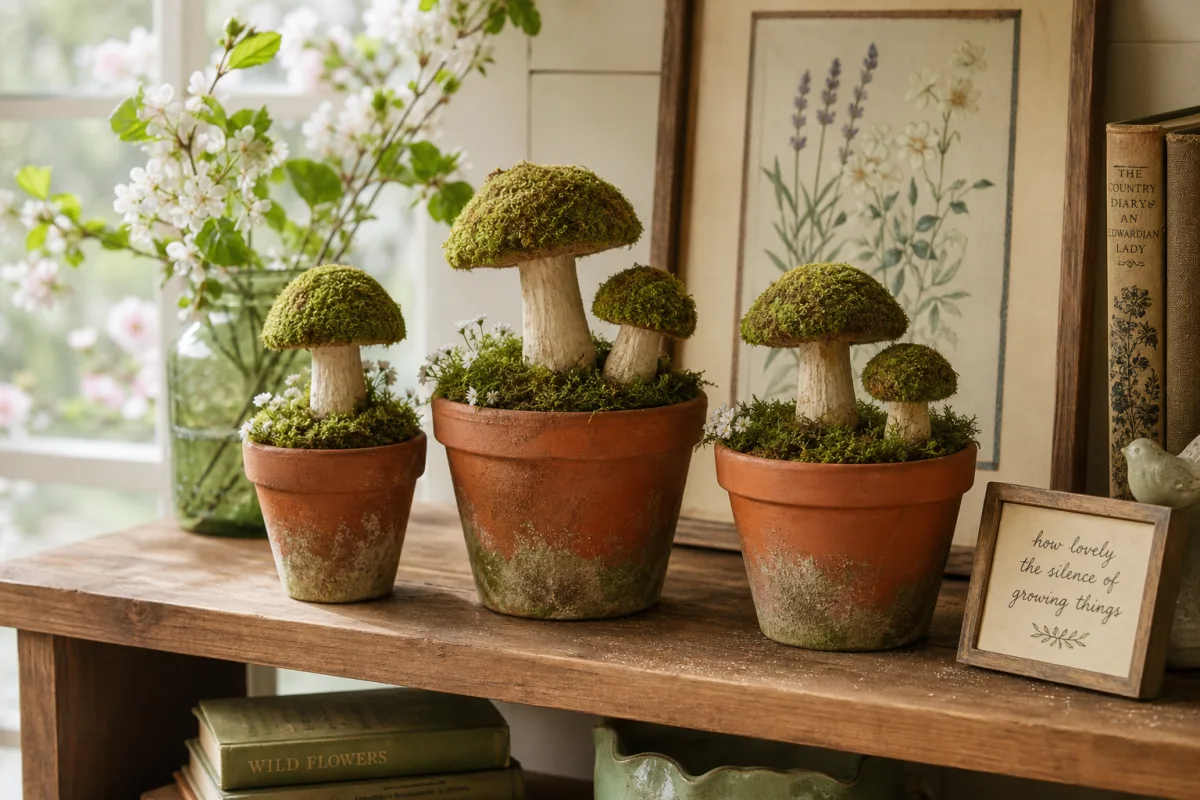
Once everything is finished and dried, finding the right spot to show them off is genuinely fun because these things work in so many different settings. For a classic spring moment on a mantle or console table, group three to five mushrooms of different heights in a shallow wooden tray or on a slice of natural wood, then fill in around the bases with loose moss, dried flowers, and a few little accents. It ends up looking like a scene straight out of a storybook illustration.
Terracotta pots are another go-to display option and they’re especially charming when the pots themselves get a little treatment too. Paint one with earthy stripes, rough it up with sandpaper for a vintage feel, or wrap it in twine — any of those approaches creates a base that feels as handmade as the mushrooms themselves. Line up a few pots in different sizes on a windowsill, porch step, or outdoor bench and you’ve got an instant spring greeting that visitors will notice right away.
If you’re into making wreaths, moss mushrooms are a fantastic addition to a spring door wreath. Hot glue finished mushrooms directly onto a grapevine or greenery base at varying angles, then surround them with dried or faux florals, ribbon, and greenery. The three-dimensionality of the mushrooms gives a wreath so much more depth than flat floral layers can, and it makes for a genuinely impressive handmade gift too.
Outside the house, moss mushrooms tuck beautifully into shaded garden spots, covered porches, or container garden arrangements. They’re not built for heavy rain or direct sun, but in a protected outdoor spot they can last a whole season with almost no upkeep. Try nestling them among potted ferns, tucking them at the base of a topiary, or lining them along a garden path for a whimsical touch that makes the whole outdoor space feel a little enchanted.
Customization and Variations: Making These Mushrooms Uniquely Yours
One of the most fun things about this project is how flexible the basic technique is. The core idea — moss on a mushroom-shaped form — stays the same, but almost everything else can be changed to fit a different season, aesthetic, or recipient. For an autumn version, swap the green moss for torn dried leaves in orange and rust, add acorns and pinecones, and paint the stems in deep burgundy or amber. It’s technically the same project, but the result looks completely different.
Color is one of your most powerful tools here. Natural green moss is the classic choice and has that instant woodland feel, but dyed moss opens things up considerably. Pastel lavender, blush pink, or sky blue moss creates mushrooms that feel more fantastical than earthy — perfect for a nursery, a fairy garden party table, or an Easter display. You can buy pre-dyed moss from craft stores or make your own by lightly misting natural moss with watered-down acrylic paint and letting it dry fully before you use it.
Scale is another great variable to play with as you get more comfortable. Very small mushrooms — built from marbles, grape-sized foam balls, or little lumps of modelling clay — can be grouped in big numbers inside a glass terrarium or on a tiny wooden plinth to create a miniature forest floor scene. At the other extreme, very large mushrooms made from basketball-sized foam spheres or repurposed lamp shades become statement pieces that anchor a whole room or make dramatic porch decorations that stop people in their tracks.
And don’t underestimate this project as a group activity. Moss mushroom crafting is a natural fit for a craft night with friends, a kids’ birthday party, a family gathering, or a community workshop. Kids as young as six or seven can jump in with minimal help, and whatever they make turns out delightful regardless of skill level. Set out a range of moss colors, paint options, and embellishments and let everyone run with it — you end up with a table full of completely different, totally personal little creations, which is exactly what makes handmade things so worth keeping.
“`








What do you think?
It is nice to know your opinion. Leave a comment.