










Eggshell Mold Garden Mushrooms: A Complete Guide to Concrete Crafting
Introduction to Eggshell Concrete Crafting
Garden art has taken a wonderfully creative turn in recent years, and one of the most charming trends to emerge is the use of everyday household items as molds for concrete sculptures. Among the most delightful of these projects is crafting miniature mushrooms using eggshells as natural molds. This technique combines resourcefulness, artistry, and a touch of whimsy to produce garden decorations that look as though they sprouted organically from the earth itself. Whether you are a seasoned concrete crafter or a complete beginner, this project is accessible, affordable, and deeply satisfying to complete.
The beauty of using eggshells as molds lies in their naturally organic shape. Eggshells produce rounded, slightly irregular caps that mimic the gentle curves found on real woodland mushrooms. When combined with a simple stem cast from a toilet paper roll or small cylinder, the finished pieces have an authenticity that is difficult to achieve with store-bought plastic molds. The natural texture of the eggshell interior even transfers faintly onto the concrete surface, giving each mushroom cap a unique, subtly patterned appearance that adds character to the finished piece.
Beyond their aesthetic appeal, these concrete mushrooms are remarkably durable and weather-resistant, making them ideal for year-round outdoor display. Unlike painted wooden or ceramic garden ornaments, properly mixed and sealed concrete can withstand frost, rain, and intense sun without cracking, fading, or deteriorating. A cluster of these charming little mushrooms nestled among ferns, peeking out from beneath a rose bush, or lining a garden path can transform an ordinary outdoor space into something that feels genuinely enchanted. This guide will walk you through every step of the process from gathering materials to displaying your finished creations.
Materials and Tools You Will Need
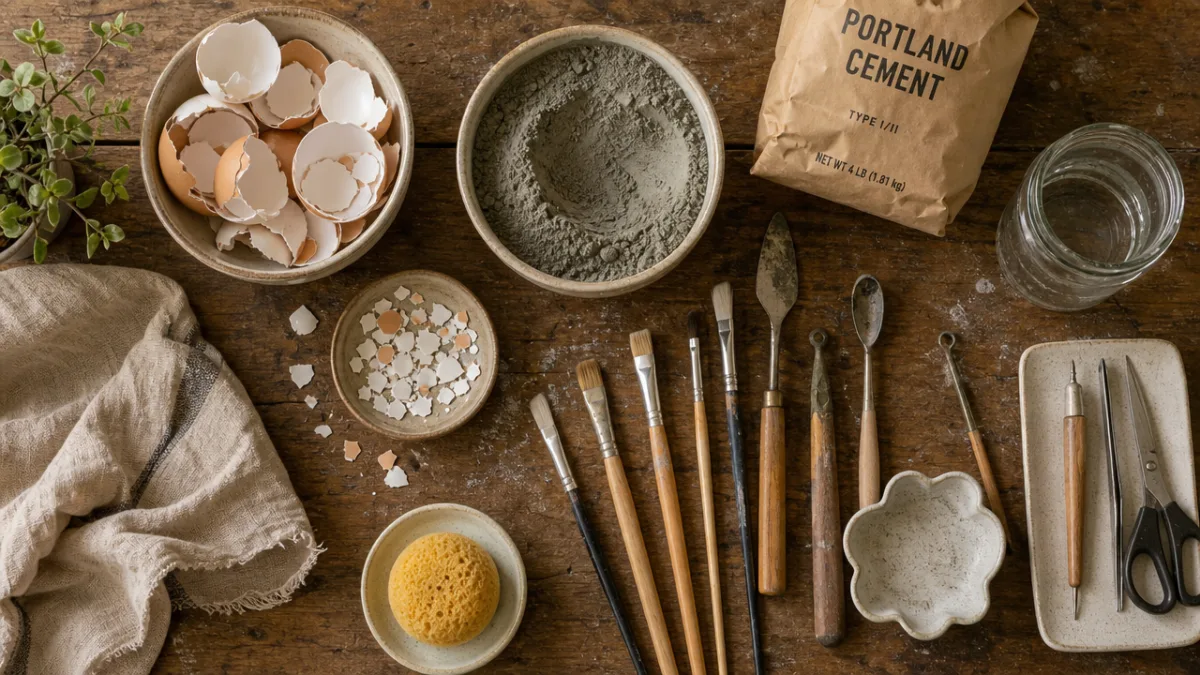
Before you begin, it is important to gather all your materials so that the crafting process flows smoothly from start to finish. The star of the show is, of course, the eggshell itself. You will want to collect a good number of eggs over several days or weeks, carefully cracking them at the top to remove as little of the shell as possible. Rinse each shell gently and allow it to dry completely before use. Aim to collect at least a dozen shells to give yourself plenty to work with, accounting for any that may crack or break during the molding process.
For the concrete itself, a fine-textured mix works best for this type of small-scale decorative project. Many crafters prefer to use a blend of Portland cement with fine sand and perlite or vermiculite, which keeps the mixture lightweight without sacrificing strength. Pre-mixed craft concrete or hypertufa mix also works beautifully and is available at most garden centers and home improvement stores. You will also need water, of course, along with a small mixing container, a wooden dowel or skewer for stirring, and protective gloves to keep the alkaline concrete mixture off your skin during handling.
For the mushroom stems, small cylinders work perfectly as molds. Consider using toilet paper rolls cut to your desired height, sections of PVC pipe, or even tightly rolled cardboard secured with tape. You will also want a flat surface or tray lined with plastic wrap to rest your filled eggshells on while they cure. Optional but recommended supplies include wire mesh or small pieces of hardware cloth to reinforce the stems, acrylic craft paint in earthy mushroom tones, concrete sealer for weather protection, and a soft brush for applying finishing details. Here is a handy checklist to keep nearby:
- Whole eggshells, rinsed and dried, cracked at the narrow top end
- Fine-blend concrete mix or hypertufa mix
- Portland cement for a smoother finish option
- Small cylindrical molds for stems (cardboard rolls or PVC sections)
- Protective gloves and safety glasses
- Mixing bowl or bucket
- Wooden skewer or dowel for mixing and tamping
- Plastic wrap and a flat tray
- Wire or a short length of rebar for stem reinforcement
- Acrylic paint in white, tan, brown, and red tones
- Exterior concrete sealer
- A soft-bristled paintbrush
Mixing and Preparing Your Concrete
Mixing concrete for small decorative projects is a straightforward process, but attention to consistency is crucial. You want your mixture to be thick enough to hold its shape and fill the mold completely without slumping or forming air pockets, but not so stiff that it refuses to flow into the delicate curves of the eggshell interior. A good target consistency is something similar to thick oatmeal or peanut butter — the mixture should hold a peak when you lift your skewer but still be workable and slightly pliable when pressed with a gloved finger.
Begin by adding your dry ingredients to the mixing container and blending them thoroughly before introducing any water. This ensures an even distribution of cement throughout the aggregate and reduces the likelihood of lumps or dry pockets in your finished piece. Add water gradually, a little at a time, mixing thoroughly between each addition. It can be tempting to add too much water when the mix seems stiff, but resist this urge. Excess water weakens the final concrete significantly, leading to a porous, fragile piece that may crack or crumble during the demolding process or after prolonged outdoor exposure.
Once your mix is the right consistency, allow it to rest for two to three minutes. This brief rest period, known in the trade as “slaking,” allows the cement particles to fully hydrate and the mixture to become more cohesive and workable. After slaking, give the mix one final stir and check the consistency again before beginning to fill your molds. If you are working with hypertufa, this is also the moment to add any optional ingredients such as chopped fiberglass fibers for added strength or a small amount of acrylic bonding agent for improved surface hardness. Work efficiently once you begin filling molds, as the mixture will start to stiffen within thirty to forty-five minutes depending on temperature and humidity.
Creating the Mushroom Caps and Stems
To create the mushroom caps, set your prepared eggshells upright in a small tray filled with sand or rice, which will hold them stable while you fill them. Using a small spoon, spatula, or even a craft stick, begin adding concrete mixture to the interior of each shell. Fill it gradually and use your skewer to tamp the mixture down firmly, eliminating any air bubbles that could create weak spots or unsightly voids in the finished cap. Fill each shell completely to its rim, smoothing the flat surface that will eventually become the underside of the cap where it meets the stem.
Press a short length of wire or a bamboo skewer into the center of the concrete in each cap while the material is still fresh and workable. This embedded wire will protrude from the base of the cap and serve as a connection point to anchor the cap securely onto the stem. Allow the caps to begin setting in a cool, slightly humid location for at least twelve hours before attempting to demold them. Direct sunlight will cause the concrete to cure too quickly, potentially leading to surface cracking, so shade and a gentle misting with water during the first hours of curing will produce a stronger, more uniform result.
While your caps are curing, you can prepare and pour your stems. Stand each cylindrical mold upright on a piece of plastic wrap and fill it with your concrete mix. If using cardboard rolls, wrap the exterior with several layers of tape to give the mold structural stability and prevent it from bowing outward under the weight of the concrete. Insert a longer wire or small rebar segment through the center of the stem, leaving enough wire protruding from the top to connect with the cap and enough at the bottom to anchor the finished mushroom into garden soil. Tamp the mixture firmly and smooth the top surface, then allow stems to cure alongside the caps.
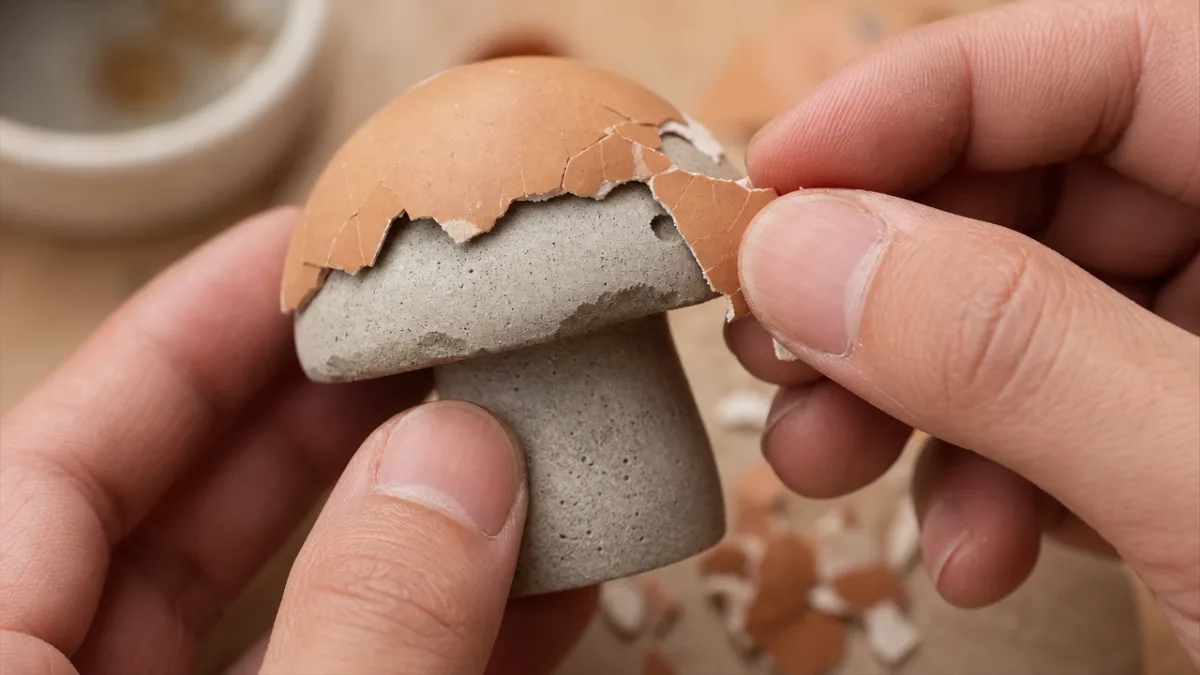
After a full cure of at least twenty-four to forty-eight hours, it is time for the satisfying process of demolding. The eggshell peels away from the concrete cap much like peeling a hard-boiled egg, revealing the smooth, organically curved concrete form beneath. Some crafters choose to leave small fragments of shell adhered to the cap surface for a more textured, natural look, while others clean the surface completely for a smoother finish. Cardboard stem molds can simply be peeled or torn away, while PVC molds may require a gentle tap and twist to release the cured stem. Join cap to stem by inserting the wire from the cap into the top of the stem and securing with a small amount of fresh concrete mix acting as an adhesive.
Painting and Finishing Your Concrete Mushrooms
Raw concrete mushrooms are undeniably charming in their natural grey state, but a little color transforms them into truly magical garden ornaments. The most popular choice for garden mushrooms is the classic red cap with white spots, inspired by the iconic Amanita muscaria of fairy tale imagery. However, earthy browns, pale creams, soft ochres, and even dusty blues and purples can all look spectacular depending on your garden palette and personal aesthetic. Acrylic craft paint is the most practical choice for this project, as it adheres well to porous concrete surfaces and is available in an enormous range of colors at very affordable prices.
Before applying any paint, make sure your mushrooms are fully cured and completely dry, which typically means waiting a full seventy-two hours after demolding. Apply a base coat of paint using a soft brush, working it into any surface texture or small crevices. Allow the base coat to dry completely before adding details. For classic spotted mushrooms, dab irregular circles of white paint across the cap using a fingertip or a small sponge for a pleasingly organic, imperfect pattern that mimics the real thing far better than stenciled dots would. Add shading by mixing a small amount of brown or grey into your base color and applying it to the edges and underside of the cap to create a sense of depth and dimension.
The stem can be painted in a contrasting or complementary color. Natural white, pale grey, or a warm ivory tone all work beautifully for classic mushroom aesthetics. You might also paint subtle vertical striations on the stem using a fine brush and a slightly darker shade to suggest natural texture and fibrous structure. For a more fantastical garden display, consider adding painted moss, tiny insects, or faux lichen effects using a dry-brush technique with pale green or silver paint. Once all paint is fully dry, apply two or three coats of exterior-grade concrete sealer, allowing each coat to dry thoroughly between applications. This sealer locks in your paintwork and dramatically extends the lifespan of your finished pieces in outdoor conditions.
Displaying Your Mushrooms in the Garden
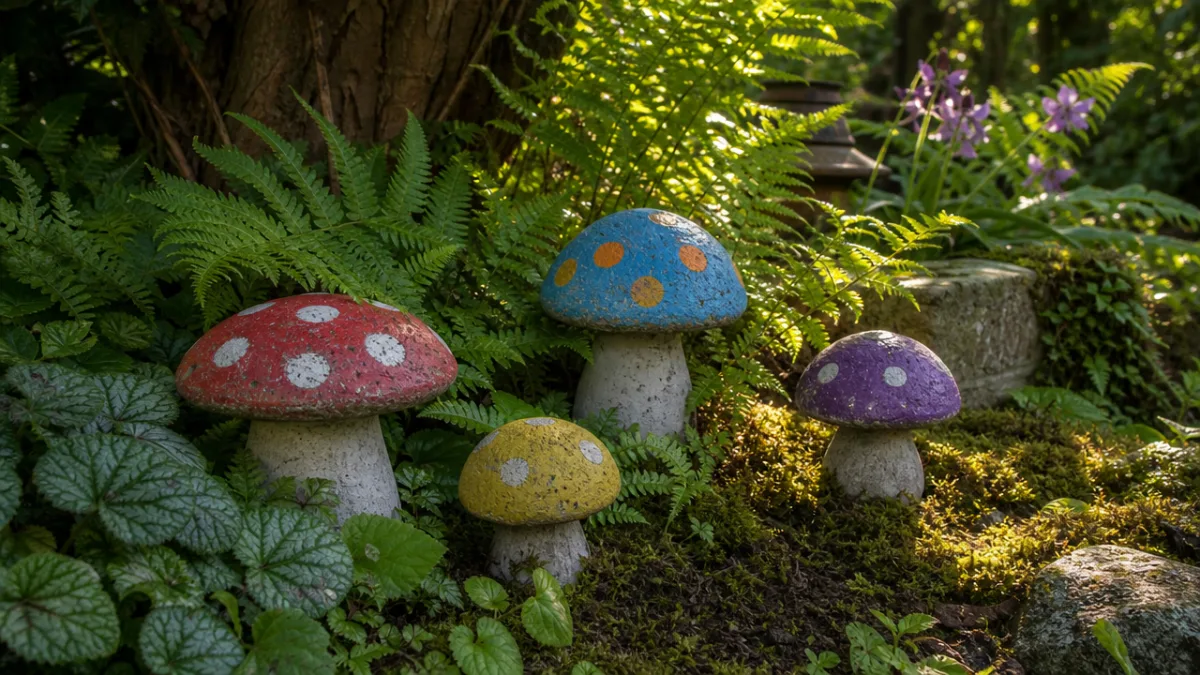
One of the great joys of this project is the almost infinite variety of ways your finished mushrooms can be displayed and arranged. A cluster of varying heights and sizes arranged around the base of a tree creates a wonderfully woodland-inspired vignette that delights visitors and adds a sense of storybook magic to even the most modest garden. To install individual mushrooms, simply press the wire anchors protruding from the base of each stem into the soil to the desired depth, securing them firmly enough to withstand wind and light disturbance without being permanently embedded.
Consider grouping mushrooms in odd numbers, as clusters of three, five, or seven tend to look more naturalistic and visually pleasing than even-numbered arrangements. Vary the heights within each grouping by adjusting how deeply each stem is pressed into the ground, or by casting stems of genuinely different lengths during the creation phase. Nestling your mushrooms among ground cover plants such as ajuga, creeping thyme, or moss creates a particularly convincing effect, as the living plants seem to grow up and around the concrete pieces in exactly the way real fungi emerge from a woodland floor.
These mushrooms also work beautifully in container gardens and raised planters, where their relatively modest scale is perfectly suited to the proportions of potted arrangements. A large terracotta pot planted with ferns and hostas, with a cluster of concrete mushrooms peeping out from among the foliage at varying levels, makes a striking patio or balcony feature that requires minimal maintenance beyond an occasional wipe-down and periodic resealing every one to two years. For indoor display, unsealed mushrooms without wire anchors can serve as charming decorative objects on a windowsill, bookshelf, or as part of a terrarium arrangement.
As the seasons change, your concrete mushrooms will develop a natural patina that many crafters find even more beautiful than the original painted finish. Mild algae and moss growth on the surface integrates the pieces further into the garden ecosystem, enhancing the illusion that they have always been there. If you prefer to maintain the original appearance, a periodic application of a diluted bleach solution will clean the surface without damaging the concrete or paint, followed by a fresh coat of sealer once dry. Either way, these small handcrafted pieces will bring genuine pleasure to your garden for many years, and the process of making them is so enjoyable that most crafters find themselves planning their next batch almost as soon as the first group is installed.
Tips, Troubleshooting, and Creative Variations
Even with careful preparation, concrete crafting occasionally presents small challenges that are worth knowing about in advance. One of the most common issues is cracking in the cured caps, which is almost always the result of curing too quickly in hot or windy conditions, or of adding too much water to the original mix. To prevent this, always cure your pieces slowly in a cool, shaded location and mist them lightly with water every few hours during the first day of curing to maintain an even moisture level throughout the concrete as it sets. A simple piece of damp burlap draped loosely over the molds works perfectly for this purpose.
Another common challenge is achieving a smooth, detailed surface on the caps. If your finished caps are rougher than you would like, try using a finer-grade concrete mix for your next batch, or add a small amount of acrylic bonding agent to the mix to improve surface detail. You can also sand dried concrete gently with fine-grit sandpaper to smooth any particularly rough areas before painting. Conversely, if you find that your caps are releasing from the eggshell molds before they are fully cured, you may need to extend your initial cure time or reduce the water content of your mix slightly to accelerate the early hardening phase.
The basic eggshell mushroom technique is also wonderfully adaptable to a range of creative variations that can expand your garden art repertoire significantly. Try using larger balloons as molds for oversized mushroom caps that make bold, statement-scale garden features. Experiment with adding powdered pigment directly to the concrete mix before pouring to achieve a through-colored result that will not chip or fade even if the surface is scratched. You might also try embedding small glass beads, shells, or pieces of colored tile into the surface of the caps while the concrete is still fresh, creating mosaic-accented mushrooms that glitter beautifully in garden light.
Consider also the possibility of making matching garden accessories using the same concrete and eggshell techniques. Small concrete toadstools, decorative stones with embedded fossils or leaf imprints, and miniature fairy doors attached to tree stumps all complement the mushroom aesthetic beautifully and can be produced using similar methods and materials. Building a cohesive collection of handcrafted concrete garden ornaments over time gives your outdoor space a deeply personal, artisanal character that no amount of store-bought decoration could replicate. Each piece carries with it the memory of its making and the pleasure of the creative process that brought it into being.
Finally, consider sharing this project with family and friends as a group crafting activity. The materials are inexpensive, the tools are simple, and the process is genuinely accessible to crafters of almost any age and experience level. Children particularly enjoy the eggshell peeling stage of the process, and painting sessions can be turned into wonderfully creative social occasions. Gifting finished mushrooms to friends and neighbors is also a lovely and personal gesture that costs very little but carries a great deal of handmade charm. In a world of mass-produced garden ornaments, a cluster of hand-poured, hand-painted concrete mushrooms carries a warmth and individuality that is impossible to manufacture at scale and deeply rewarding to create with your own hands.








What do you think?
It is nice to know your opinion. Leave a comment.