










Easy Garden Bench with Wood & Concrete Blocks: The Ultimate DIY Guide
Introduction: Why a DIY Garden Bench Is the Perfect Weekend Project
There’s something genuinely special about sitting on a piece of furniture you built yourself — especially when it’s sitting in a garden you actually care about. A bench made from wood planks and concrete blocks is one of those rare DIY projects that’s accessible to almost everyone. You don’t need a workshop full of tools, a big budget, or years of carpentry experience. Whether you’ve built furniture before or you’re picking up a drill for the first time, this project is forgiving, fun, and ends with something you’ll actually use every day.
The mix of raw concrete and warm timber has become a go-to look in outdoor design for good reason. It’s that sweet spot between industrial and natural — structured but not cold, rustic but not sloppy. Unlike something you’d pull off a shelf at a big-box store, a bench you put together yourself has actual character. It looks intentional. And when someone sits down and asks “where did you get this?” you get to say you made it, which never gets old.
On a practical level, this combo just works. Concrete blocks are heavy, stable, and don’t care about the weather. Properly sealed timber holds up beautifully through rain, sun, and everything in between. Together they make a bench that’s tough, good-looking, and costs a fraction of what you’d spend on something comparable at a garden center. This guide covers everything from picking your materials to the finishing touches that take it from “basic bench” to a real focal point in your outdoor space.
Materials and Tools You Will Need
Before you start building, it helps to have everything on hand so the process stays smooth and enjoyable rather than full of hardware store trips. For this bench, you’re really working with just two main materials: concrete cinder blocks and wooden planks. The blocks form the legs and supports; the timber becomes your seat. Almost everything you need is available at a standard hardware or home improvement store, and the total cost usually comes in well under what you’d pay for a similar piece of ready-made outdoor furniture.
For the blocks, you can go with smooth-faced or standard cinder blocks depending on the look you’re after. Most benches use somewhere between four and eight blocks, which varies based on how many leg stacks you build and how high you want the seat. Standard 8x8x16-inch blocks work well for most setups. For the wood, go at least two inches thick so the seat has real strength underfoot. Cedar, pine, Douglas fir, and reclaimed barn wood are all popular choices — each has its own feel and level of natural weather resistance, so pick what appeals to you visually as much as practically.
Here’s a quick rundown of everything you’ll want to gather before you start:
- Six to eight standard concrete cinder blocks (8x8x16 inches)
- Three to four wooden planks, roughly six feet long and at least two inches thick
- Exterior-grade wood stain, paint, or sealant in your chosen color
- Sandpaper in medium and fine grits (80 and 120 grit are perfect)
- A paintbrush or foam roller for applying your sealant
- A level to make sure your base is even and stable
- Optional: masonry paint or chalk paint for the concrete blocks
- Optional: outdoor cushions or foam padding if you want extra comfort
- Optional: construction adhesive if you’d rather the whole thing stay put permanently
One of the best things about this project is how flexible it is. You don’t need power tools for a basic version — the blocks stack, the planks rest on top, and that’s genuinely it. If you want to smooth out your timber, a random orbital sander will save you a lot of elbow grease. If you need to cut planks to length, a circular or miter saw makes that quick and clean. But even without either of those, a bit of patience and some hand tools will get you there just fine.

Step-by-Step Building Instructions
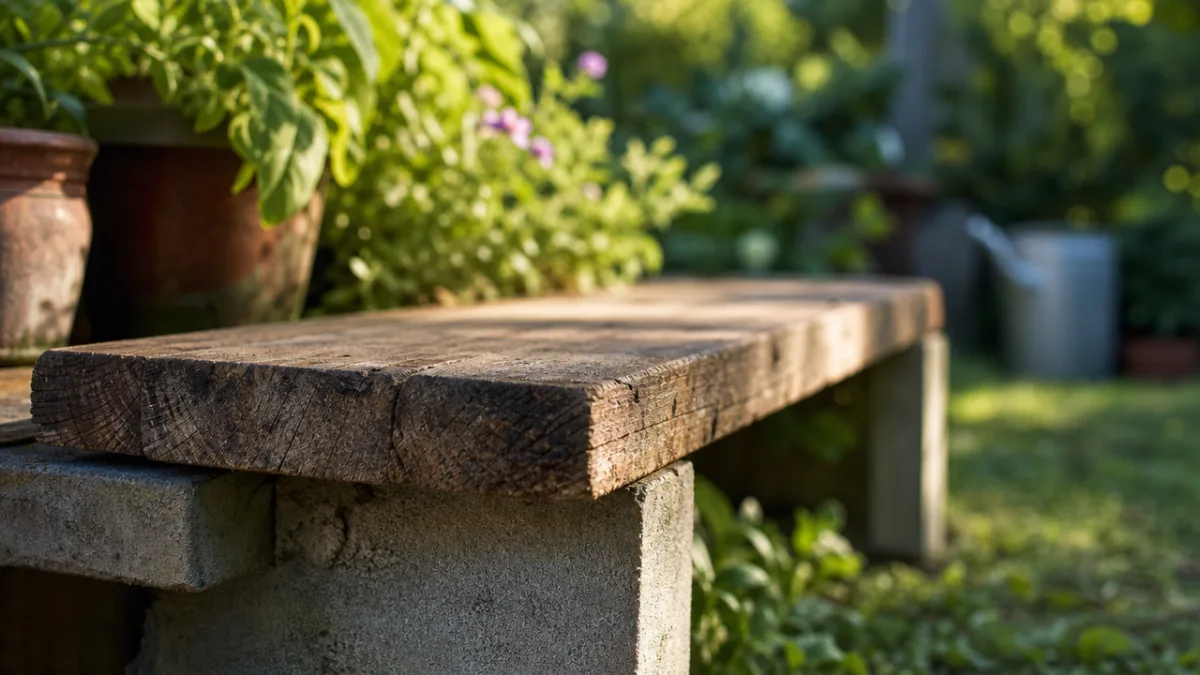
Here’s where it gets fun. Assembling a wood-and-concrete bench is honestly one of the more straightforward builds you’ll ever do — just a handful of steps with very little that can go wrong. Start by choosing where you want the bench to live. Pick a spot that’s as flat and stable as possible. If the ground is a little uneven, take a few minutes to dig out some soil or lay down a thin bed of gravel or sand to level things out. It’s a small step that’s worth doing right, because a wobbly bench is annoying to sit on and could tip unexpectedly.
Once your base is sorted, arrange the blocks into two groups — two or three blocks per group — spaced roughly four to five feet apart depending on how long your planks are. Stack them with the hollow cores facing sideways rather than up. This looks cleaner, and it also leaves open the option to slide a rod or plank through those cores later if you ever want extra stability. Check both stacks with your level. If one side sits a hair higher than the other, adjust what’s underneath until they match. Getting this right makes everything else easier.
While the base is set, go ahead and prep your timber before laying it down. Sand all the surfaces — start with the medium grit, then follow with the fine grit. This knocks out splinters, rough patches, and any mill marks from cutting, leaving you with a surface that looks intentional and is actually comfortable to sit on bare. Once the sanding is done, apply your sealant, stain, or paint in smooth, even coats and let each coat dry fully before adding the next. Two coats minimum for anything going outside — moisture is the enemy of untreated wood, and a good seal makes a real difference to how long your bench lasts.
When the planks are fully dry, lay them across the tops of your block stacks. You can run two or three boards side by side depending on how wide a seat you want. Leave a small gap between parallel boards — half an inch to an inch is ideal — so water can drain rather than pool on the surface during rain. It seems like a tiny detail, but it genuinely extends the life of the wood by reducing how long it stays wet. Give the whole thing a once-over, adjust anything that looks off, and that’s it — your bench is built.
Finishing and Personalizing Your Garden Bench
The build might be done, but the finishing is where the bench stops being a bench and starts being yours. Natural gray cinder blocks are fine structurally, but give them a coat of chalk paint and they transform completely. Chalk paint sticks well to porous concrete and comes in a huge range of colors — crisp white, sage green, deep charcoal, terracotta. Follow it up with a clear outdoor sealer and those industrial blocks start looking like deliberate design choices rather than construction materials. It’s a surprisingly big visual upgrade for very little effort.
For the wood, think about what else is already in your garden. If you’ve got cedar planter beds, matching the bench stain pulls the whole space together. If your outdoor palette tends lighter, a whitewash or pale gray stain gives the bench a breezy, Scandinavian feel that works beautifully against green plants. And if you want the bench to be a real statement piece rather than background furniture, a deep navy, forest green, or rich burgundy stain will absolutely do the job.
Beyond paint and stain, there are some really nice ways to make this bench feel like it was designed specifically for your space:
- Add outdoor cushions: A weather-resistant cushion in a pattern or color you love makes a huge difference in comfort and gives the whole thing a more finished, inviting look. Quick-dry foam filling is worth seeking out for easy care.
- Plant through the blocks: If you orient the hollow cores upward when stacking, you can fill them with potting soil and tuck in trailing herbs, succulents, or small flowers. It’s a clever way to blend furniture and planter into one piece.
- Add string lights: Winding solar fairy lights around the bench legs creates a really lovely atmosphere for evenings in the garden — no wiring, no fuss.
- Use reclaimed wood: Old barn wood or salvaged timber from a demolition yard brings an instant sense of age and character that brand-new lumber just can’t match.
- Build a matching side table: One extra stack of blocks topped with a short plank or a piece of thick slate makes a coordinating side table that ties the whole seating area together.
Don’t overlook placement, either. A bench that’s positioned in front of a climbing rose, a tall hedge, a painted fence, or an interesting garden wall always looks more considered than one that’s just set down in an open patch of lawn. Soften the base with a few potted plants, and the concrete feels less industrial and more intentional. Context does a lot of the design work for you.

Maintenance Tips to Keep Your Bench Looking Beautiful Year After Year
One of the quietly great things about this bench design is how little upkeep it actually needs. The concrete blocks are essentially bulletproof in normal weather — give them an occasional wipe-down with a damp cloth and they’ll stay looking fresh. If you’ve painted or sealed the blocks, take a look once a year and touch up any spots where the coating has chipped or worn. That’s about ten minutes of work, but it keeps everything looking intentional and cared-for rather than neglected.
The timber does need a bit more attention, especially if you’re in a place with cold winters, high humidity, or intense summer sun. Once a year — early spring or late autumn works well — scrub the wood surface with mild soap and water and a soft brush to clear off any dirt, algae, or mildew that’s built up. Let it dry completely, then put on a fresh coat of exterior sealant or wood oil. This annual treatment refills the protective barrier that keeps moisture and UV rays from doing real damage to the wood over time. Those two things — water and sun — are what age outdoor timber fast, so staying on top of this makes a genuine difference.
If you’re somewhere with harsh winters, it’s worth pulling the timber planks inside for the coldest months. Because this bench has no fasteners, the planks lift right off — they can go in a garage, shed, or even under a covered patio table. The concrete blocks can stay outside with zero concern; they genuinely don’t mind frost. This simple habit of seasonal storage can easily double or triple the life of your wood, which means the bench keeps looking good for far longer with very little extra effort on your part.
Design Variations and Creative Inspiration
Once you’ve finished your first bench and felt that satisfaction of actually completing a meaningful DIY project, it’s pretty natural to start thinking about what else you could do with the same idea. The modular nature of this design makes it easy to scale and adapt in all kinds of directions. A longer version with three sets of block legs instead of two can stretch across an entire garden wall, creating a generous communal seating area that’s perfect for summer get-togethers, outdoor meals, or just a long afternoon with a book and something warm to drink.
A matching garden table is an obvious next step. A taller block stack with a wider, thicker plank on top gives you a side table or even a full dining table that pairs naturally with your bench. Using the same materials throughout creates that cohesive, outdoor-room feeling that makes a garden space feel genuinely designed rather than assembled from unrelated pieces. You can also experiment with different block types — smooth decorative concrete blocks or natural stone blocks each bring their own texture and personality to the finished piece while following exactly the same basic method.
For a more ambitious build, try integrating a raised planter directly into the bench structure. Arrange the blocks in a U-shape — two parallel rows connected at one end — and fill the enclosed section with soil. Plant herbs, lavender, or ornamental grasses in it and you’ve got a piece of outdoor furniture that actually contributes to your garden’s ecosystem as well as providing somewhere to sit. That kind of thinking — furniture and garden working together rather than alongside each other — is what makes a space feel truly memorable.
There’s no shortage of inspiration out there if you want to see where this idea can go. Pinterest alone has thousands of examples of this bench concept adapted to rooftop terraces, suburban backyards, rustic farmhouses, and sleek urban gardens. What ties all of them together is the core appeal of the idea: a bench you built yourself, for far less than you’d pay in a store, that looks great and holds up well — and that reminds you every time you sit down on it what you can pull off with basic materials and a free weekend afternoon.








What do you think?
It is nice to know your opinion. Leave a comment.