










DIY Hanging Garden Plastic Bottle Idea: Transform Waste Into a Thriving Vertical Garden
Why Hanging Plastic Bottle Gardens Are a Brilliant Idea
We’re all thinking more carefully about our environmental footprint these days, and the DIY hanging plastic bottle garden might just be one of the cleverest responses to that challenge. Rather than rinsing out a bottle and tossing it in the recycling bin with your fingers crossed, you can actually give it a whole second life as a planter. The result? A living, breathing wall of greenery that’s part garden, part artwork, and entirely made from something that would’ve otherwise ended up in a landfill.
This kind of vertical gardening is especially great if you’re living somewhere without much outdoor space. Apartment balconies, side fences, blank walls, even a sunny indoor corner — all of it can be transformed into something lush and green with a bit of creativity and some repurposed materials. Because you’re building upward instead of outward, you’re making use of all that vertical space that usually just sits there doing nothing.
There’s also something genuinely enjoyable about this project that goes beyond the finished product. You’re making decisions at every step — which plants to grow, how to arrange the bottles, whether to paint them and in what colors. That makes it feel personal in a way that buying a planter from a store simply doesn’t. Beginners will find it approachable, and more experienced DIYers can take it as far as they like. Either way, it rewards the effort you put into it.
Materials You Will Need to Get Started
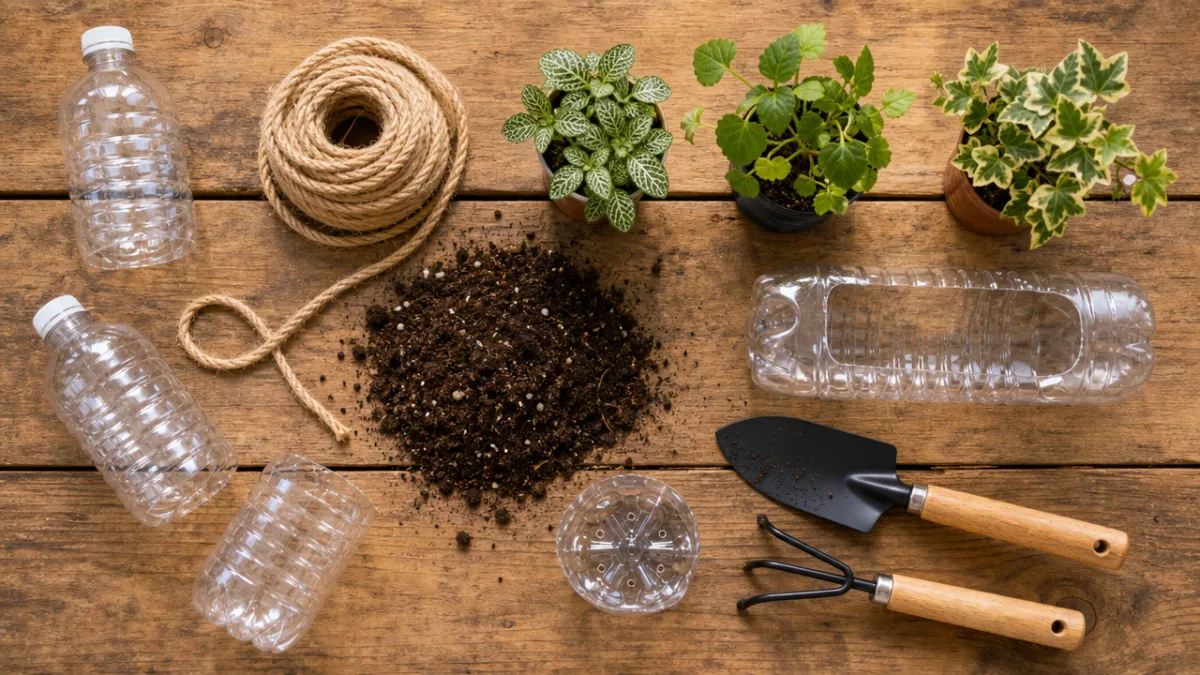
Before you dive in, it’s worth taking a few minutes to gather everything you’ll need. Starting organized makes the whole process a lot smoother. The star of the show, obviously, is plastic bottles — and standard two-liter soda bottles are the go-to choice. They’re easy to find, solid enough to hold soil without collapsing, and roomy enough for herbs, small veggies, or flowers to actually put down decent roots. How many you’ll need depends on how ambitious your design is, so it’s worth thinking that through early and starting to collect them ahead of time.
You’ll also need something to hang them with. Nylon rope, jute twine, and wire are all common options, and each one brings a slightly different feel to the finished garden. Jute has that natural, earthy look that pairs really nicely with greenery, while wire or metal chain gives things a more modern edge. You’ll need a drill or a heated nail too, both for making drainage holes in the bottom of each bottle and for threading your hanging material through.
Beyond that, the other essentials are good potting soil suited to whatever you’re planning to grow, a watering can or spray bottle, and your plants or seeds. A few extras worth picking up: exterior-grade paint or spray paint if you want to give the bottles some color, a waterproof sealant to protect painted surfaces, and a handful of small pebbles or gravel to layer at the bottom of each bottle for drainage. Having everything laid out before you start makes the whole build feel a lot less chaotic.
- 2-liter plastic bottles (collect as many as your design requires)
- Strong nylon rope, jute twine, or metal wire for hanging
- Drill with a small drill bit or a heated metal nail
- Quality potting soil suited to your chosen plants
- Small pebbles or gravel for drainage layers
- Exterior-grade paint or spray paint (optional but recommended)
- Waterproof sealant to protect painted surfaces
- A sturdy wall mount, hooks, or a freestanding frame for display
- Plants or seeds: herbs, succulents, strawberries, or flowering annuals
Step-by-Step Instructions for Building Your Hanging Garden
Start by getting each bottle clean and ready to use as a planter. Peel off the labels, wash everything out with warm soapy water, and let the bottles dry completely. Then grab your drill or heated nail and punch several small drainage holes in the bottom of each one. This step really matters — without good drainage, water sits at the roots and causes rot, which will kill your plants faster than almost anything else. Four to six evenly spaced holes along the bottom works well for a standard two-liter bottle.
Next, cut an opening that will serve as your planting window. If you’re hanging the bottles horizontally (which tends to give the most visual impact), cut a long rectangular slot on one side, leaving a border of a few centimeters around the edges so the bottle keeps its shape. If you’d rather hang them vertically with the mouth pointing down, you can skip this step and plant straight through the top. Both orientations look great — it really just comes down to the look you’re going for.
Now thread your rope or wire through the holes you’ve made near the mouth and base of each bottle. For a cascading vertical design, space the bottles evenly along a single length of rope and tie firm knots — or use cable ties — to lock each one in place at your chosen intervals. Before you add any soil or plants, give each knot a good tug to test it. Soil is heavier than you might expect, and the last thing you want is a connection giving way once everything is hanging outdoors in the wind and rain.
Once the structure is solid, add a layer of small pebbles at the base of each bottle for drainage, then fill with a generous amount of good-quality potting mix. Leave enough room to fit your plant’s root ball in comfortably without cramming. Press the plant gently into the soil, firm the mix around the roots, and give it a good initial watering before hanging. Then find your spot — a hook, a rail, a freestanding frame — somewhere that gets the right amount of sun for whatever you’ve planted, and hang it up.
Best Plants to Grow in Your Hanging Bottle Garden
Plant choice matters a lot here, because not everything is happy in a small plastic bottle. Herbs are probably the most popular pick for good reason — they tend to have compact root systems that handle container life well, they’re fast growers, and you actually get to use what you harvest. Basil, mint, cilantro, parsley, chives, and thyme all do really well, and keeping them regularly harvested actually encourages more growth, so you get a lot of plant out of a small space.
Succulents and small cacti are a fantastic option if you’d rather have something that doesn’t need much attention. They’re incredibly forgiving — infrequent watering, well-drained soil, done. A hanging wall of succulents looks genuinely stunning, and because they’re so low-maintenance, it’s a great entry point for anyone who’s nervous about keeping plants alive. The variety of shapes, colors, and textures you can put together makes for a really interesting display even without any flowers.
If you want the garden to be both beautiful and actually productive, strawberries are worth considering. Compact varieties like alpines or everbearing types fruit generously through the season and have lovely trailing runners and little white flowers. Flowering annuals like petunias, nasturtiums, and lobelia also love hanging containers and will spill over the edges in a way that looks almost waterfall-like once they really get going.
- Herbs: basil, mint, cilantro, parsley, chives, thyme, oregano
- Succulents and small cacti for low-maintenance, drought-tolerant beauty
- Compact strawberry varieties for productive, edible charm
- Flowering annuals: petunias, nasturtiums, lobelia, pansies
- Leafy greens: lettuce, spinach, and arugula for salad gardens
- Small pepper varieties for warm climates and sunny walls
Leafy greens are also seriously underrated for this kind of setup. Lettuce, spinach, arugula, and kale all take to bottle planters well — they’re fast from seed, they don’t need deep soil, and they can be harvested using the cut-and-come-again method, where you snip the outer leaves and the plant just keeps growing from the center. If you want your hanging garden to actually contribute to dinner on a regular basis, a few bottles of salad greens are probably your best bet.
Creative Design Ideas to Elevate Your Hanging Bottle Garden
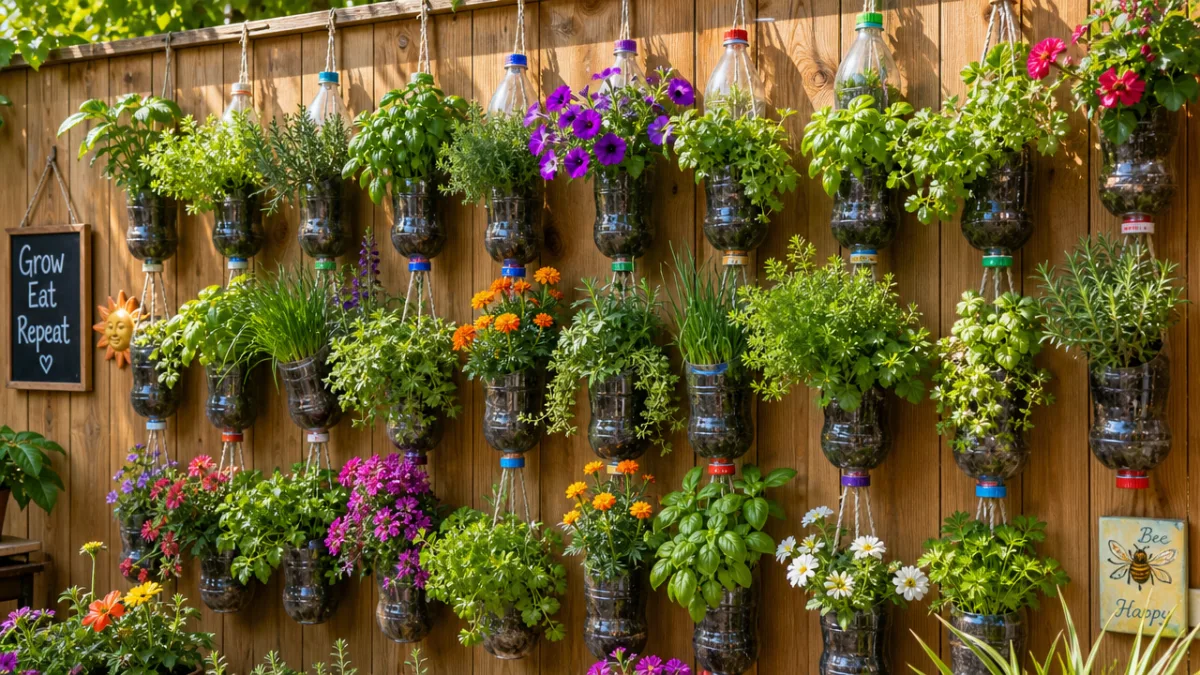
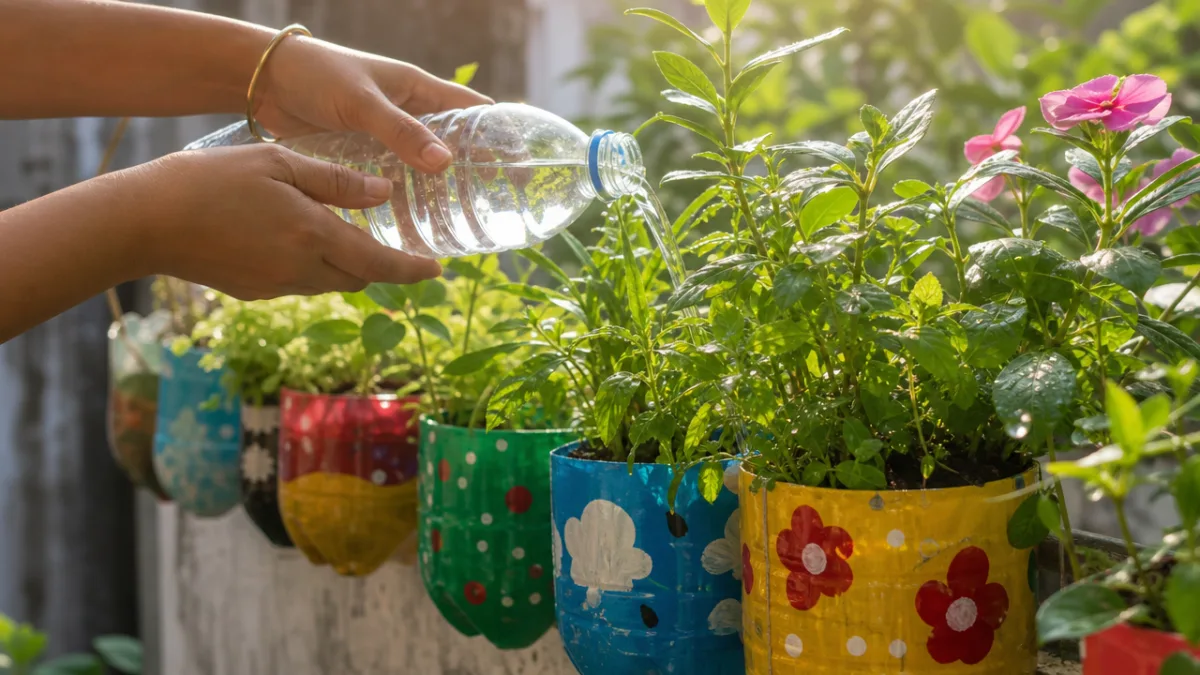
A plain row of green bottles filled with plants is perfectly functional, but if you put a little more thought into the design, this thing can go from a clever DIY project to a genuine showpiece. The quickest upgrade is paint. Pick a color palette that works with your outdoor space, or go full rainbow for something more playful. Chalk paint sticks to plastic surprisingly well and gives a matte, slightly vintage finish, while metallic spray paint pushes things in a sleeker, more contemporary direction. Either way, a coat of waterproof sealant afterward will help the color last through the seasons.
The way you arrange the bottles is another design decision that can completely change the feel of the finished wall. A straight vertical column reads as clean and modern. A staggered grid — where each row is offset slightly — creates a more dynamic, honeycomb-like pattern that feels a bit more organic and lively. If you really want to commit to something dramatic, try arranging the bottles in a shape: a heart, a tree, your family’s initials. With enough bottles and a bit of planning, it’s more achievable than it sounds.
Mixing bottle sizes and orientations is another way to keep things visually interesting. Alternating standard two-liter bottles with smaller half-liter ones creates variation in scale that stops the whole display from looking too uniform. Hanging some horizontally and others vertically within the same installation adds even more texture. And if you want to go the extra mile, weaving fairy lights through the rope system, adding a small wind chime, or tucking in some painted pebbles can turn the whole thing into something that feels genuinely curated rather than just assembled.
Maintenance Tips to Keep Your Hanging Garden Thriving
Once your garden is up and planted, keeping it in good shape comes down to a few consistent habits. Watering is the big one. Small containers dry out much faster than garden beds or large pots, so during warm weather you might find yourself watering every day or every other day. The easiest way to check is just to push your finger into the top centimeter of soil — if it’s dry, water it. If it still feels damp, hold off. Overwatering is just as much of a problem as underwatering, even with drainage holes in place.
Feeding your plants regularly is equally important and easy to overlook. Potting mix comes with a finite amount of nutrients, and once plants have absorbed what’s there, they’ll start to struggle. A diluted liquid fertilizer every couple of weeks through the growing season keeps things looking green and vigorous. If you’d rather not think about it that often, mixing slow-release granular fertilizer into the soil when you first plant is a convenient way to set it and mostly forget it for a while.
It’s also worth getting into the habit of checking your plants for pests every week or so. Aphids, spider mites, and whiteflies can spread fast through a densely planted hanging garden, and catching them early makes a huge difference. A spray of diluted neem oil or insecticidal soap handles most soft-bodied pests effectively without harsh chemicals. While you’re at it, pull off any dead or yellowing leaves — it keeps the garden looking tidy and improves airflow, which helps prevent the damp conditions that fungal diseases love.
As the seasons shift, your maintenance routine will need to shift with them. In cooler climates, tender plants should come inside before the first frost, and it’s a good moment to look over the hanging system itself for any wear. Rope and twine in particular take a beating from sun and moisture over a summer, and it’s much better to replace them proactively than to wait until something snaps. Each spring, refreshing the potting soil — either by topping it up with compost or swapping it out entirely — gives your plants a much stronger start to the new growing season.
The Environmental and Community Impact of Bottle Gardens
The impact of a project like this reaches further than your own backyard. Plastic pollution is a genuinely serious problem — millions of tons of it end up in landfills and natural ecosystems every year. Repurposing even a small number of bottles into planters is a vote against the throwaway mentality, and when that practice spreads — through neighborhood beautification projects, school gardens, community installations — the cumulative effect on both waste reduction and community connection starts to add up in ways that actually matter.
Urban gardens built from recycled materials also do real ecological work. Plants filter air pollutants, help cool city streets through evaporation, and provide food and habitat for pollinators like bees and butterflies that are genuinely struggling to survive in heavily built-up environments. A wall of flowering plants, even one made from repurposed soda bottles, offers something meaningful to the local ecosystem — not just a pretty backdrop, but actual ecological function in a place that rarely offers it.
From an educational angle, this kind of project is remarkably effective with kids and young people. Schools and youth groups around the world have used similar projects to bring concepts like sustainability, ecology, and biology to life in a hands-on way that a textbook simply can’t replicate. When children plant something, care for it, watch it grow, and eventually harvest from it, they’re building a relationship with the natural world that tends to stick. That’s a pretty significant return on a handful of empty bottles and an afternoon of building.
And if you share your project — on social media, with neighbors, in a local community group — the ripple effect can go further than you’d expect. Documenting the process from collecting bottles to final harvest and putting it out there gives other people a concrete, approachable model to follow. What starts as a personal DIY project has a way of inspiring others to look at their own empty bottles differently. That shift in perspective — from waste to resource — is small, but it’s exactly the kind of thing that quietly adds up into something larger.








What do you think?
It is nice to know your opinion. Leave a comment.