










DIY Grape Arbor: Build an Inexpensive Garden Archway
Why Every Garden Needs a Grape Arbor
A grape arbor might just be the best thing you can add to a garden. It’s one of those rare structures that pulls double duty — looking beautiful while actually doing something useful. Unlike a decorative arch that just sits there looking pretty, a grape arbor gives your vines a real home, creates a shady spot to relax on hot afternoons, and gives your yard that sense of intentional design that’s hard to achieve any other way. Whether you’re dreaming of picking your own grapes or just want a leafy green canopy to sit under with a glass of lemonade, an arbor is hard to beat.
Building your own arbor instead of buying a kit gives you a level of freedom you just can’t get any other way. You pick the size, the materials, the style — all of it. A DIY grape arbor can be as stripped-down as four posts and a handful of crossbeams, or as impressive as a fully covered outdoor room with lattice panels and decorative details. The point is, you’re in charge. And there’s something genuinely satisfying about sitting under a structure you put together with your own hands.
There are also some very practical reasons to build one. Grapevines grow fast and get big — if you don’t give them a proper structure, they’ll swamp a fence or trellis in no time. Trained over a sturdy arbor, though, they become organized, productive, and honestly stunning. A well-built arbor also effectively adds a whole new room to your backyard, one with a living green ceiling. For families who live outdoors in the warmer months, that kind of shaded, defined space has a way of becoming the center of everything.
Planning Your Grape Arbor: Site Selection and Design
Before you start digging, it’s worth spending some real time on the planning side — it’ll save you a lot of headaches (and money) down the road. The biggest thing to get right is sunlight. Grapevines are sun worshippers. They need at least six to eight hours of direct sun a day to grow well and produce fruit. Spend a day walking your yard at different times and paying attention to where the light lands consistently. In most of North America and Europe, a spot with southern or western exposure is usually your best bet.
You’ll also want to think about drainage. Grapevines really don’t like wet feet — waterlogged soil can stress or even kill them. If your chosen spot tends to stay soggy after a rain, you may need to work in some organic matter, put in drainage channels, or raise the planting area a bit. It’s also worth doing a quick soil pH test, since grapevines prefer something in the 5.5 to 7.0 range. It might seem like a lot of prep work upfront, but here’s the thing: a healthy grapevine can live and produce for fifty years or more, so getting the soil right before you build is absolutely worth it.
For the design itself, sketch things out on paper before you go shopping for lumber. Figure out the length and width based on your space and how many vines you’re planning to grow. Most grape arbors end up six to eight feet tall at the peak — enough clearance to walk through comfortably while still letting the vines hang down in a nice, natural way. Think about whether you want it to stand alone in the yard, form a passage between two garden areas, or run along an existing fence or wall. Each option changes how many posts you’ll need and how you’ll eventually train the vines.
Materials and Tools: What You Will Need
One of the best things about building your own grape arbor is how affordable it is compared to hiring someone or buying a pre-fab kit. Everything you need is available at a home improvement store, lumberyard, or farm supply shop. For a basic arbor around twelve feet long by six feet wide, you’re mainly looking at four-by-four posts for the uprights, two-by-six lumber for the beams, and two-by-four boards for the roof slats. For any wood that’s going into or near the ground, go with pressure-treated lumber — it holds up against rot and insects far better than untreated wood and will last significantly longer.
Beyond the lumber, you’ll need some hardware to hold it all together properly. Here’s what a typical grape arbor build calls for:
- Concrete mix for setting posts firmly in the ground
- Post anchors or post bases if you prefer not to bury posts directly
- Galvanized carriage bolts, nuts, and washers for beam connections
- Joist hanger hardware for cross slat attachment
- Galvanized decking screws in three-inch and two-inch lengths
- Heavy-gauge galvanized wire or training wire for supporting the vines
- Eye bolts or wire staples for anchoring the training wire to the beams
- Exterior wood stain, paint, or sealant to protect the finished structure
The tool list is pretty manageable, even if you’re relatively new to DIY projects. You’ll need a post hole digger or a rented power auger, a circular saw or miter saw, a drill with bits, a level, a tape measure, and a pencil or chalk line for marking cuts. Clamps are handy for holding beams in place while you fasten them, and you’ll definitely need a ladder once the posts are up and you’re working overhead. Don’t skip the safety glasses and work gloves — they’re worth it.
Step-by-Step Construction Guide
Once your materials are ready and your design is finalized, you can get building. Start by marking out the exact position of each post hole using stakes and string lines. Before you dig anything, check that the layout is truly square by measuring diagonally from corner to corner — if those measurements match, you’re good. Post holes should be at least one third the total length of the post, so for a finished structure around seven feet tall, you’re looking at holes roughly two and a half to three feet deep. If you’re in a climate with frost, make sure those holes go below the frost line so your posts don’t heave over winter.
Getting the posts set right is honestly the most important part of this whole project — everything else builds on it. Mix your concrete per the package instructions, pour it in around each post, and use a level to make sure every post is perfectly plumb in both directions before the concrete starts to firm up. Temporary diagonal braces nailed to stakes in the ground will hold things in place while it cures. Give the concrete a full twenty-four to forty-eight hours before you start attaching beams — moving the posts too soon can seriously compromise the foundation.
Once the posts are set and cured, the rest of the build goes together in a straightforward top-to-bottom sequence:
- Attach the side beams to the tops of the posts using carriage bolts, checking that they’re level across their full length before you tighten everything down
- Install the cross beams spanning the width of the arbor, secured to the side beams with joist hangers or through-bolted connections
- Lay the roof slats across the top, spacing them evenly and driving two screws into each end
- Run horizontal training wires along the inside of the side beams at twelve-inch intervals, anchored to eye bolts and pulled taut
- Apply your chosen finish — stain, paint, or clear sealant — to all exposed wood surfaces
- Let the finish dry completely before planting your vines at the base of each post
Keep checking for level and square as you go. Small errors at the post stage have a way of showing up more obviously once the beams and slats are on, and they can also cause water to pool in places you don’t want it. For the roof slats, a gap of about four to six inches looks good, lets light and air through, and gives the vines room to weave as they grow in. If you’re building a longer arbor, add intermediate posts every eight to ten feet — mature, fruit-loaded vines are heavier than you’d think, and you don’t want the beams sagging down the road.
Choosing and Planting the Right Grape Varieties
The arbor is really only half the story. The vines you grow on it will shape everything — how much fruit you get, how the structure looks through the seasons, and how much time you spend maintaining it year to year. Grape varieties vary a lot when it comes to cold hardiness, disease resistance, flavor, and how vigorously they grow. Before you buy anything, do some research on what actually performs well in your climate zone, and don’t hesitate to call your local cooperative extension service or visit a good nursery for region-specific advice.
If you’re gardening in a cooler northern climate, American hybrid varieties are usually your safest bet. Concord, Niagara, and Marquette have all been developed to handle cold winters, shrug off common fungal problems like powdery mildew and black rot, and still produce good crops. Concord in particular is a classic arbor grape — it’s vigorous, produces gorgeous dark purple clusters, and has that sweet, familiar flavor that’s perfect for juice and jelly. In warmer regions, European varieties like Cabernet Sauvignon, Chardonnay, or Muscat Blanc can do really well as long as you’re giving them good airflow and staying on top of disease prevention.
How you plant matters a lot for getting vines established quickly. Bare-root vines go in early spring as soon as the ground is workable; container-grown plants can go in anytime during the growing season as long as you water them regularly. Space vines six to eight feet apart along the base of the arbor, and dig a hole big enough that you’re not cramming or bending the roots. If your soil is on the poor side, mix in some compost with the backfill. Water deeply and consistently through that first growing season. And resist the urge to let the vine run wherever it wants in year one — pick the strongest cane and train it straight up toward the top of the arbor to start building that main trunk.
Training, Pruning, and Long-Term Care
Grapevines are remarkably tough when it comes to pruning — they can take it, and they actually need it. Skip regular pruning and you’ll end up with a tangled mess of old wood that shades itself out and produces less fruit every year. What you’re aiming for is a clean, open structure: a permanent woody trunk with arms radiating out from it, and productive one-year-old canes replacing themselves each season. It sounds more complicated than it is. Spend a little time learning the basics in the first year or two and it quickly becomes intuitive.
The most common approach for arbors is a variation of the four-arm Kniffin system or a simple overhead pergola method. In both cases, you train the main trunk up to the top of the structure and then let it branch into two or four permanent lateral arms. From those arms, fruiting canes are selected each year and trained out along the training wires or over the top of the arbor. Each late winter — before the buds break — you cut back the previous year’s fruited canes and choose vigorous new ones to replace them. That annual renewal cycle is what keeps the vine healthy and productive over the long haul.
Outside of pruning, grapevines growing on an arbor appreciate a straightforward fertilizing routine and some basic pest and disease monitoring. A balanced granular fertilizer in early spring gets them off to a good start, and a potassium-focused fertilizer in midsummer helps with fruit development. Keep the area around the base of each vine clear of weeds, and lay down some organic mulch to hold moisture and keep new weeds from getting established. The main things to watch for are Japanese beetles, grape berry moths, powdery mildew, and black rot. None of these are disasters if you catch them early, and once you know what to look for, you’ll spot the warning signs quickly.
Finishing Touches and Enjoying Your Grape Arbor
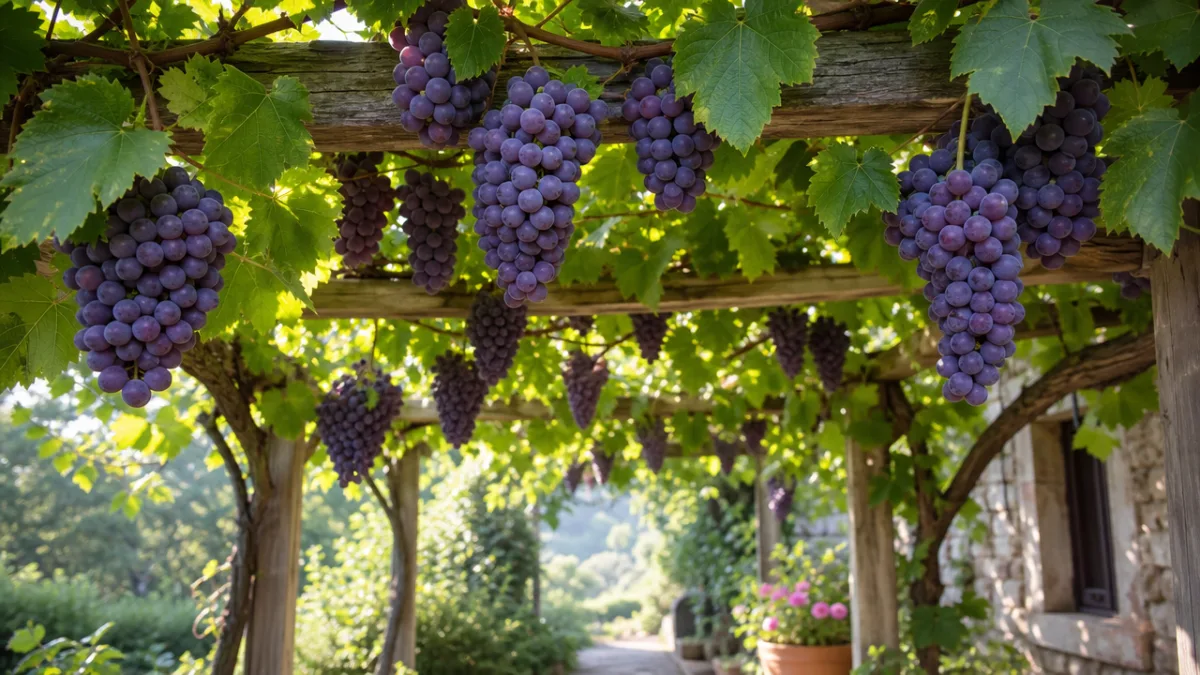
Once the structure is up and the vines are starting to find their footing, it’s genuinely fun to think about making the space underneath it feel like somewhere you actually want to spend time. A grape arbor naturally creates an outdoor room, and a little thought about furnishing it can turn a nice garden feature into a spot the whole family gravitates toward. A weatherproof table and chairs underneath makes for a beautiful shaded dining area. A simple wooden bench along one side is all you need for a quiet spot to read. The filtered, dappled light that comes through a vine canopy on a summer afternoon has a quality that’s really hard to describe — and absolutely impossible to replicate with any store-bought shade structure.
Planting around the base of the arbor is a nice way to tie the whole thing into the rest of the garden. Low-growing herbs like thyme, oregano, and lavender work beautifully around the posts — they don’t mind a bit of shade, they look great, and they can actually help keep certain pest insects away. Flowering annuals like sweet alyssum or nasturtiums add a pop of color in early spring before the grapevine leafs out, and since they’re annuals, you can swap them out or change things up each year without disturbing anything permanent. Finish it all off with a simple gravel or flagstone path leading up to and through the arbor, and you’ve got something that looks intentional and put-together in every kind of weather.
Living with a grape arbor is a slow, rewarding experience. In year one, most of what you’ll see is leafy new growth while the vines put their energy into building strong roots. By year two or three, growth really takes off and the structure starts looking genuinely lush and covered. Around year four, most well-tended vines will give you your first real harvest, and by then the arbor will have settled so naturally into the landscape that it’ll look like it’s always been there. That’s really the magic of this kind of project — a modest investment of time and money early on that just keeps giving back, in fruit and beauty and enjoyment, for decades to come.








What do you think?
It is nice to know your opinion. Leave a comment.