










20 Creative Plant Marker Ideas for Your Garden
There’s something genuinely satisfying about walking through a garden where every plant has its own little label. Whether you’ve been gardening for decades or you’re just getting your first raised bed sorted out, plant markers do more than just tell you what’s growing where. They add personality, a little charm, and that feeling that someone actually thought about this space. What started as a plain stick with a scribbled name has turned into one of the most fun DIY rabbit holes a gardener can fall down.
Plant markers have become one of those DIY projects that gardening communities genuinely get excited about, and honestly, it’s not hard to see why. They’re quick to make, the materials are usually cheap or already lying around, and the payoff is immediate — you can see the results the next time you step outside. And beyond the fun of making them, they solve a very real problem. If you’ve ever crouched over a row of seedlings trying to remember whether you planted basil or parsley, you already understand exactly why a good label is worth its weight in gold.
This article rounds up twenty of the most creative, practical, and good-looking plant marker ideas from gardeners and DIY makers who’ve actually tried them. We’re talking rustic wooden stakes, painted river rocks, upcycled silverware, hand-stamped clay, and a whole lot more. Whatever your garden style, there’s something here that’ll make you want to head outside and start labeling things.
Rustic and Natural Wood Plant Markers
Wood is probably the most popular material for plant markers, and once you start working with it, it’s easy to understand why. It blends right into the garden, it’s warm and natural-looking, and you can do so many different things with it. Whether you’re working with craft sticks, fallen branches from the backyard, or salvaged lumber scraps, wood has a way of making a garden feel cohesive and grounded in a way that plastic just can’t pull off.
One of the easiest starting points is to collect some straight fallen branches, cut them into roughly six-to-eight-inch lengths, and use a wood-burning tool to etch the plant names right into the surface. Burned lettering holds up remarkably well against rain and sun — much better than paint or marker — and it looks great too. You can keep things simple with just the name, or add little decorative touches like a leaf or flower outline to make each marker feel a bit more special. Finish with a light coat of outdoor sealant and these will easily last you multiple growing seasons.
Another approach worth trying is cutting small paddle shapes from thin plywood or balsa wood. The extra surface area gives you more room to work with, and chalk paint gives them that lovely matte, vintage finish that photographs really well. Write the plant names with a chalk pen or permanent marker — either neat and tidy or loose and hand-lettered, depending on your style. If you’re not confident in your handwriting, adhesive letter stamps pressed into wet paint give surprisingly clean results with very little effort. Seal everything with waterproof varnish and you’ve got markers that’ll hold up through a full growing season, no problem.
Painted Stone and Rock Markers
Painted rocks might just be the most beginner-friendly plant marker project out there. If you can find smooth river rocks — and if you live near a stream or a garden center, you probably can for free — you already have the best possible canvas to work with. Flat, smooth stones accept acrylic paint well, they’re easy to hold while you work, and there’s something about the slightly imperfect quality of hand-painted lettering on a rock that looks charming rather than messy. Even people who swear they have no artistic ability tend to be pretty pleased with how these turn out.
The basic approach is straightforward: clean your stones, let them dry, and use a white paint pen or a fine brush with acrylic paint to write each plant name. For crisper, more readable results, paint a base coat of white or cream first, let it fully cure, and then add your lettering on top. The contrast really makes the names pop and the paint holds up better outdoors this way too. If you’re feeling ambitious, adding a small illustration of each plant alongside the name takes things to the next level — your herb garden ends up looking like something out of a botanical sketchbook.
If you want markers that’ll genuinely last for years, it’s worth picking up paint markers specifically made for outdoor use on rock and ceramic surfaces. They bond more firmly and resist UV fading far better than regular craft store acrylics. Top everything off with a coat of outdoor Mod Podge or a clear waterproof sealant, and you’re set for multiple seasons. A collection of painted stones lined up through a herb garden or tucked along the edge of a flower bed ties the whole space together in a way that feels deliberate and personal rather than thrown together.

Upcycled and Repurposed Household Items
Some of the most interesting plant markers you’ll ever see didn’t come from a craft store — they came from a kitchen drawer or a recycling bin. There’s something genuinely delightful about finding a second life for an old household item, and when it ends up in the garden, it gives the space a story. A vintage spoon poking up next to your tomatoes or a wine cork on a skewer marking your basil has a quirky, unexpected quality that makes people stop and look twice.
Old silverware is a particularly great option, especially spoons and forks. The bowl of a spoon gives you a natural little surface to engrave, paint, or write on with a paint pen. Bend the handle into a stake shape so it pushes right into the soil, or attach it to a wooden dowel if you need more height. Thrift store silverware is perfect for this because the age and patina add character that you simply can’t get from something brand new. A row of mismatched silver spoons marking a kitchen herb garden has this wonderfully whimsical quality that makes the whole corner of the garden feel special.
Once you start looking around the house with this in mind, the ideas keep coming: wine corks on bamboo skewers, painted popsicle sticks, wooden clothespins clipped to stakes, old keys with plant names tied on with a bit of twine, even ceramic mug handles repurposed as little markers. For a more industrial look, strips of old license plates embossed with letter stamps work surprisingly well in a modern minimalist garden. The main thing to keep in mind is that the material should bring something to the party — a bit of visual interest, a history, a texture — rather than just being a free substitute for buying something new.
Clay and Ceramic Plant Markers
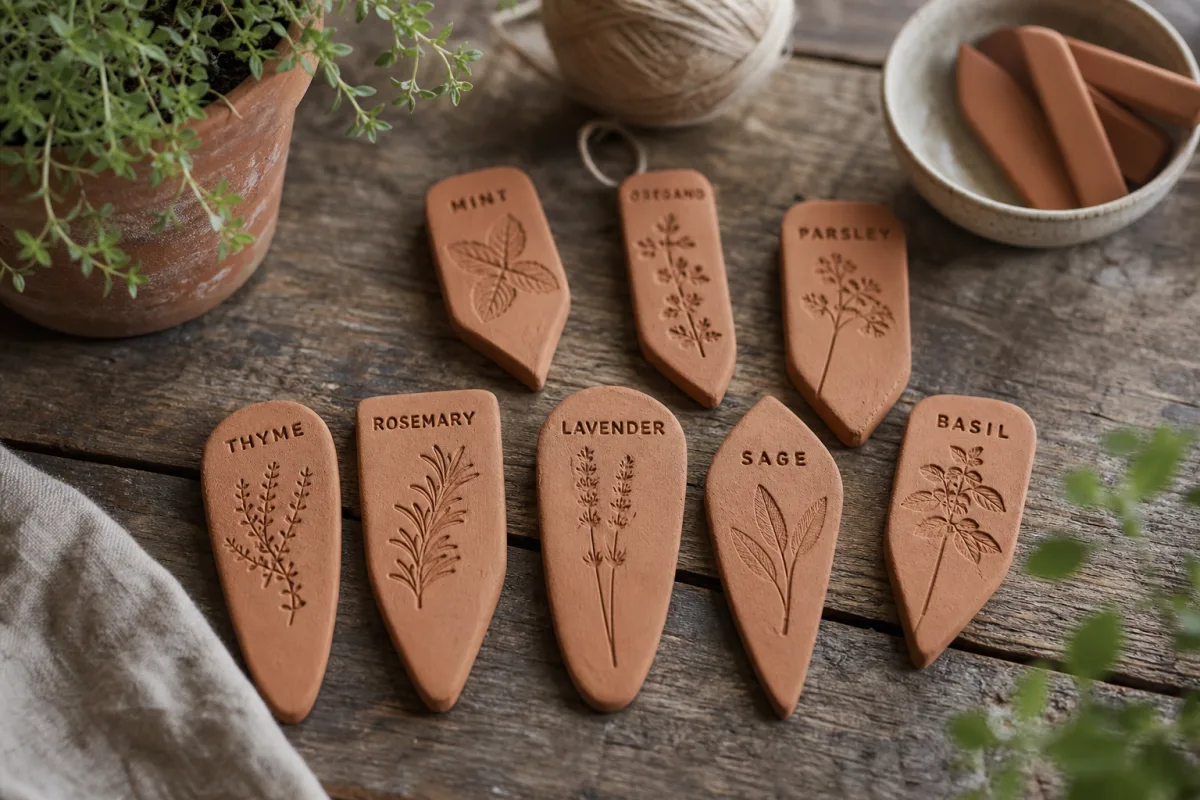
Air-dry clay and polymer clay have opened up a whole new category of plant marker for gardeners who want to make something truly from scratch. Unlike wood or stone where you’re working with what you find, clay lets you design the shape, size, and style of the marker itself. The process is hands-on and genuinely enjoyable — a lot of gardeners find making a batch of clay markers on a rainy afternoon just as satisfying as seeing them in the garden later. One session can easily produce enough labels for an entire growing season.
The simplest version starts with a small flat oval or rectangle, rolled out to about a quarter inch thick. While the clay is still soft, press letter stamps, a stylus, or even interesting objects like old keys or buttons into the surface to create texture and lettering. Use a skewer or toothpick to poke a small hole near the bottom where you can later thread through a thin wire or wooden stake to anchor it in the ground. Air-dry clay usually cures within 24 to 48 hours at room temperature, and once it’s fully dry you can paint it with acrylics and seal it with an outdoor varnish to keep it weather-resistant.
Polymer clay, which needs a short bake in a regular oven to cure, is worth considering if you want more detail and extra durability. The color range is incredible — from earthy terracotta tones to bright jewel shades — and you can blend colors to create exactly the palette that suits your garden. One especially beautiful technique involves pressing actual leaves or flower petals into the clay before baking, which leaves a delicate botanical impression in the finished marker. Polymer clay holds up really well outdoors once it’s cured, staying looking good through years of wind and rain with very little upkeep.
Chalkboard and Slate Markers
One of the smartest things about chalkboard markers is that they can be wiped clean and rewritten whenever something new goes in the ground. For vegetable gardens and herb beds where crops rotate through the seasons, that flexibility is genuinely useful. The same marker that spent summer labeling your tomatoes can be cleaned off and redeployed for autumn kale without wasting a thing — which feels very much in the spirit of how most gardeners like to operate.
Chalkboard paint works on almost anything, so you have a lot of options here: wood, metal, terracotta pots, even slate tiles. Natural slate is particularly nice because it’s already waterproof and weather-resistant, so it doesn’t need much prep. Just write on it with chalk or a chalk pen, and the name shows up in clean, easy-to-read lettering. When it’s time to change the label, a damp cloth wipes it off in a few seconds and you’re ready to start again. It’s about as low-fuss as plant markers get.
For a slightly more permanent option, small wooden paddles coated in two or three layers of chalkboard paint strike a good balance between flexibility and durability. Sharpen one end of the stake to push directly into soil, or mount the paddle on a decorative metal rod if you want a tidier look. One combination that works especially well is using small chalkboard markers in terracotta pots — the matte black of the chalkboard surface against the warm clay and the green of the plant is one of those simple, timeless visual combinations that just looks right. It’s unfussy, it’s practical, and it photographs beautifully if that matters to you.
Metal, Wire, and Stamped Aluminum Markers
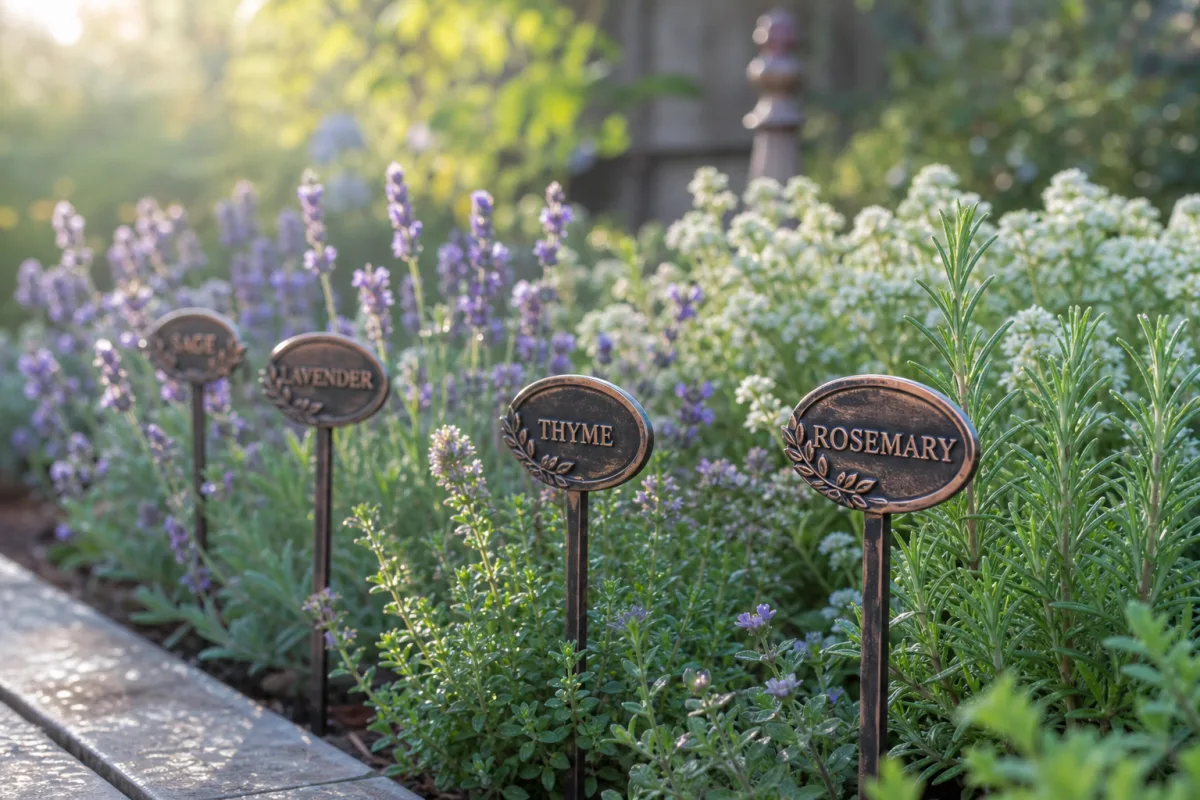
Metal plant markers are in a category of their own when it comes to longevity. Wood rots, paint fades, but a well-finished metal marker can genuinely last for decades. If you have a perennial garden where the same plants come back every year, investing the time to make metal markers once and never having to remake them is a pretty compelling argument. They also have an elegance and quiet sophistication that suits a more formal or mature garden beautifully.
Aluminum sheeting from a hardware or craft store is a great starting point. It cuts easily with scissors or a craft knife, and you can stamp plant names into the surface using metal letter stamps and a hammer — creating engraved labels that will never wash away or fade. Once you have a set of metal stamps, the stamping process itself goes quickly, and the finished result looks far more refined than the effort involved would suggest. A thin coat of outdoor sealant or a rub of beeswax gives the surface a warm, slightly aged look while protecting it from oxidizing in wet conditions.
Copper takes things up another notch visually. Over time, copper develops that gorgeous blue-green patina as it weathers naturally, and unlike most materials that degrade when exposed to the elements, copper actually gets better looking. Thin copper sheeting can be cut into pointed stake shapes, stamped, and pushed right into the garden bed, where the warm reddish-gold tone sets off the surrounding greens and browns beautifully. For something a bit more sculptural, galvanized steel wire bent into letter forms and mounted on stakes spells out plant names in airy, three-dimensional cursive that adds a playful, artistic element you really don’t get from any other material. Whatever metal you choose, these markers are a long-term investment that pays off a little more with each passing season.
Tips for Making Your Plant Markers Last
The most beautiful plant marker in the world isn’t much use if it falls apart after one rainy season. And unfortunately, a lot of homemade markers do exactly that — not because the design was wrong, but because of a couple of small finishing mistakes that are completely avoidable. Understanding how your chosen material behaves outdoors, especially with moisture, UV exposure, and fluctuating temperatures, makes a real difference. A little extra effort at the finishing stage can multiply the lifespan of your markers several times over.
The single most important step is sealing any painted or decorated surface with an outdoor-rated sealant before it goes in the garden. Outdoor Mod Podge, polyurethane spray, clear exterior varnish, and epoxy resin all work well depending on the material. Apply it in thin, even coats, letting each one dry fully before adding the next, and make sure you get the edges and any joints where water might sneak in. For wooden markers, it’s worth giving the bottom inch or two — the part that goes into the soil — an extra coat of sealant or a thin layer of melted beeswax to stop moisture wicking up through the wood grain from below.
Beyond sealing, how you install and store your markers matters too. Metal markers pushed firmly into the soil will outlast ones left sitting on the surface where freeze-thaw cycles can knock them around. Wooden stakes need to go deep enough to stay stable, but not so deep that a big section is constantly sitting in damp soil. At the end of the season, take a few minutes to pull up your markers, give them a gentle clean, check for any damage, and store them somewhere dry over winter. It’s a small habit, but it’s the kind of thing that turns a one-season marker into a five-season marker — which makes all the creative effort that went into making them very much worth it.








What do you think?
It is nice to know your opinion. Leave a comment.