










Olearia lirata: The Complete Guide to Growing Snowy Daisy Bush from Seed
Introduction to Olearia lirata
If you’ve ever come across a shrub so smothered in white flowers that you could barely see the leaves underneath, there’s a good chance you were looking at Olearia lirata — the Snowy Daisy Bush. It’s one of those Australian natives that stops people in their tracks, and for good reason. Native to southeastern Australia across New South Wales, Victoria, and South Australia, this member of the Asteraceae family has spent thousands of years adapting to woodland and forest life, and it shows. It flowers prolifically even without much fuss, which is why native plant lovers and anyone wanting a garden that actually means something ecologically tend to fall for it pretty hard.
Size-wise, you’re looking at a medium to large shrub — anywhere from one to four metres tall depending on how happy it is in its spot. The leaves are lance-shaped (that’s actually where the species name lirata comes from, referring to their lyre-like shape), dark green on top with a soft, woolly white coating underneath that gives the whole plant a silvery-grey look. It’s honestly quite handsome even when it’s not in flower, which makes it a solid year-round presence rather than a one-season wonder.
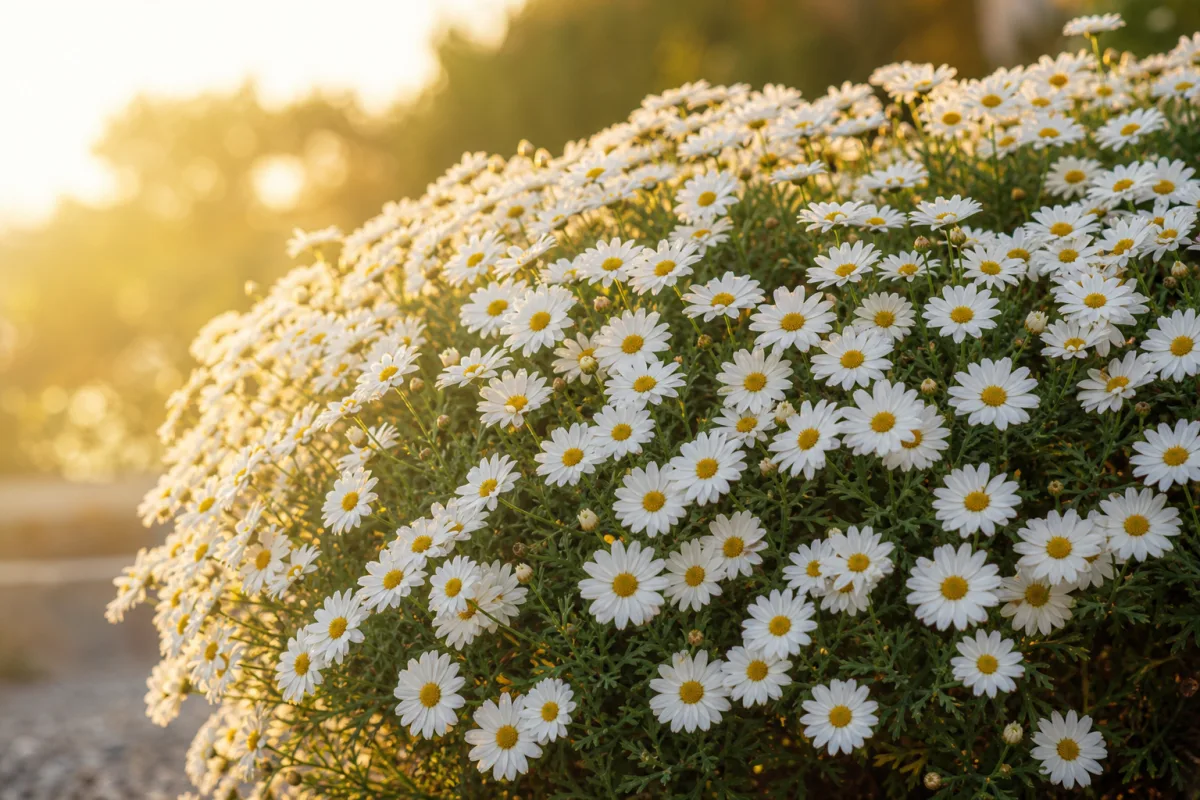
What really sets Olearia lirata apart from its many Olearia relatives, though, is just how much it flowers. Come spring, the shrub practically disappears under clusters of small white composite blooms — each one a yellow central disc ringed by delicate white ray florets. Beyond looking spectacular, that floral display is a genuine magnet for native bees, butterflies, and hoverflies. So you’re not just getting a pretty garden plant; you’re getting something that actively pulls its weight in supporting local biodiversity.
Understanding the Natural Habitat and Ecology
Out in the wild, Olearia lirata tends to find its home in the sheltered, moister spots — creek banks, gullies, and the understory of forest where it gets filtered light rather than full blast sun all day. You’ll often find it growing alongside tree ferns, wattles, and various eucalypts, all part of the layered community that makes southeastern Australian woodland so rich and complex. Knowing this is genuinely useful if you want to grow it well, because it tells you exactly what conditions the plant has evolved to thrive in.
Like so many Australian plants, Olearia lirata has a long relationship with fire. It bounces back remarkably well after burning — both from seed germination and from resprouting at the root crown — and that same underlying toughness carries over into garden life. It handles pruning, the odd dry spell, and general adversity far better than a lot of other ornamentals would. There’s a resilience baked into it that’s hard not to appreciate.
From a wildlife angle, it’s more than just a pretty flower for pollinators. The dense branching of a mature plant makes great nesting and shelter habitat for small birds, the seeds that follow flowering are a useful food source, and the root system does a solid job of stabilising creek bank soils and reducing erosion after heavy rain. When you think about all of that together, you start to see why getting this plant into thoughtfully designed gardens and restoration projects is genuinely worthwhile — it earns its space in a lot of different ways.
Collecting and Sourcing Olearia lirata Seeds
Getting hold of good seed is the real starting point for growing Olearia lirata, and you’ve got a few options. Specialist native plant nurseries are usually your best bet, especially if you care about provenance — meaning seeds from plants of known identity and ideally from genetic stock that’s locally appropriate. This matters more if you’re doing ecological restoration work or if you’re gardening within the species’ natural range, but even for a backyard planting it’s worth seeking out reputable suppliers rather than just grabbing whatever’s available.
If you’re collecting directly from wild or cultivated plants, timing really is everything. Seeds mature fairly quickly after the flowers fade — usually within four to eight weeks of petal drop — and you need to keep a close eye on the developing seed heads because the window is short. The seeds are small and light, fitted with the little pappus structures typical of the daisy family that let them float off on the breeze, so a day or two’s inattention can leave you with nothing but an empty seed head. You’re looking for the moment when the head has dried and gone brownish but the individual seeds haven’t quite started separating yet.
Storage is worth thinking about too, because Olearia lirata seeds, like most daisy family seeds, don’t stay viable forever. Fresh seed stored in paper envelopes somewhere cool, dry, and dark should hold reasonable germination rates for up to twelve months, but sowing as fresh as you can will nearly always give better results. Some growers keep seeds in sealed containers with a silica gel desiccant packet in the fridge to stretch viability a bit further. Whatever approach you use, it’s sensible to test a small batch first before committing to a large sowing, just to know what germination rate you’re actually working with.
Germinating Olearia lirata Seeds Successfully
Germinating Olearia lirata seeds isn’t particularly difficult once you understand what the plant wants, though it does reward a bit of patience. One nice thing is that there’s no fiddly pre-treatment required — no scarification, no stratification — which keeps things refreshingly simple compared to some other Australian natives. What you do need is a well-draining propagation mix, consistent moisture without overdoing it, and warm temperatures in the range of eighteen to twenty-four degrees Celsius, roughly mimicking an Australian spring.
For the propagation mix, the goal is something that drains freely but doesn’t dry out instantly. A good combination to work with looks something like this:
- Two parts coarse propagating sand or perlite to provide aeration and drainage
- One part fine composted pine bark to provide a small amount of organic nutrition
- One part coir peat or sphagnum moss to assist with moisture retention without waterlogging
- A light dusting of horticultural grit across the surface to help anchor the small seeds after sowing
Sow thinly across the surface of your prepared mix in shallow trays or small pots, pressing the seeds very gently into contact with the medium — but don’t bury them, since these seeds need light to germinate. Cover with a clear plastic dome or slip the tray into a clear plastic bag to hold humidity while still letting light through, and sit it somewhere warm and bright but out of harsh direct sun. Germination usually kicks off within two to four weeks under good conditions, though some seeds take longer, and it’s worth keeping the tray going for up to eight weeks before giving up on a batch.
Once seedlings are up and have developed their first true leaves past the initial seed leaves, start easing them out of their protected environment gradually — removing the humidity cover for longer stretches each day so they can adjust without going into shock. When they’re around three to five centimetres tall and sturdy enough to handle, prick them out into individual small pots with a slightly richer mix and grow them on somewhere sheltered before they eventually go out into the garden.

Planting and Establishing Olearia lirata in the Garden
Picking the right spot is one of those decisions that really does shape how well your plant performs long-term. Olearia lirata is happiest in full sun to partial shade, with partial shade being a genuine asset in hotter, drier climates where fierce summer sun combined with limited moisture can put the plant under real stress. In cooler and moister parts of the country, a full sun position typically brings out the best in it — the most vigorous growth and the most generous flowering, since the plant can make full use of available light to fuel that spectacular spring show.
Preparing the soil before planting is worth the effort. Olearia lirata is fairly adaptable, but it clearly prefers something that drains well while still holding reasonable moisture — which makes sense given its natural habitat along creek banks and in sheltered gullies. Working some well-composted leaf mould or aged compost into the planting hole at roughly one part organic matter to three parts existing soil will improve drainage in heavy clay and moisture retention in sandy ground. One important thing to avoid is high-phosphorus fertilisers or composts, because like many Australian natives, Olearia lirata is adapted to naturally low-phosphorus soils and excess phosphorus can actually damage the plant rather than help it.
When it’s actually time to plant, give it the best possible start with a few simple steps. Water the plant well in its pot the day before so the root ball goes in fully hydrated. Dig a hole twice as wide as the pot but no deeper — planting too deep invites collar rot. Ease the plant out of its pot with minimal root disturbance, sit it in the hole so the top of the root ball sits level with the surrounding soil, backfill carefully, and firm the soil gently. Finish with a good layer of coarse organic mulch around the base, keeping it away from the stem, to hold moisture in and keep weeds down while the plant finds its feet.
Ongoing Care, Pruning, and Problem Solving
Once it’s settled in, Olearia lirata is genuinely low maintenance — one of those plants that rewards a hands-off approach more than an attentive one. Watering needs drop off noticeably once the plant has been in the ground for twelve to eighteen months and has developed a decent root system. In areas with reliable winter and spring rainfall, established plants often don’t need supplementary watering at all. In drier summers, a deep drink every two to three weeks will keep the plant healthy and prevent leaf drop, but the key word there is deep — infrequent deep watering does far more for long-term drought resilience than frequent light sprinkles.
Pruning is where you can really make a difference to how the plant performs year after year. A light trim straight after flowering — cutting back roughly a third of the season’s new growth — encourages dense, branchy regrowth that sets up an even better flowering display the following spring. Skip the pruning regularly and the plant can get a bit open and leggy, especially in shadier spots, so it’s genuinely worth building into your garden routine. If a plant has really gotten away from you or lost its shape, a harder renovation prune back to about a third of its overall size is perfectly fine — most healthy specimens shrug it off and come back strongly.
Pest and disease issues are generally minor, but a few things are worth knowing about, particularly if growing conditions aren’t quite ideal:
- Powdery mildew: A fungal condition that can appear during humid conditions with poor air circulation, presenting as a white powdery coating on leaves. Improve air circulation through pruning and avoid overhead watering to manage this issue.
- Aphid infestations: Soft-bodied sap-sucking insects that occasionally colonise young growth, particularly on plants that have been over-fertilised with nitrogen-rich fertilisers. Strong water jets or insecticidal soap sprays manage most infestations effectively.
- Root rot: The most serious potential issue, caused by waterlogged soil conditions. Prevention through good drainage is far preferable to treatment, as severely affected plants rarely recover fully.
- Scale insects: Occasionally found on stems, particularly on older wood. Horticultural oil sprays applied during cooler months provide effective control without harming beneficial insects.
On the topic of fertilising, less really is more here. If you feel the plant needs a feed, reach for a slow-release fertiliser made specifically for Australian native plants — these are formulated with low phosphorus levels for exactly this reason. Apply sparingly in early spring before the main growth flush, and resist the urge to be generous thinking it’ll produce a better result. With many Australian natives, overfeeding produces the opposite of what you want: soft, lush growth that’s more prone to pests and disease, and paradoxically, fewer flowers. A light hand with fertiliser is genuinely the better approach.
Landscape Uses and Garden Design Applications
One of the things that makes Olearia lirata so useful for gardeners and designers working with Australian natives is how versatile it is in a planting scheme. At its medium to large size, it works beautifully as a feature specimen in mixed native borders, where that extraordinary spring flowering becomes a genuine focal point — the kind of thing that defines a season and draws people into the garden. It looks particularly good underplanted with lower-growing native ground covers and grasses that fill out the space beneath its canopy, creating the kind of layered structure you’d see in natural Australian woodland and maximising the ecological value of the whole planting.
It also holds its own as a screening or hedging plant, and it does the job without needing to be formally clipped into submission. The naturally dense, multi-stemmed growth creates a solid visual barrier and a good sense of privacy, though regular post-flowering trims will keep things tidier if that’s what you’re after. In coastal and exposed gardens, the plant’s toughness makes it a useful windbreak component, and its reasonable tolerance of salt air gives it a leg up over plenty of other ornamental shrubs in those kinds of challenging spots. The silvery-grey leaf undersides are a nice bonus in coastal settings too — they catch and reflect light in a way that gives the planting a lively, shifting quality through the day.
If you’re thinking about the garden from an ecological perspective, the most powerful thing you can do is pair Olearia lirata with other native species that carry flowering interest through the rest of the year. Think Grevillea and Hakea for winter, Hardenbergia violacea for a splash of late-winter colour, Acacia species to complement the spring show, and Callistemon or Melaleuca for summer. With Olearia lirata anchoring the spring season, a combination like that provides year-round nectar and pollen for native pollinators and builds something that genuinely functions as a self-sustaining garden ecosystem — beautiful to look at, and genuinely good for the local environment.








What do you think?
It is nice to know your opinion. Leave a comment.