










What is Mosaic Crochet? A Guide to Understanding this Stunning Crochet Technique
Introduction to Mosaic Crochet
Mosaic crochet is one of those fiber art techniques that looks way harder than it actually is. It creates these gorgeous, intricate multicolored geometric patterns — but here’s the thing: you only ever work with one color at a time. No juggling multiple strands, no tangled yarn chaos. Just one color per row, and somehow the finished result looks like something a seasoned expert spent weeks figuring out.
The real magic here is in the slip stitches. By placing them strategically, you create the illusion of interlocking colors and elaborate motifs — each row pulling a little color up from below to build that layered, tapestry-like look. The finished fabric has this wonderful richness and depth to it, whether you’re working on a cozy blanket, a stylish hat, or an elegant shawl. It’s genuinely eye-catching stuff.
Mosaic crochet grew out of mosaic knitting techniques, but it’s taken on a life of its own in the fiber arts world. Over the last decade or so, it’s really taken off as more and more people have discovered how approachable and satisfying it can be. If you can work a single or double crochet and handle a slip stitch, you already have everything you need to dive in and start making things that look impressively complex.
The Core Mechanics: How Mosaic Crochet Works
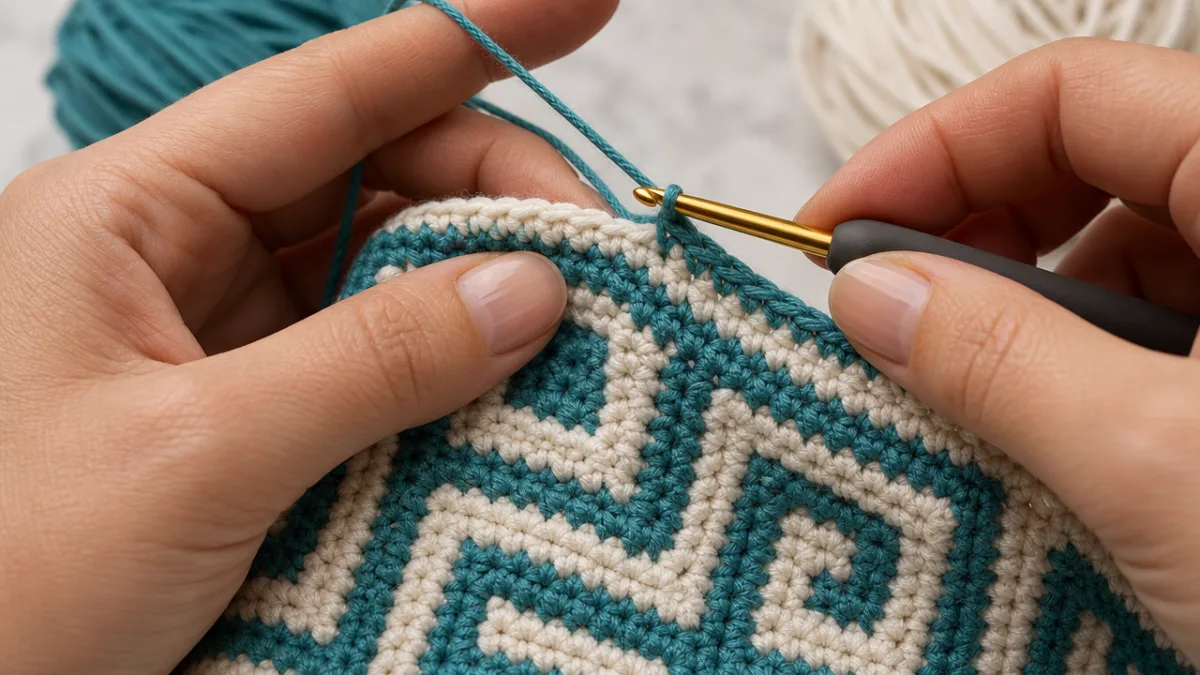
The whole technique boils down to a simple principle: you alternate between two colors, working two rows or rounds with each one before switching. While you’re working a row in the active color, you use regular crochet stitches where that color should show and slip stitches where you want the color from below to peek through. Those slip stitches drop down and grab the yarn from the previous row, pulling it up to the surface and creating the geometric design as you go.
There are two main ways to work mosaic crochet — the overlay method and the inlay method. With overlay, the slip stitches sit on top of the fabric’s surface, giving everything a raised, almost three-dimensional texture. With inlay, those slip stitches are tucked inside the fabric instead, resulting in a flatter, more uniform look. Same color-alternating logic either way, but very different end results — so it’s worth thinking about which aesthetic suits your project before you start.
Most mosaic crochet patterns use a chart rather than written-out row instructions, though a lot of modern patterns include both. The chart is essentially a grid where each square is a stitch and each row of squares is a row of crochet. Colored squares tell you where to work regular stitches in your active color; open or differently marked squares show where your slip stitches go. Once you get the hang of reading these charts, even patterns that look wildly complicated become surprisingly logical to work through row by row.

Materials and Tools You Will Need
Good news: you probably already own everything you need. Mosaic crochet doesn’t call for any special equipment — just a standard crochet hook in whatever size suits your yarn. Most people start with a smooth, plied worsted or DK weight yarn because those fibers show stitch definition really clearly, making it much easier to see where your slip stitches belong. Once you’re comfortable with the technique, feel free to experiment with other weights.
Color choice is honestly one of the most fun parts of planning a mosaic crochet project, and also one of the most important decisions you’ll make. Since the whole pattern depends on two colors playing off each other, high contrast combinations tend to give the sharpest, most striking results. Think navy and cream, black and white, or deep teal paired with a bright mustard. That said, softer tonal pairings can create a more understated, sophisticated effect that works really beautifully for wearables like shawls and scarves.
Beyond yarn and a hook, a few small extras will make your life a lot easier. Stitch markers help you keep track of pattern repeats, especially when you’re working in the round. A row counter — physical or an app on your phone — keeps you from losing track of where you are in the two-row color cycle. And because you’ll be changing colors fairly often, having a solid plan for weaving in ends will keep the back of your work as tidy as the front.
- Smooth, plied yarn in worsted or DK weight for clear stitch definition
- Two contrasting colors with sufficient visual difference to showcase the pattern
- A crochet hook appropriate to your yarn’s recommended gauge
- Stitch markers for tracking pattern repeats and color changes
- A row counter to monitor your two-row color sequences
- Tapestry needle for weaving in yarn ends cleanly and securely
Learning the Basic Stitches and Techniques
If you already know the basics of crochet, there’s really just one new skill to pick up: working slip stitches into rows below your current working row. You might see this called a dropped slip stitch or an elongated slip stitch, and it’s the building block everything else is built on. To do it, you insert your hook into the matching stitch in the row below (the one that matches your current color), pull up a loop, and draw it through the loop on your hook — no yarn over, nice and simple.
Before jumping into a full project, do yourself a favor and work a practice swatch first. Pick a simple mosaic pattern with a small repeat and work through at least four to six complete color cycles — so eight to twelve rows. This gives you time to build muscle memory for the color changes and slip stitch placements, check your gauge, and see how your color combination actually looks in the pattern. Most people notice their tension getting noticeably more consistent after just a swatch or two.
Speaking of tension — this is where a lot of new mosaic crocheters run into trouble. If your slip stitches are too tight, they’ll pull the fabric inward and cause puckering. Those elongated slip stitches need enough length to lie flat without distorting the stitches around them. Try pulling up a slightly longer loop than feels natural, and check periodically that your fabric is lying flat. If you see puckering or the piece looks narrower than it should, consciously working those slip stitches a little looser will usually sort it out pretty quickly.
Step-by-Step Overview for Beginners
Here’s the basic flow of a mosaic crochet project once you sit down to start. You make a foundation chain in your first color, work the first two rows entirely in that color using your base stitch (usually single or double crochet), and then introduce your second color on the third row. From there, you follow the chart — regular stitches where the chart shows your new color, slip stitches where the first color needs to show through. After two rows of color two, you go back to color one, and you just keep that alternation going throughout the whole project.
The key to clean color changes is carrying the unused yarn up the side of your work rather than cutting it at every transition. Just bring that unused color up along the edge as you turn and start each new pair of rows. It eliminates a mountain of ends to weave in and also neatens up the selvedge edge as a bonus. If you’re working in the round, you can apply a similar carrying method at the start of each round.
Popular Mosaic Crochet Patterns and Projects
One of the best things about mosaic crochet is how many patterns are out there for every experience level. Beginners usually gravitate toward simple chevron or diamond motifs — small repeats, easy chart reading, and results that look genuinely impressive even at this early stage. These foundational designs are a great way to build confidence and get the rhythm of the technique into your hands before moving on to more complex stuff.
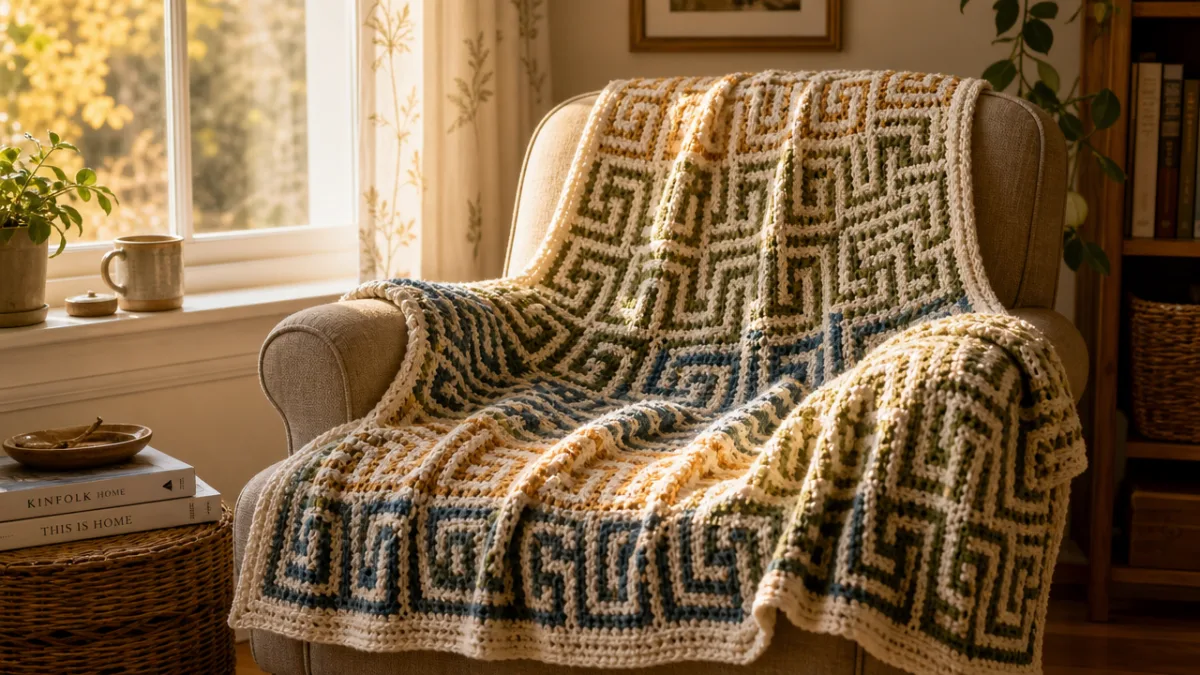
Once you’re comfortable with the basics, folk-inspired geometric designs open up — interlocking hexagons, stylized florals, traditional Nordic-style patterns. The repeats are larger and the charts take a bit more focus, but the payoff is spectacular. Blankets and afghans are a favorite at this stage because the large surface area gives you plenty of time to really settle into the technique, and the finished result has that heirloom quality that makes people stop and stare.
At the advanced end of things, mosaic crochet gets genuinely exciting. Three-color variations, tapestry-inspired designs with multiple simultaneous motifs, sculptural three-dimensional effects through creative use of the overlay technique — there’s a lot of room to push boundaries here. Wearables like sweaters, cardigans, and intricate shawls sit at the top of the skill ladder, requiring careful attention to shaping and gauge on top of all the colorwork. Some advanced makers also experiment with gradient or hand-dyed yarns, which layer even more visual unpredictability into the finished piece.
- Simple diamond or chevron patterns — ideal for beginners building foundational skills
- Geometric interlocking motifs — a satisfying next step for growing confidence
- Folk and Nordic-inspired designs — rich visual complexity with rewarding results
- Tapestry-style pictorial patterns — advanced designs mimicking woven textile art
- Three-dimensional overlay sculptures — pushing mosaic crochet into new creative territory
Tips, Tricks, and Common Mistakes to Avoid
Even seasoned crocheters hit a few predictable snags when they first try mosaic crochet, so knowing about them ahead of time can save you a lot of frustration. The most common issue is accidentally skipping or misplacing a slip stitch in the chart, which throws off the geometric design. Good lighting, a careful read of each row before you start it, and stitch markers at the beginning of each pattern repeat will catch most errors before they travel too far into your work.
Inconsistent tension between regular stitches and elongated slip stitches is another common pitfall. Because the two stitch types are worked so differently, it’s easy to unconsciously shift your tension between them, which creates an uneven surface texture. Being deliberate and mindful about each stitch type really helps. Some people find it useful to pause briefly before each slip stitch — just long enough to make sure they’re working it with enough looseness before drawing through the loop.
Keeping the back of your work tidy is another skill worth building from the start. The carried yarn runs up the sides at each color change, and those edges can look messy if the strands are too loose or unevenly tensioned. Working the carried yarn in consistently and checking that it isn’t showing through to the front will give your finished object a much more polished look. And when you’re done, blocking is really worth the effort — it evens out the tension across the whole piece and lets those geometric patterns open up and show themselves properly.
Helpful Habits for Ongoing Success
A few simple organizational habits will make every mosaic project more enjoyable. Keeping a printed copy of your chart nearby and marking off each completed row with a pencil or highlighter is low-tech but genuinely effective. Many experienced mosaic crocheters also keep a small notebook for jotting down yarn choices, hook size, gauge, and any modifications they make — it becomes a personal reference library that gets more useful the more you fill it in.
Getting connected with the mosaic crochet community is also really worthwhile, whether that’s online through social media groups and forums or in person at a local craft circle. Sharing work-in-progress photos, asking questions when you get stuck, seeing what other people are making — it all adds up to a richer, more enjoyable crafting experience. The mosaic crochet community has a well-earned reputation for being welcoming and generous with tips and encouragement, which makes it a great place to land whether you’re brand new or have been crocheting for years.
And finally — once you’ve got the basics down, let yourself play. Swap out the colors a pattern suggests for combinations that feel more like you. Try working a flat pattern in the round. Take a small motif and scale it up into a larger repeating design. Mosaic crochet charts are essentially a visual language, and once you can read them fluently, you’re free to remix and reinvent them however you like. The most important thing is to enjoy the process and take real pride in what your hands are making — because it’s genuinely beautiful work.








What do you think?
It is nice to know your opinion. Leave a comment.